Bus 009 Device 033: ID 303a:1001 Espressif USB JTAG/serial debug unit
Bus 009 Device 034: ID 0403:6001 Future Technology Devices International, Ltd FT232 Serial (UART) IC
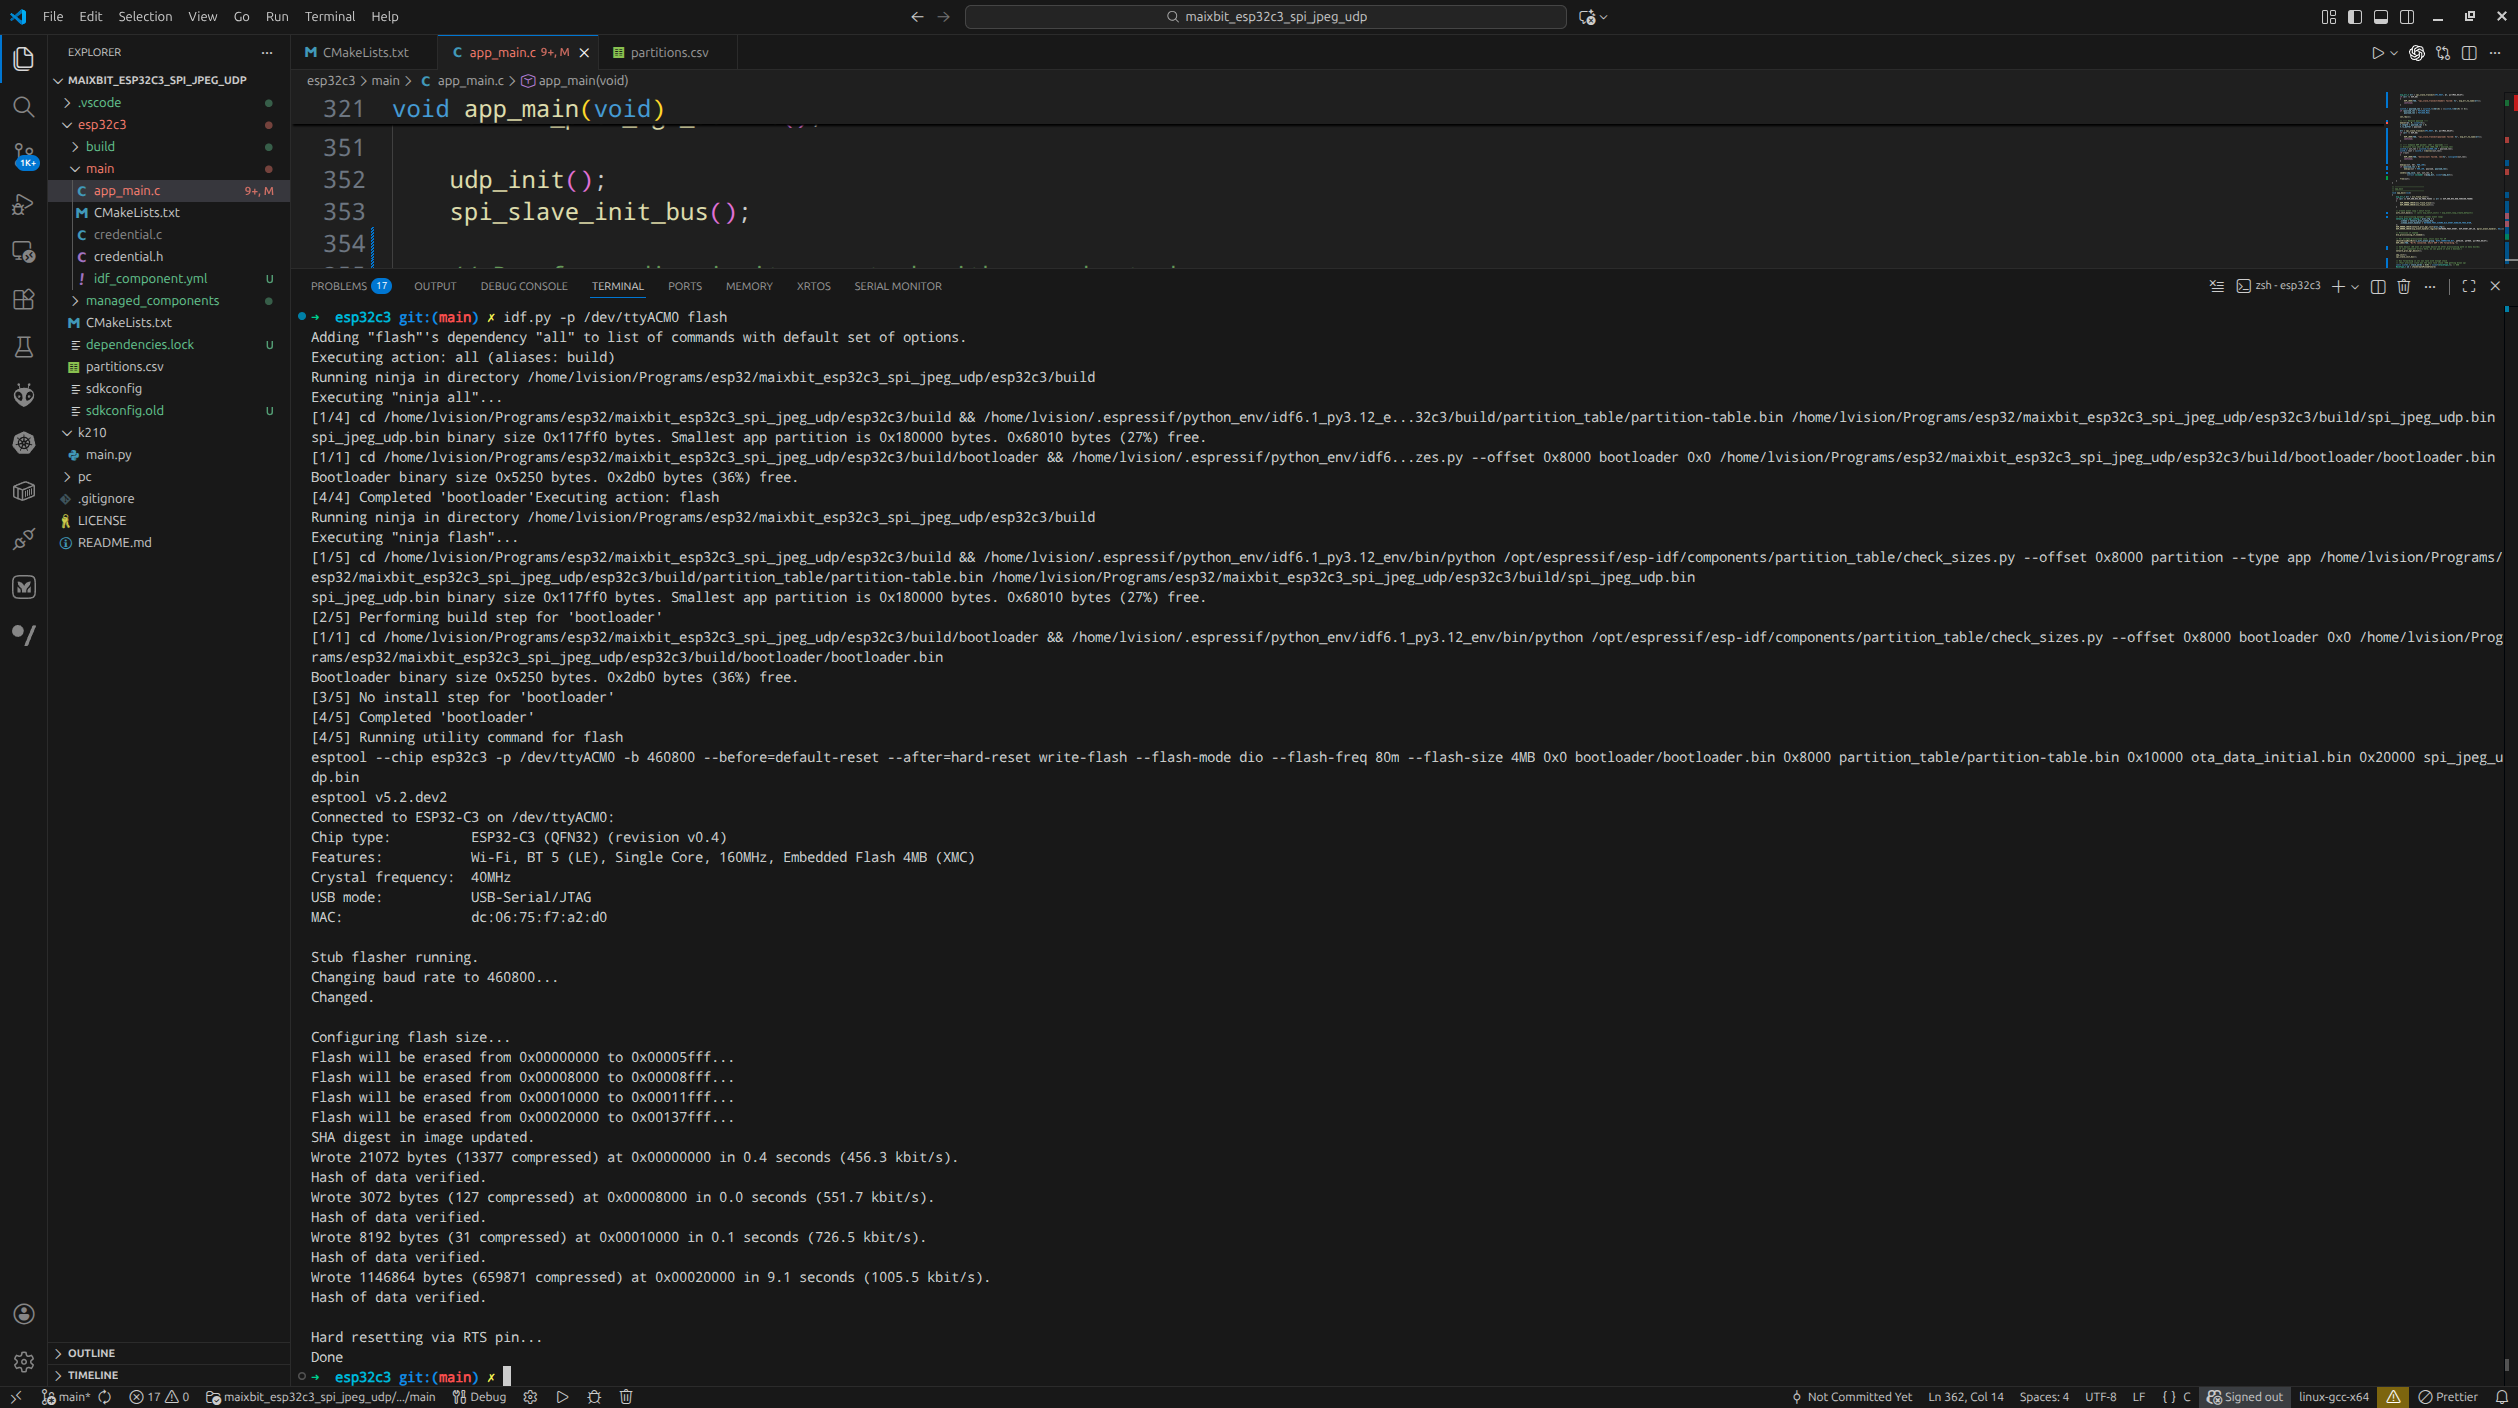
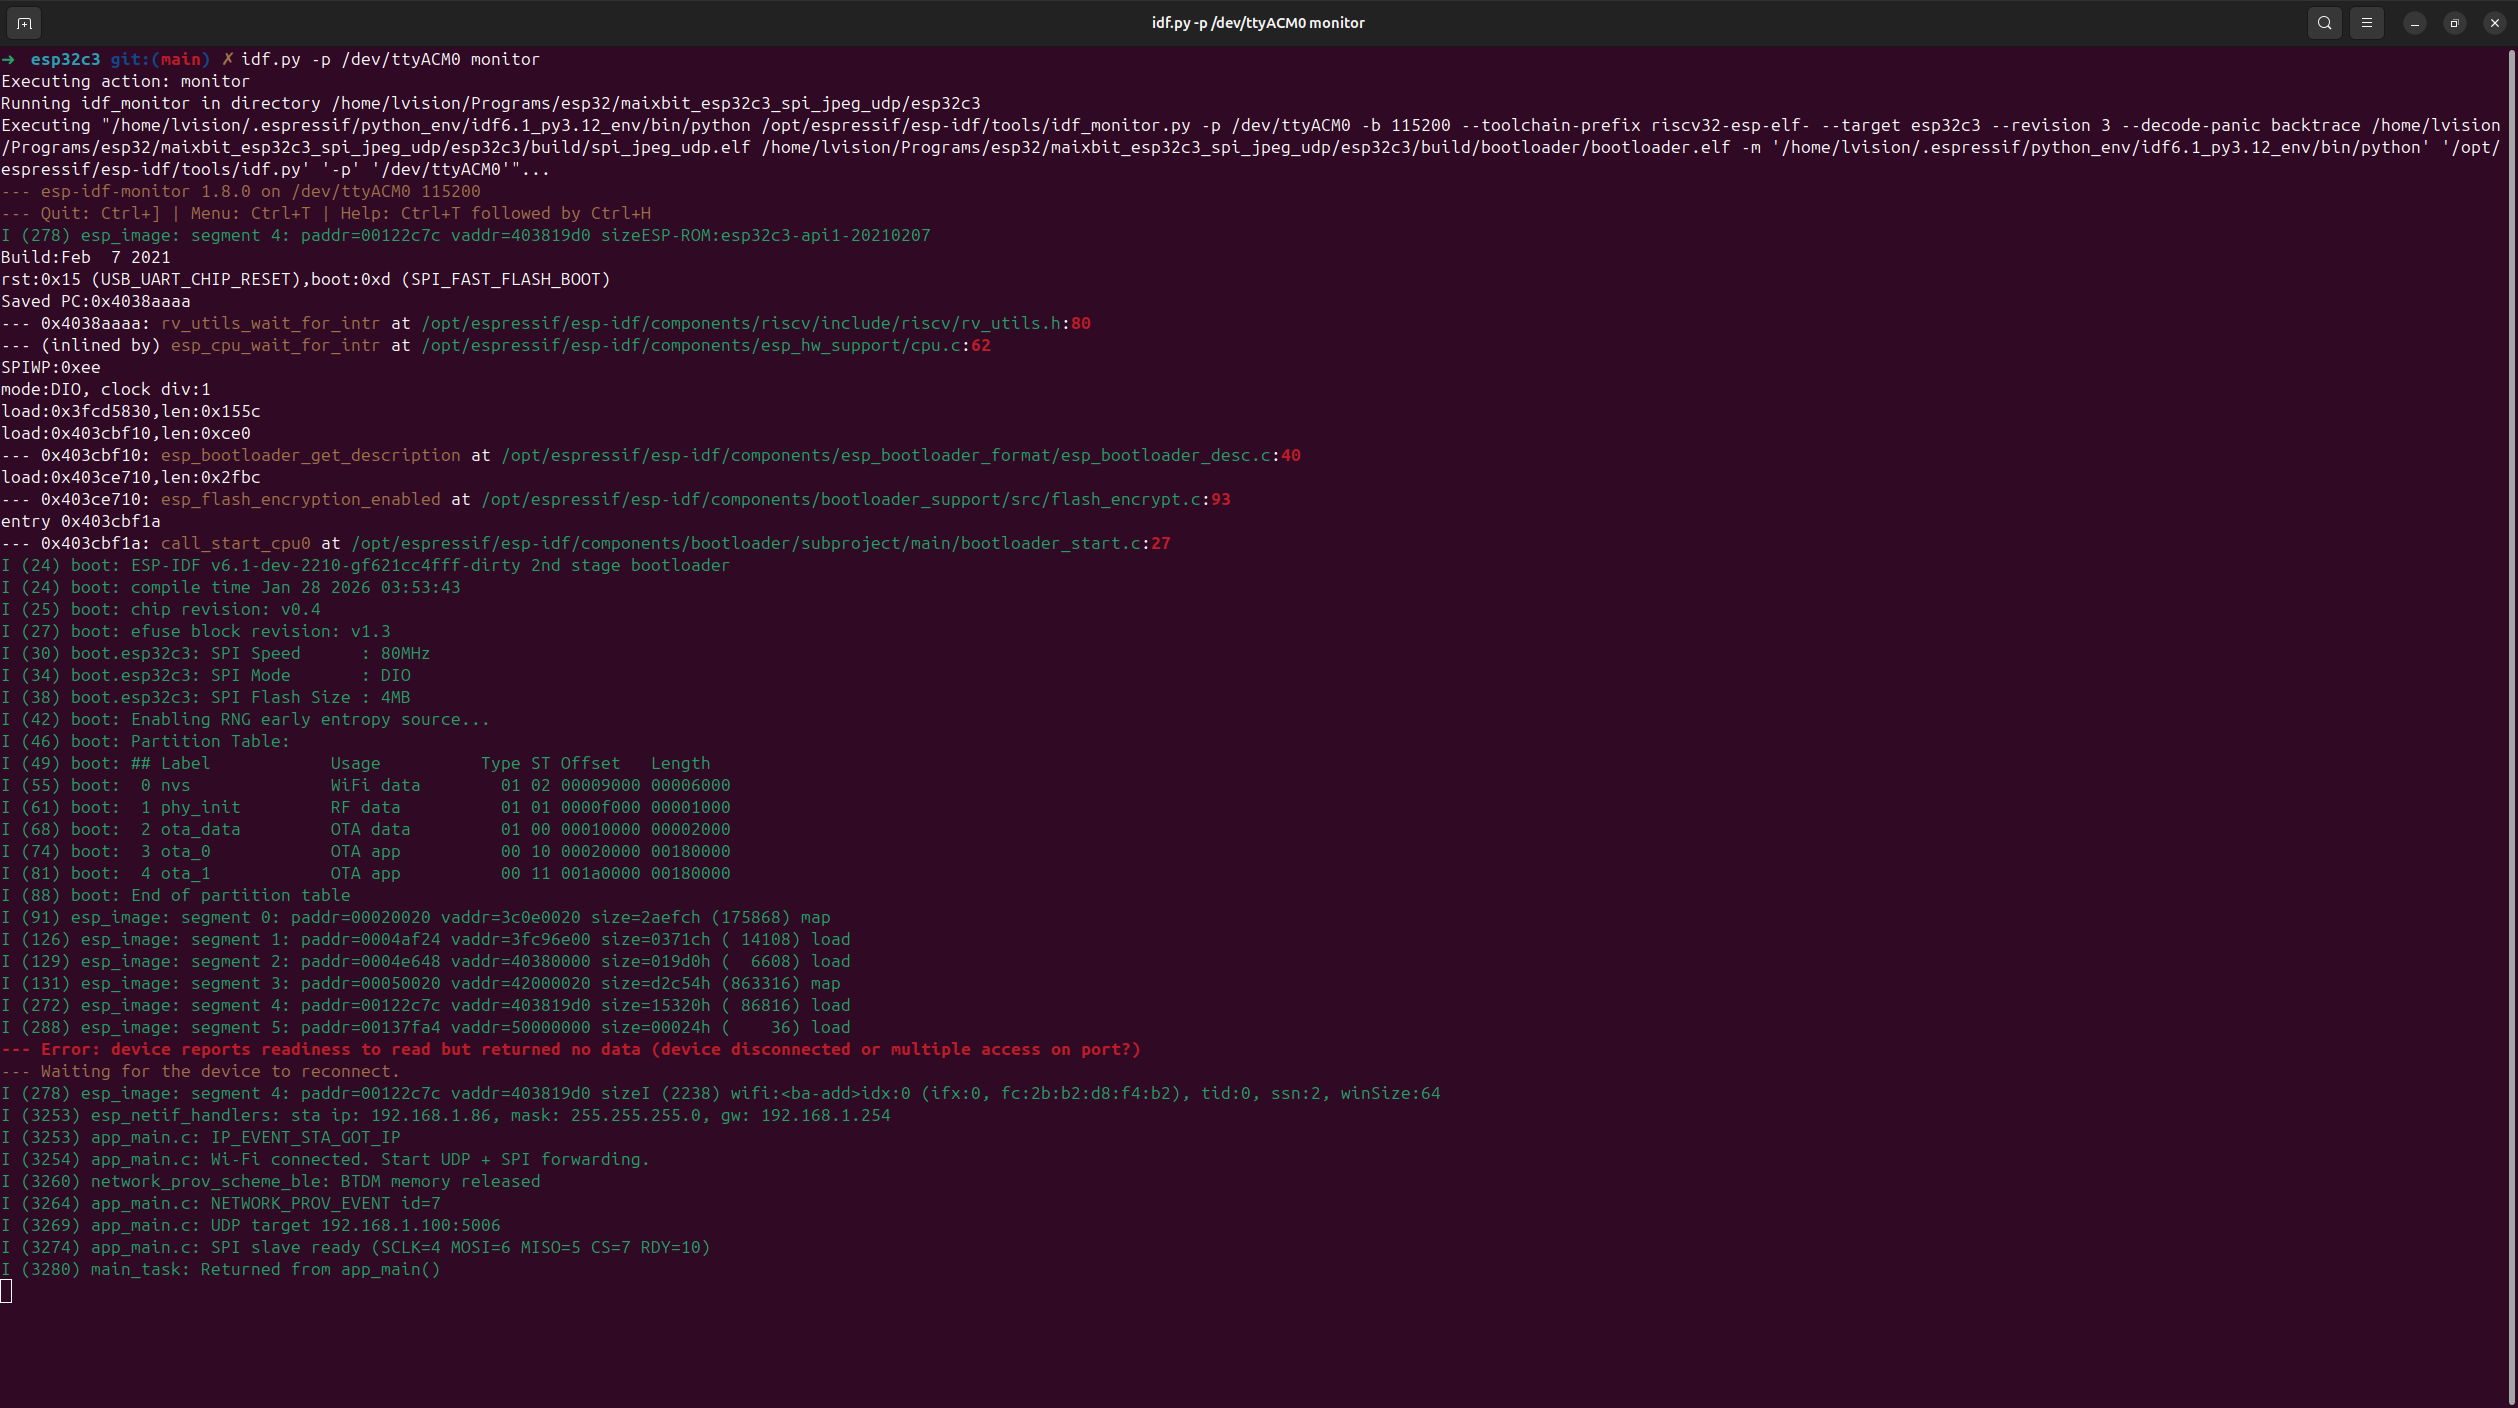
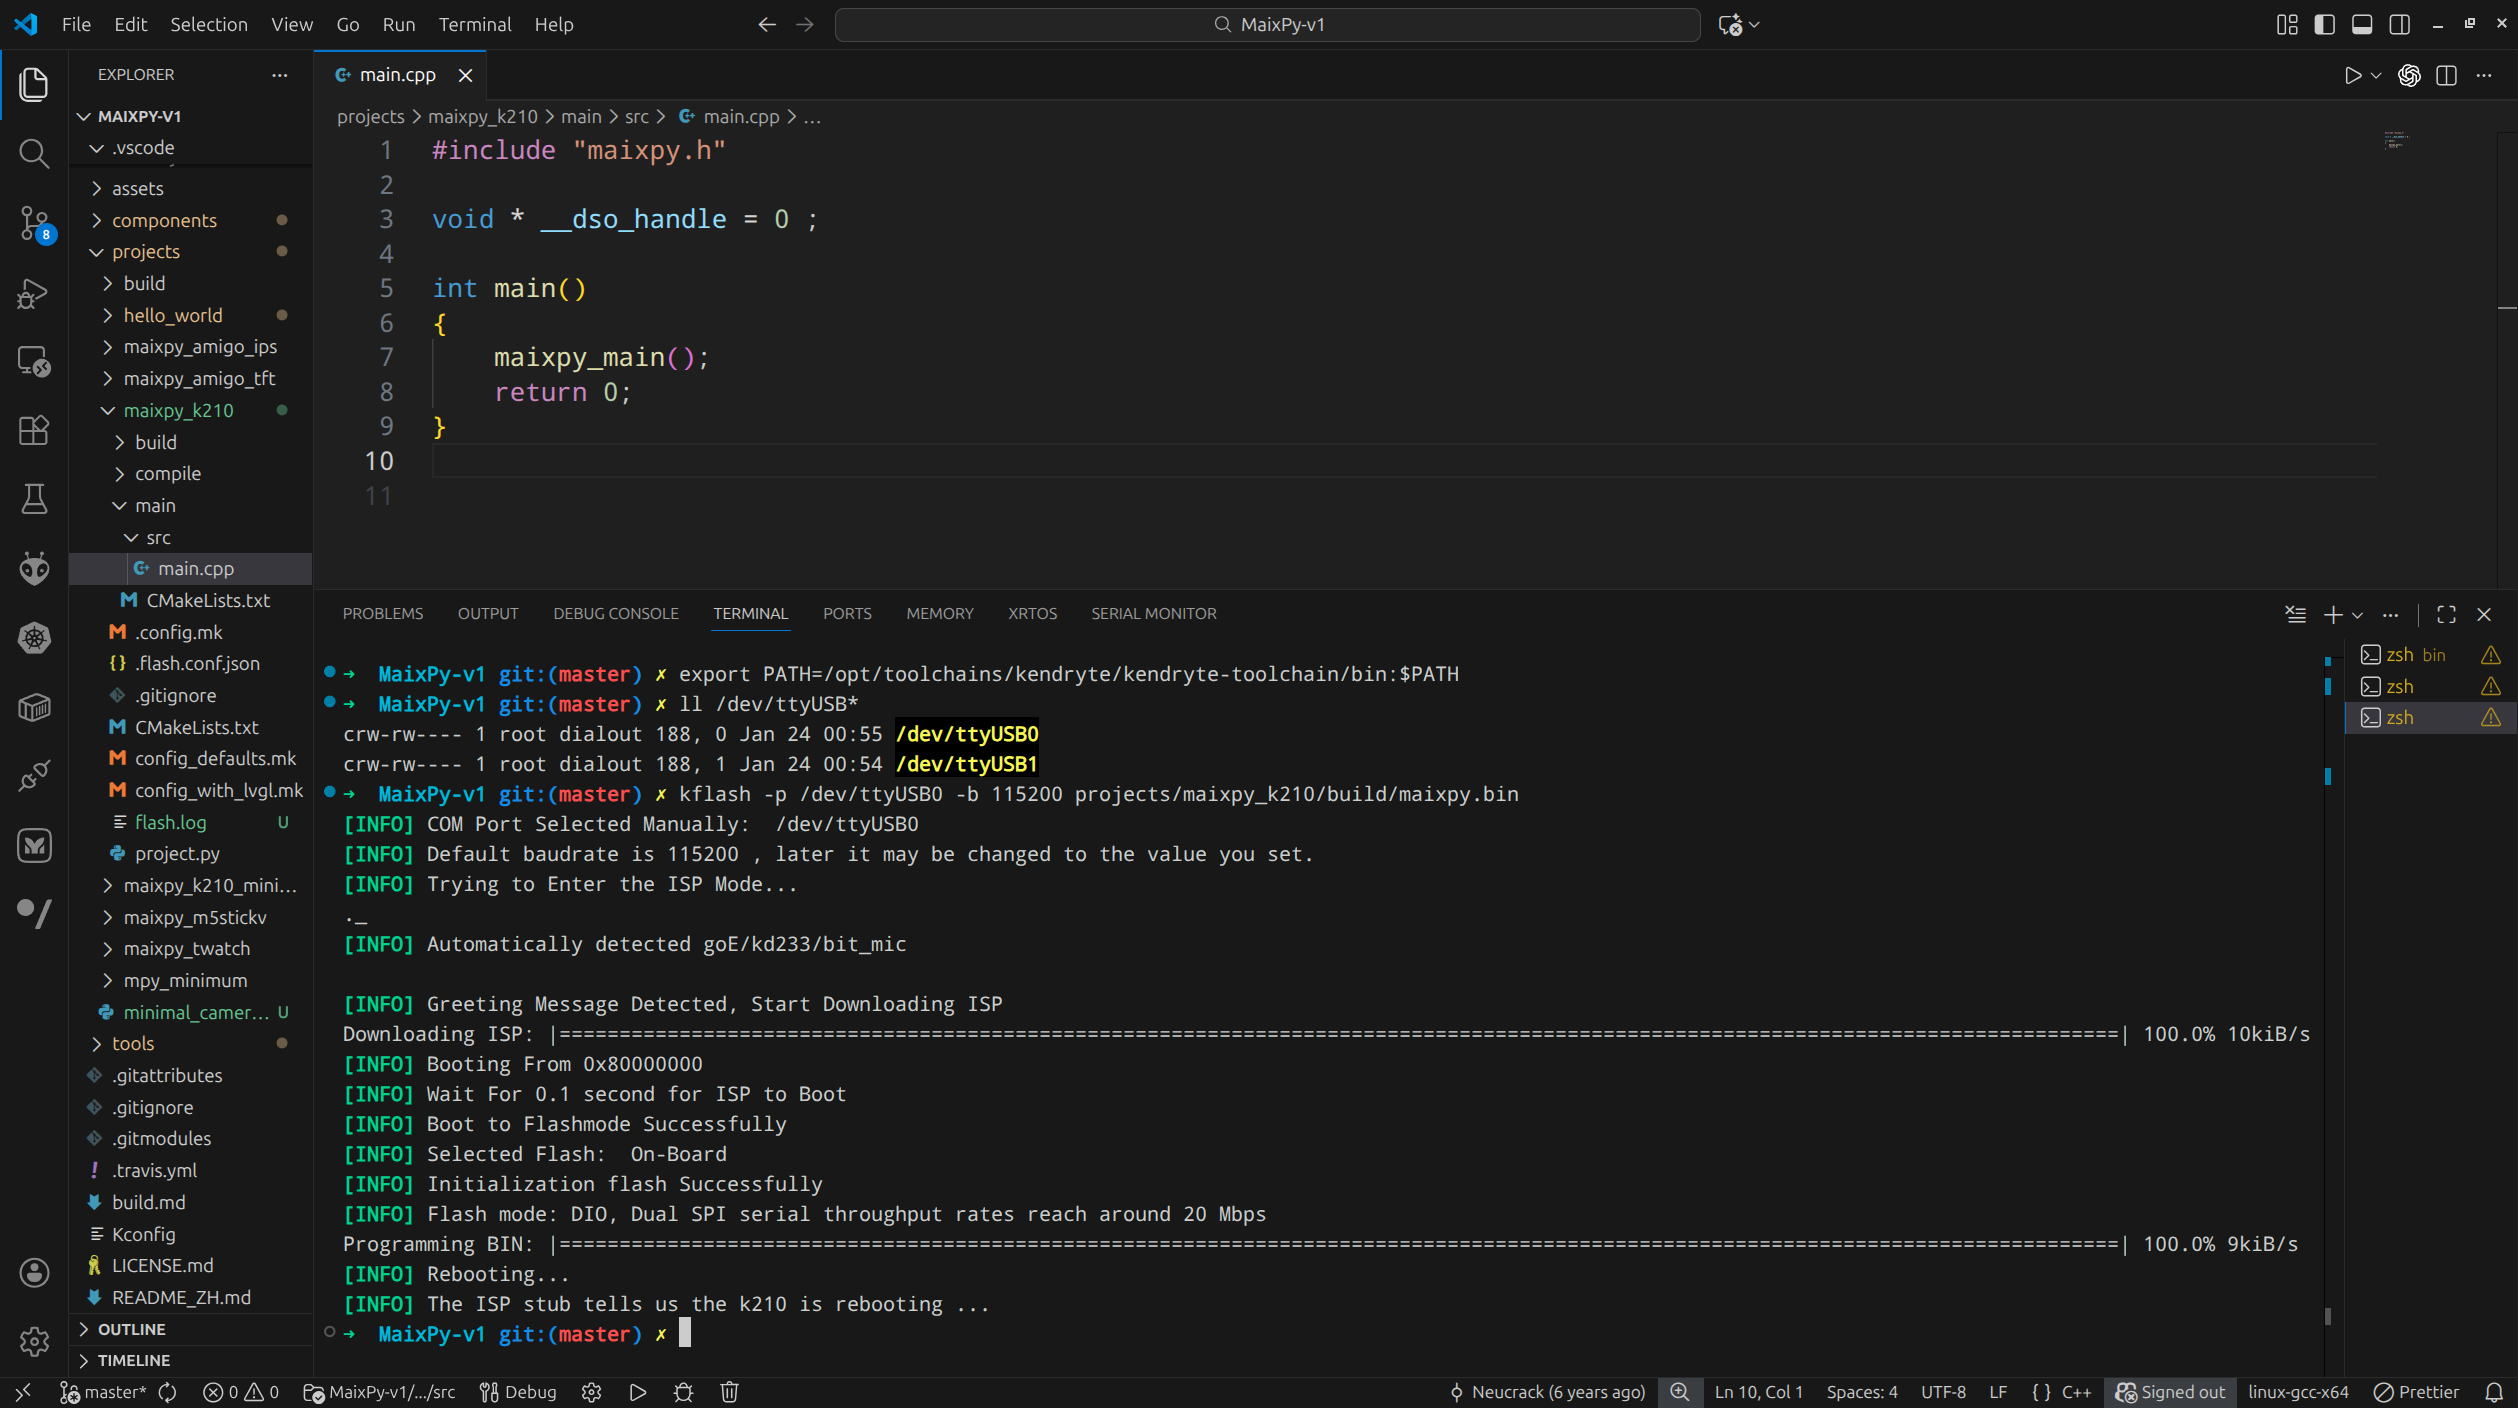
In my previous two MaixDuino blog posts MaixDuino 1 and MaixDuino 2, flashing was done using the Arduino IDE. In hindsight, this was neither necessary nor particularly convenient. Especially after flashing the Sipeed official firmware MaixPy-v1 onto the MaixDuino board, there is no real need to rely on the Arduino IDE anymore.
This blog post continues the MaixDuino exploration and completes two experiments:
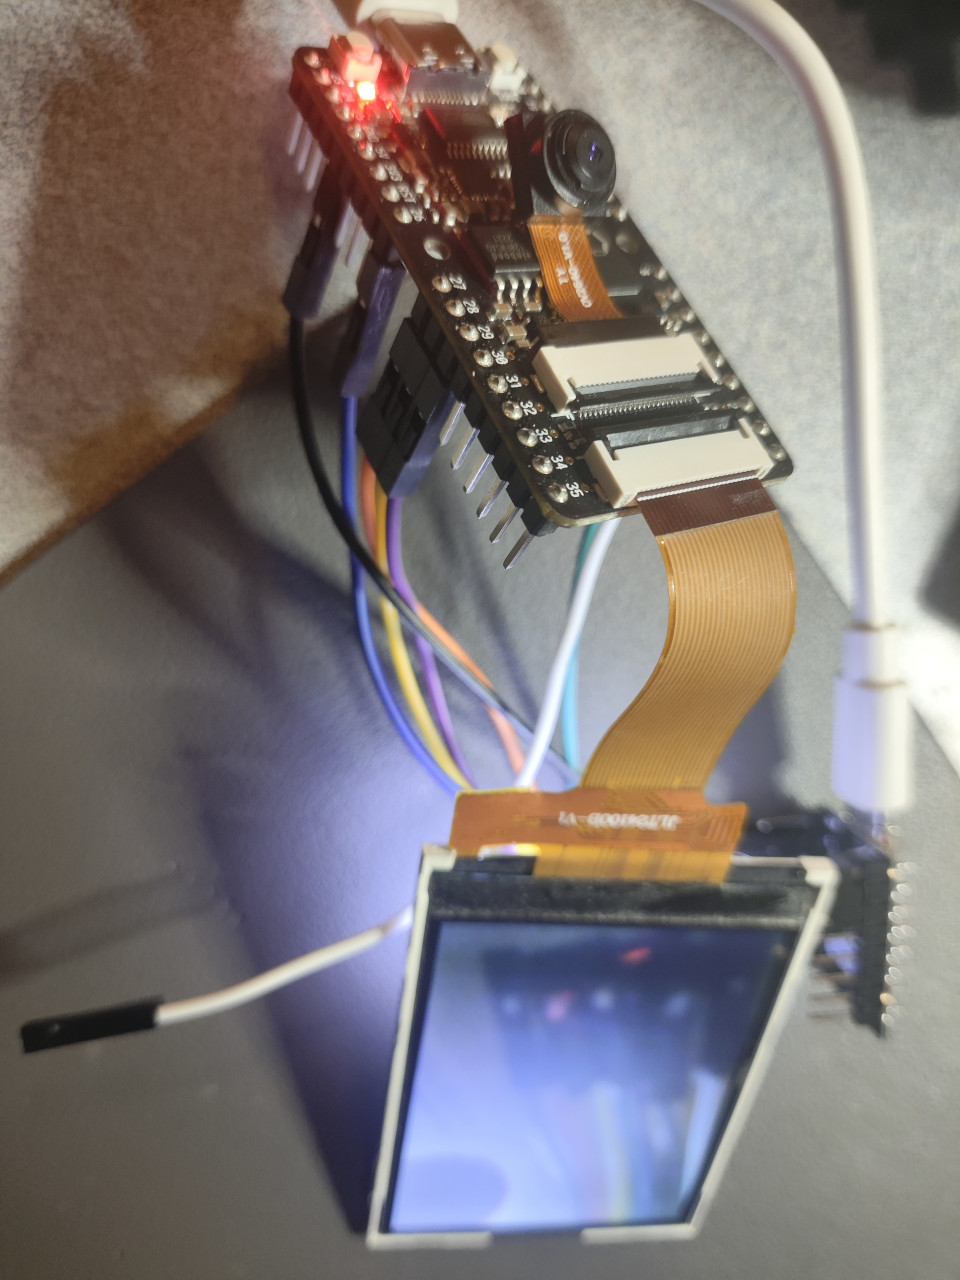
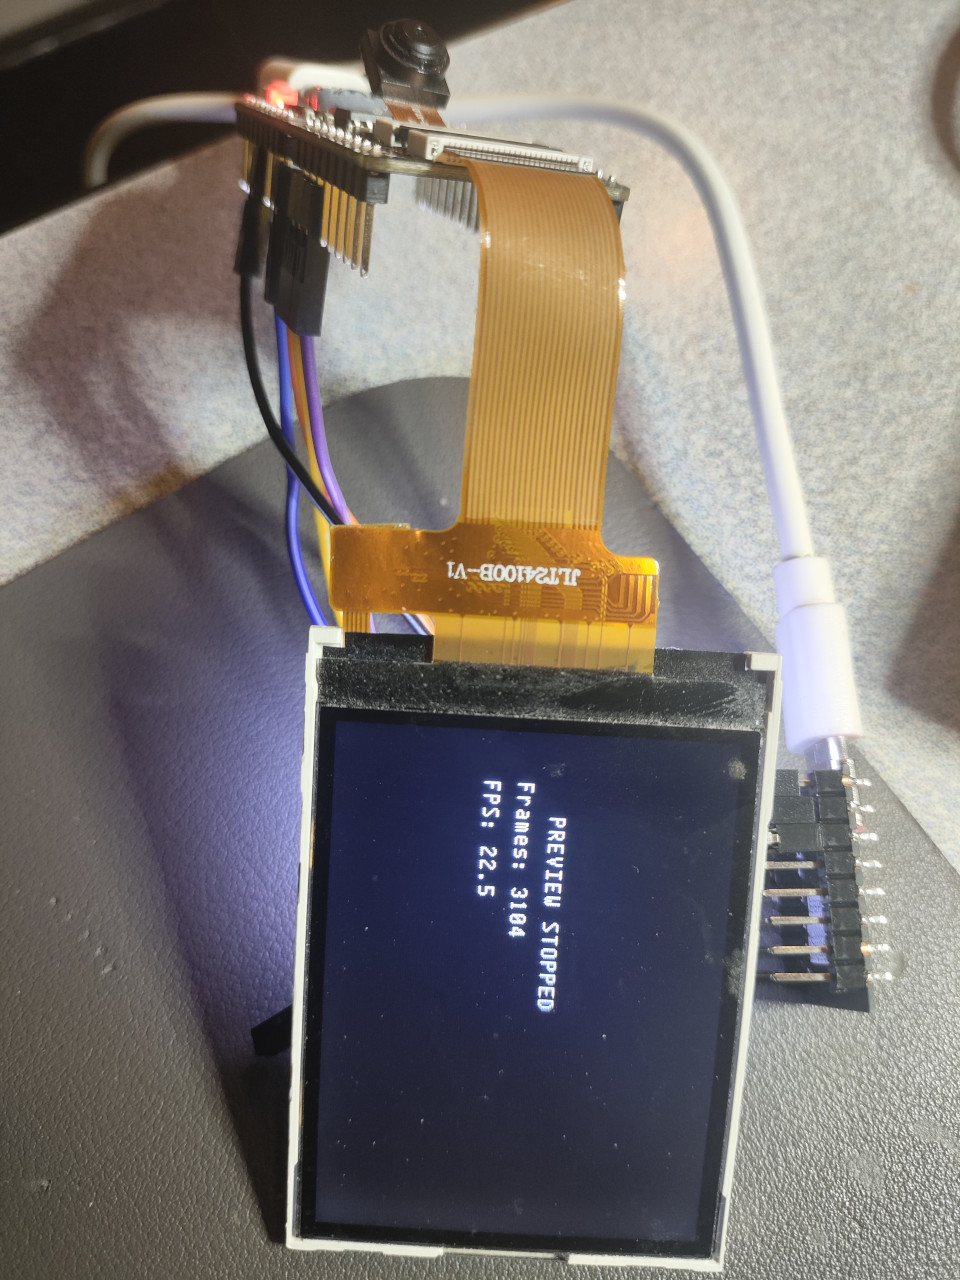
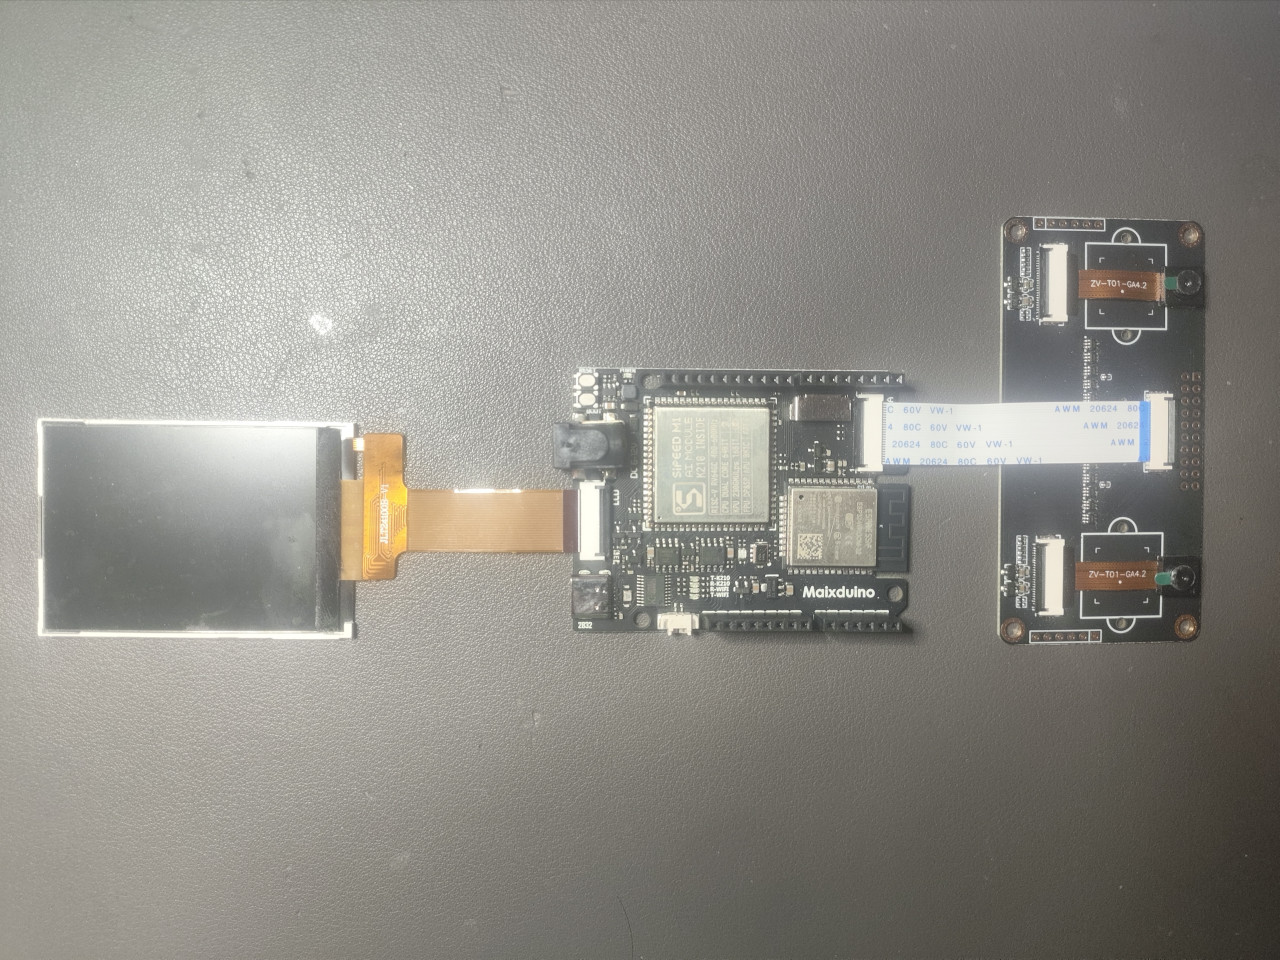
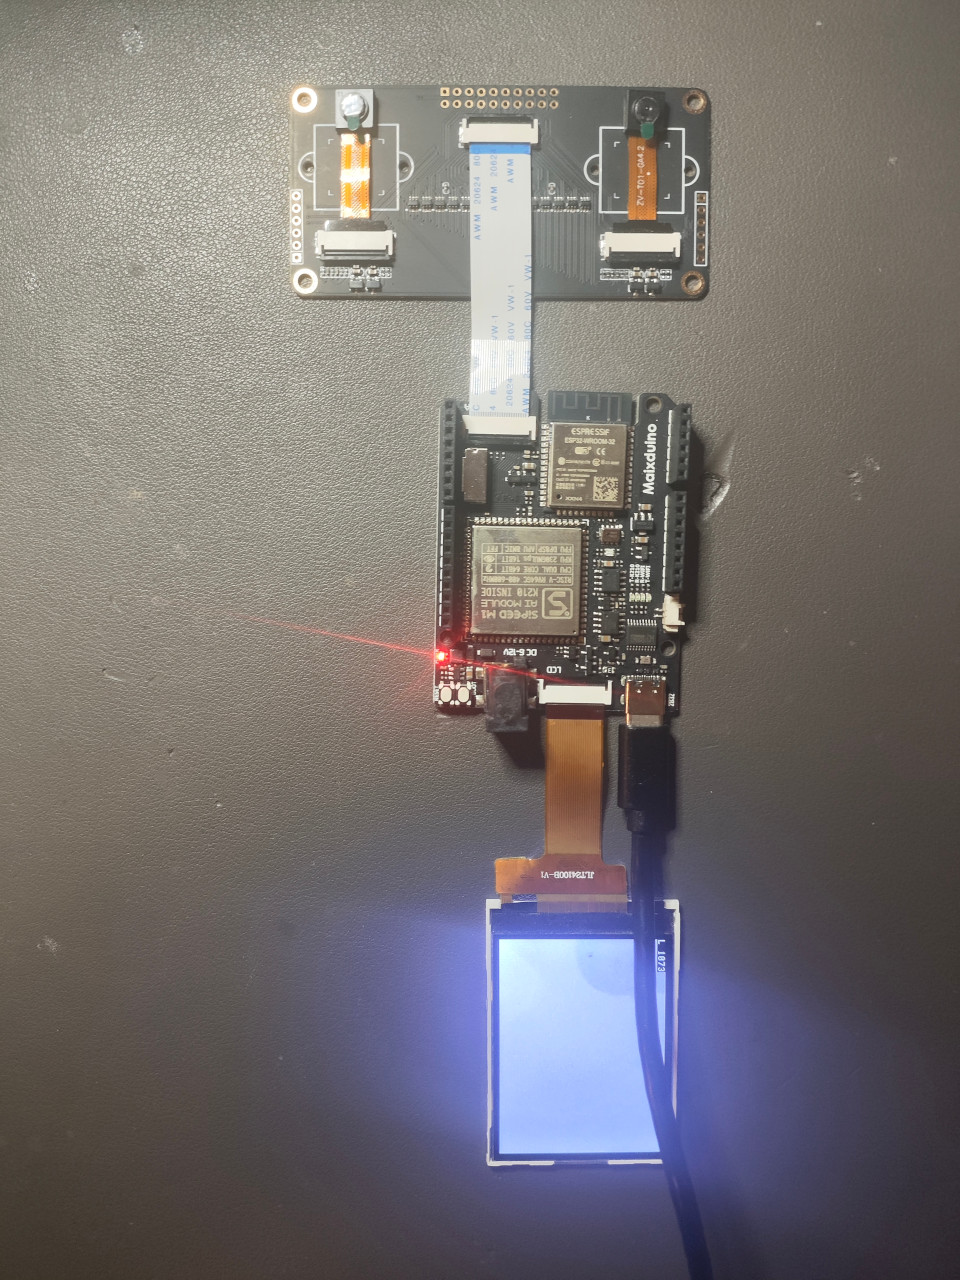
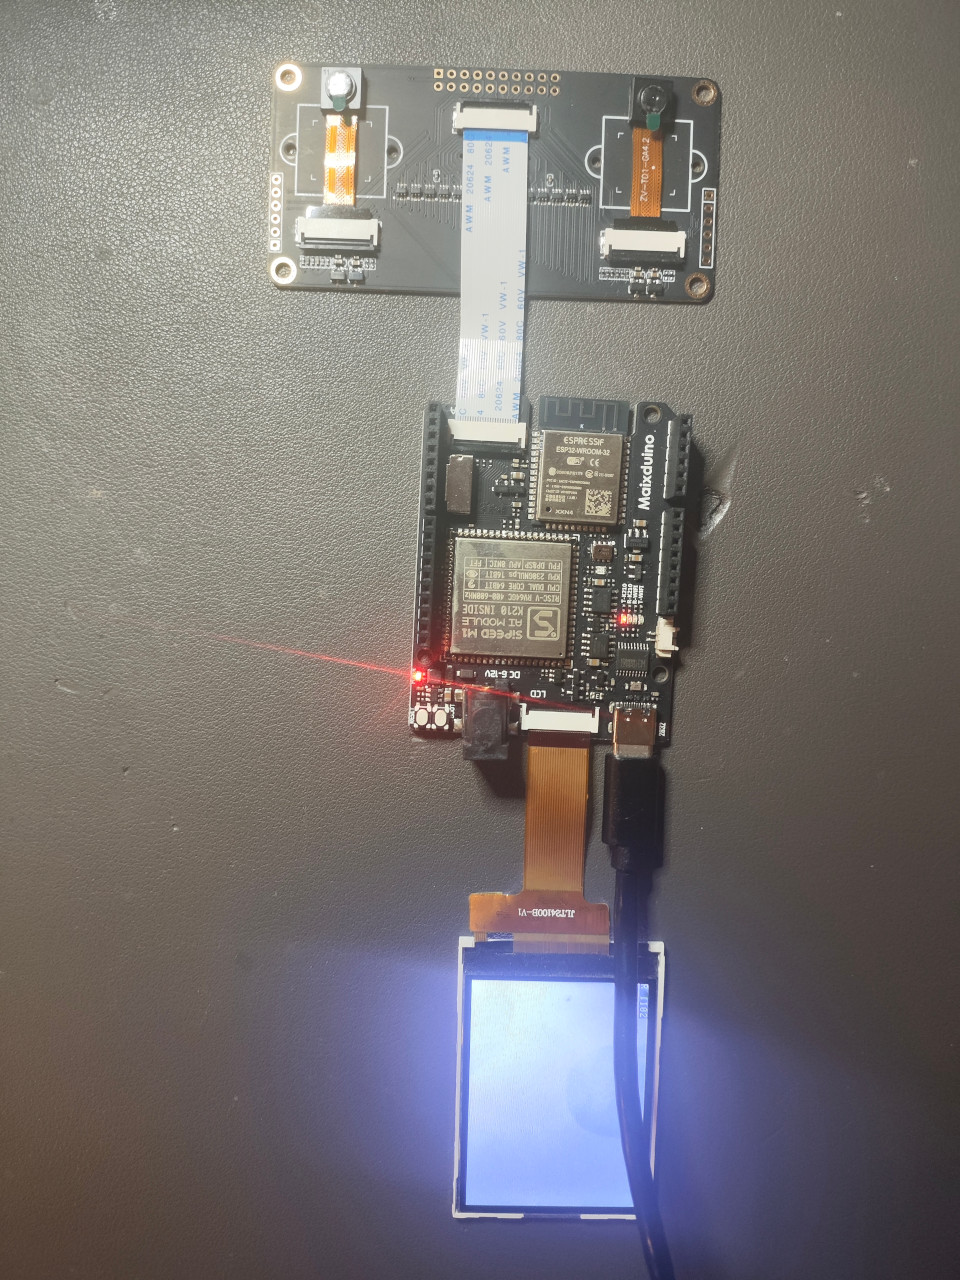
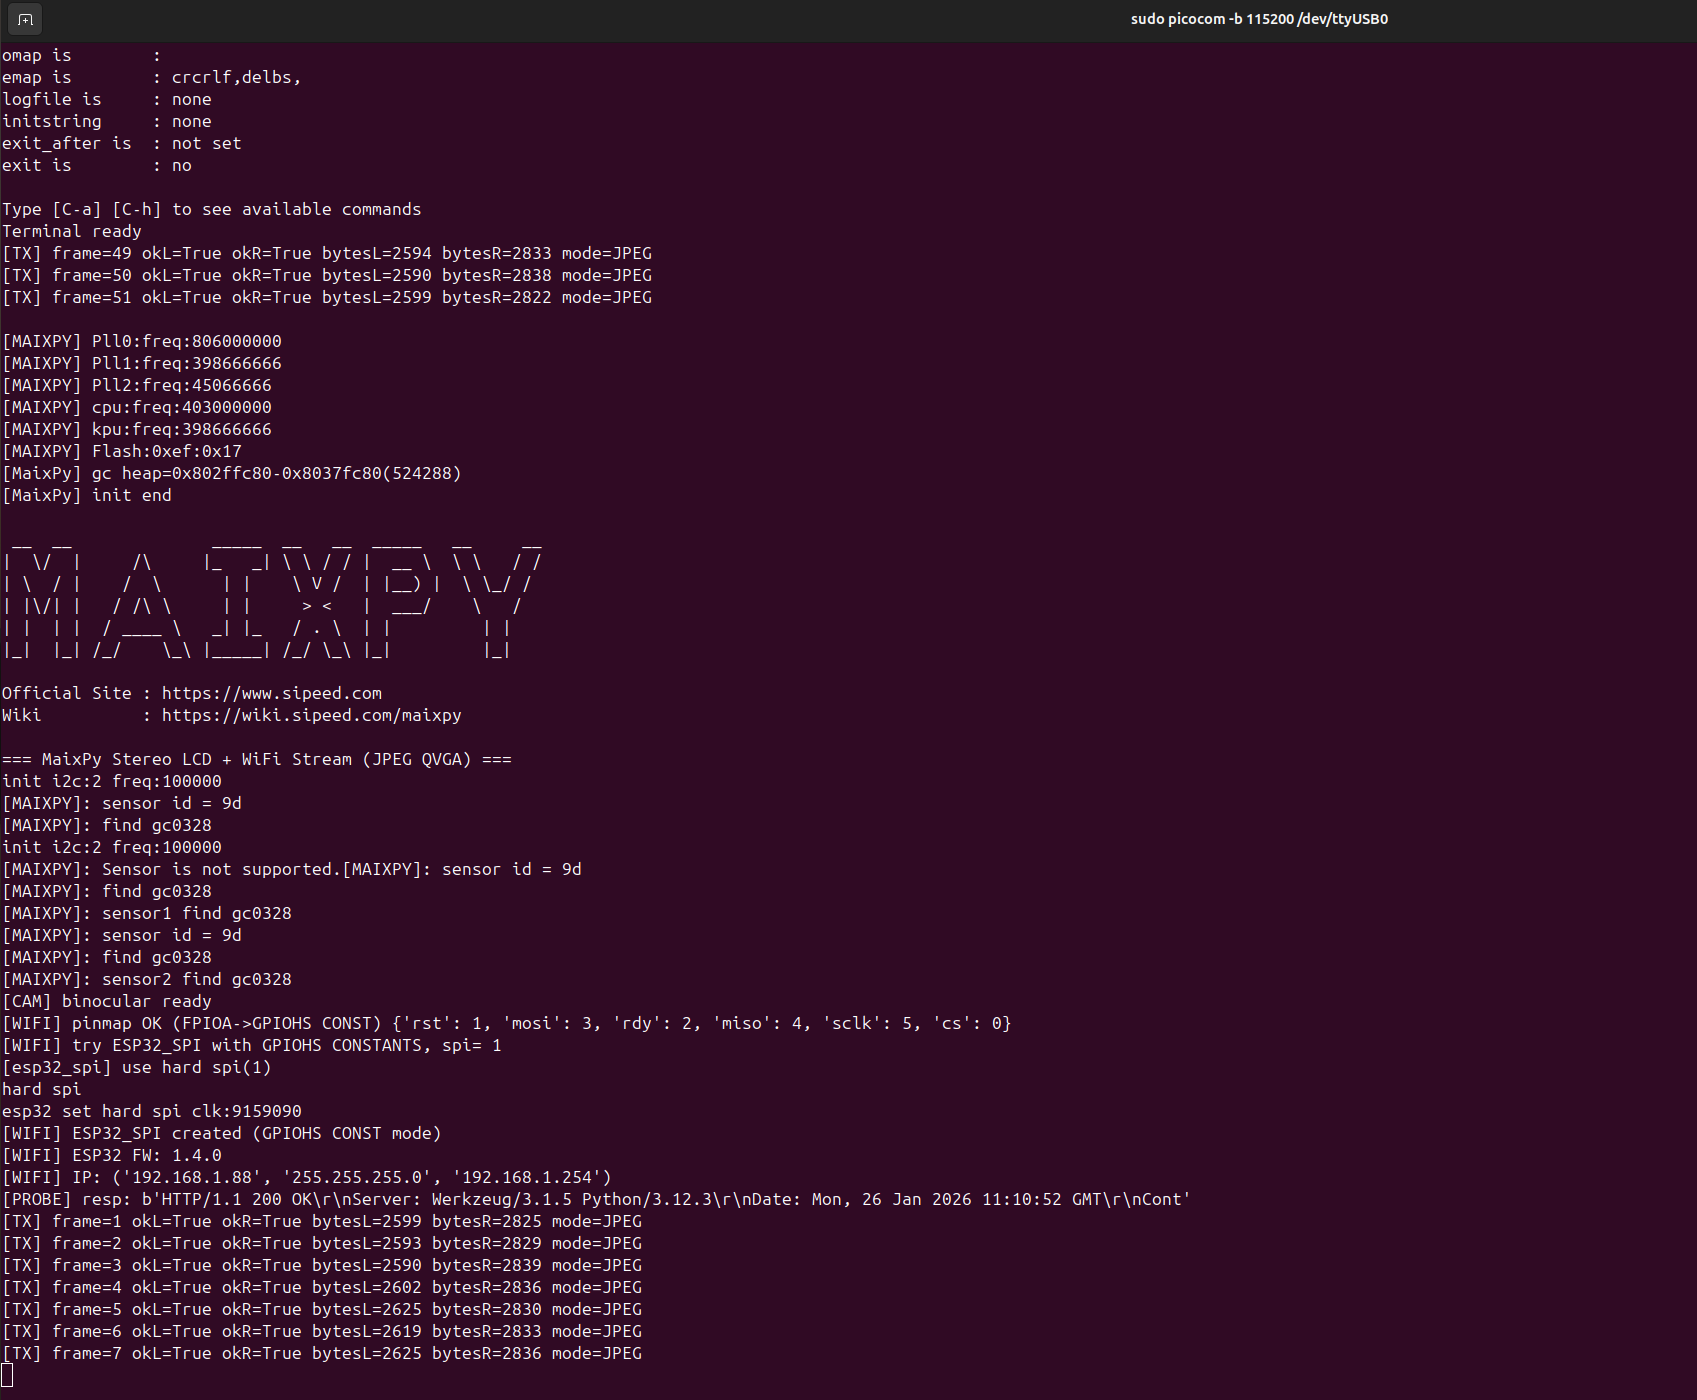
A very simple implementation of dual-camera image capture on the MaixDuino board, with alternating display on the onboard LCD screen (Refer to LCD API), without relying on Arduino IDE at all;
Streaming the stereo camera images over the MaixDuino’s onboard Wi-Fi to a remote display endpoint.
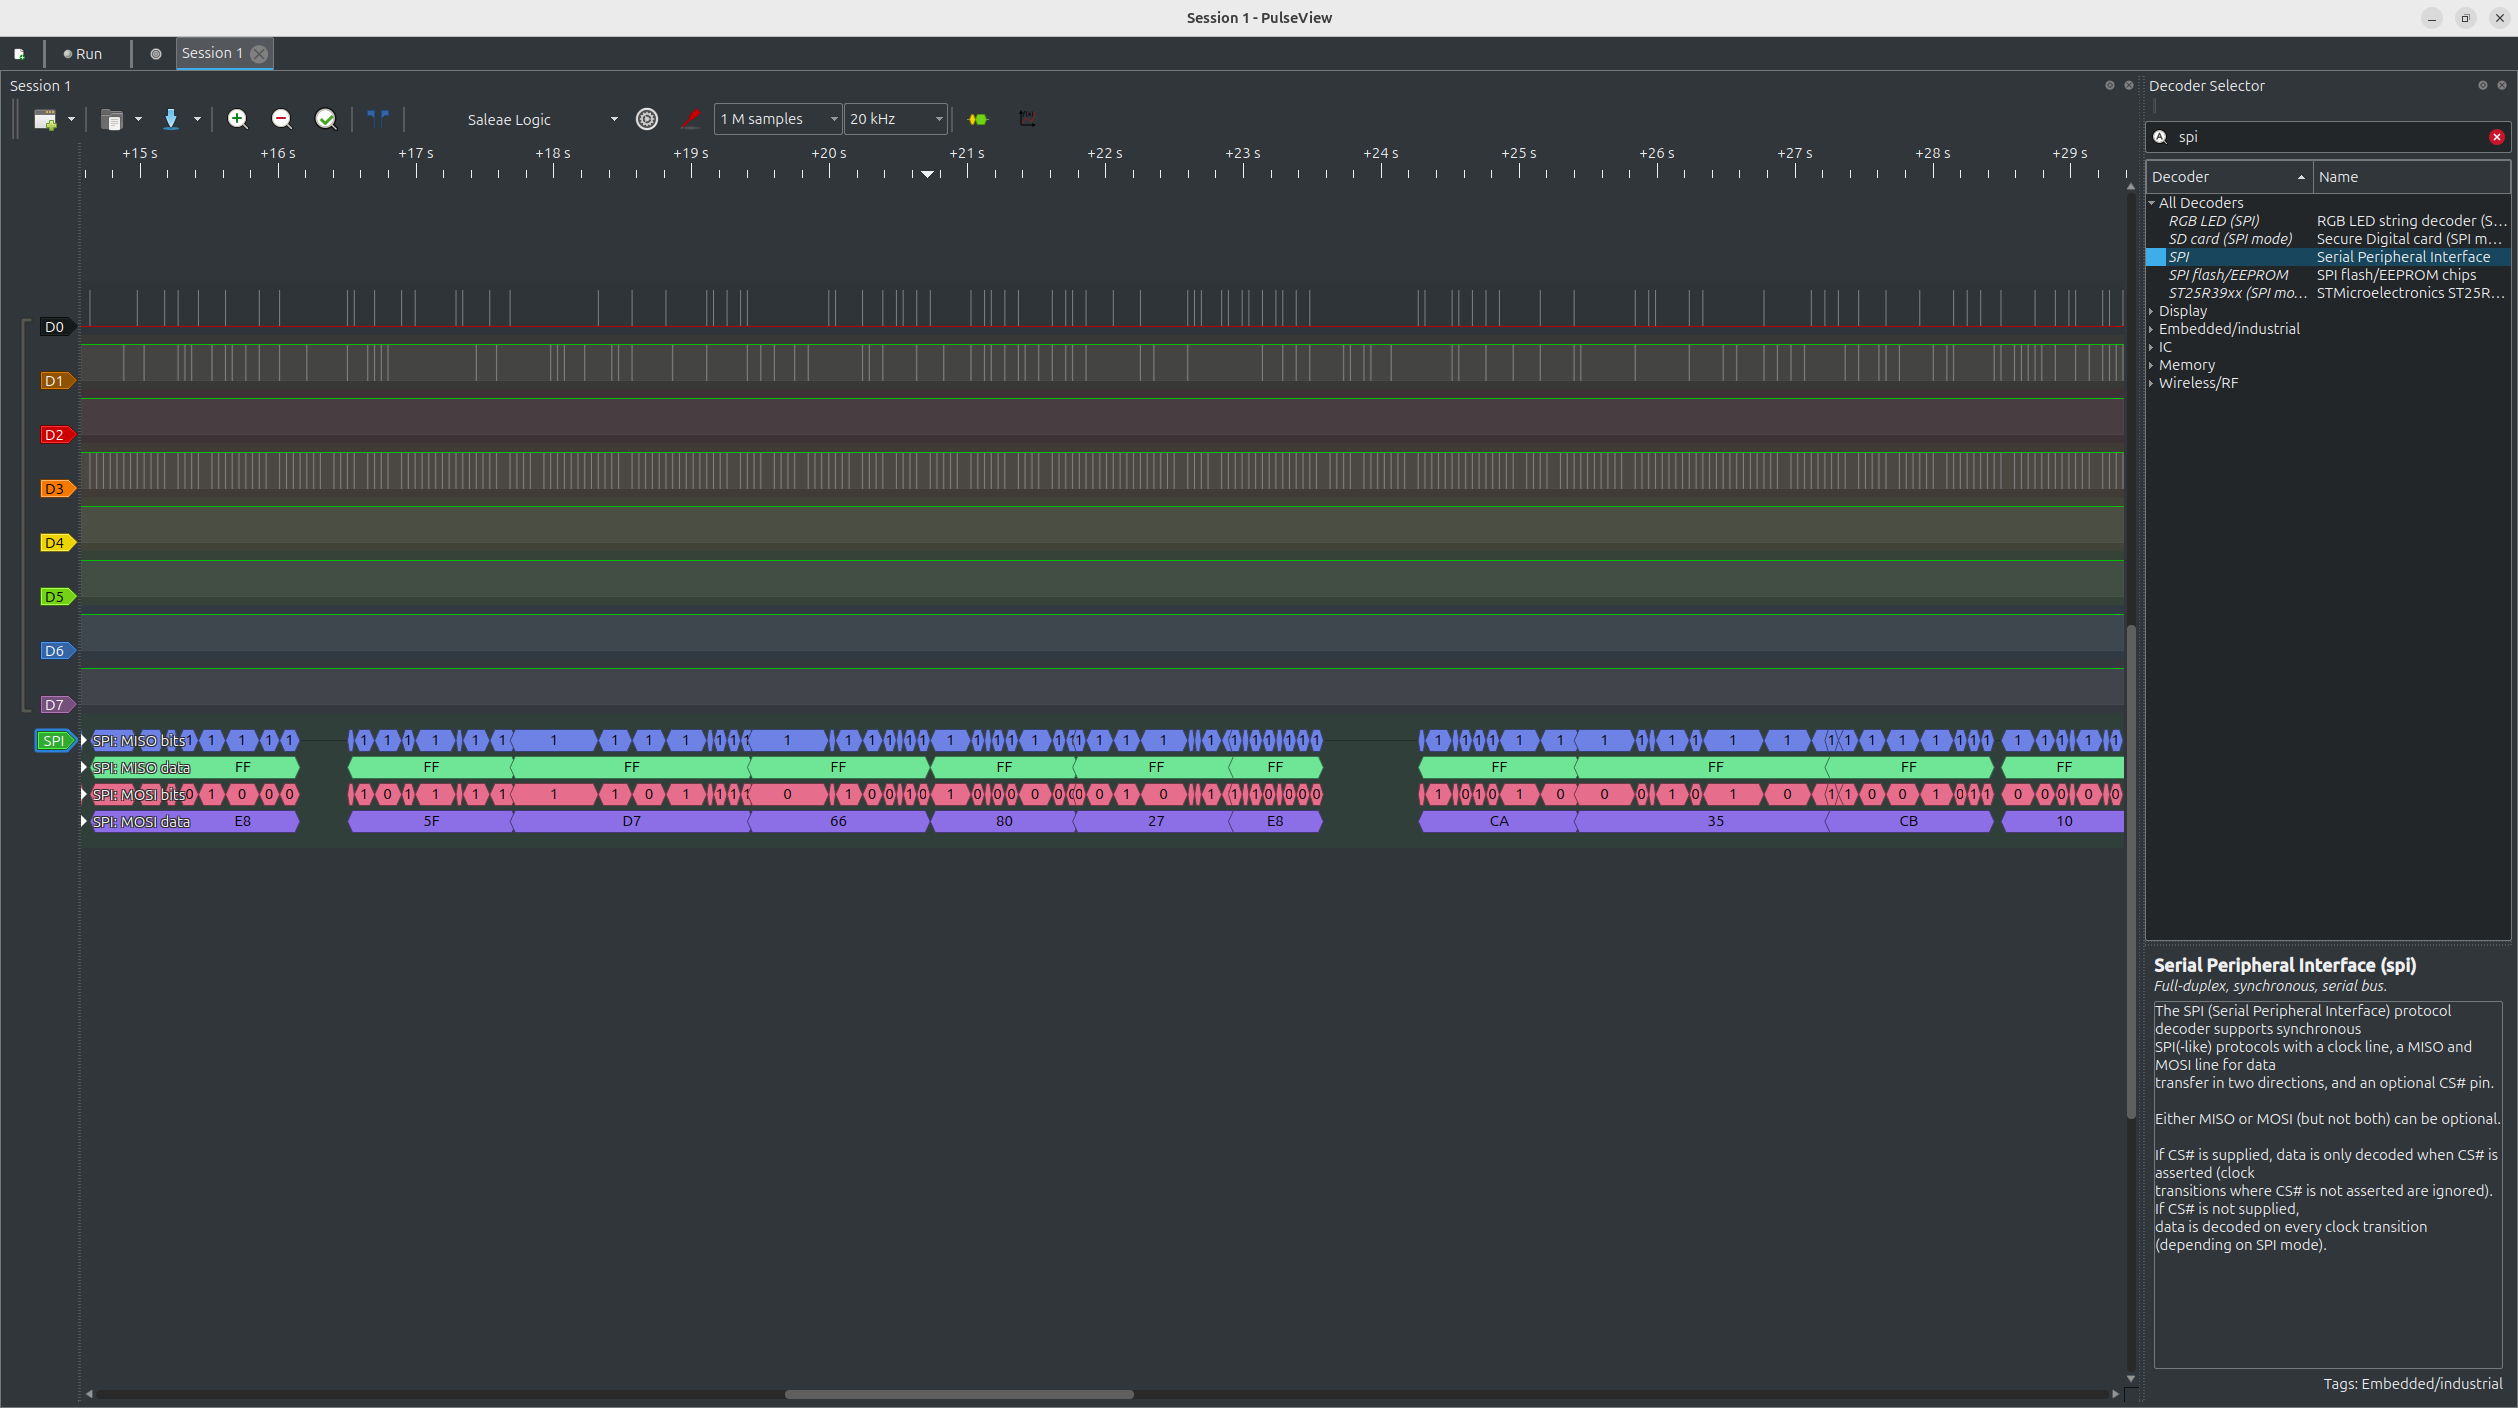
MaixDuino‘s Sipeed-M1 uses the FIXED hard SPI1 to communicate with its onboard ESP32-WROOM-32, where you need to use network.ESP32_SPI for communication via WiFi, as follows:
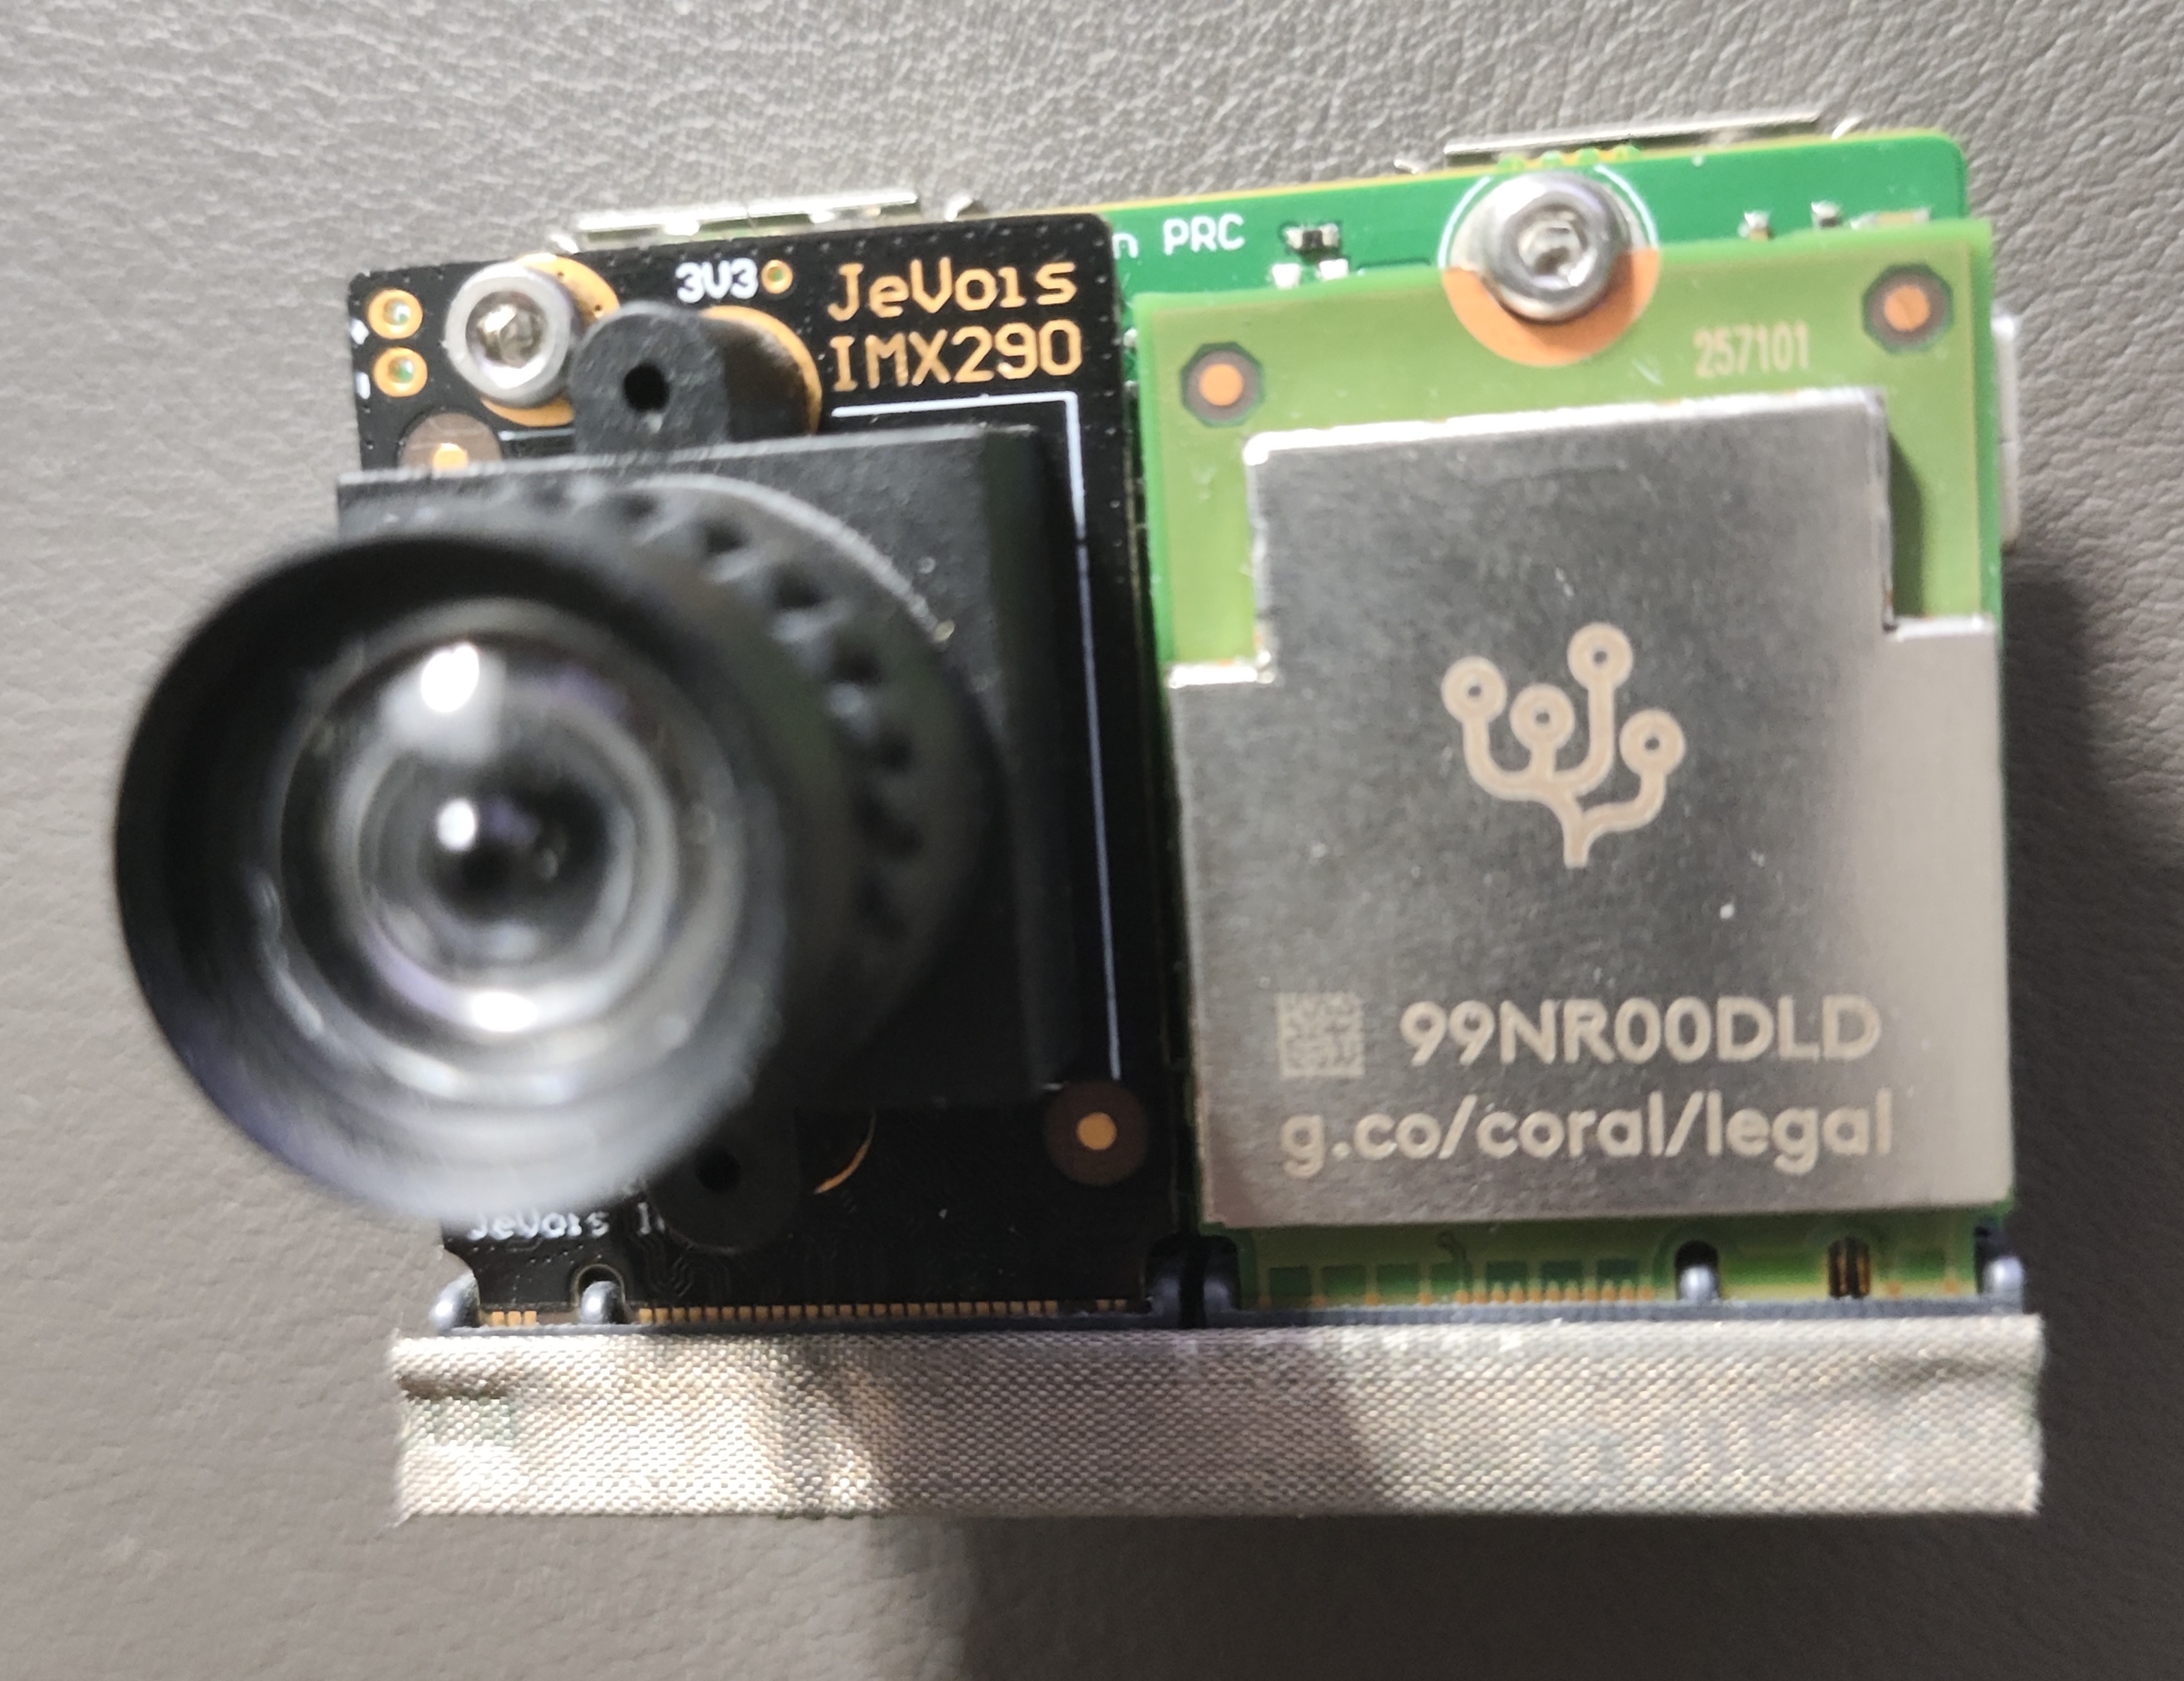
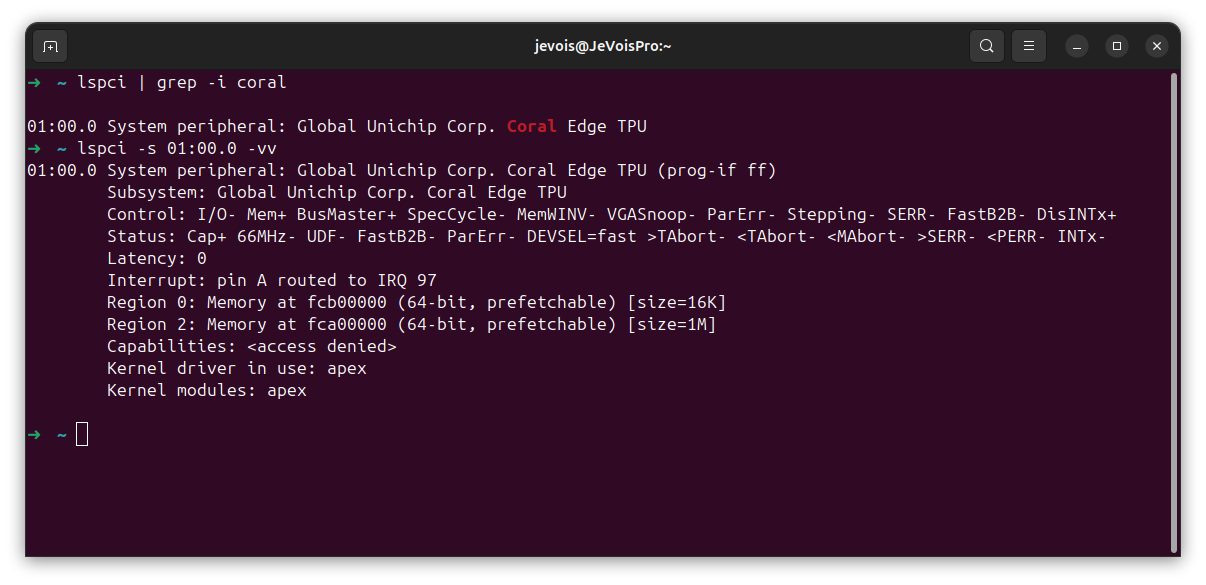
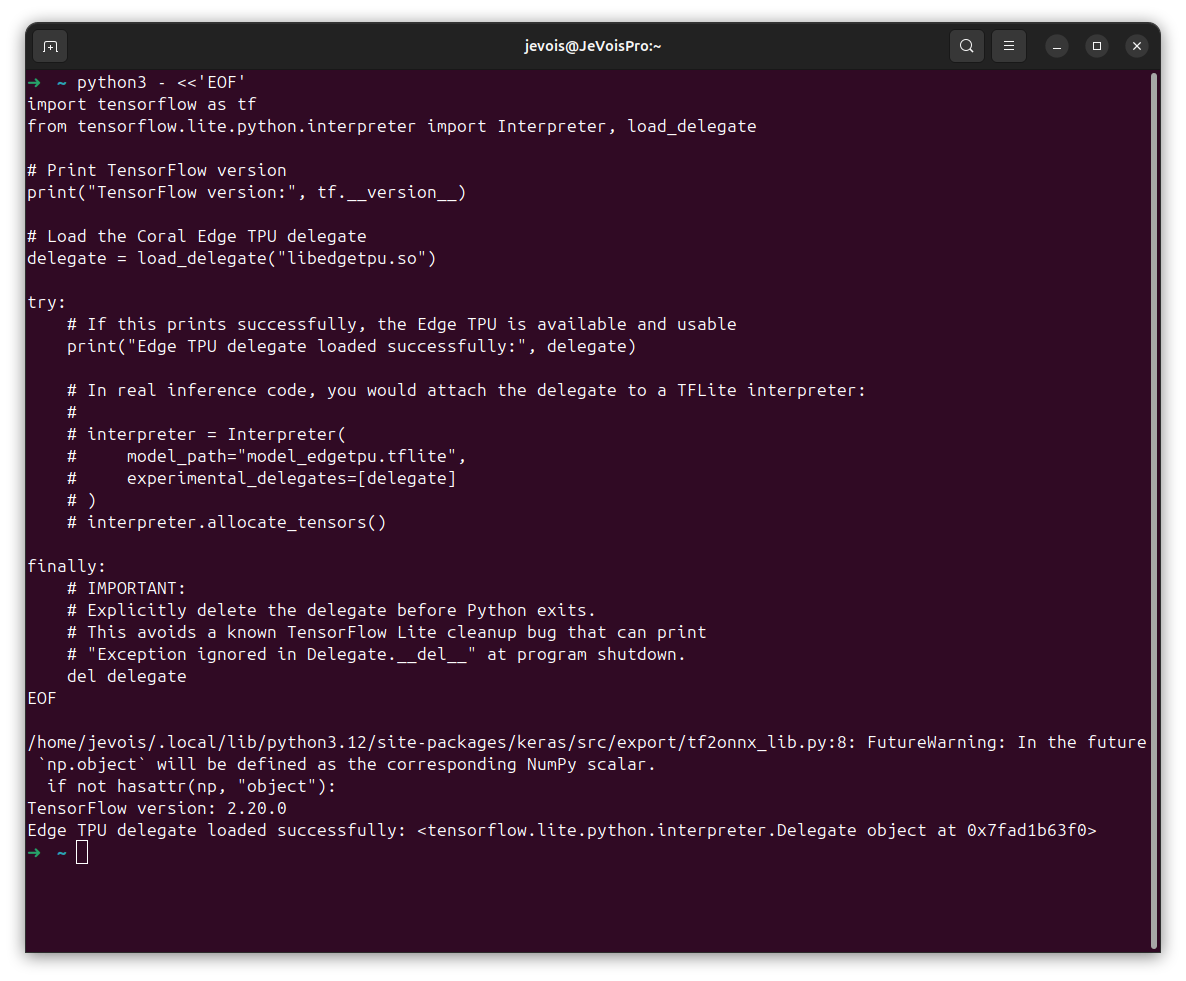
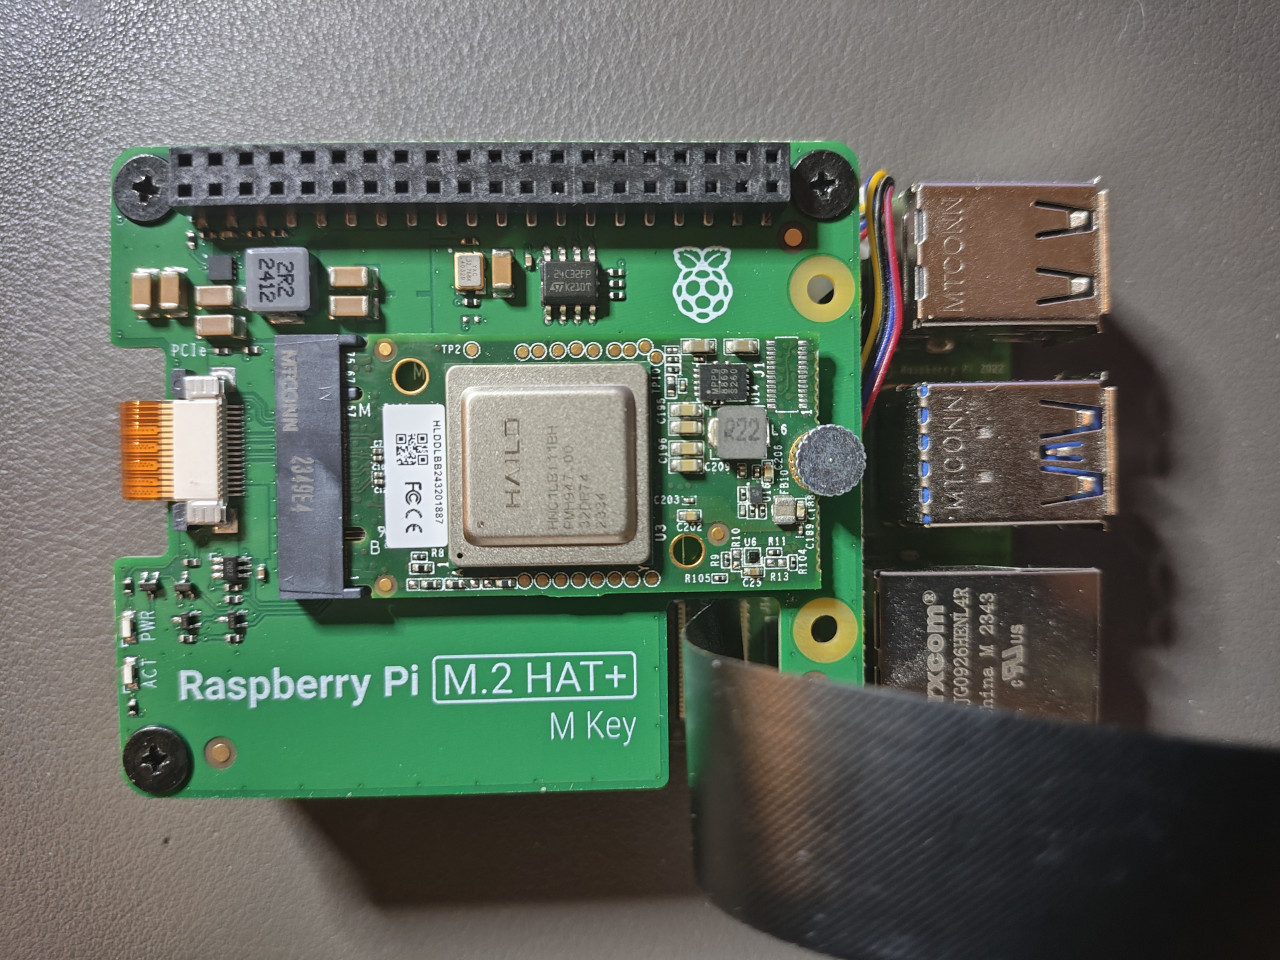
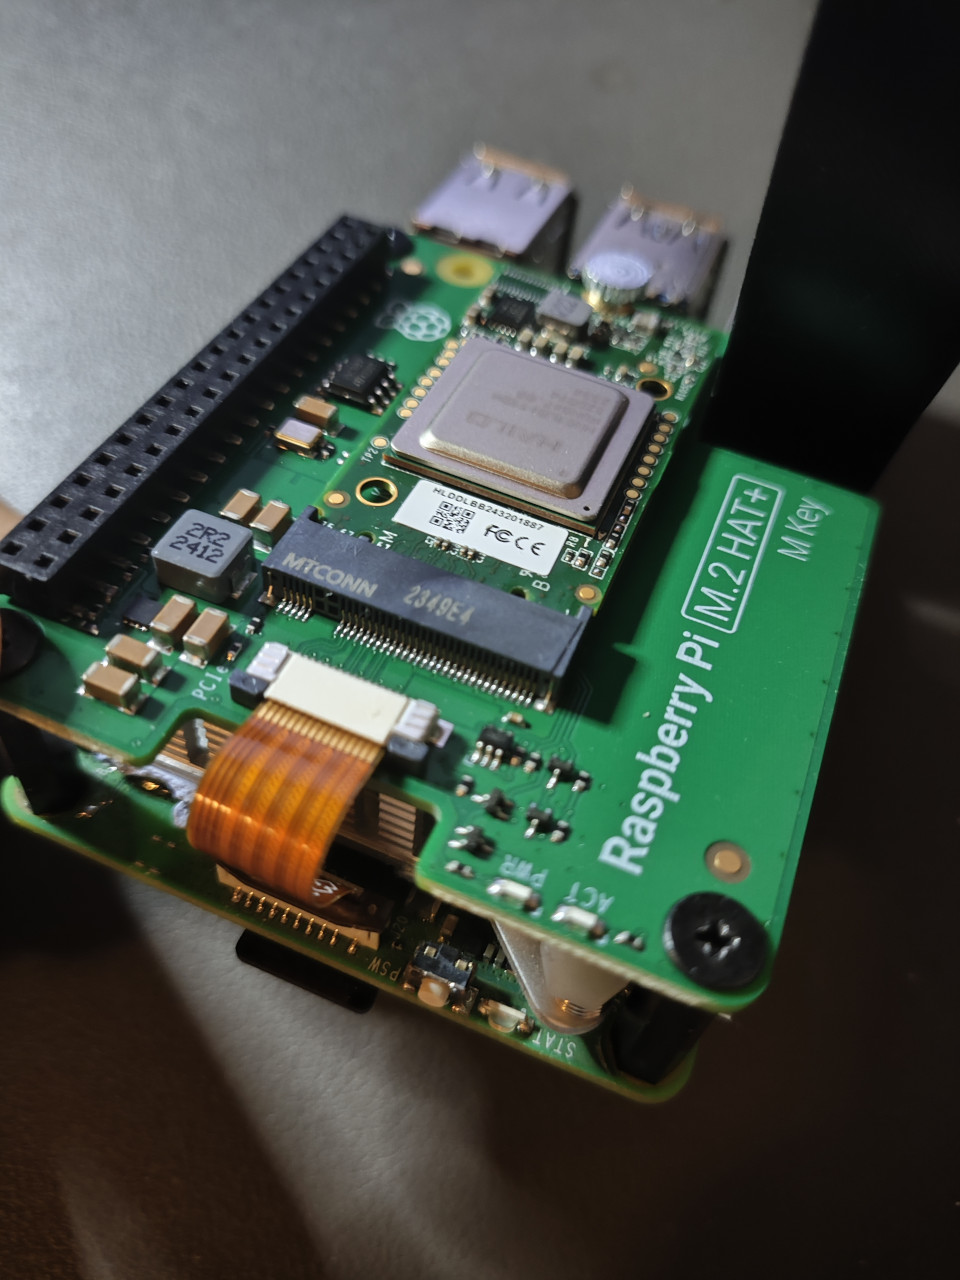
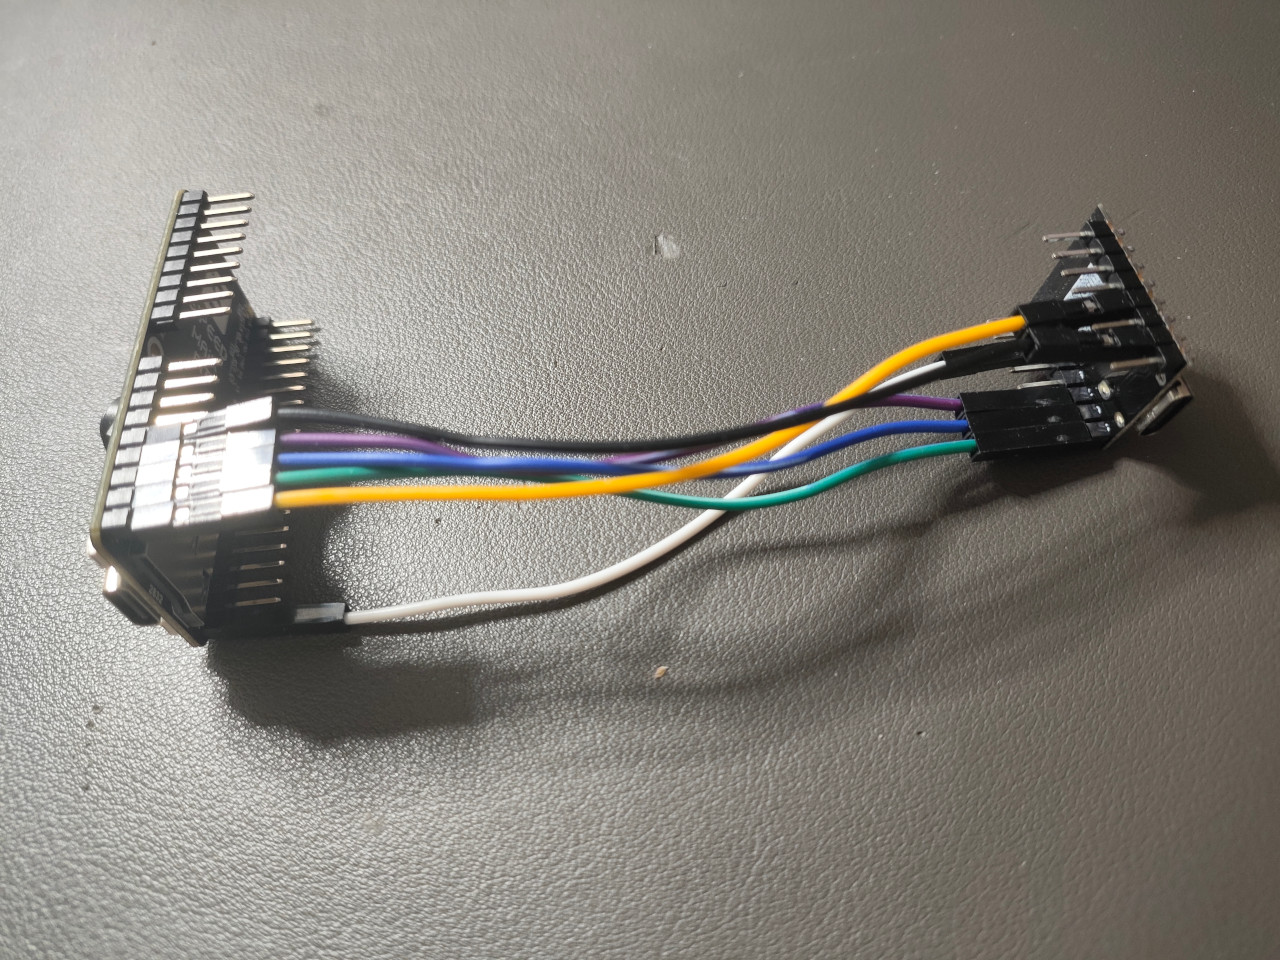
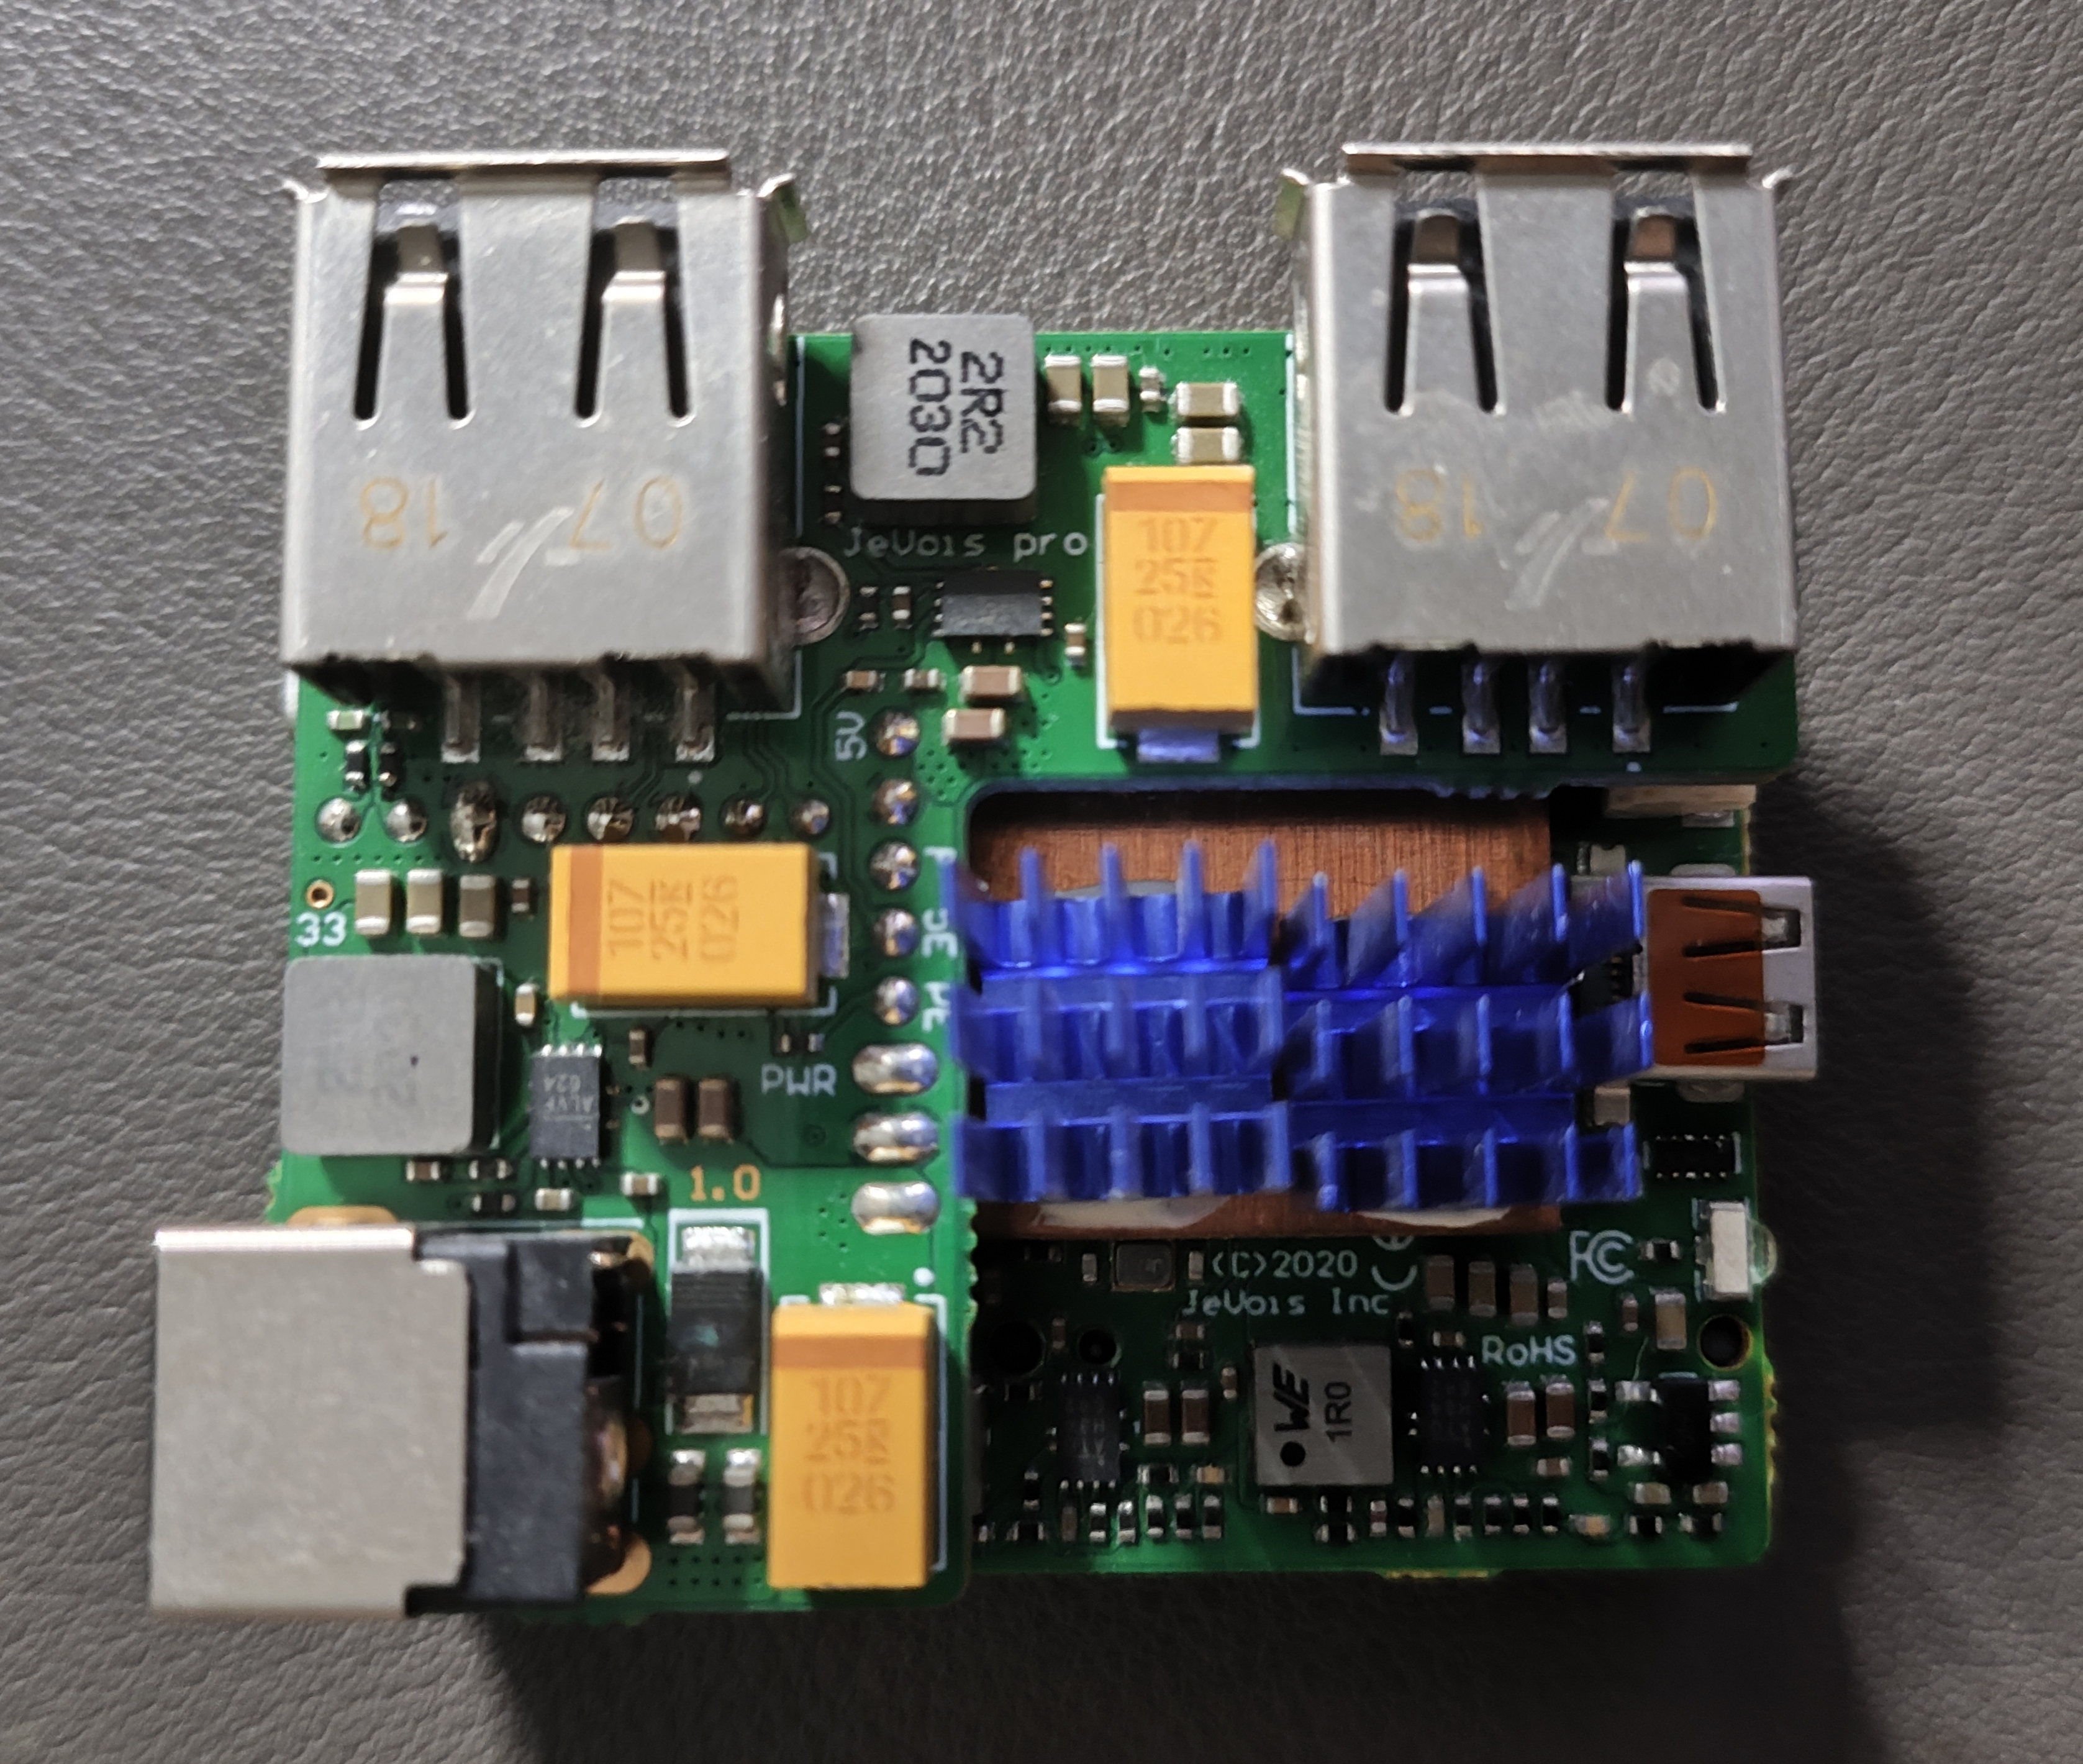
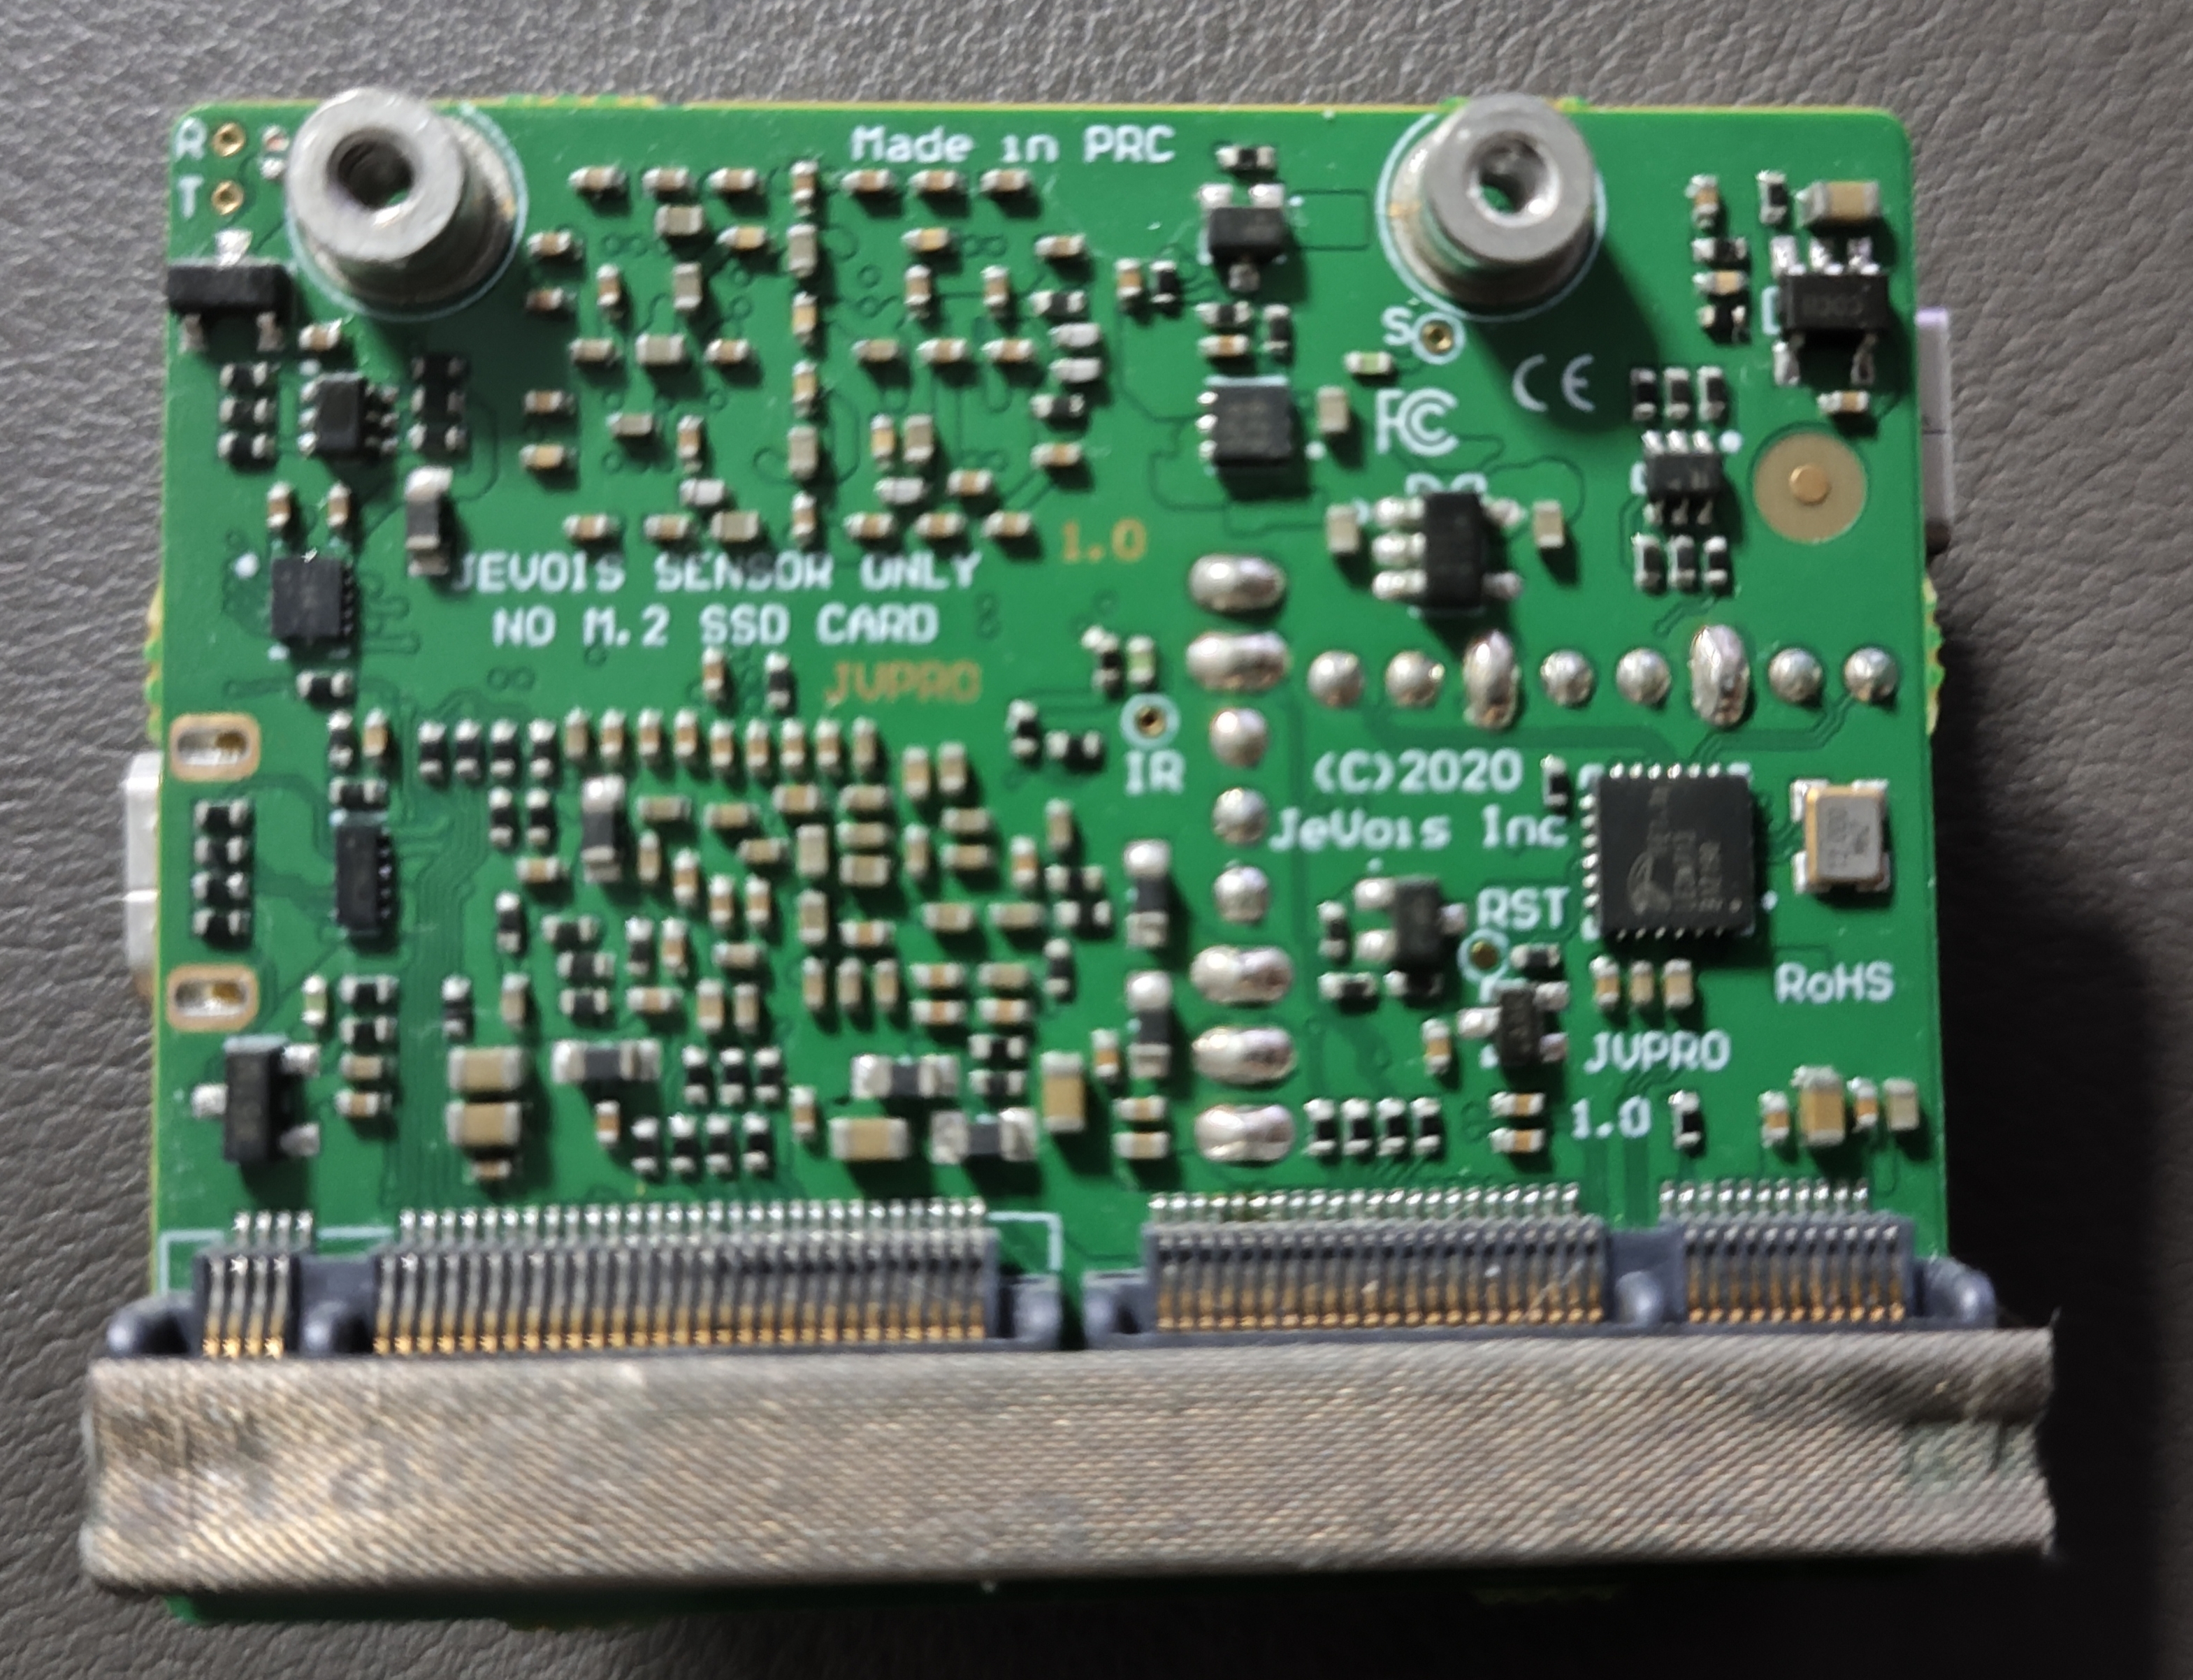
I had never realized before that the JeVois-Pro actually has such powerful computing capability. Today, while digging through some of my old gears, I suddenly came to realize that in addition to the 5 TOPs of computing capability on the SoC itself, my JeVois-Pro also has a Google CoralM.2 Accelerator A+E key installed, adding another 4 TOPs of computing power.
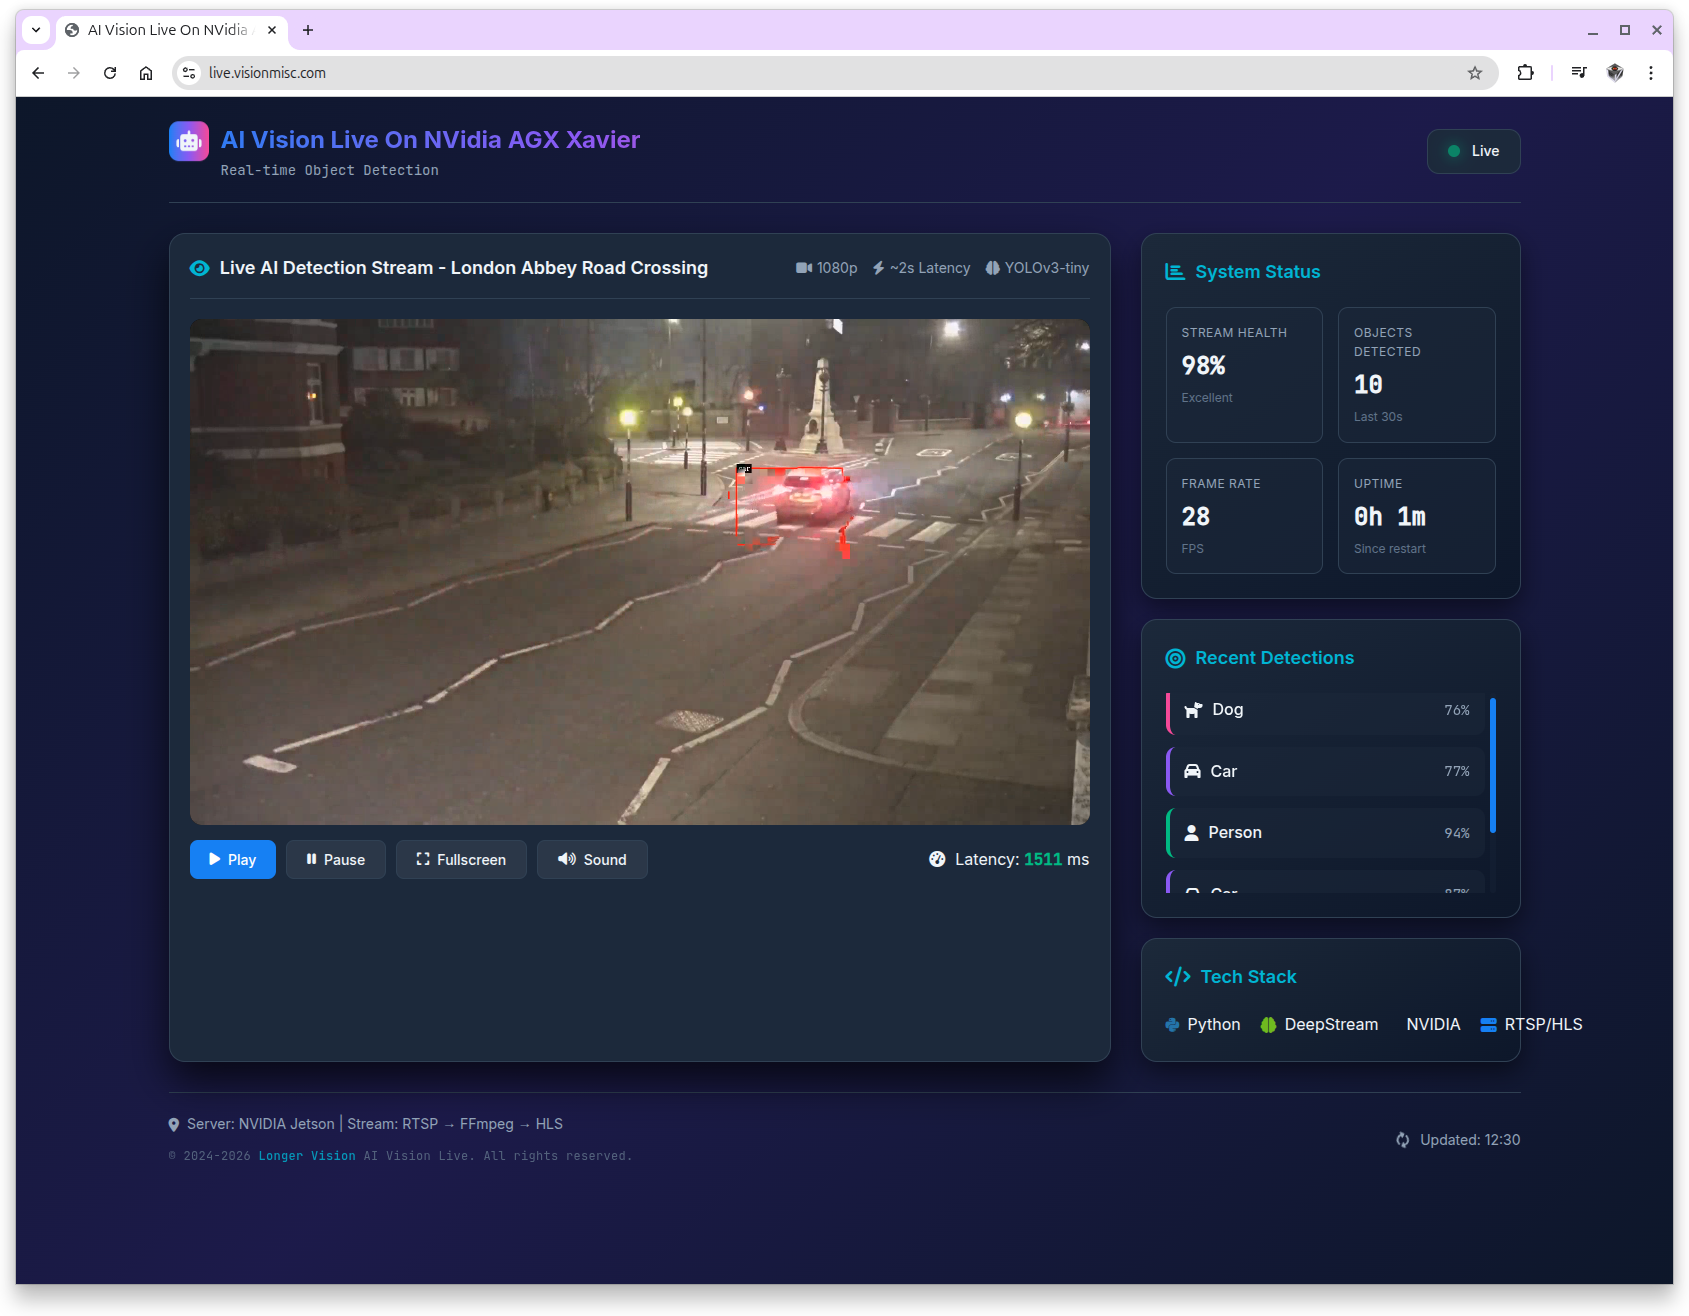
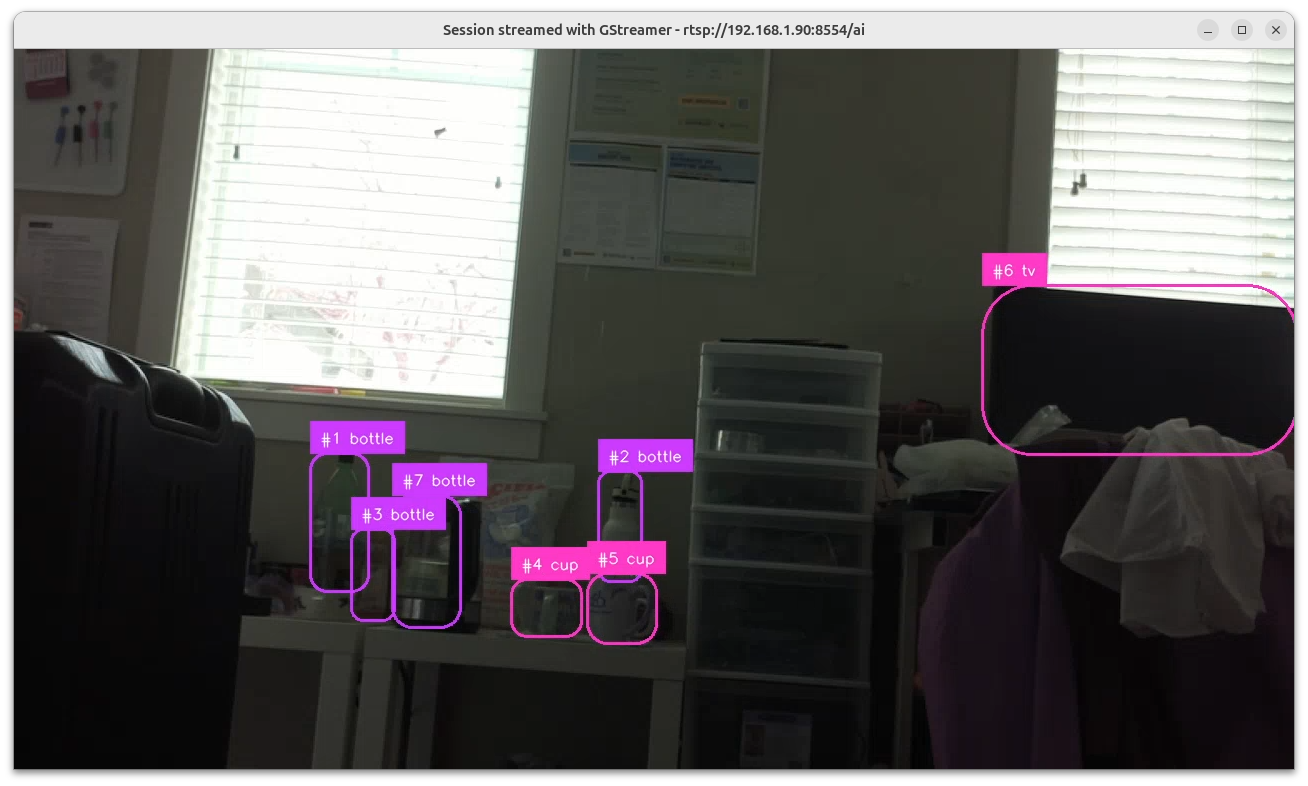
From my earlier blog about JeVois-Pro, it’s clear that I never really took full advantage of the computing power of the JeVois-Pro, and I also didn’t succeed in turning the JeVois-Pro into an RTSP server. However, in this blog post, I will carry out a comprehensive test.
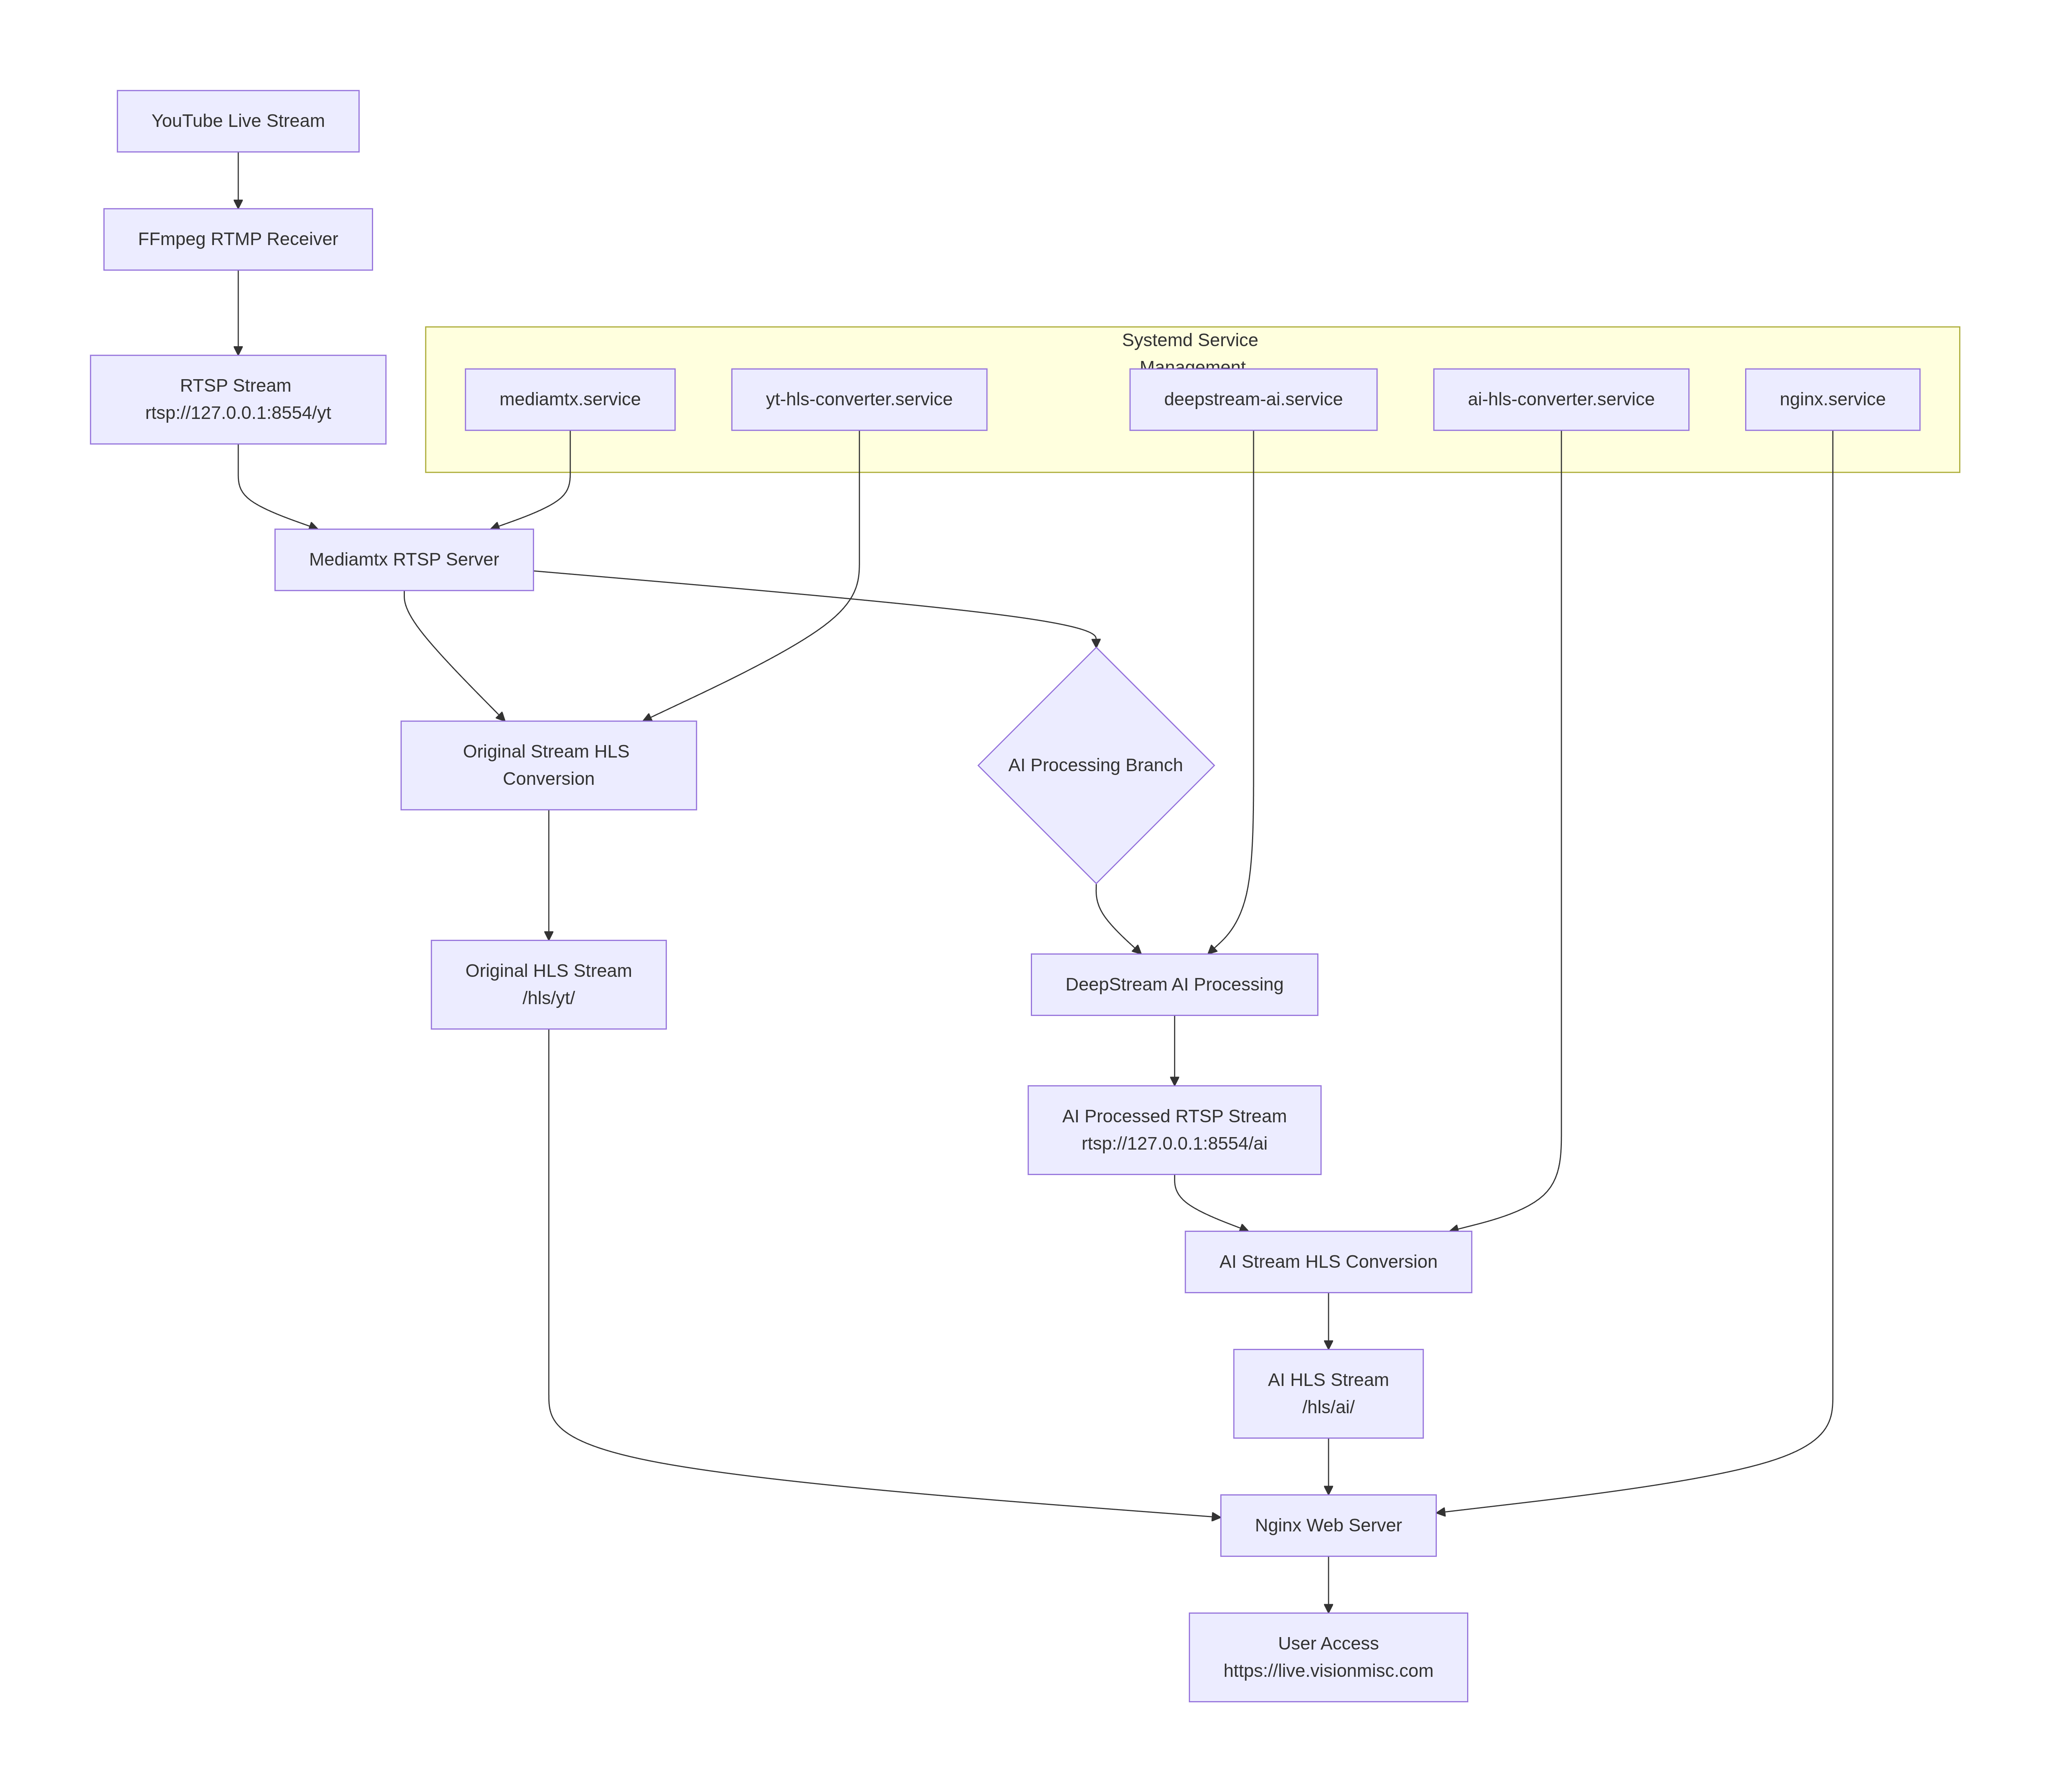
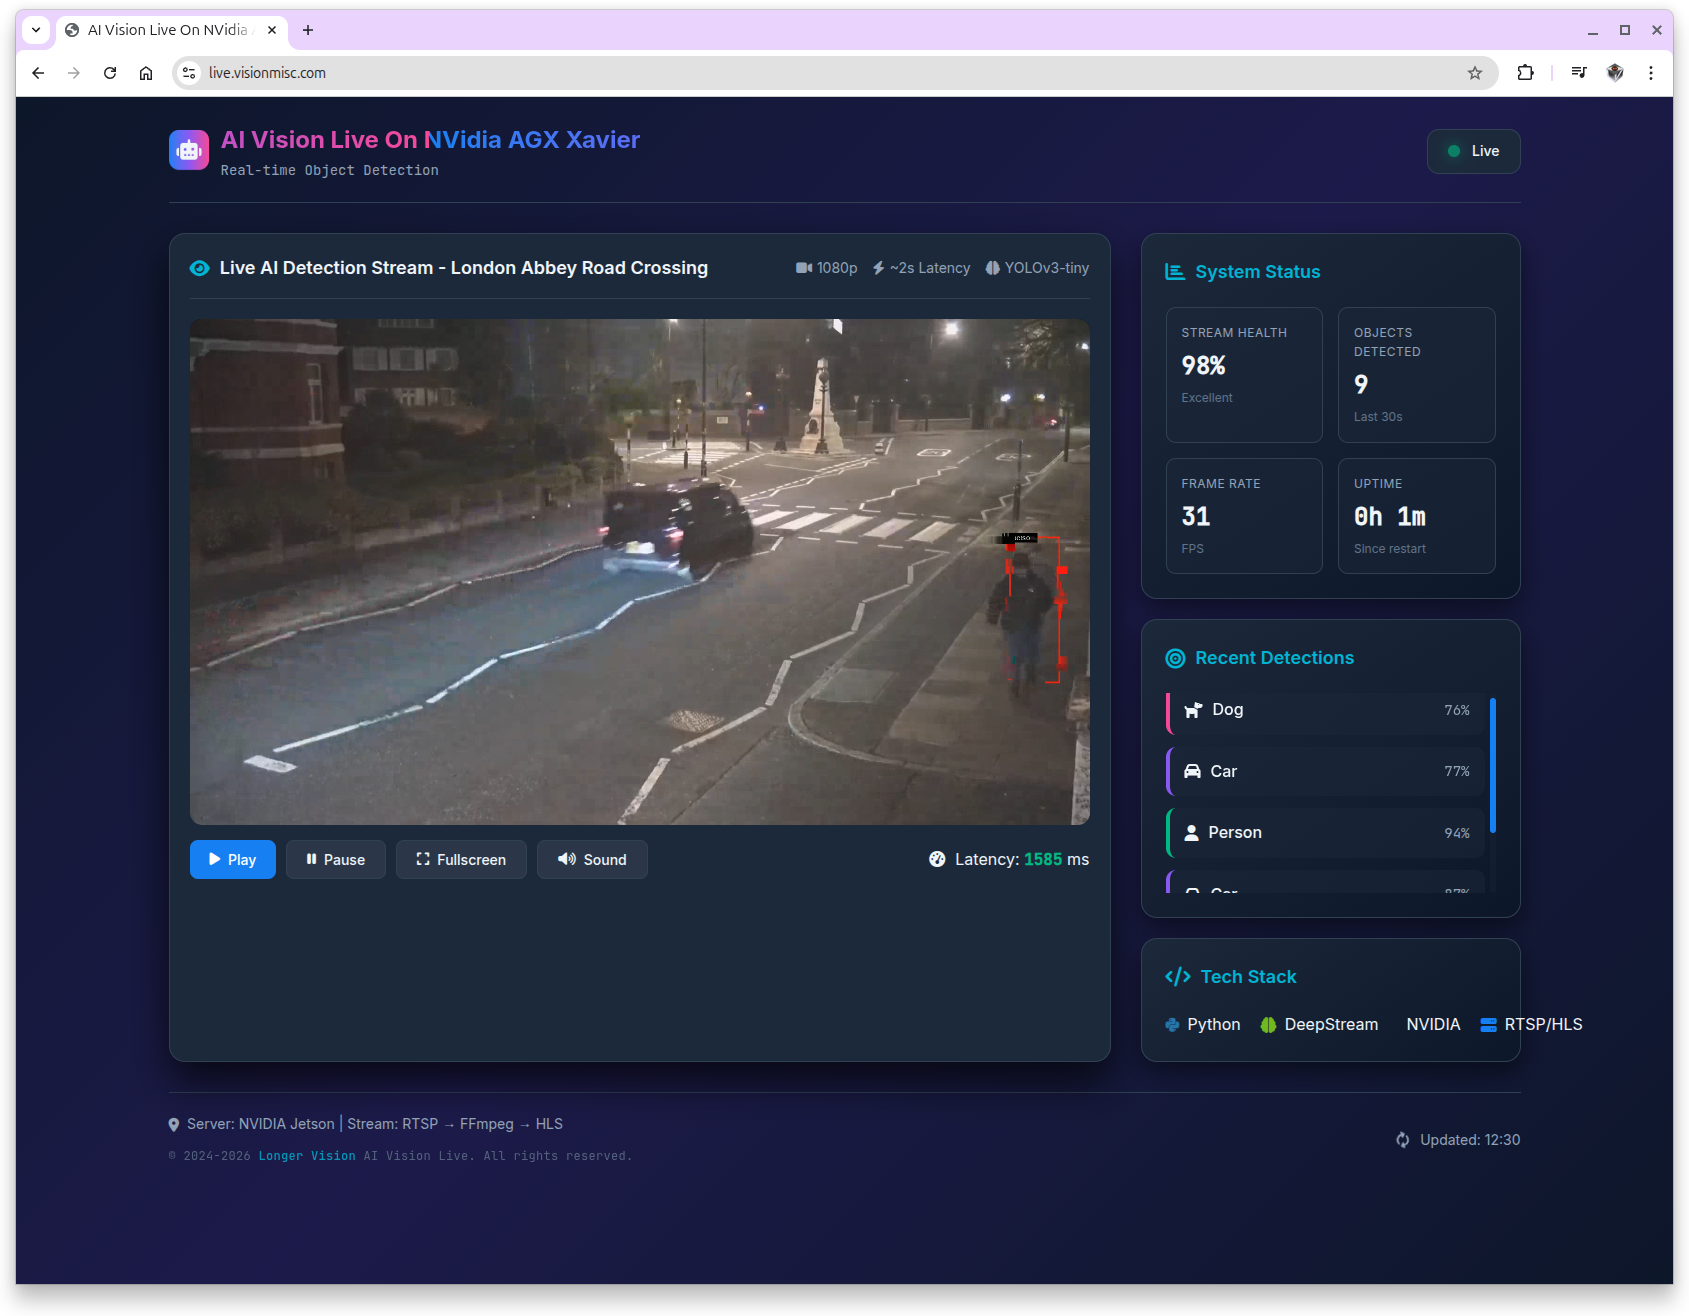
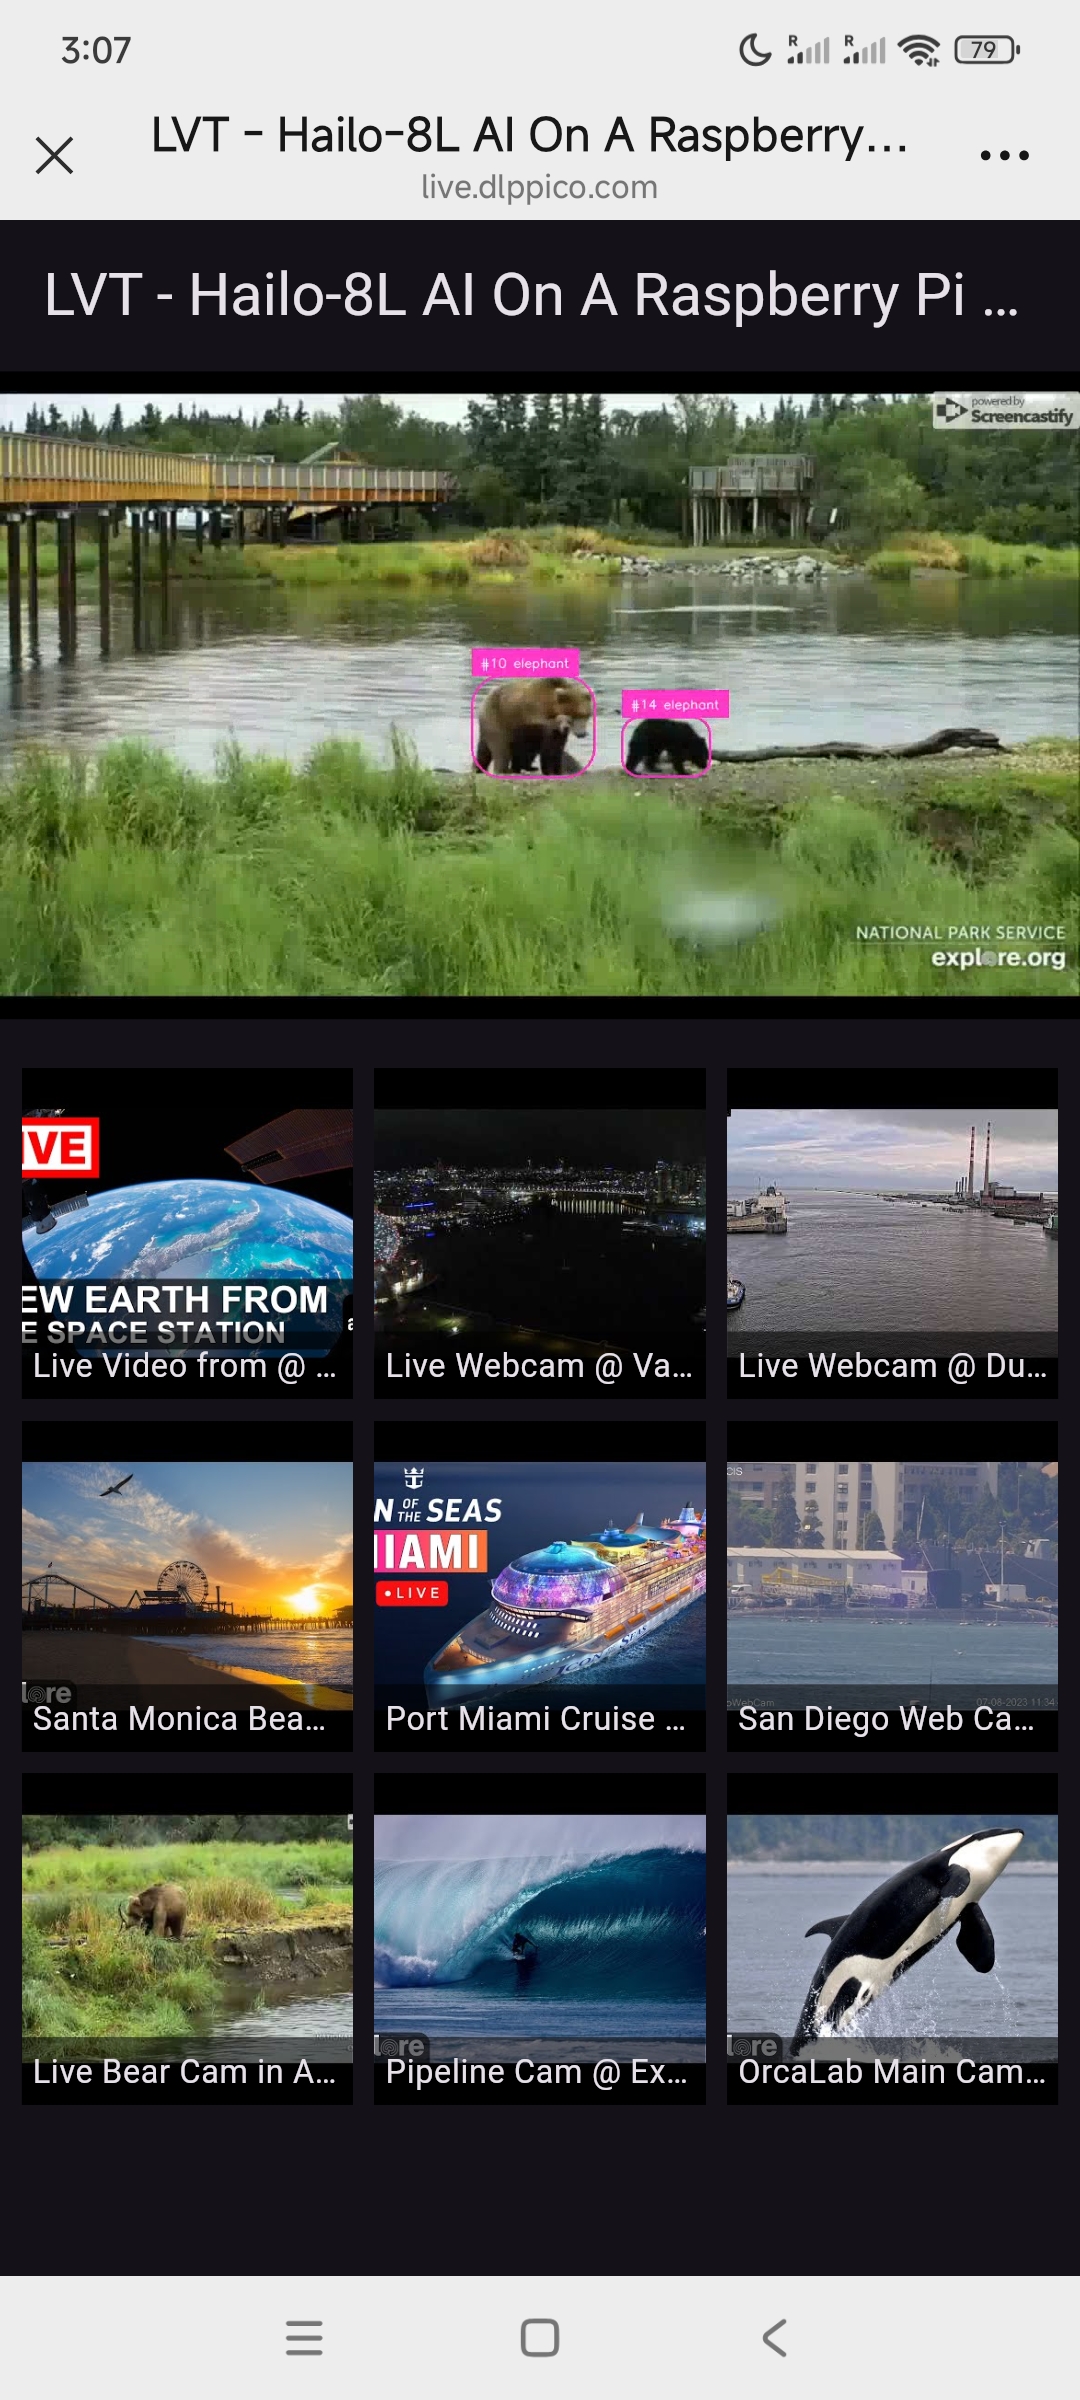
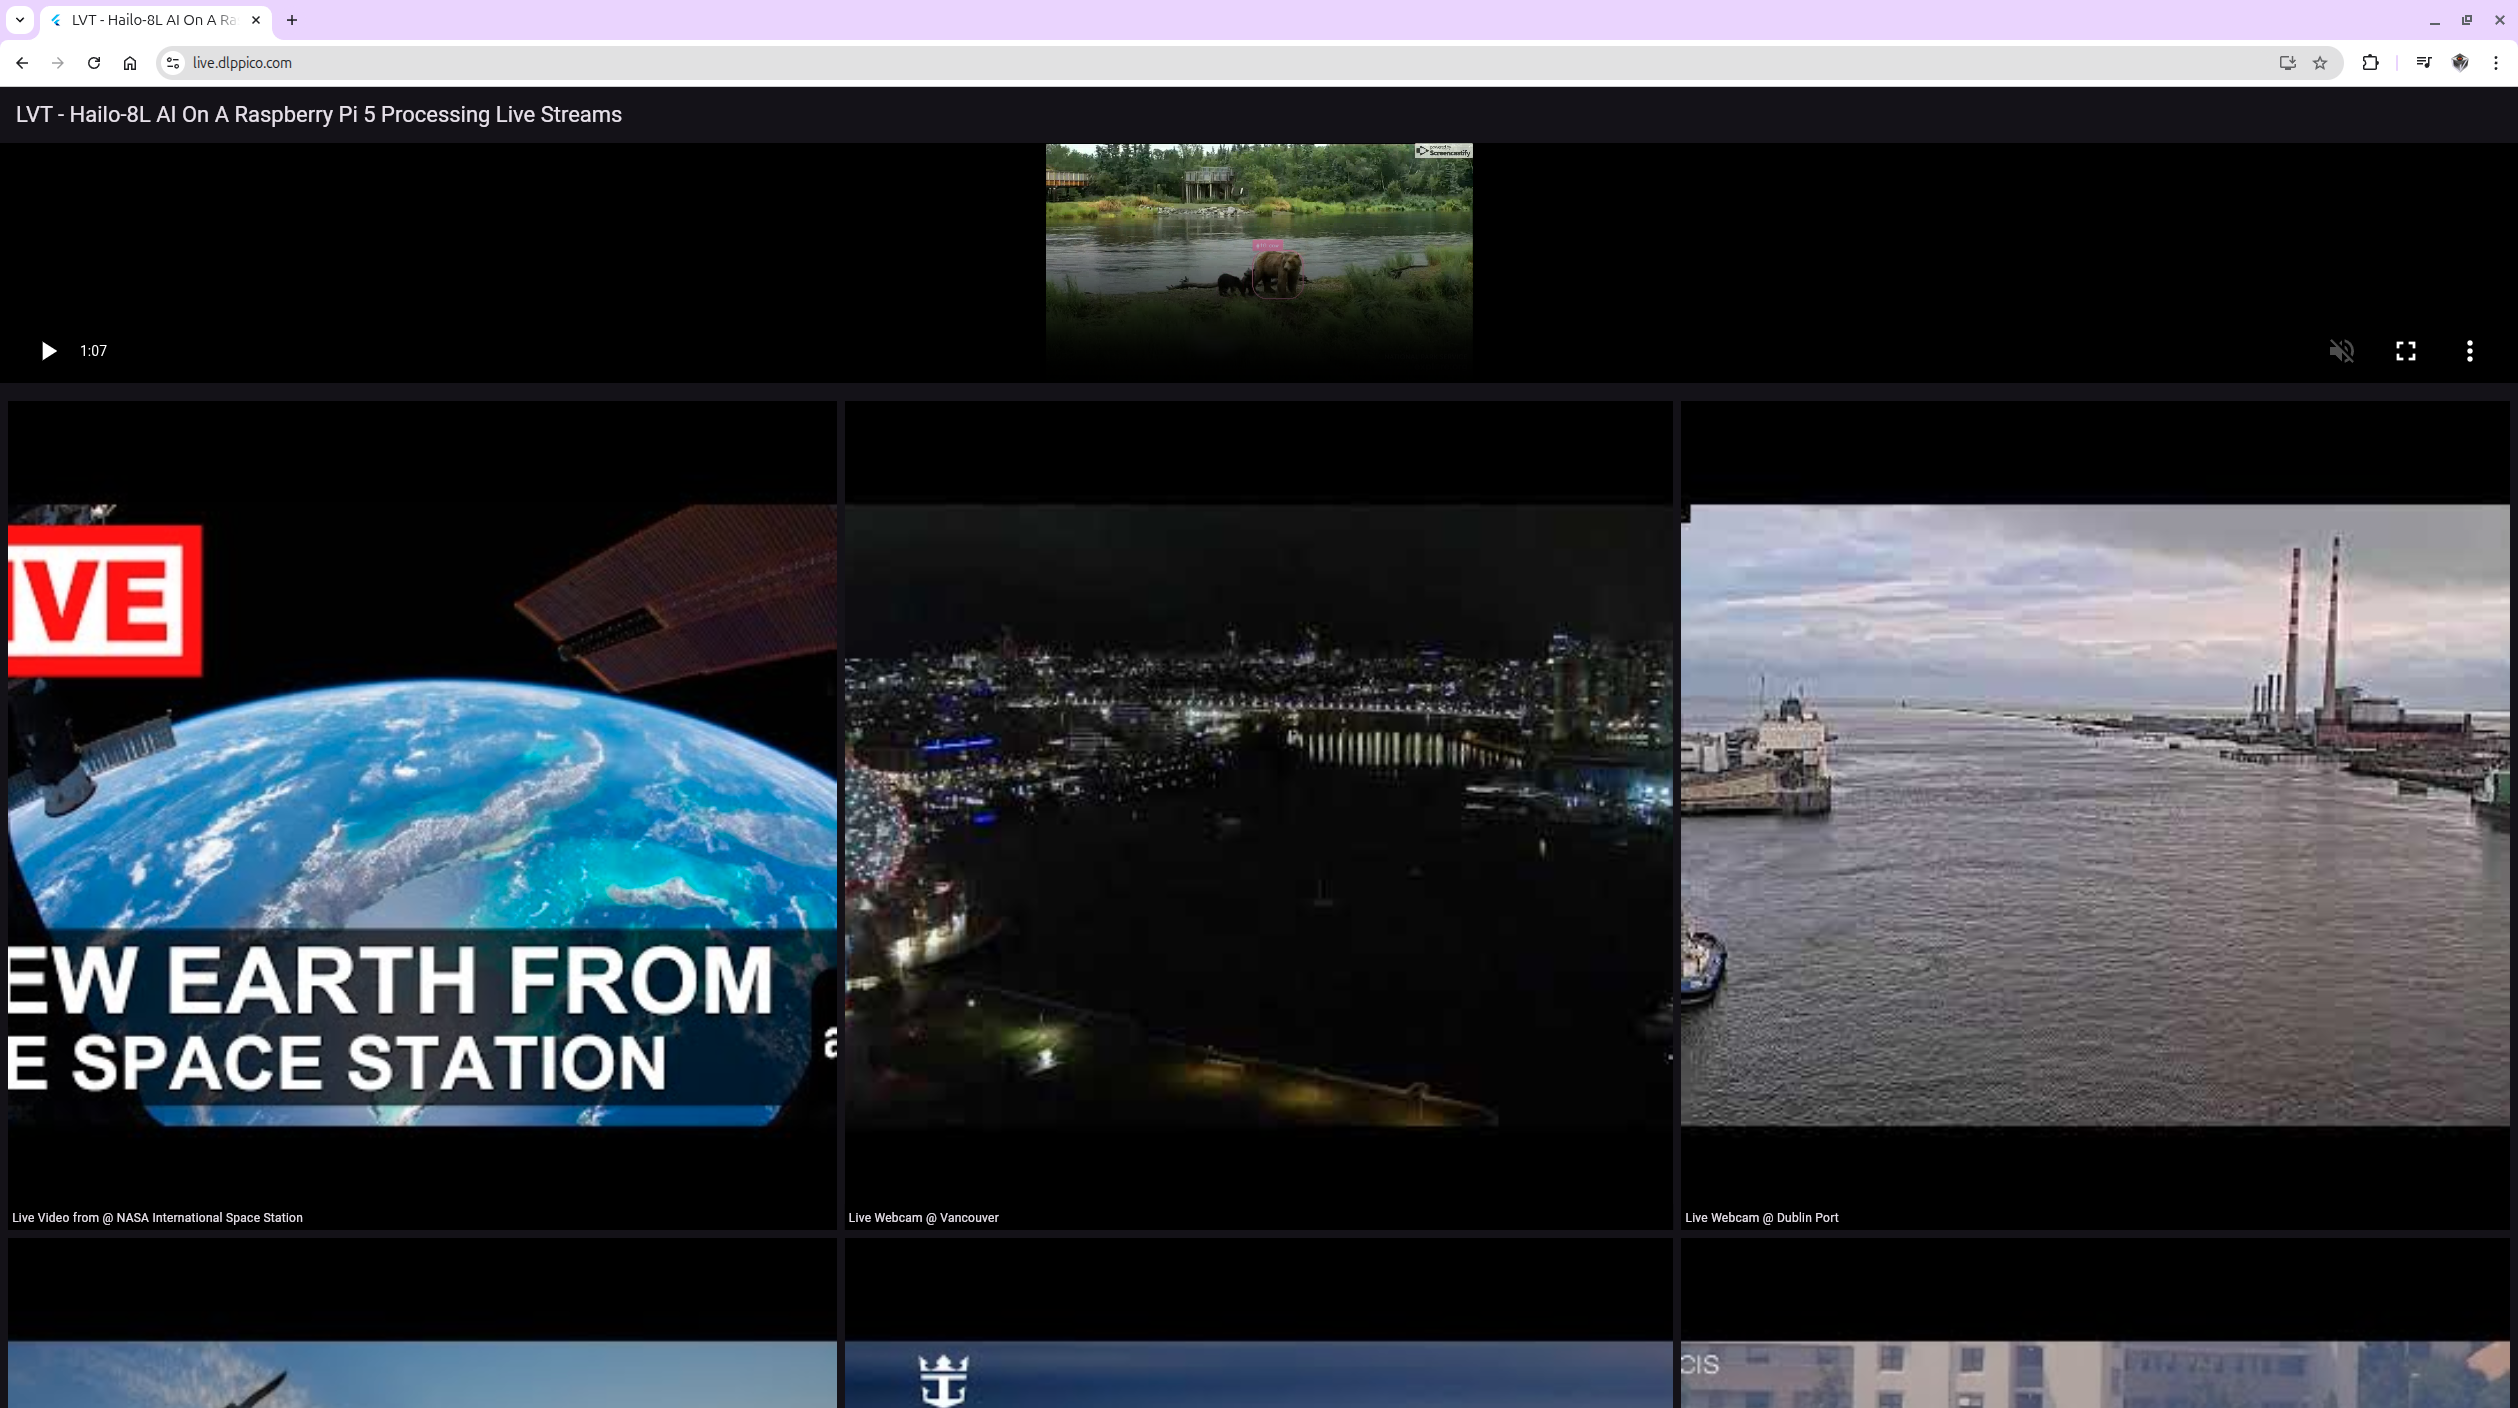
flowchart TD
    A[YouTube Live Stream] --> B[FFmpeg RTMP Receiver]
    B --> C[RTSP Stream rtsp://127.0.0.1:8554/yt]

    C --> D[Mediamtx RTSP Server]

    D --> E[Original Stream HLS Conversion]
    E --> F[Original HLS Stream<br>/hls/yt/]

    D --> G{AI Processing Branch}

    G --> H[DeepStream AI Processing]
    H --> I[AI Processed RTSP Stream<br>rtsp://127.0.0.1:8554/ai]

    I --> J[AI Stream HLS Conversion]
    J --> K[AI HLS Stream<br>/hls/ai/]

    F --> L[Nginx Web Server]
    K --> L

    L --> M[User Access<br>https://live.visionmisc.com]

    subgraph "Systemd Service Management"
        S1[mediamtx.service]
        S2[yt-hls-converter.service]
        S3[deepstream-ai.service]
        S4[ai-hls-converter.service]
        S5[nginx.service]
    end

    S1 --> D
    S2 --> E
    S3 --> H
    S4 --> J
    S5 --> L
➜  system systemctl list-units --type=service --state=active | grep -E "(mediamtx|hls|deepstream|mtx)"

  ai-hls-converter.service           loaded active running AI RTSP to HLS Converter
  deepstream-ai.service              loaded active running DeepStream AI Processing
  mediamtx.service                   loaded active running MediaMTX (RTSP/HLS/WebRTC Media Server)
  youtube-to-mtx@lvision.service     loaded active running YouTube -> MediaMTX RTSP Publisher (yt) for user lvision
  yt-hls-converter.service           loaded active running YouTube RTSP to HLS Converter
➜  system
➜ system cat mediamtx.service [Unit] Description=MediaMTX (RTSP/HLS/WebRTC Media Server) After=network-online.target Wants=network-online.target # Add this line to allow other services to declare dependencies Before=yt-hls-converter.service ai-hls-converter.service deepstream-ai.service
[Service] Type=simple # Add user/group to maintain consistency with other services User=lvision Group=lvision # Add environment variables to ensure correct working environment Environment=PATH=/usr/local/sbin:/usr/local/bin:/usr/sbin:/usr/bin:/sbin:/bin
# Adjust restart policy - keep your choice, but consider stricter restart Restart=on-failure RestartSec=2 # Add startup timeout - mediamtx starts quickly, but just in case TimeoutStartSec=10
➜ system cat yt-hls-converter.service [Unit] Description=YouTube RTSP to HLS Converter After=network.target mediamtx.service Wants=mediamtx.service # If you want to start only after /yt path is ready, you can add: # After=mediamtx.service # BindsTo=mediamtx.service
➜ system cat ai-hls-converter.service [Unit] Description=AI RTSP to HLS Converter # Key Modification 1: Add the dependency of deepstream-ai.service After=deepstream-ai.service mediamtx.service network.target Wants=deepstream-ai.service mediamtx.service # If you want to start only after /ai path is ready, you can add: # After=mediamtx.service # BindsTo=mediamtx.service
# It's possible to use regular expressions by using a tilde as prefix, # for example "~^(test1|test2)$" will match both "test1" and "test2", # for example "~^prefix" will match all paths that start with "prefix". paths: # example: # my_camera: # source: rtsp://my_camera yt: runOnDemand: /usr/local/bin/youtube_to_mtx.sh runOnDemandRestart: yes runOnDemandStartTimeout: 30s runOnDemandCloseAfter: 10s
# Log to stderr (mediamtx will capture) echo"=== YouTube Stream Start $(date) ===" >&2 echo"Source: $YOUTUBE_URL" >&2 echo"Destination: $MTX_RTSP" >&2
# Get best stream URL (filter out warning messages) echo"Fetching stream URL..." >&2 STREAM_URL=$(yt-dlp -f "best[height<=1080]" -g "$YOUTUBE_URL" 2>/dev/null | grep -E "^https?://" | head -1)
if [ -z "$STREAM_URL" ]; then echo"Error: Unable to fetch stream URL" >&2 # Debug: show full output echo"Attempting to fetch stream URL (with debugging):" >&2 yt-dlp -f "best[height<=1080]" -g "$YOUTUBE_URL" >&2 exit 1 fi
echo"Stream URL fetched successfully" >&2 echo"Starting stream to MediaMTX..." >&2
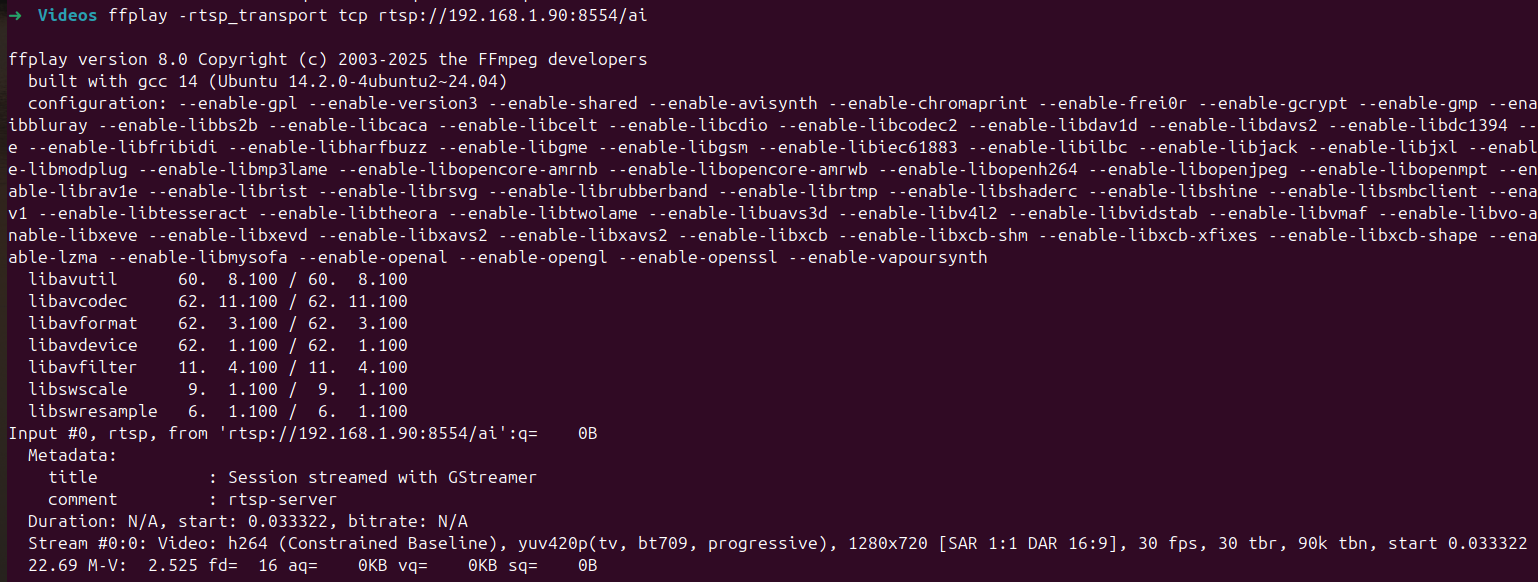
➜ ~ cat /usr/local/bin/rtsp_to_hls_ai.sh #!/usr/bin/env bash set -euo pipefail
# Modification 1: RTSP URL points to AI stream RTSP_URL="rtsp://127.0.0.1:8554/ai" # Modification 2: HLS directory points to ai HLS_DIR="/var/www/live.visionmisc.com/html/hls/ai" HLS_M3U8="${HLS_DIR}/index.m3u8" # Modification 3: log file is now named as AI version LOG_FILE="/home/lvision/logs/rtsp_to_hls_ai.log"
# Simple logging function log() { echo"[$(date '+%Y-%m-%d %H:%M:%S')] $*" | tee -a "${LOG_FILE}" }
log"=== Starting AI RTSP -> HLS Converter ==="
# Clean up old files find "${HLS_DIR}" -name "*.ts" -delete 2>/dev/null || true rm -f "${HLS_M3U8}" 2>/dev/null || true
# Added: Wait for AI RTSP stream to be ready (DeepStream may need time to start) log"Waiting for AI RTSP stream to be ready..." MAX_WAIT=60 for i in $(seq 1 $MAX_WAIT); do iftimeout 2s ffprobe -rtsp_transport tcp "${RTSP_URL}" 2>&1 | grep -q "Stream.*Video"; then log"AI RTSP stream is ready (waited ${i} seconds)" break fi if [ $i -eq $MAX_WAIT ]; then log"Warning: AI RTSP stream not ready within ${MAX_WAIT} seconds, but will continue trying" fi sleep 1 done
# Simple logging function log() { echo"[$(date '+%Y-%m-%d %H:%M:%S')] $*" | tee -a "${LOG_FILE}" }
# Main loop whiletrue; do log"Attempting to connect to AI RTSP stream: $RTSP_URL" log"Starting HLS conversion for AI stream..." if ffmpeg -hide_banner -loglevel warning \ -rtsp_transport tcp \ -i "${RTSP_URL}" \ -an \ -c:v copy \ -f hls \ -hls_time 2 \ -hls_list_size 6 \ -hls_flags delete_segments+append_list \ -hls_segment_filename "${HLS_DIR}/segment_%05d.ts" \ "${HLS_M3U8}" 2>&1 | grep -E "(Stream|Opening|error|failed)" | head -2; then log"AI stream conversion process reported an error" else log"AI stream conversion loop ended or interrupted, preparing to retry..." fi log"Waiting 5 seconds before retrying connection..." sleep 5 done ➜ ~
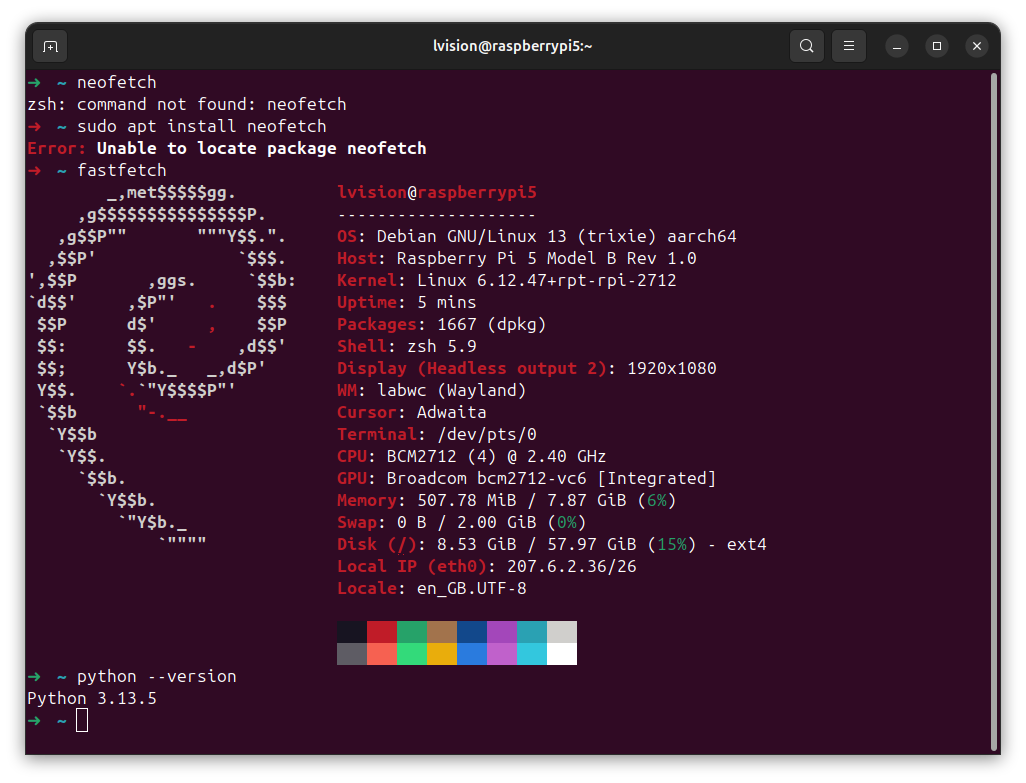
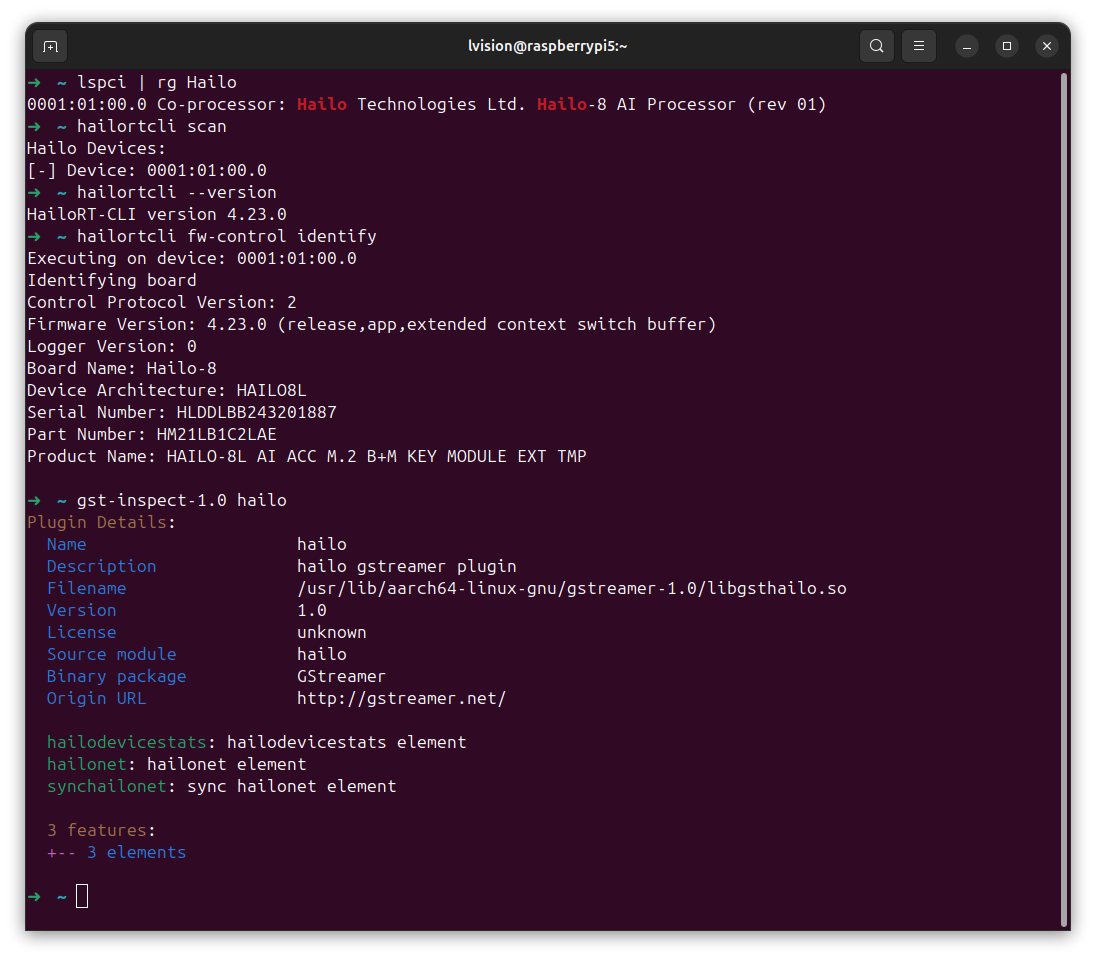
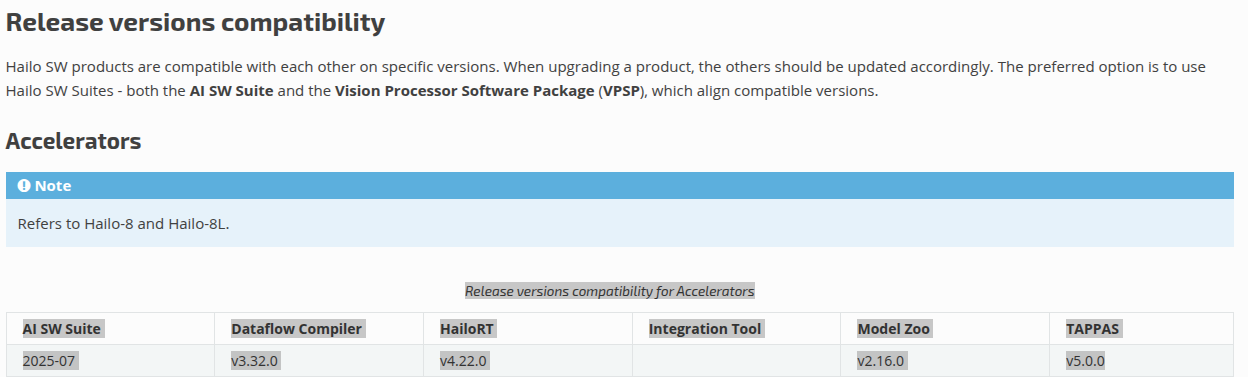
Good news !!! Hailo 4.23.0 has been released, and it supports Raspberry Pi 5 with native Python 3.13.5 installation, which is incredibly convenient. The only thing to remember: make sure to install DKMS by sudo apt install dkms.
Please visit Hailo Software Downloads to download and install the following three MUST software packages:
1.3.1 HailoRT – Ubuntu package (deb) for arm64 hailort_4.23.0_arm64.deb
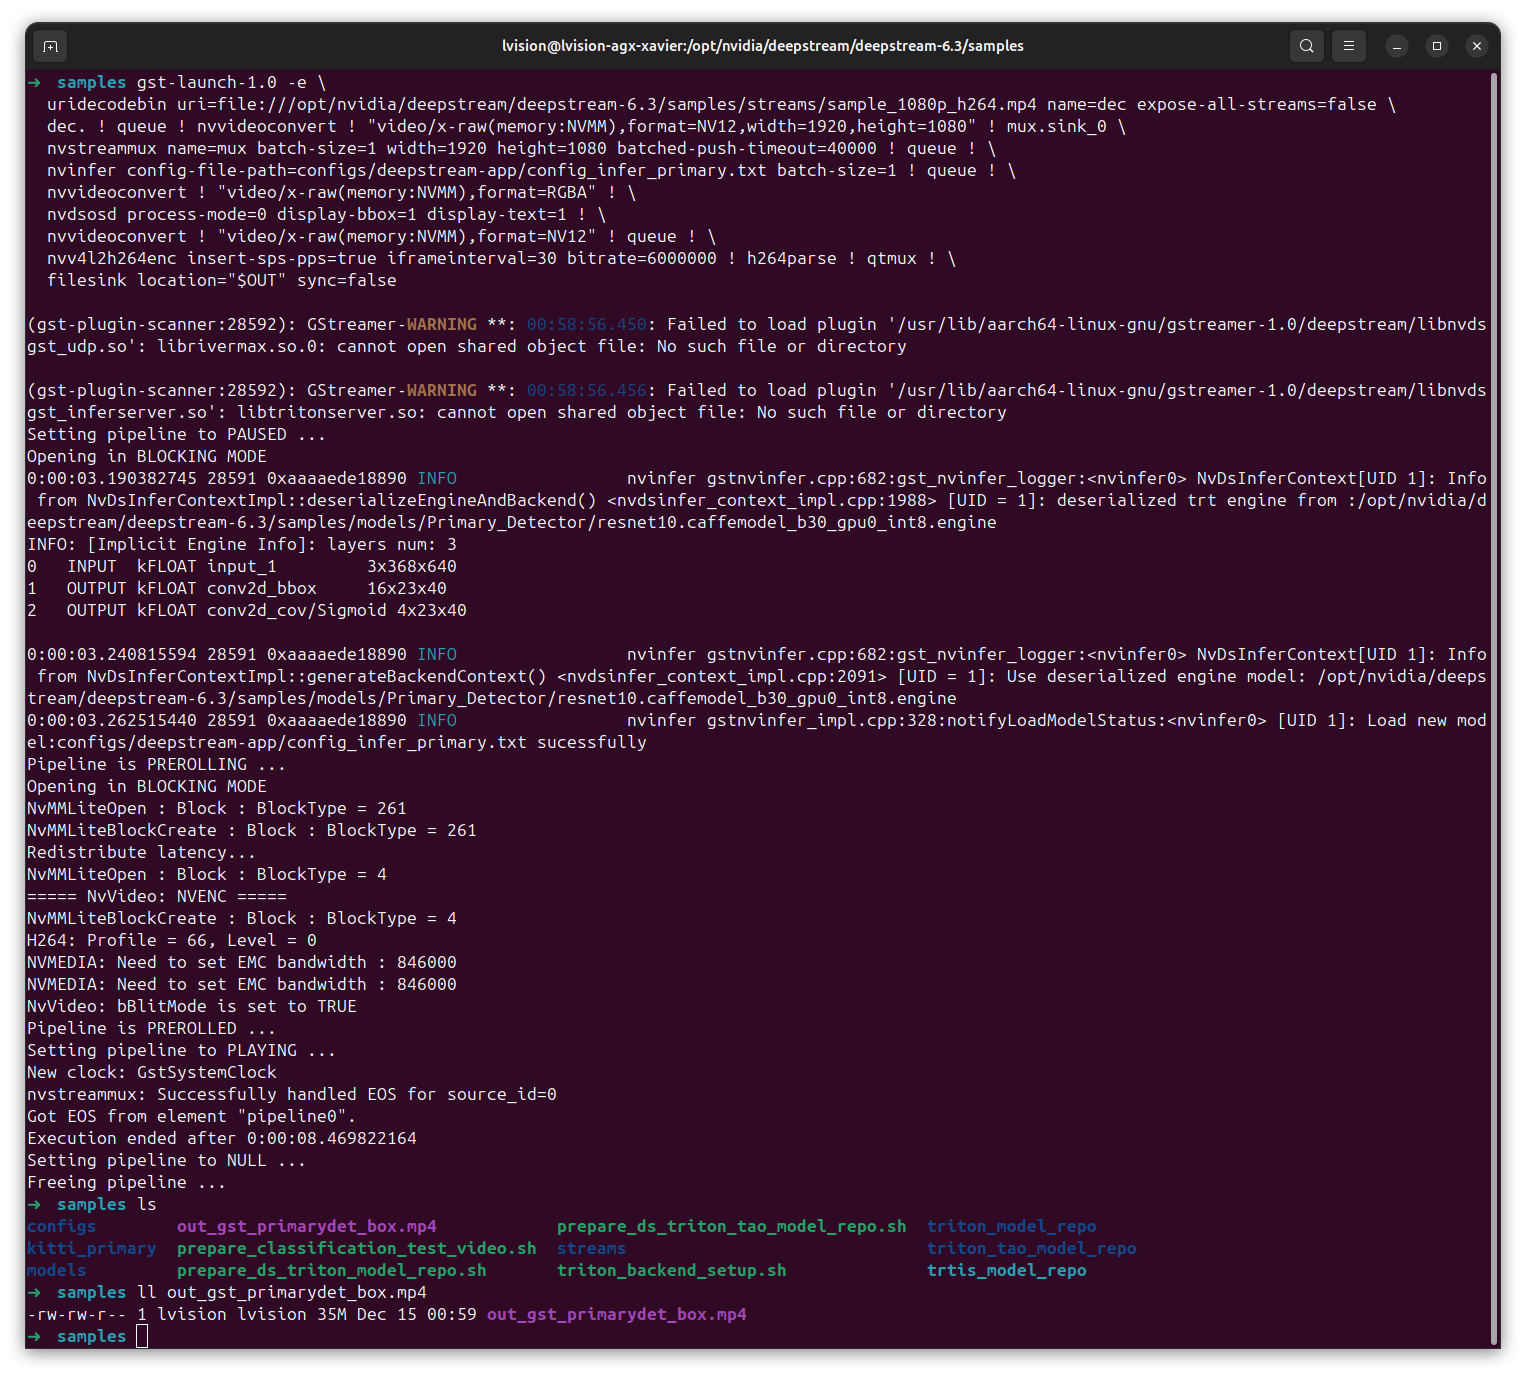
Process On a Video without Using deepstream Command
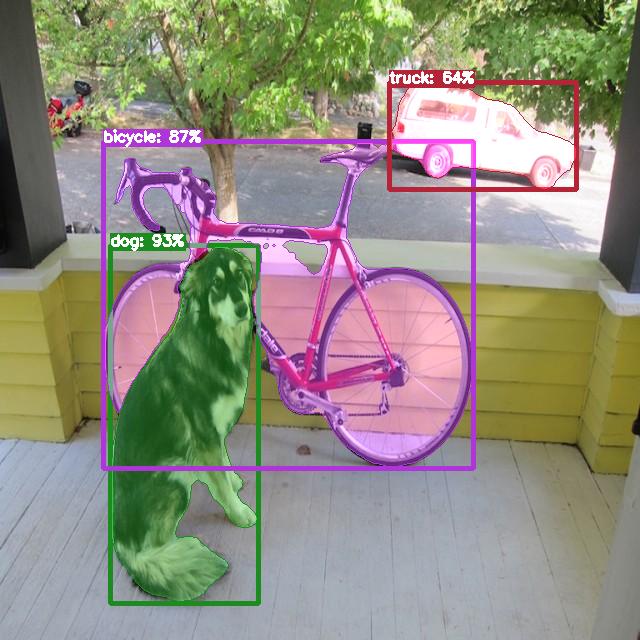
Results of Detection
2.5 Conclusion
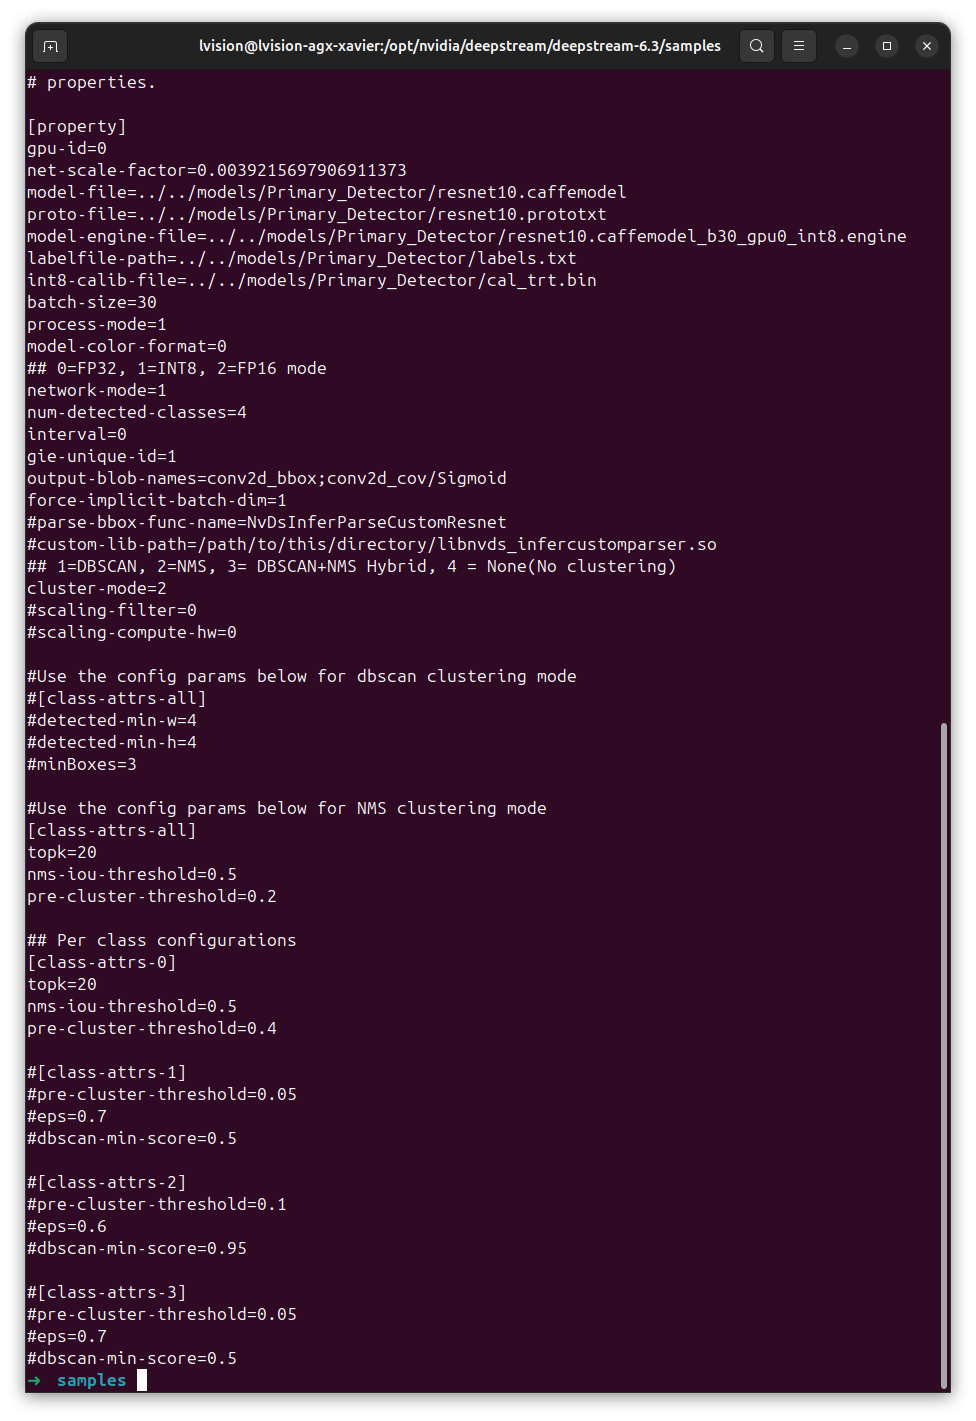
DeepStream 6.3 does not provide an out-of-the-box sample for rendering different object classes with different bounding box colors.
In DeepStream 6.3, deepstream-app uses the default nvdsosd behavior, which applies a single bounding box style to ALL detected objects.
The application-level configuration parser does not support class-wise color mapping, and nvdsosd color customization is not exposed through deepstream-app config files.
As a result, rendering different colors for different object classes requires custom OSD logic or a modified application, rather than configuration-only changes.
In my first blog post about Hailo last year, not using a Docker container to create a Python 3.10 environment caused me significant troubles, and I actually failed to complete the demonstration. Today, we are going to walk through the entire Hailo process again.
Note: Since my Raspberry Pi 5 comes with Python 3.11 pre-installed, I have selected the Python 3.11 version. You should choose the appropriate version that matches your Python environment for installation.
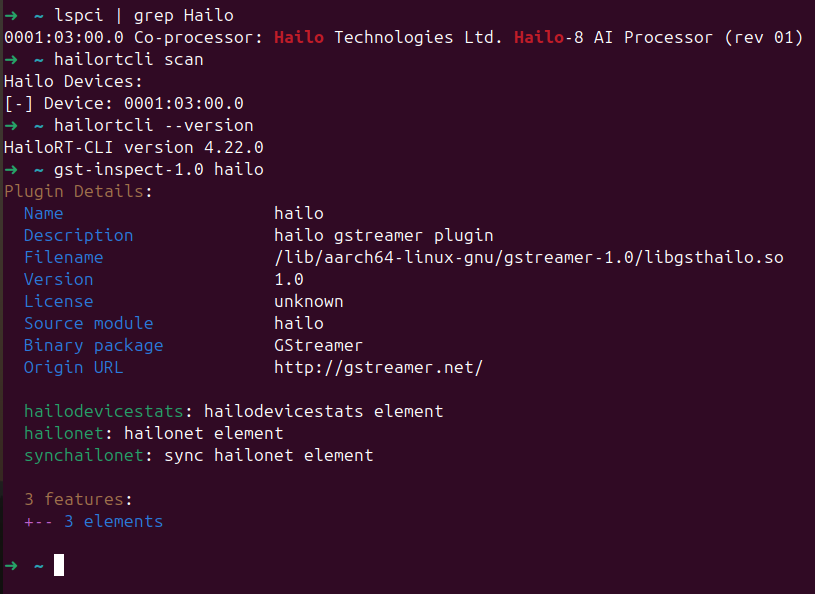
Executing on device: 0001:03:00.0 Identifying board Control Protocol Version: 2 Firmware Version: 4.22.0 (release,app,extended context switch buffer) Logger Version: 0 Board Name: Hailo-8 Device Architecture: HAILO8L Serial Number: HLDDLBB243201887 Part Number: HM21LB1C2LAE Product Name: HAILO-8L AI ACC M.2 B+M KEY MODULE EXT TMP
➜ ~
Mine is a HAILO8L.
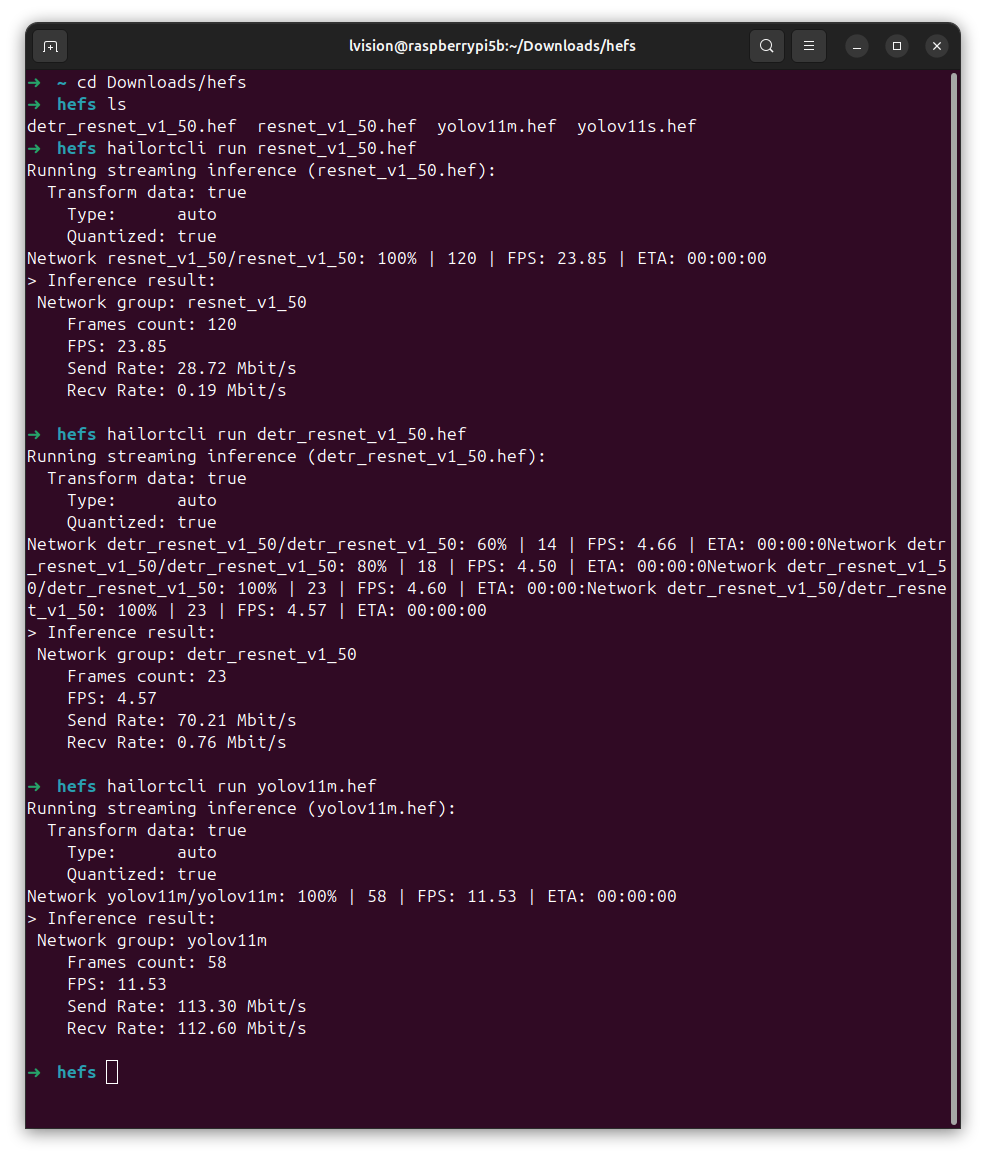
2 Models
2.1 Download .hefs
For simplicity, I directly downloaded some .hef files from HAILO8L Models
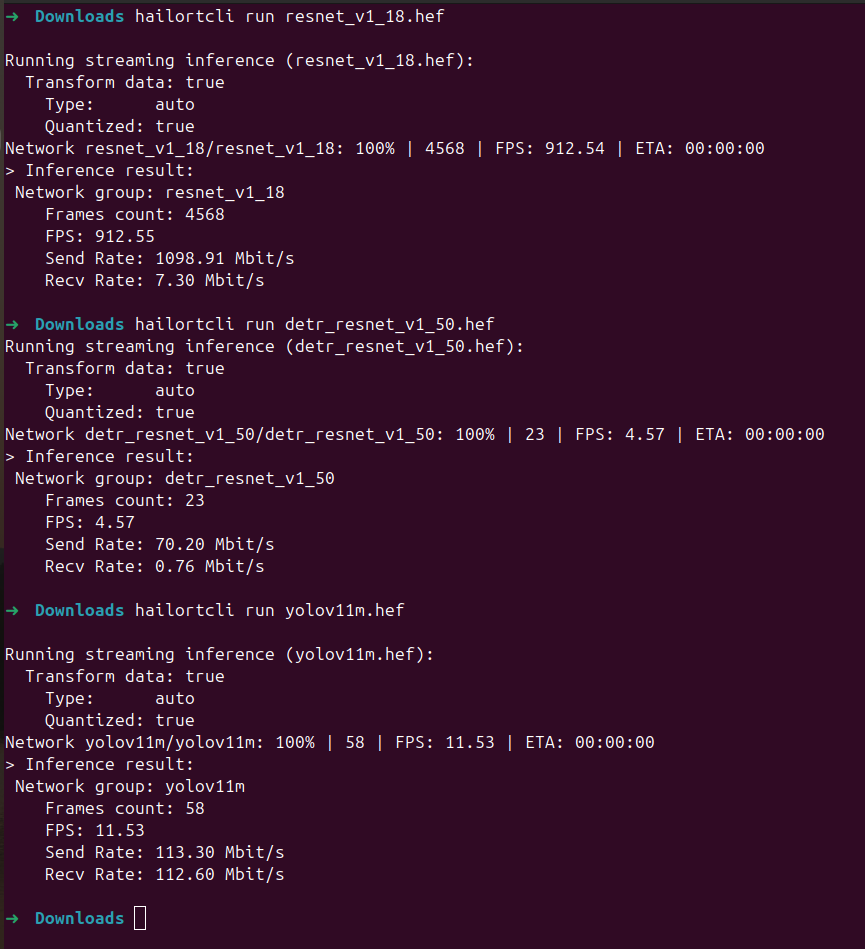
2.2 hailortcli run.hefs
The .hef (Hailo Executable File) format is platform-independent: a single .hef file can be executed on both x86_64 hosts and aarch64 (ARM64) hosts, as long as the system has the appropriate Hailo runtime (HailoRT) and driver installed.
This is possible because the .hef file does not contain host-specific binaries or compiled CPU code. Instead, it encapsulates the compiled Hailo neural network graph targeted for the Hailo hardware accelerator itself. The host platform - whether x86_64 or aarch64 - acts mainly as a controller that loads the .hef into the Hailo device, configures it, and orchestrates inference.
In other words, the .hef file is tied to the Hailo hardware (e.g., Hailo-8, Hailo-8L, Hailo-10) but is independent of the host CPU architecture. This allows the same .hef model file to be deployed seamlessly across development environments (for example, a workstation with an x86_64 CPU and PCIe card) and edge devices (for example, a Raspberry Pi 5 or Jetson board with an ARM64 CPU and M.2 card).
3. Demonstration
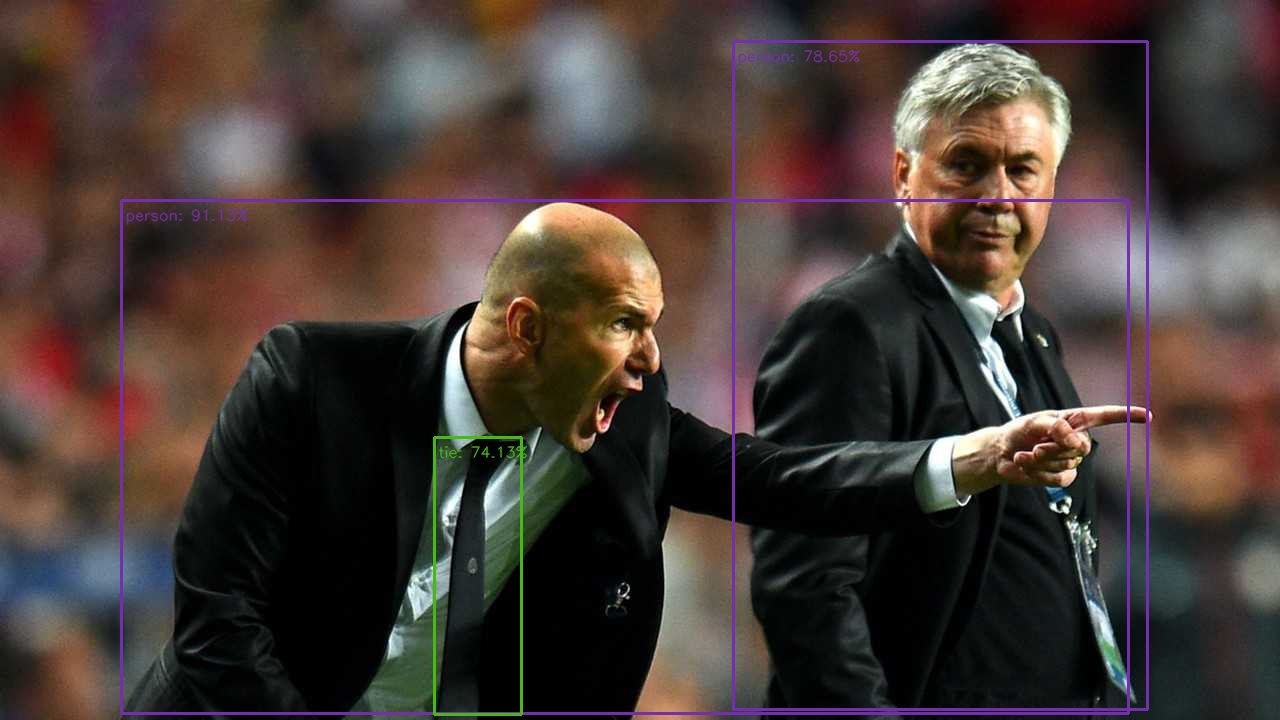
3.1 Single Image - Object Detection and Image Segmentation
In this demonstration, 2 famous images from Ultralytics are respectively adopted for object detection and image segmentation:
Like other dedicated AI hardware platforms, Hailo‘s software stack involves compiling a trained model, converting it from the standard ONNX format into its proprietary HEF (Hailo Executable Format) file optimized for its own architecture.
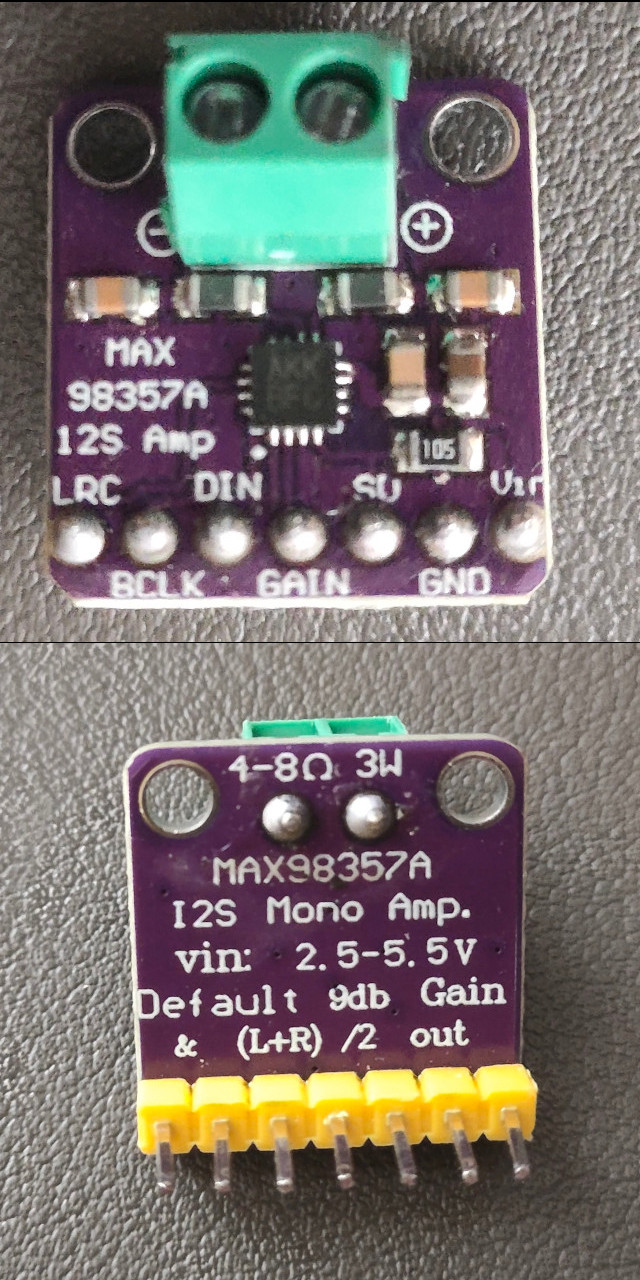
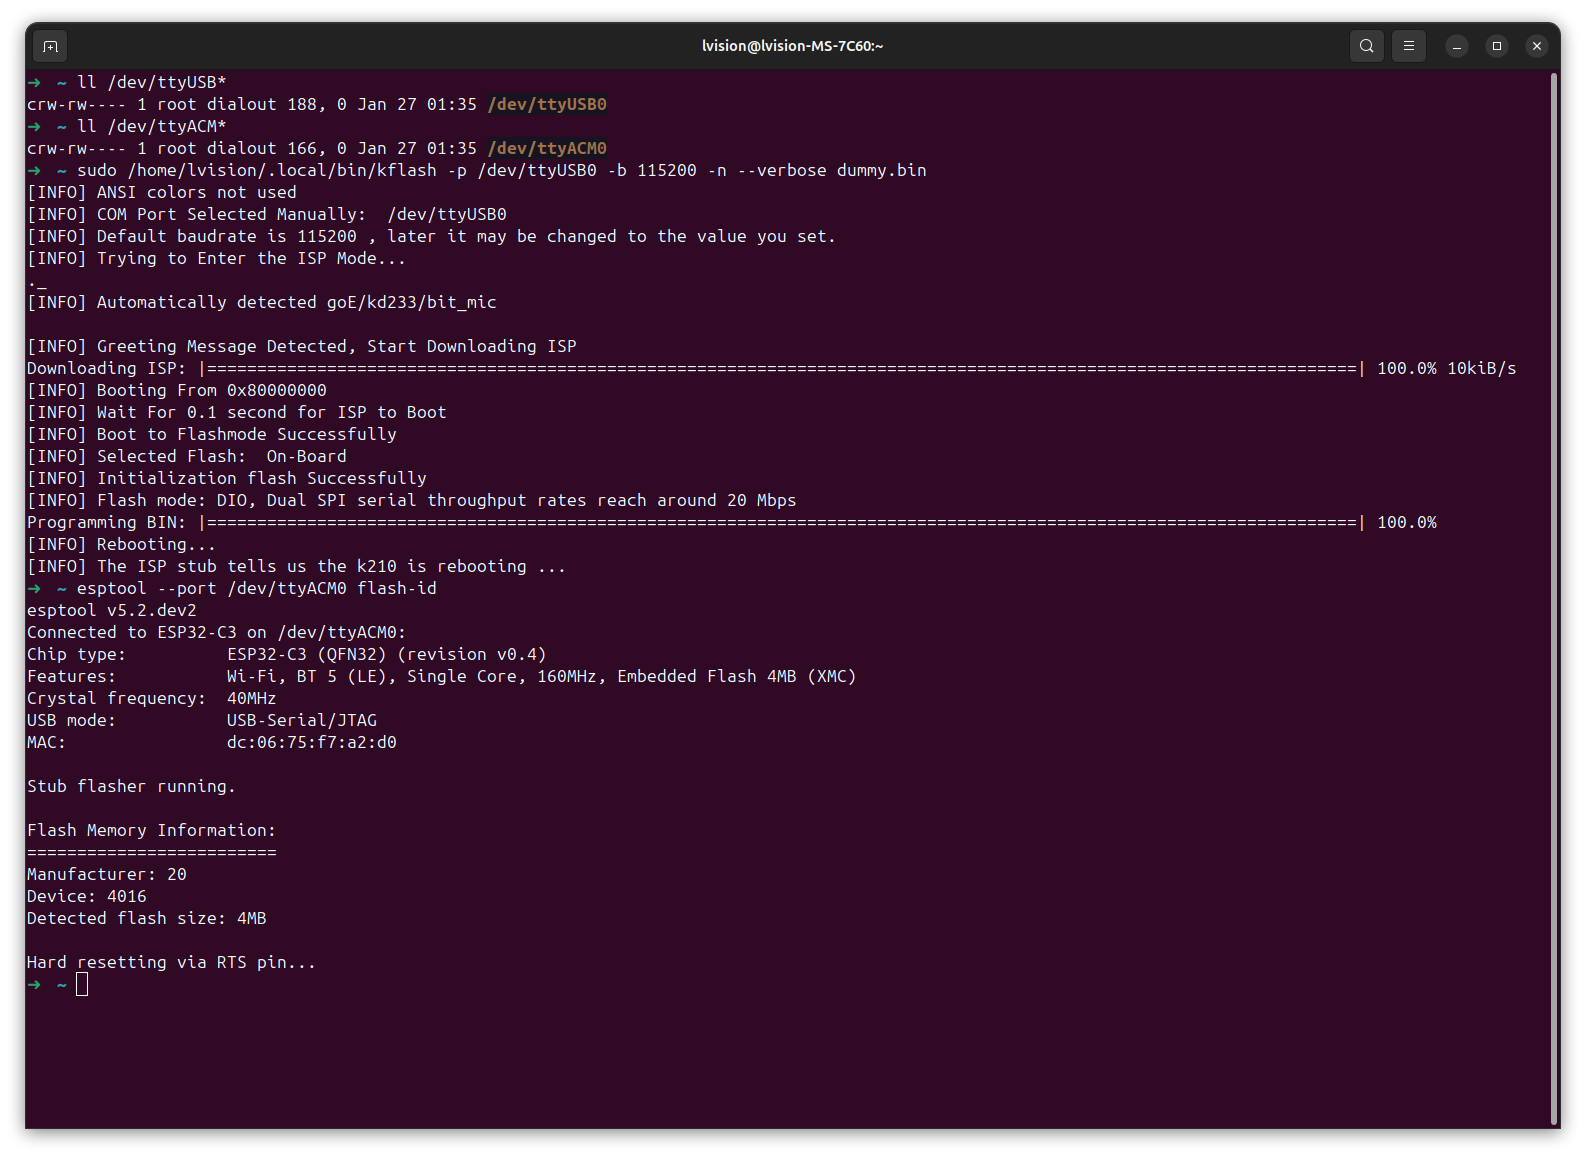
I2S (Inter-IC Sound) is a synchronous serial communication protocol usually used for transmitting audio data between two digital audio devices.

ESP32-C3 contains one I2S peripheral(s). These peripherals can be configured to input and output sample data via the I2S driver.
In sum:
Although a single I2S controller is nominally full-duplex – supporting both input (recording) and output (playback), in practice, operations must be time-multiplexed. In other words, it is not truly capable of simultaneous input and output. To achieve real-time interaction – such as detecting user input and instantly interrupting playback – two independent I2S controllers are required: one dedicated to continuously handling microphone input, and the other to audio output to the speaker.
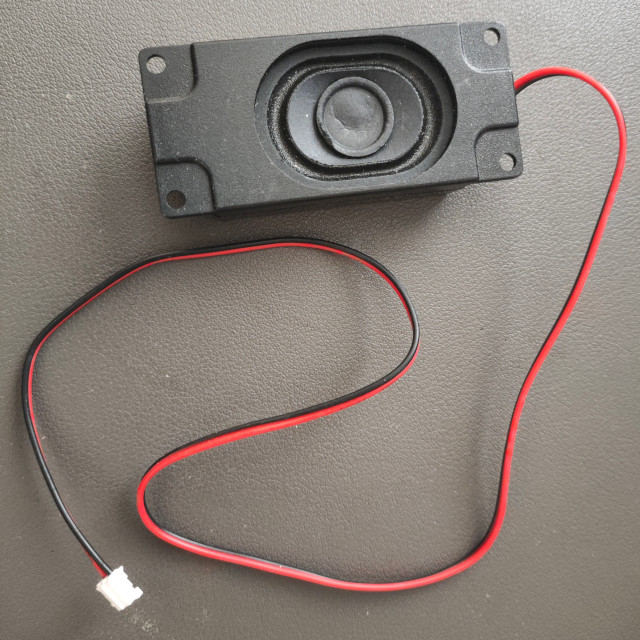
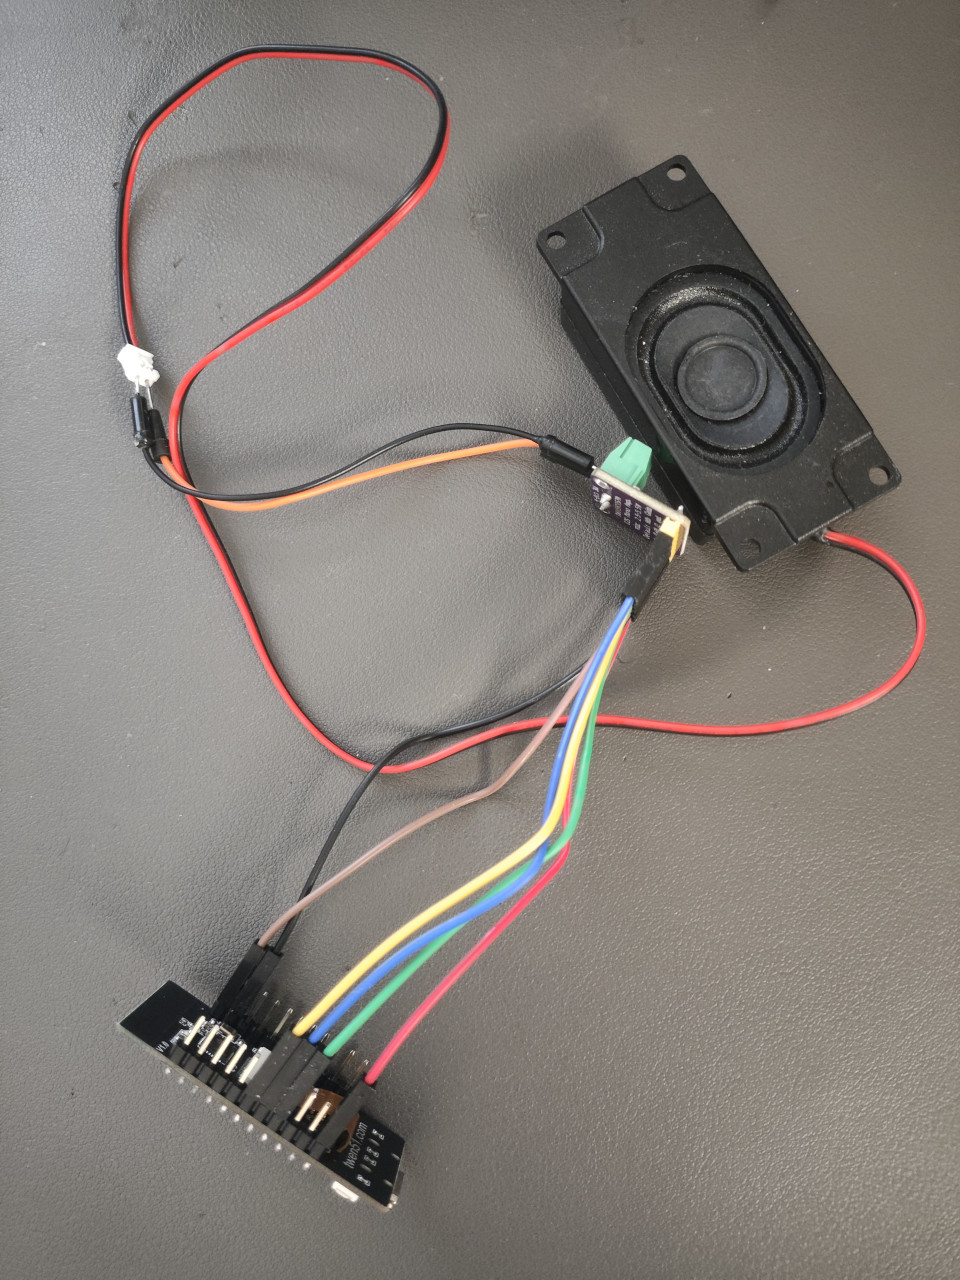
So, today, let’s make a bluetooth speaker based on ESP32-C3, which ONLY requires I2S to serve as output (playback).

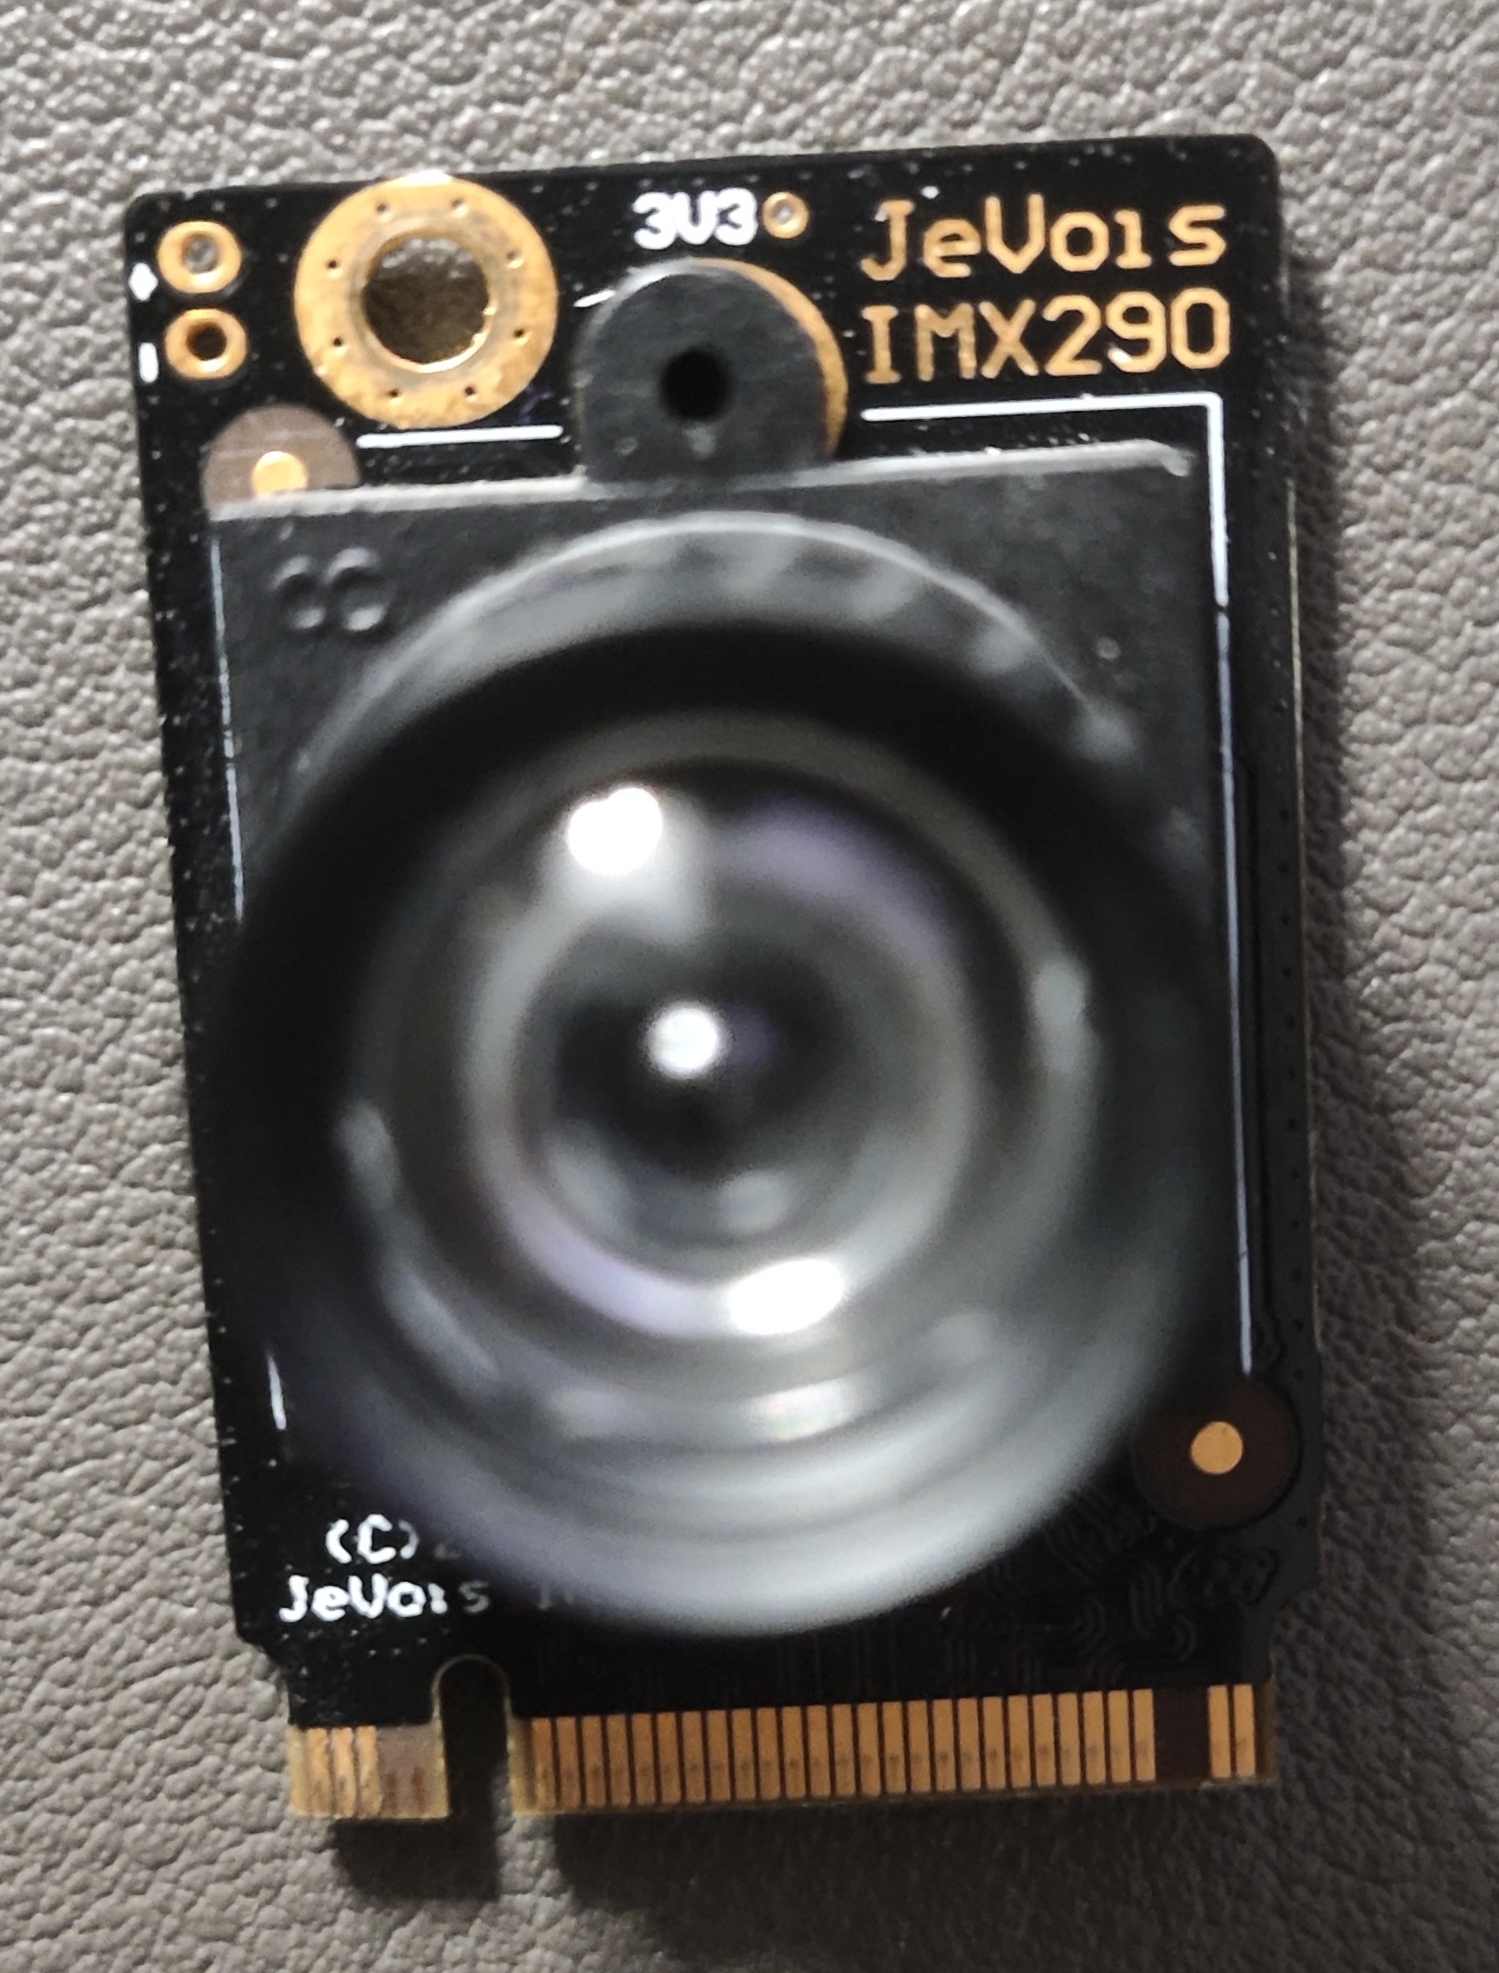
![[Google Coral] [M.2 Accelerator A+E key]](https://raw.githubusercontent.com/LongerVision/Resource/refs/heads/main/MachineVision/ARMLinux/jevois-pro/04_JeVois-Pro_Google-Coral.jpg)