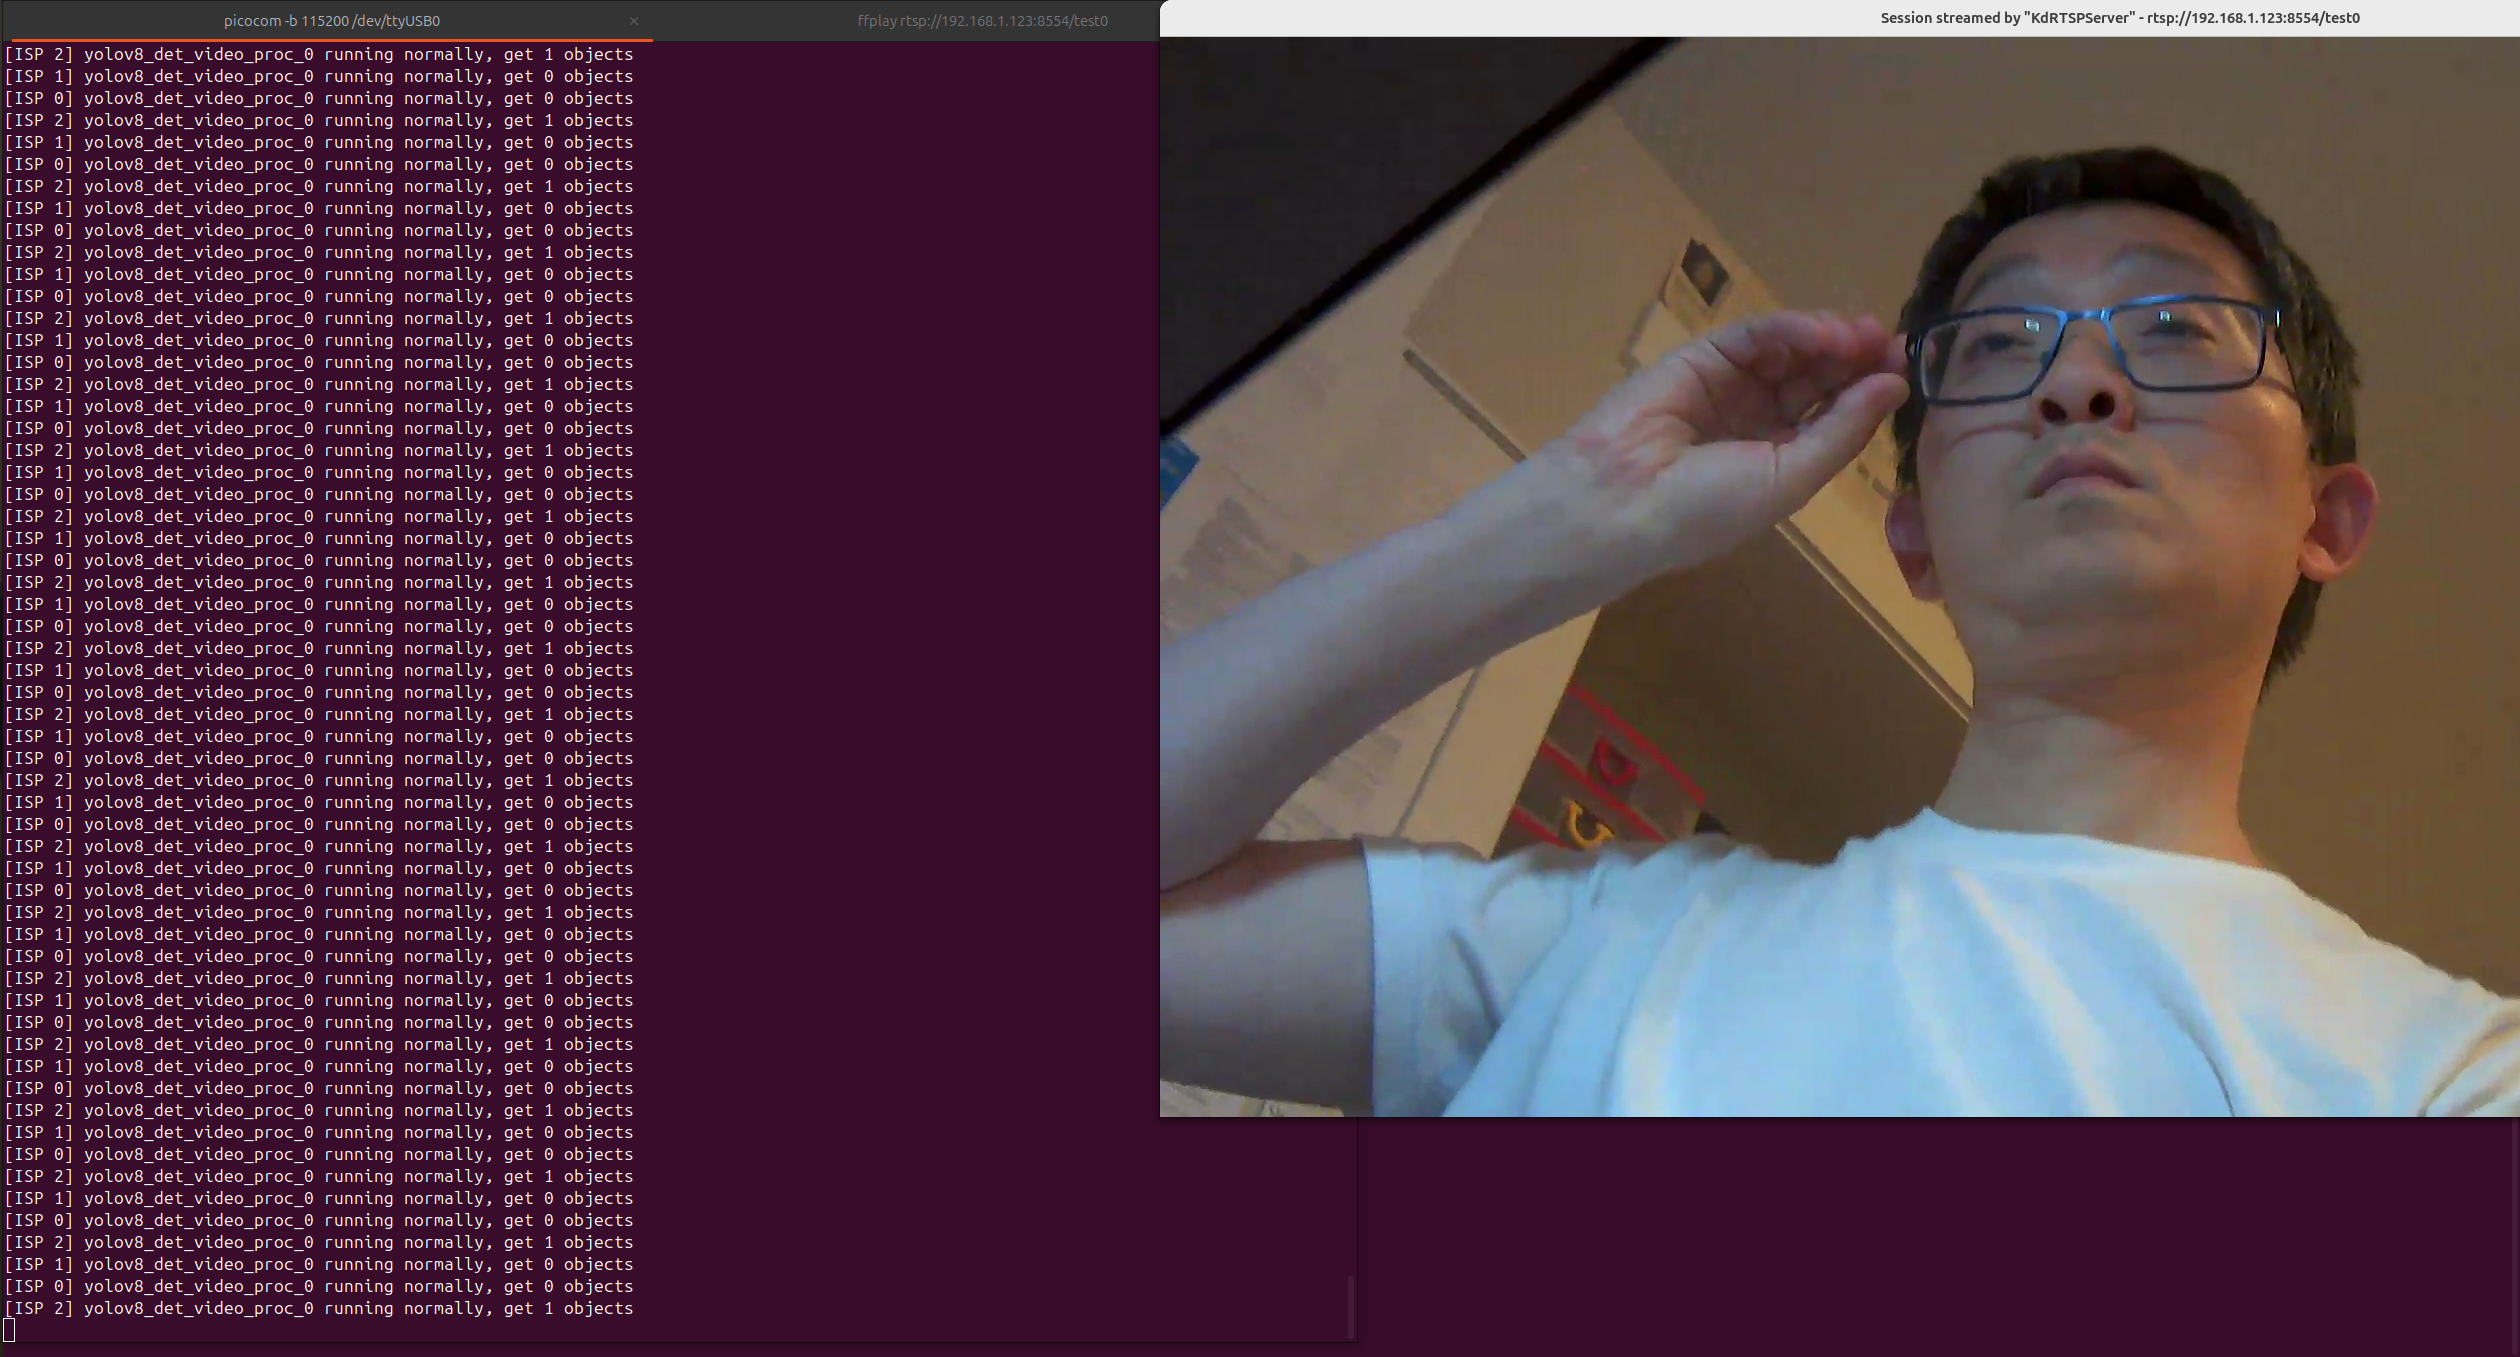
In the previous blog CanMV K230 - (1), I didn’t finish implementing the remote display of the AI detection results. The issue lies in the AI transmission protocol. Clearly, what we need to transmit includes:
the raw data stream,
the AI detection/recognition results,
and possibly control messages as well.
In theory, the overall protocol should consist of these three parts. In this blog, I will implement a simple custom AI transmission protocol, designed to align with industry standards.
I purchased a T113-i Industrial Evaluation Board - MiniEVM early in September 2025. Unfortunately, there is NO chance for me to have some fun on this board yet. Finally, today, let’s try it out and see what we can use it for.
The TLT113-MiniEVM from Tronlong Technology is a compact, fully domestic industrial evaluation board based on the Allwinner T113-i heterogeneous multi-core processor. It integrates a dual-core ARM Cortex-A7, a XuanTie C906 RISC-V core, and a HiFi4 DSP. The ARM Cortex-A7 processing unit operates at up to 1.2 GHz.

The evaluation board consists of a core module and a carrier board. The core module adopts a 100% domestic industrial-grade component solution, with all key components—including CPU, ROM, RAM, power supply, and crystal oscillator—sourced from domestic suppliers, achieving full localization. It has undergone professional PCB layout optimization and rigorous high- and low-temperature testing, ensuring stable and reliable performance suitable for various industrial environments.

The evaluation board provides a rich set of interfaces, including Gigabit Ethernet, dual USB ports, MicroSD, HDMI output, microphone input, headphone output, and UART. Additional communication interfaces can be expanded via headers, including one SPI, two CAN, four I²C (TWI), and five UART channels. It supports hardware video encoding at 1080P@60fps in JPEG/MJPEG formats, as well as hardware decoding of 4K@30fps H.265 and 4K@24fps H.264 video.

With a compact form factor of 57 mm × 87 mm, the evaluation board can be used as a card-sized computer. Its small size and flexible expandability make it easy to integrate into products, enabling users to quickly perform solution evaluation and early-stage technical development.
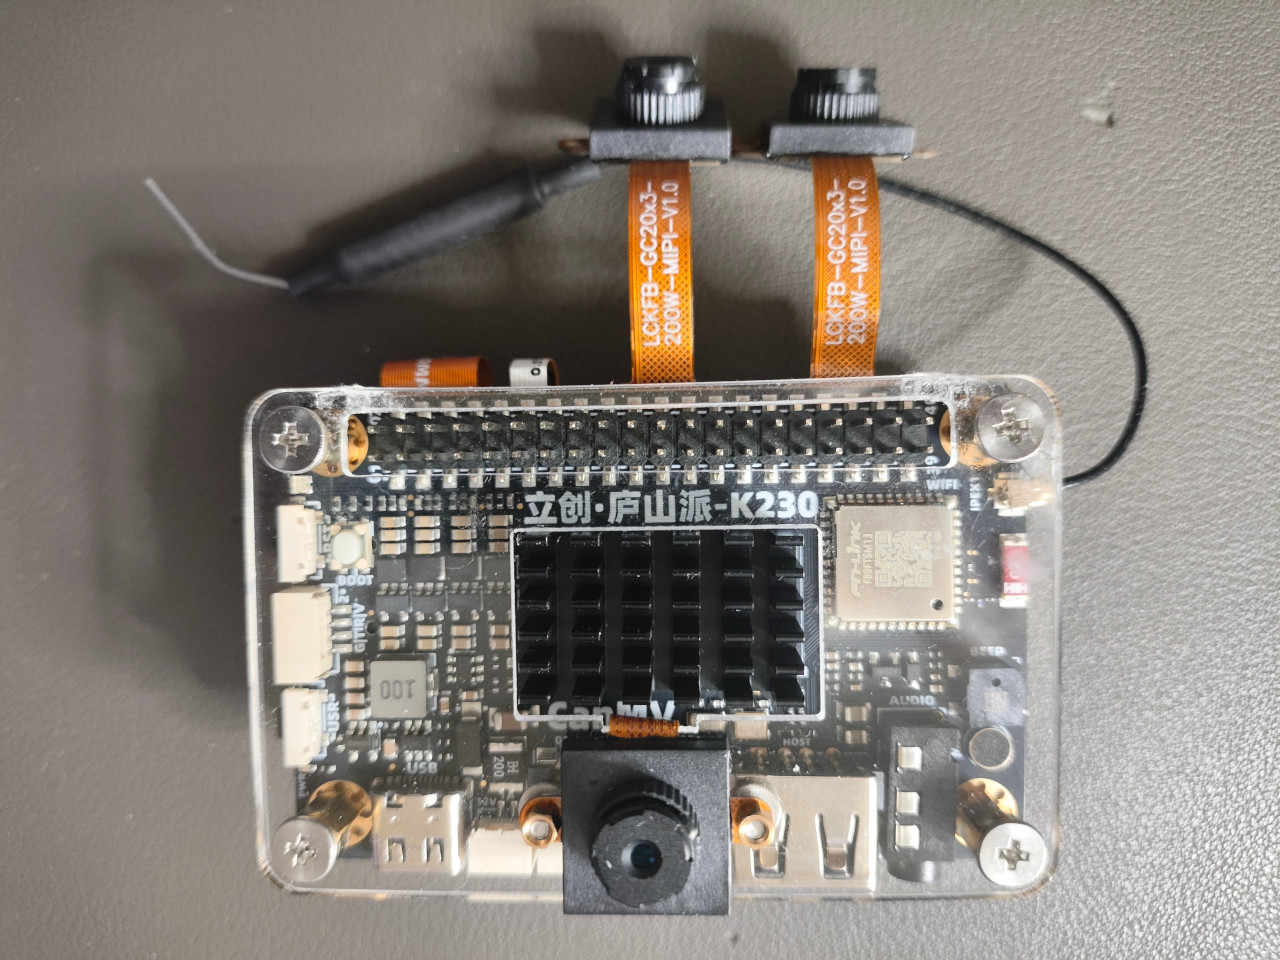
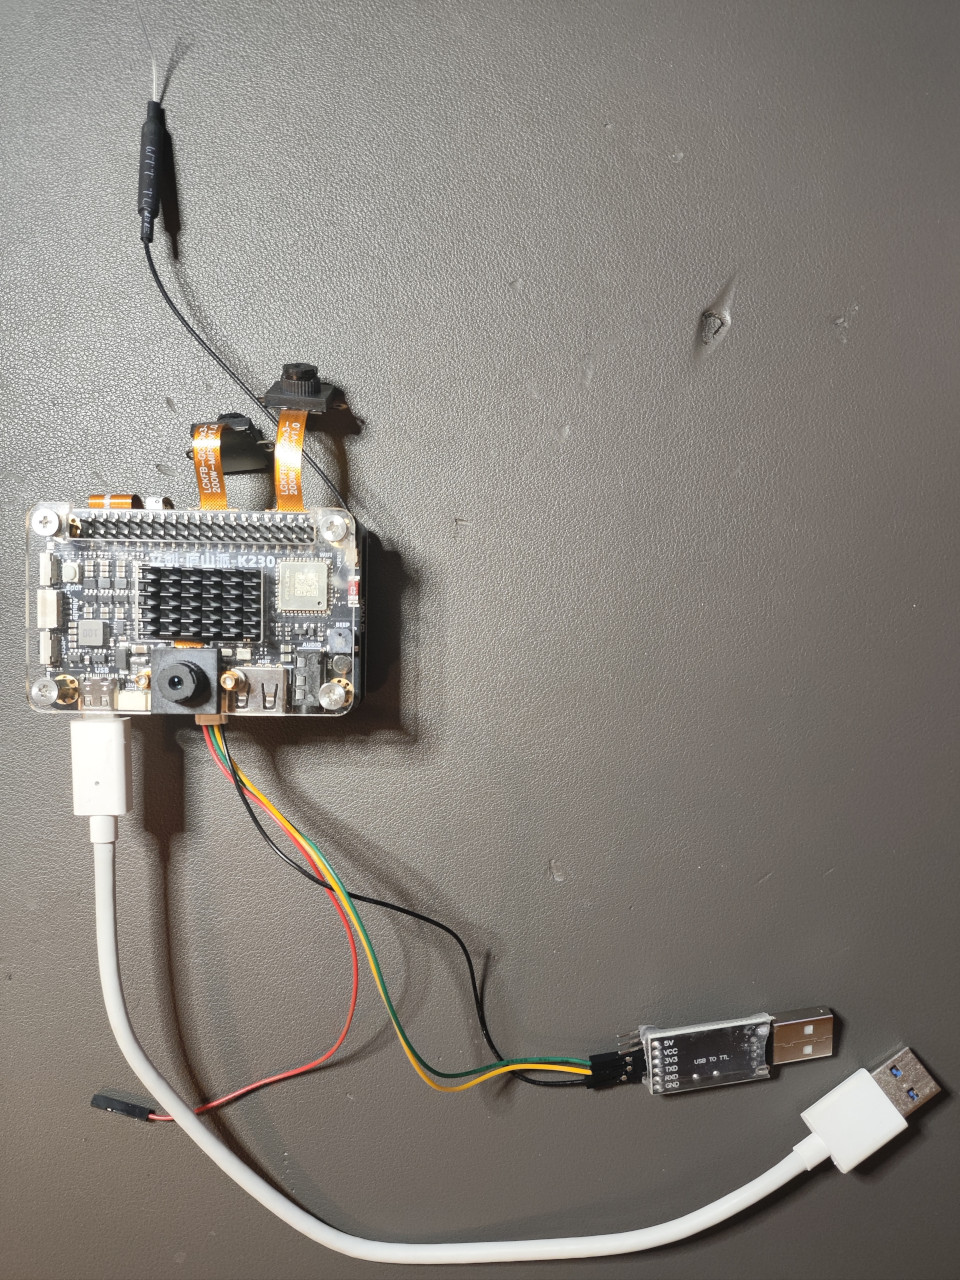
Several K230 manufacturers including LCKFB have each designed their own development boards. I purchased the LCKFB Lushan Pi developed and produced by Lichuang (JLC). See the figure below for details:
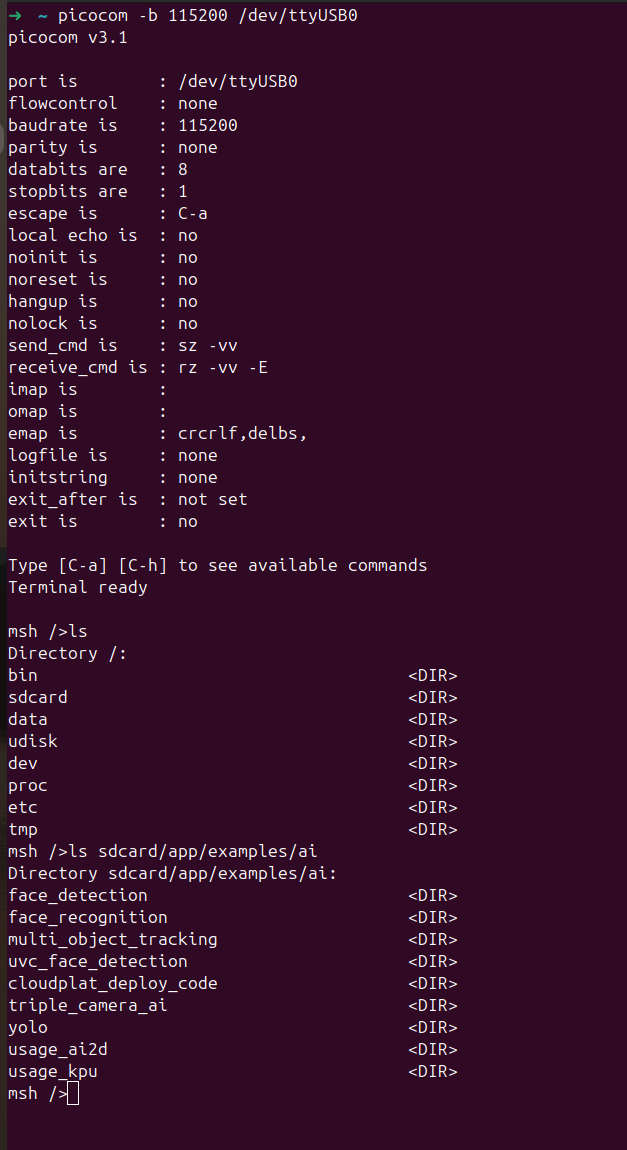
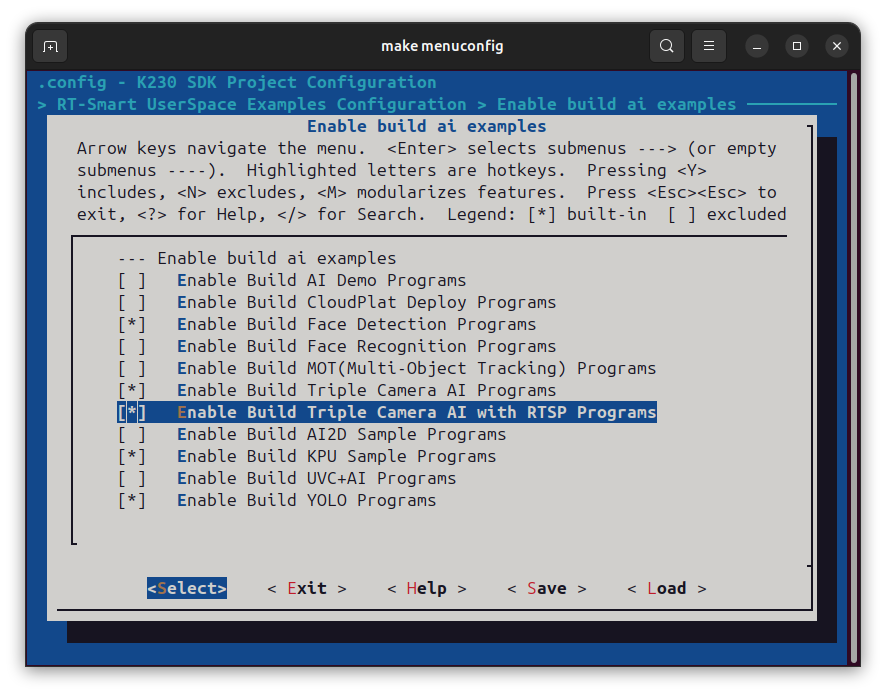
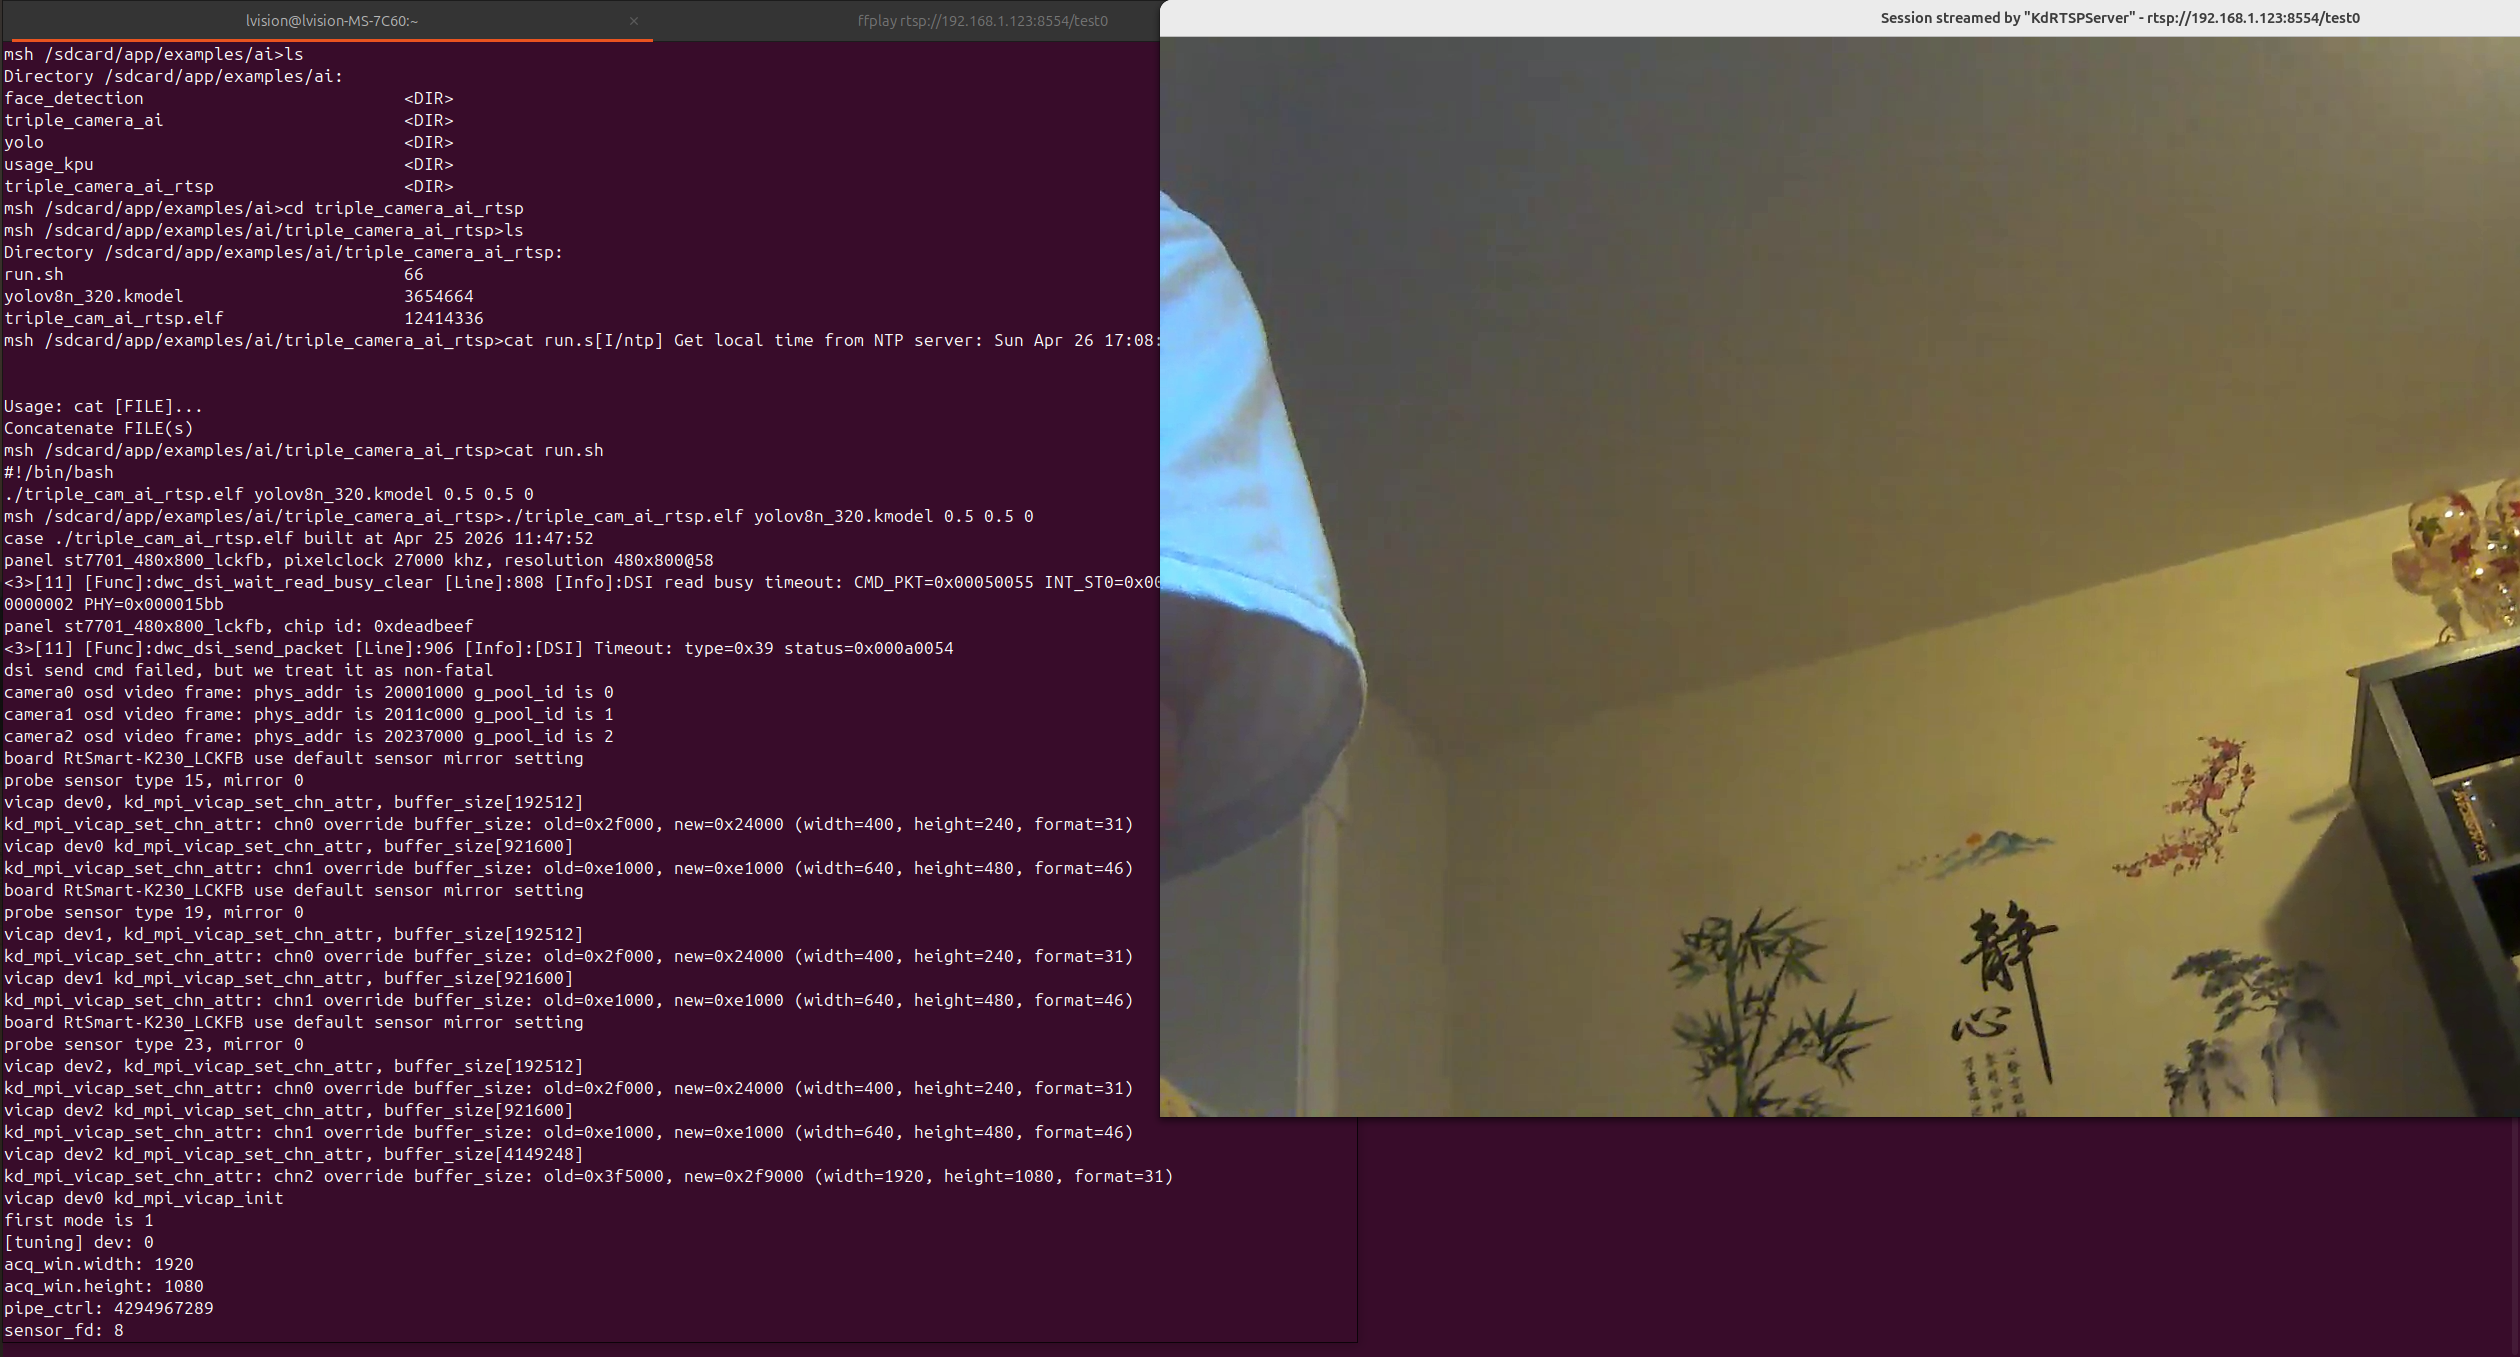
However, it looks it does NOT contain a demo using 3 cameras.
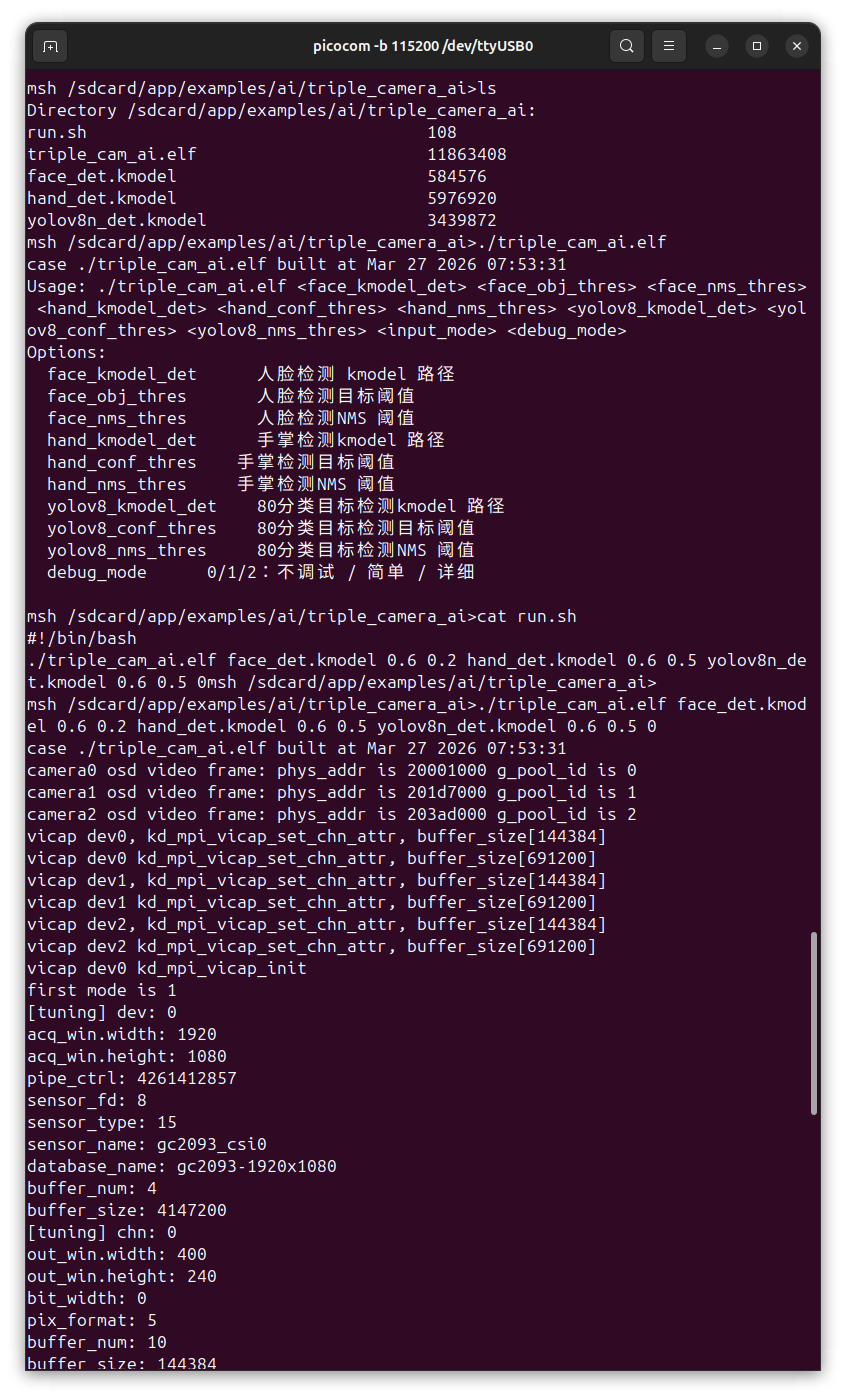
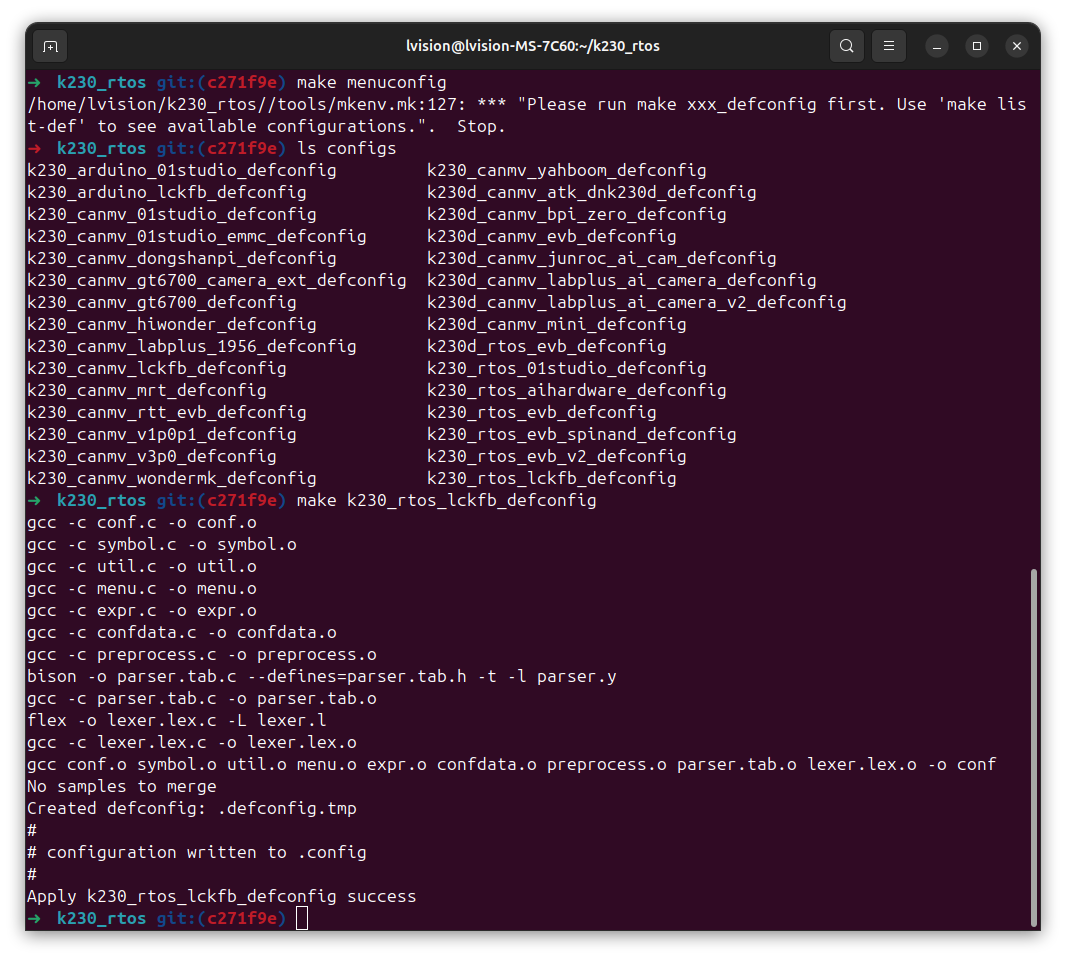
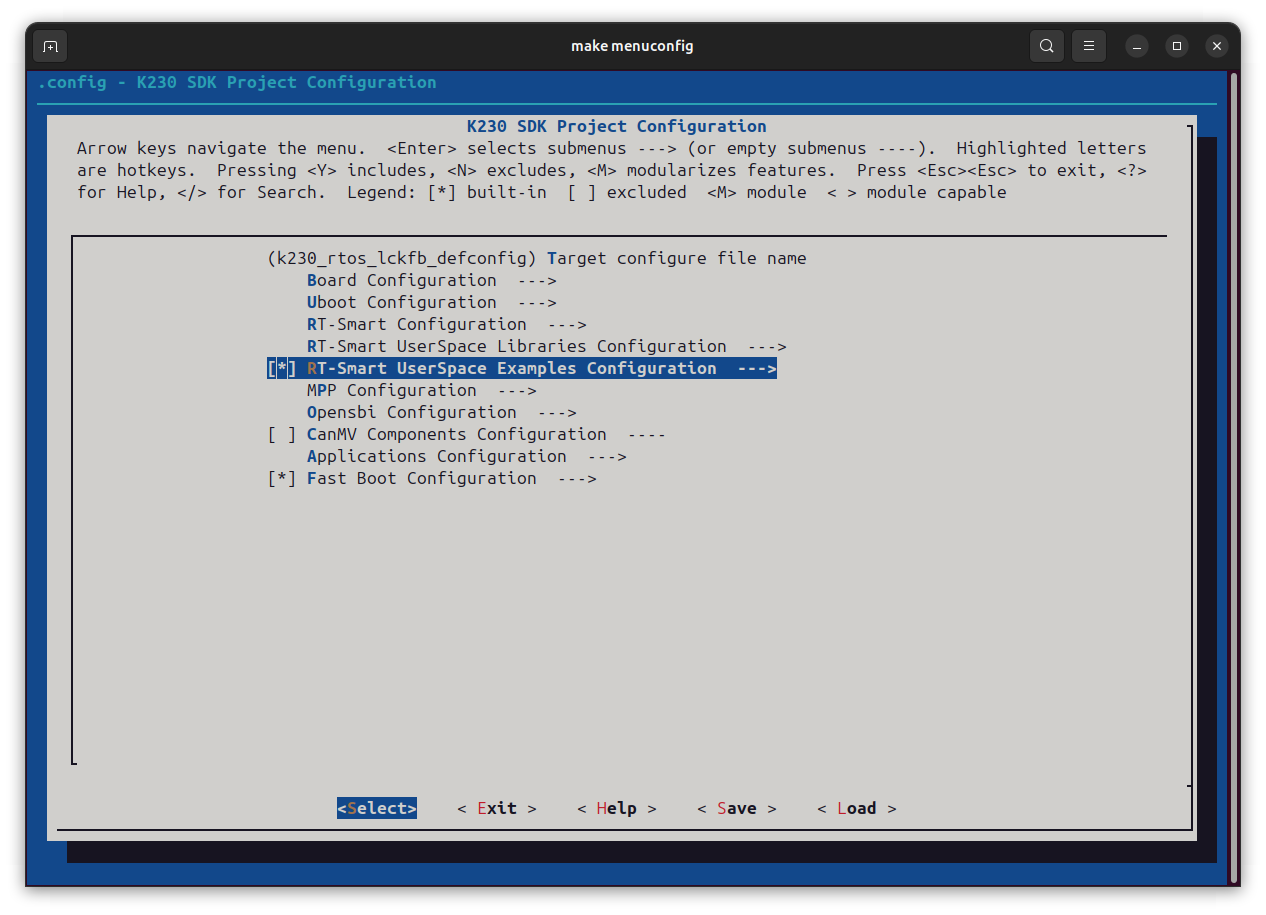
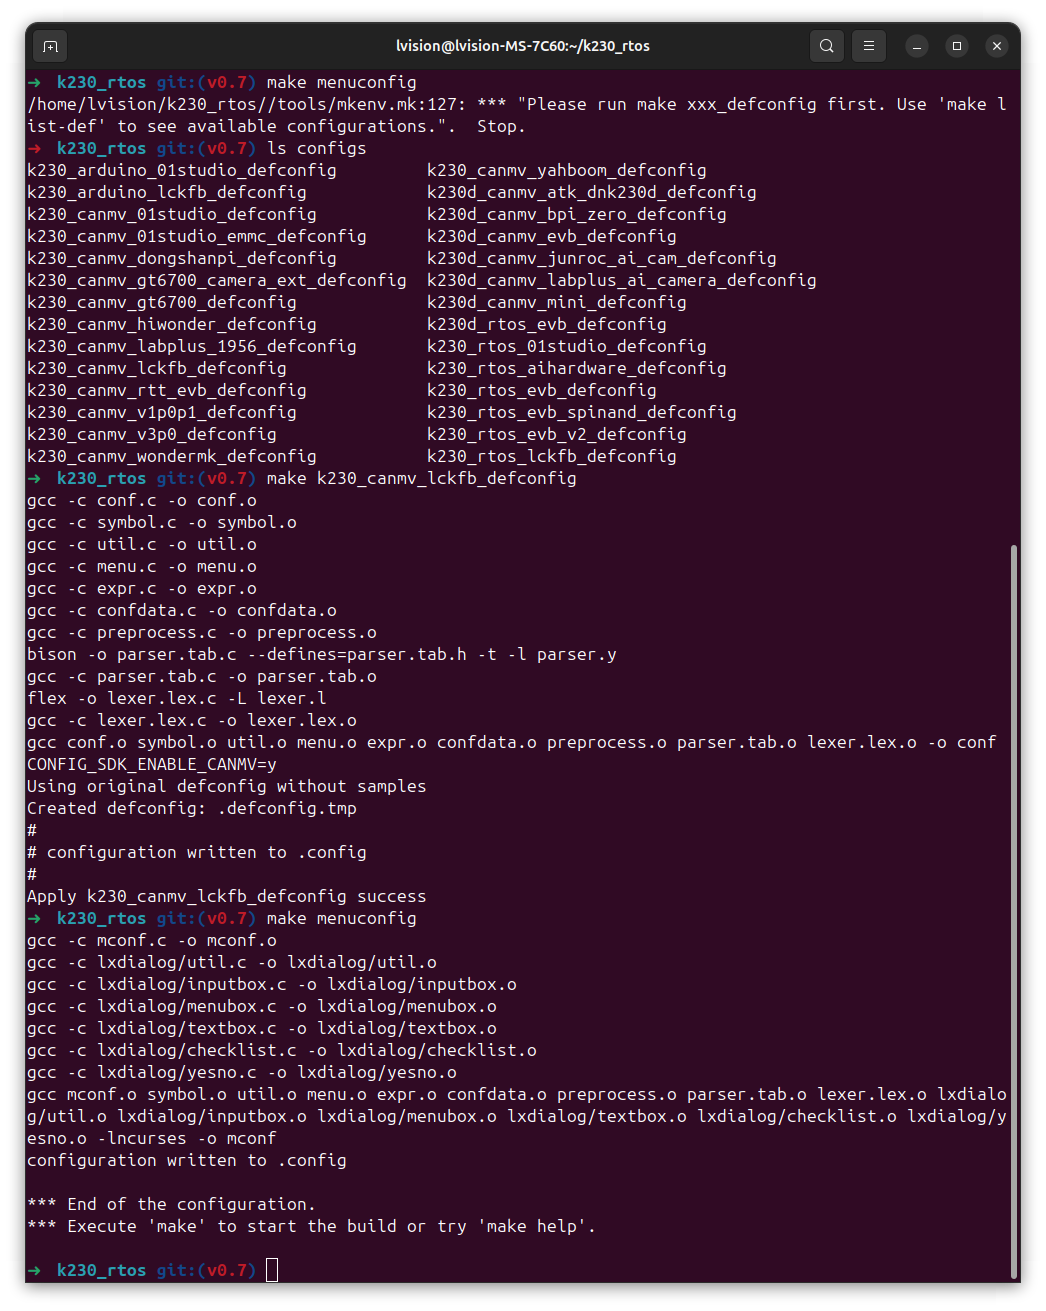
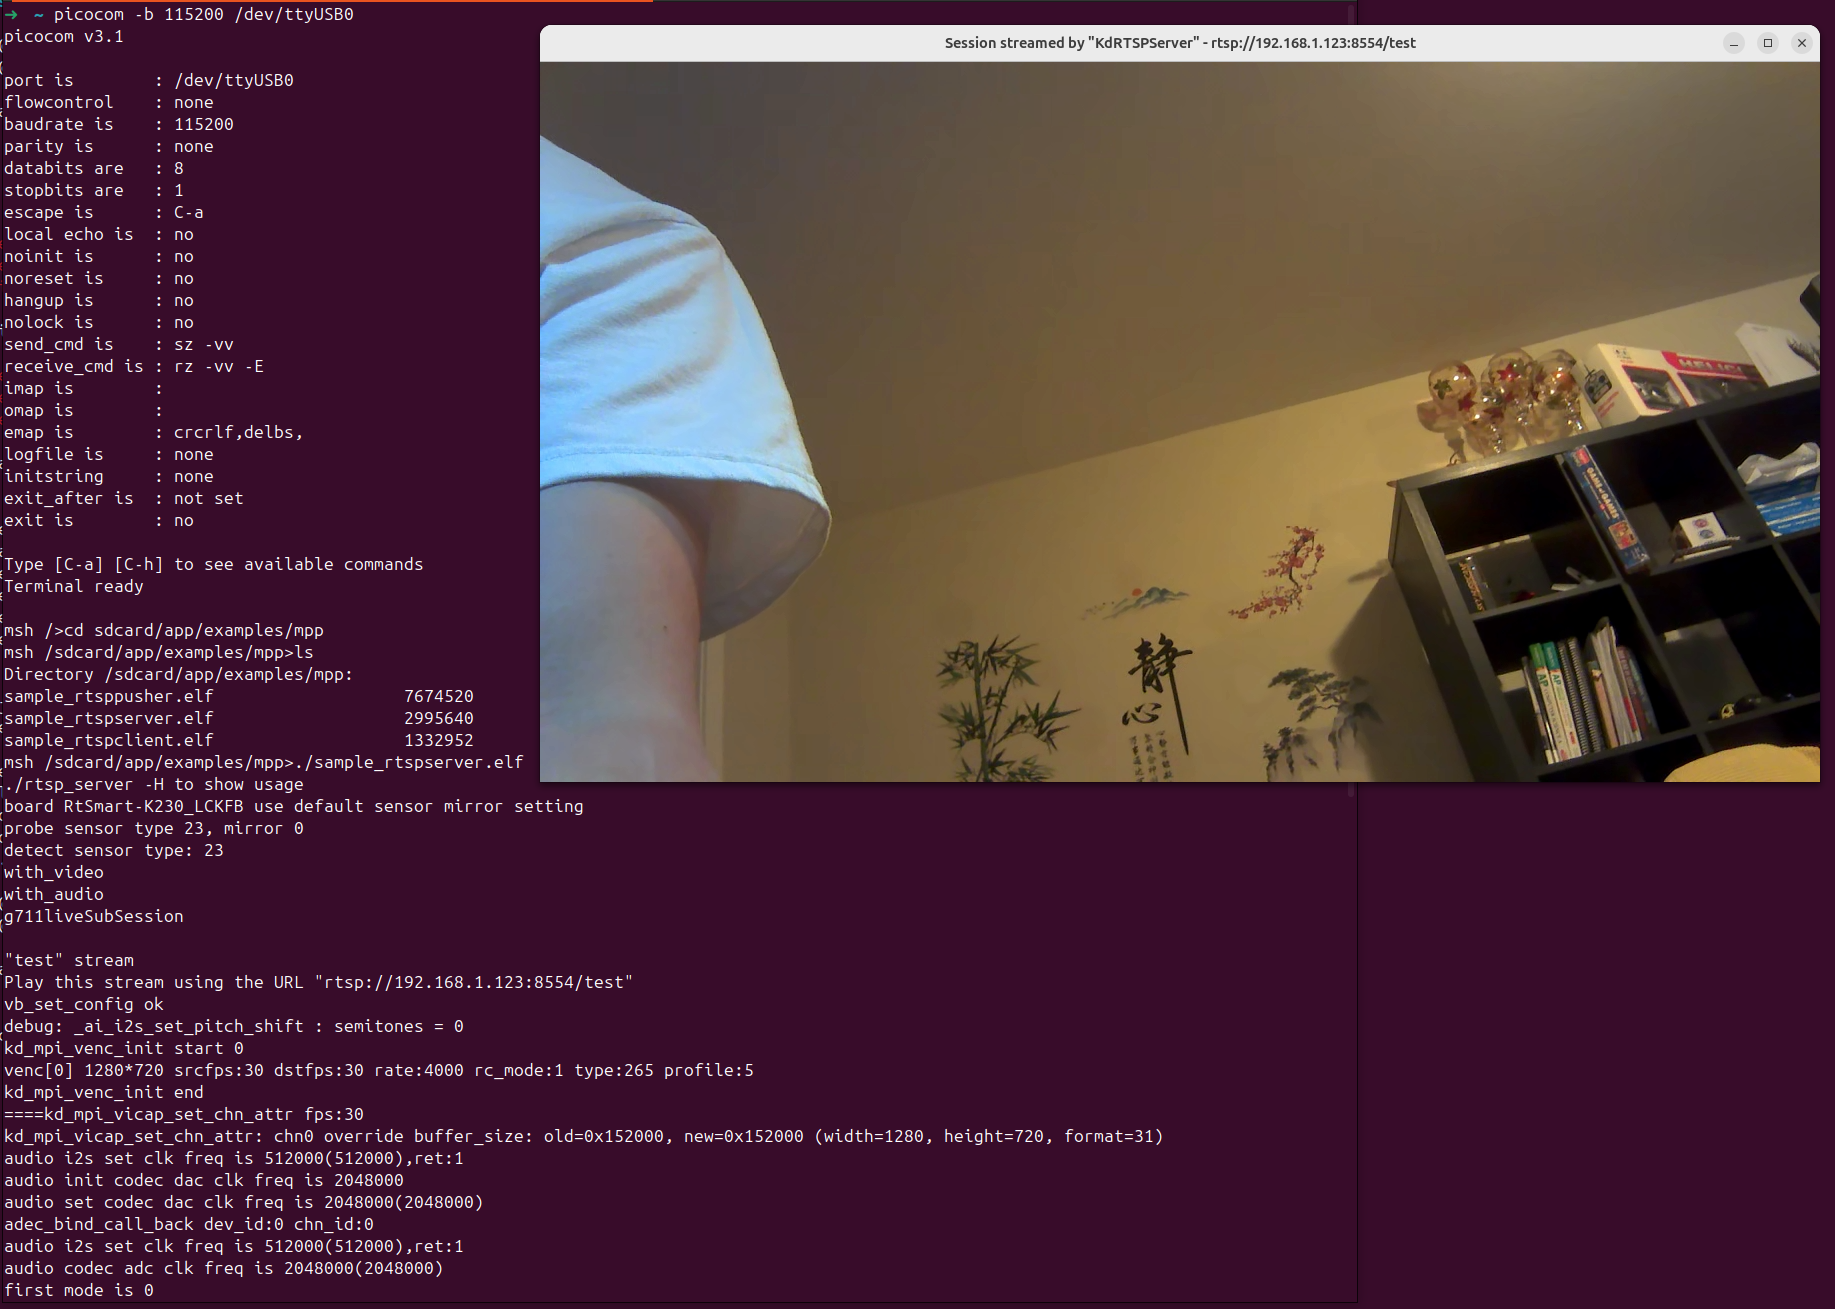
In order to demonstrate the following two examples provided at k230_rtsmart_examples, we need to either flash a different firmwareK230 RTOS SDK or build these examples using triple MIPI cameras based on the environment provided by the firmware K230_LCKFB_rtsmart.
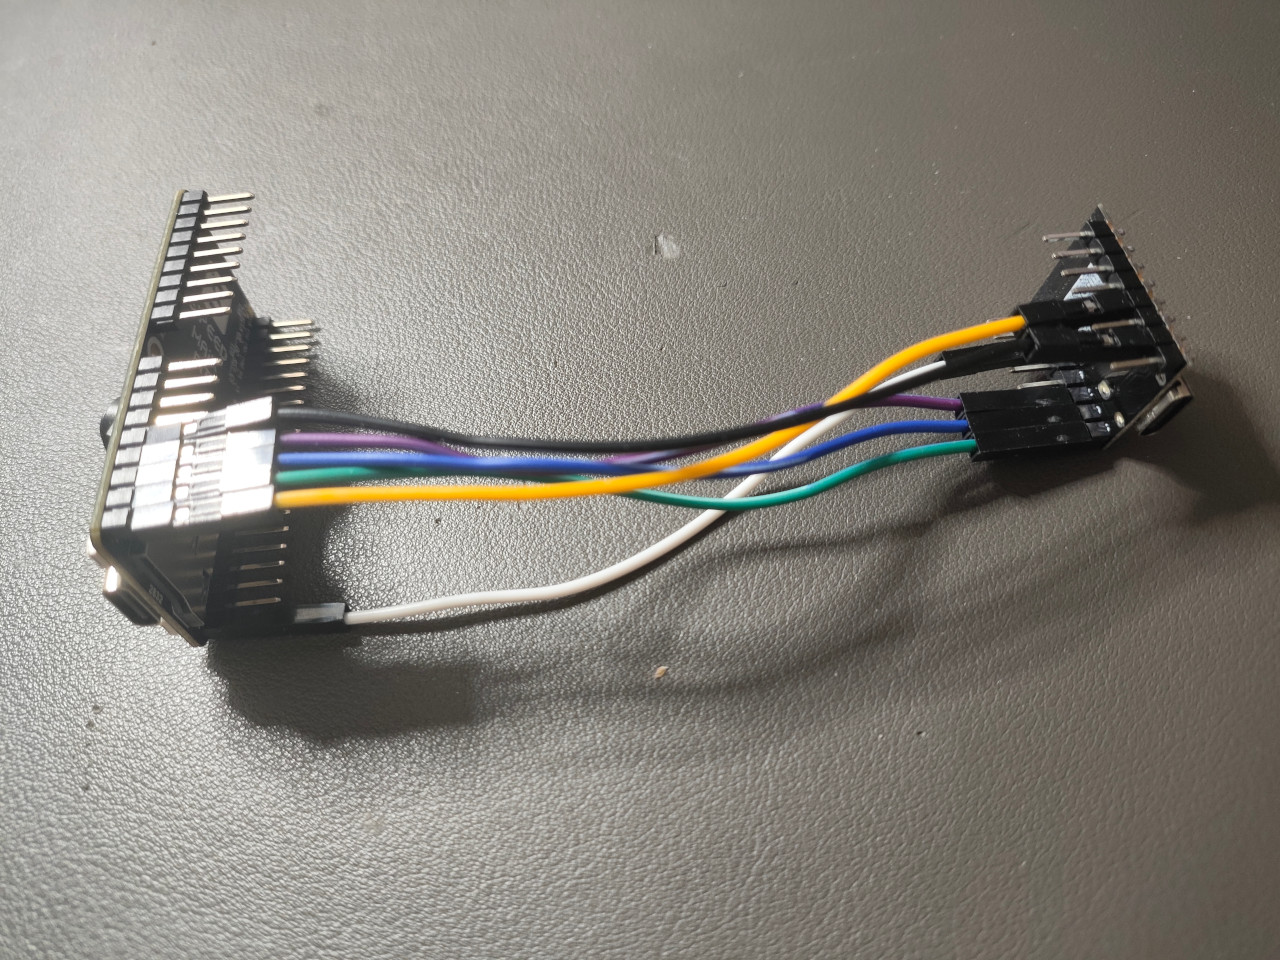
You need a type-C USB cable (the white cable in the picture) used as the power of LCKFB Lushan Pi
You need a USB-to-TTL (for instance: CH341 or PL2303) for communication via serial port between LCKFB Lushan Pi and your PC
You need to ensure the RED cable (for power as well) is disconnected. Otherwise, the USB-to-TTL is going to be overheated.
3.3 lsusb
1 2 3 4 5
➜  ~ lsusb
......
Bus 009 Device 049: ID 1a86:7523 QinHeng Electronics CH340 serial converter
Bus 009 Device 052: ID 1209:abd1 Generic OpenMV Cam
......
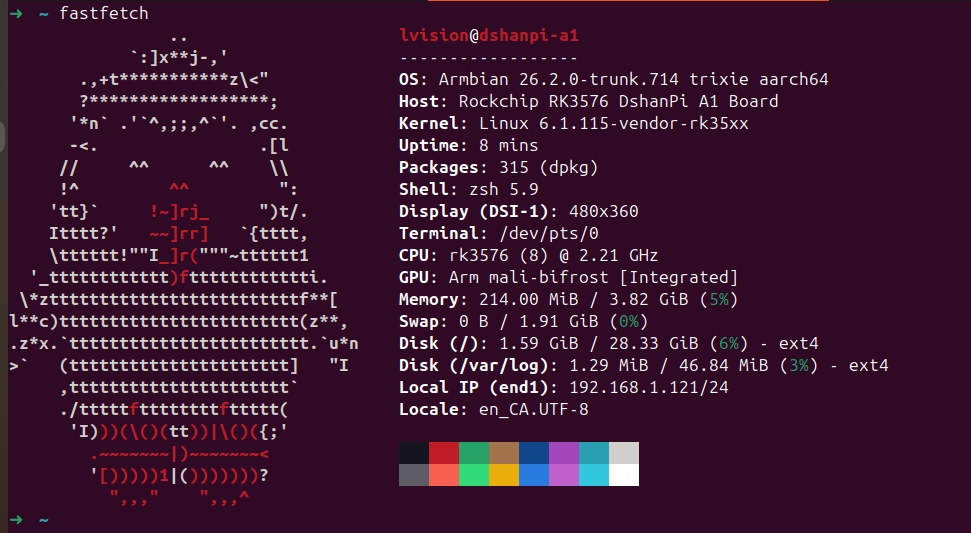
DshanPi-A1 has been out for quite a while. Some rather baffling legal matters have slowed down my pace of writing blog posts, but they cannot hinder the steady progress of scientific research in China. Today, let’s have some fun exploring this SBC DshanPi-A1.
1. Wiki
There is a wealth of documentation and learning materials available online. Here, a few examples are provided as:
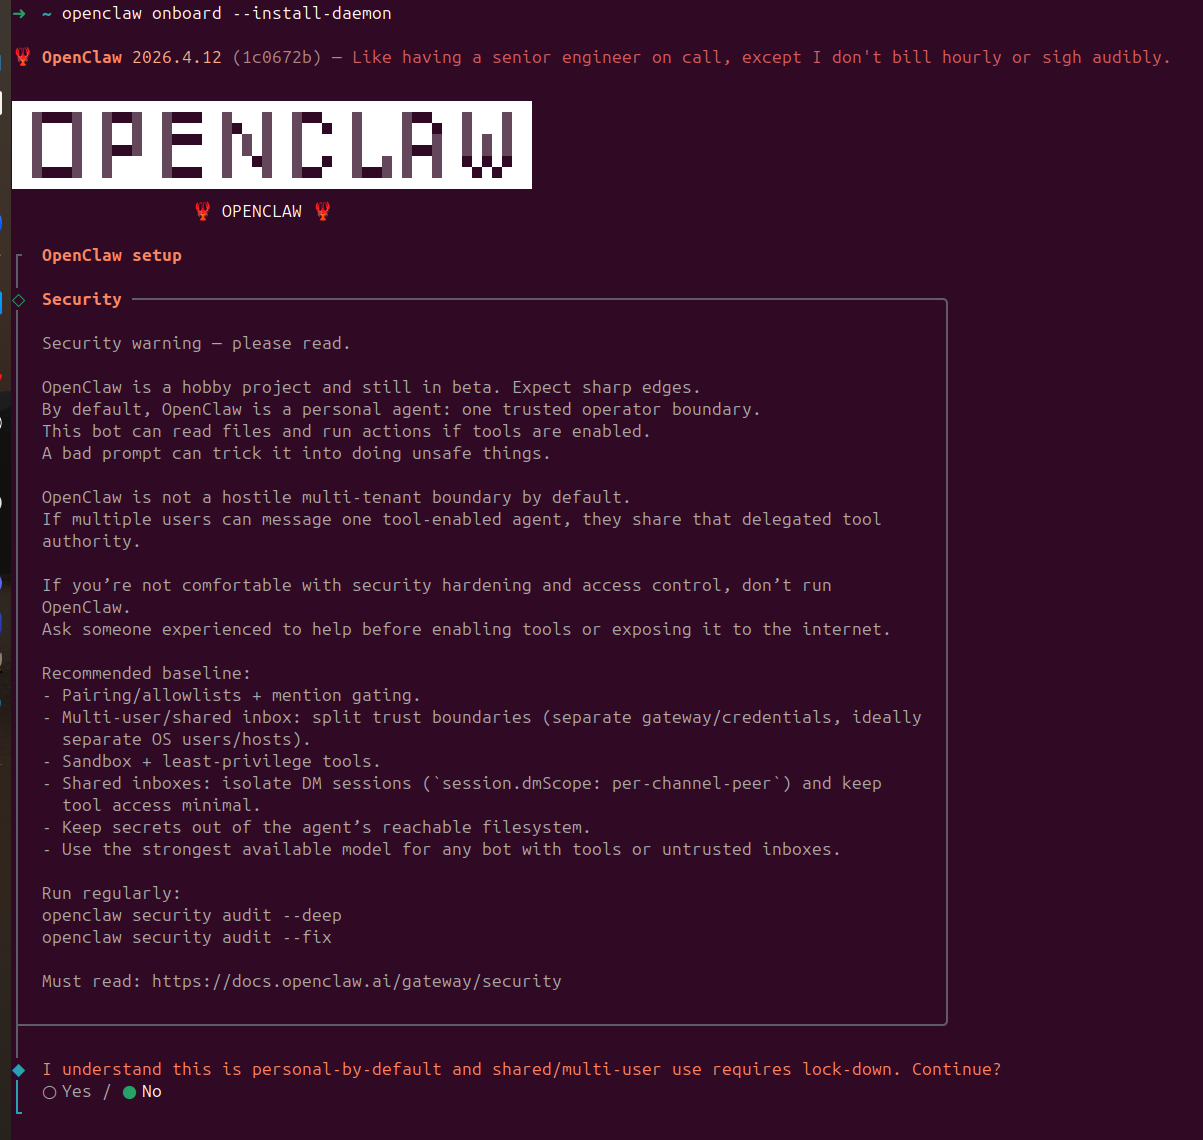
Clearly, this OpenClaw is still far too dangerous. Without the necessary expertise, I would not take on such tasks. This blog post ends here and will not continue further.
Bus 009 Device 033: ID 303a:1001 Espressif USB JTAG/serial debug unit
Bus 009 Device 034: ID 0403:6001 Future Technology Devices International, Ltd FT232 Serial (UART) IC
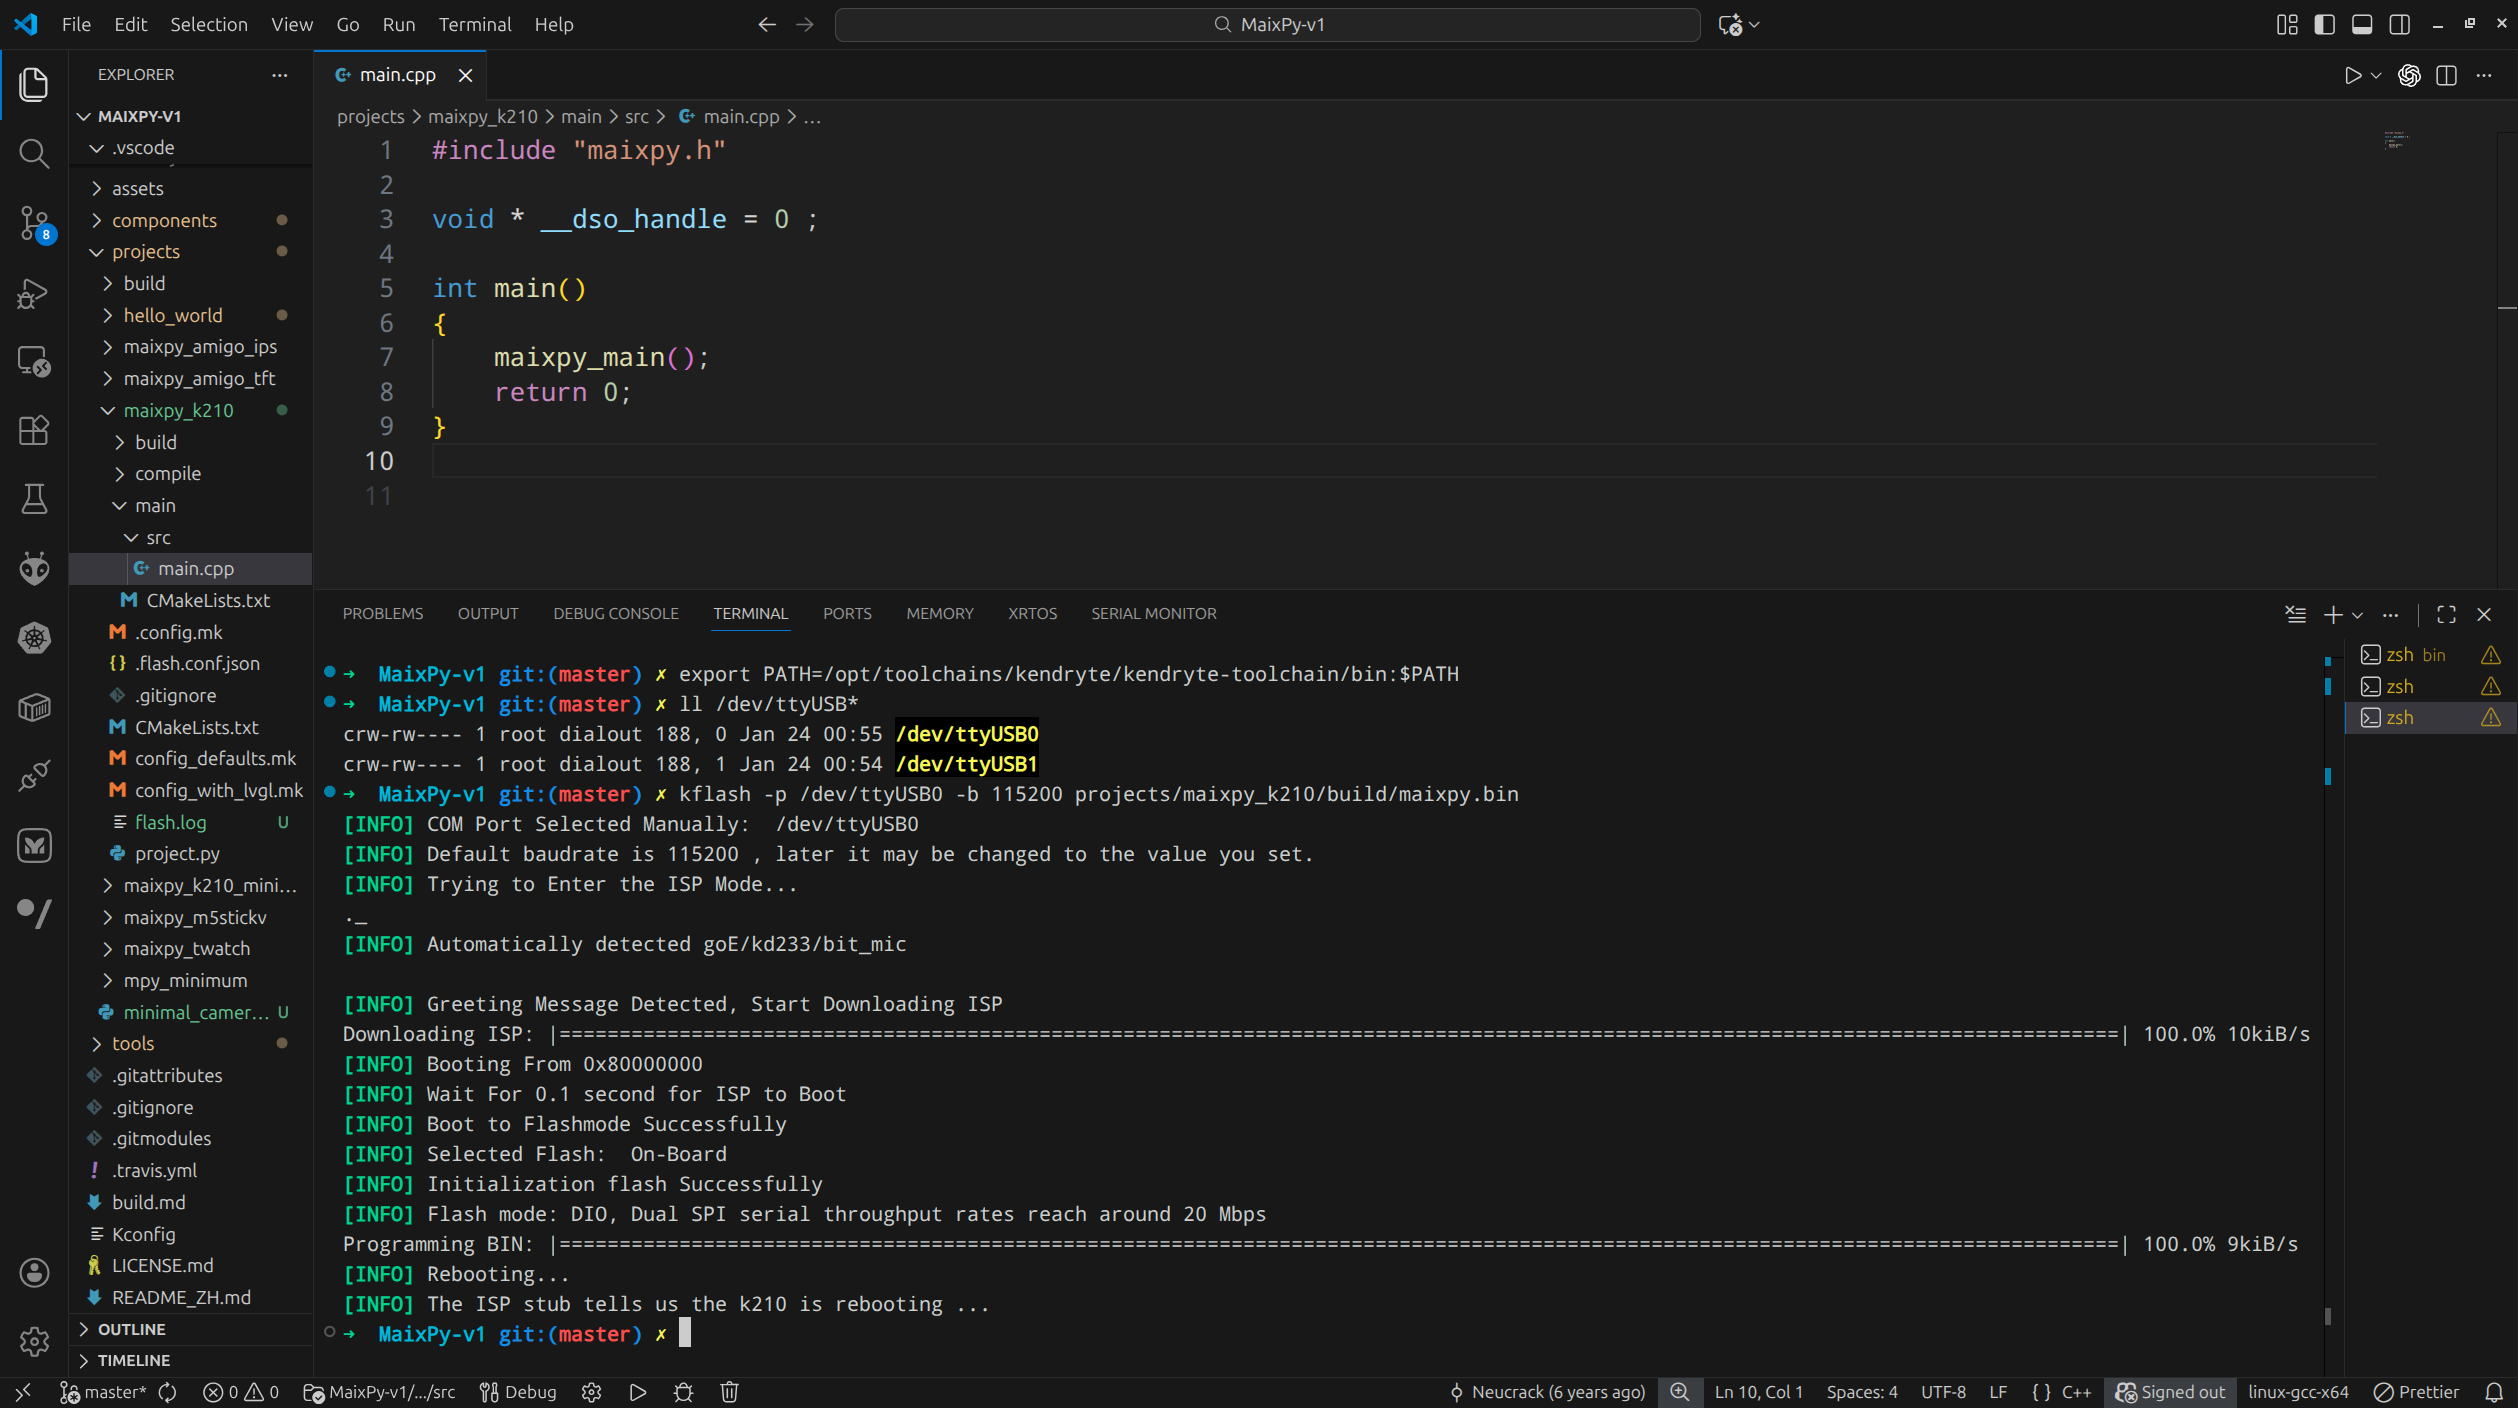
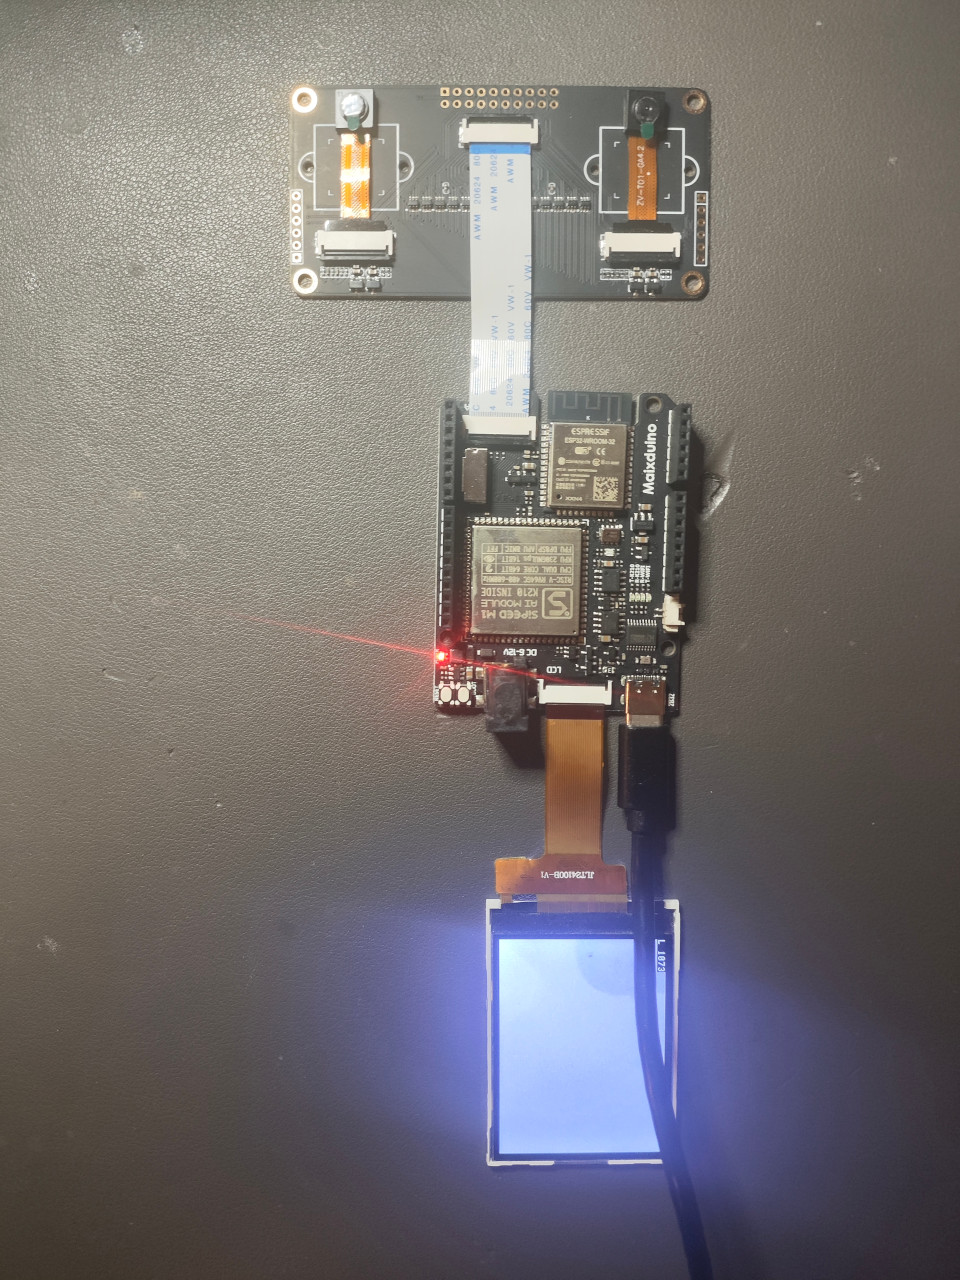
In my previous two MaixDuino blog posts MaixDuino 1 and MaixDuino 2, flashing was done using the Arduino IDE. In hindsight, this was neither necessary nor particularly convenient. Especially after flashing the Sipeed official firmware MaixPy-v1 onto the MaixDuino board, there is no real need to rely on the Arduino IDE anymore.
This blog post continues the MaixDuino exploration and completes two experiments:
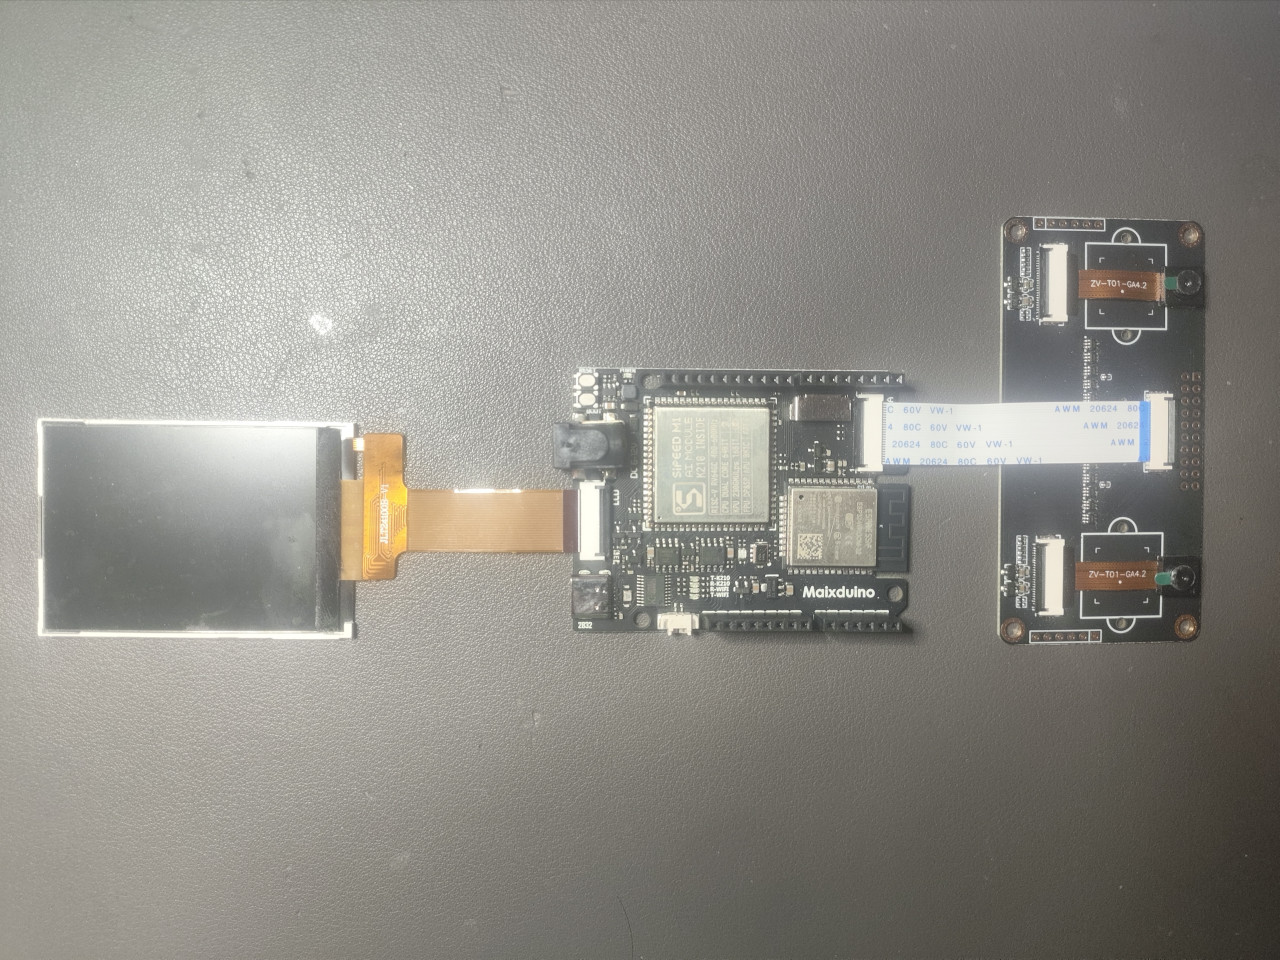
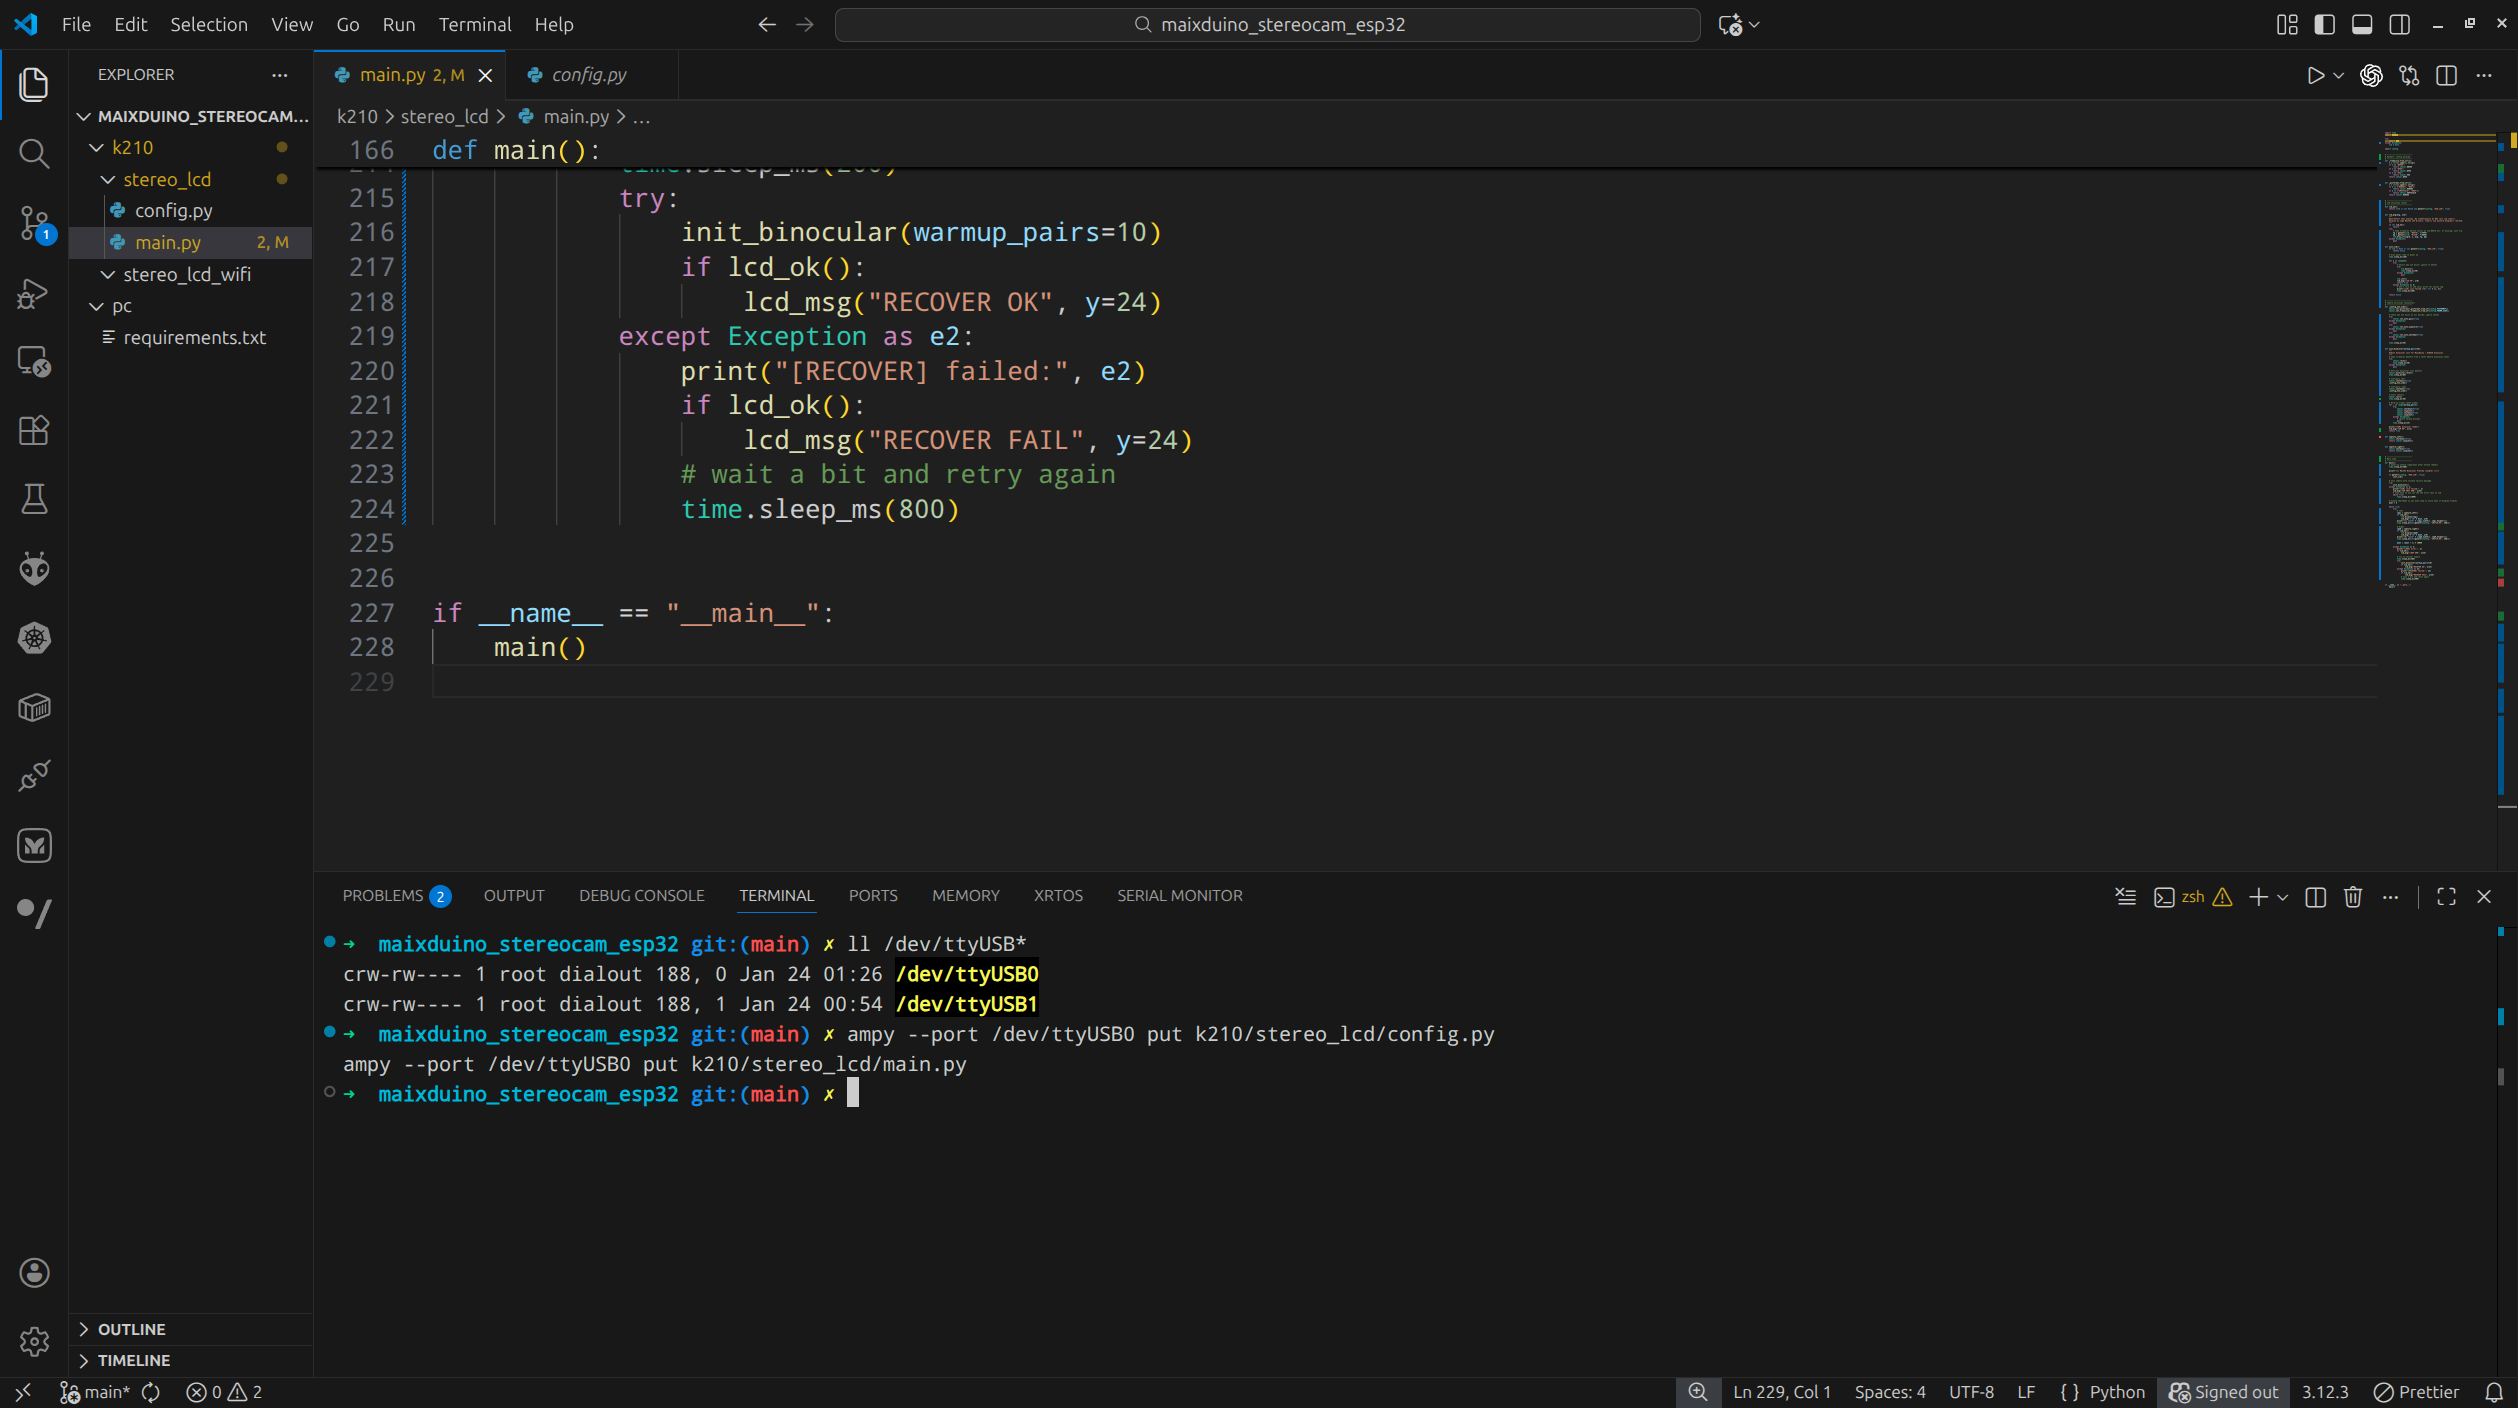
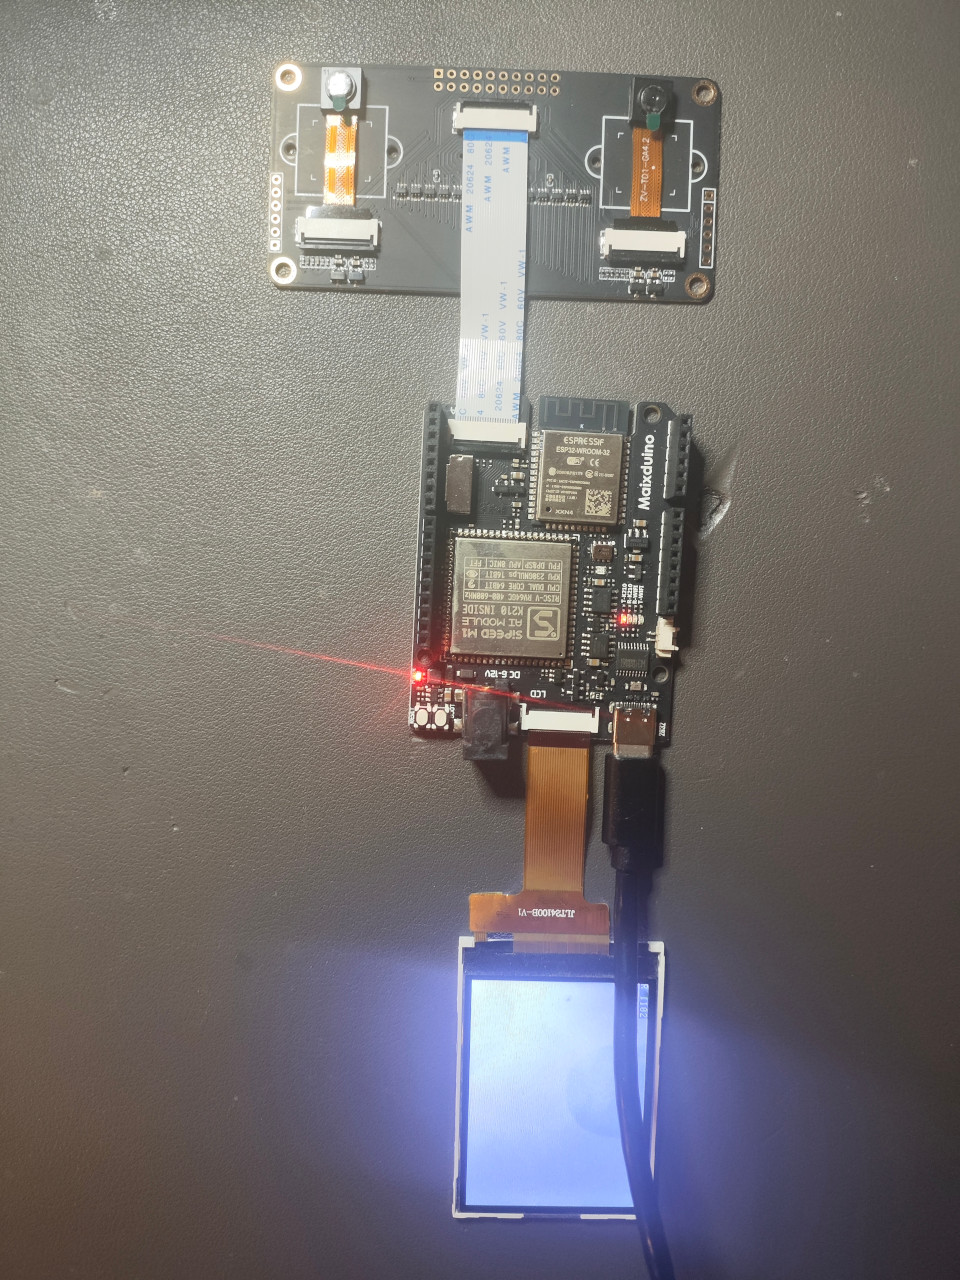
A very simple implementation of dual-camera image capture on the MaixDuino board, with alternating display on the onboard LCD screen (Refer to LCD API), without relying on Arduino IDE at all;
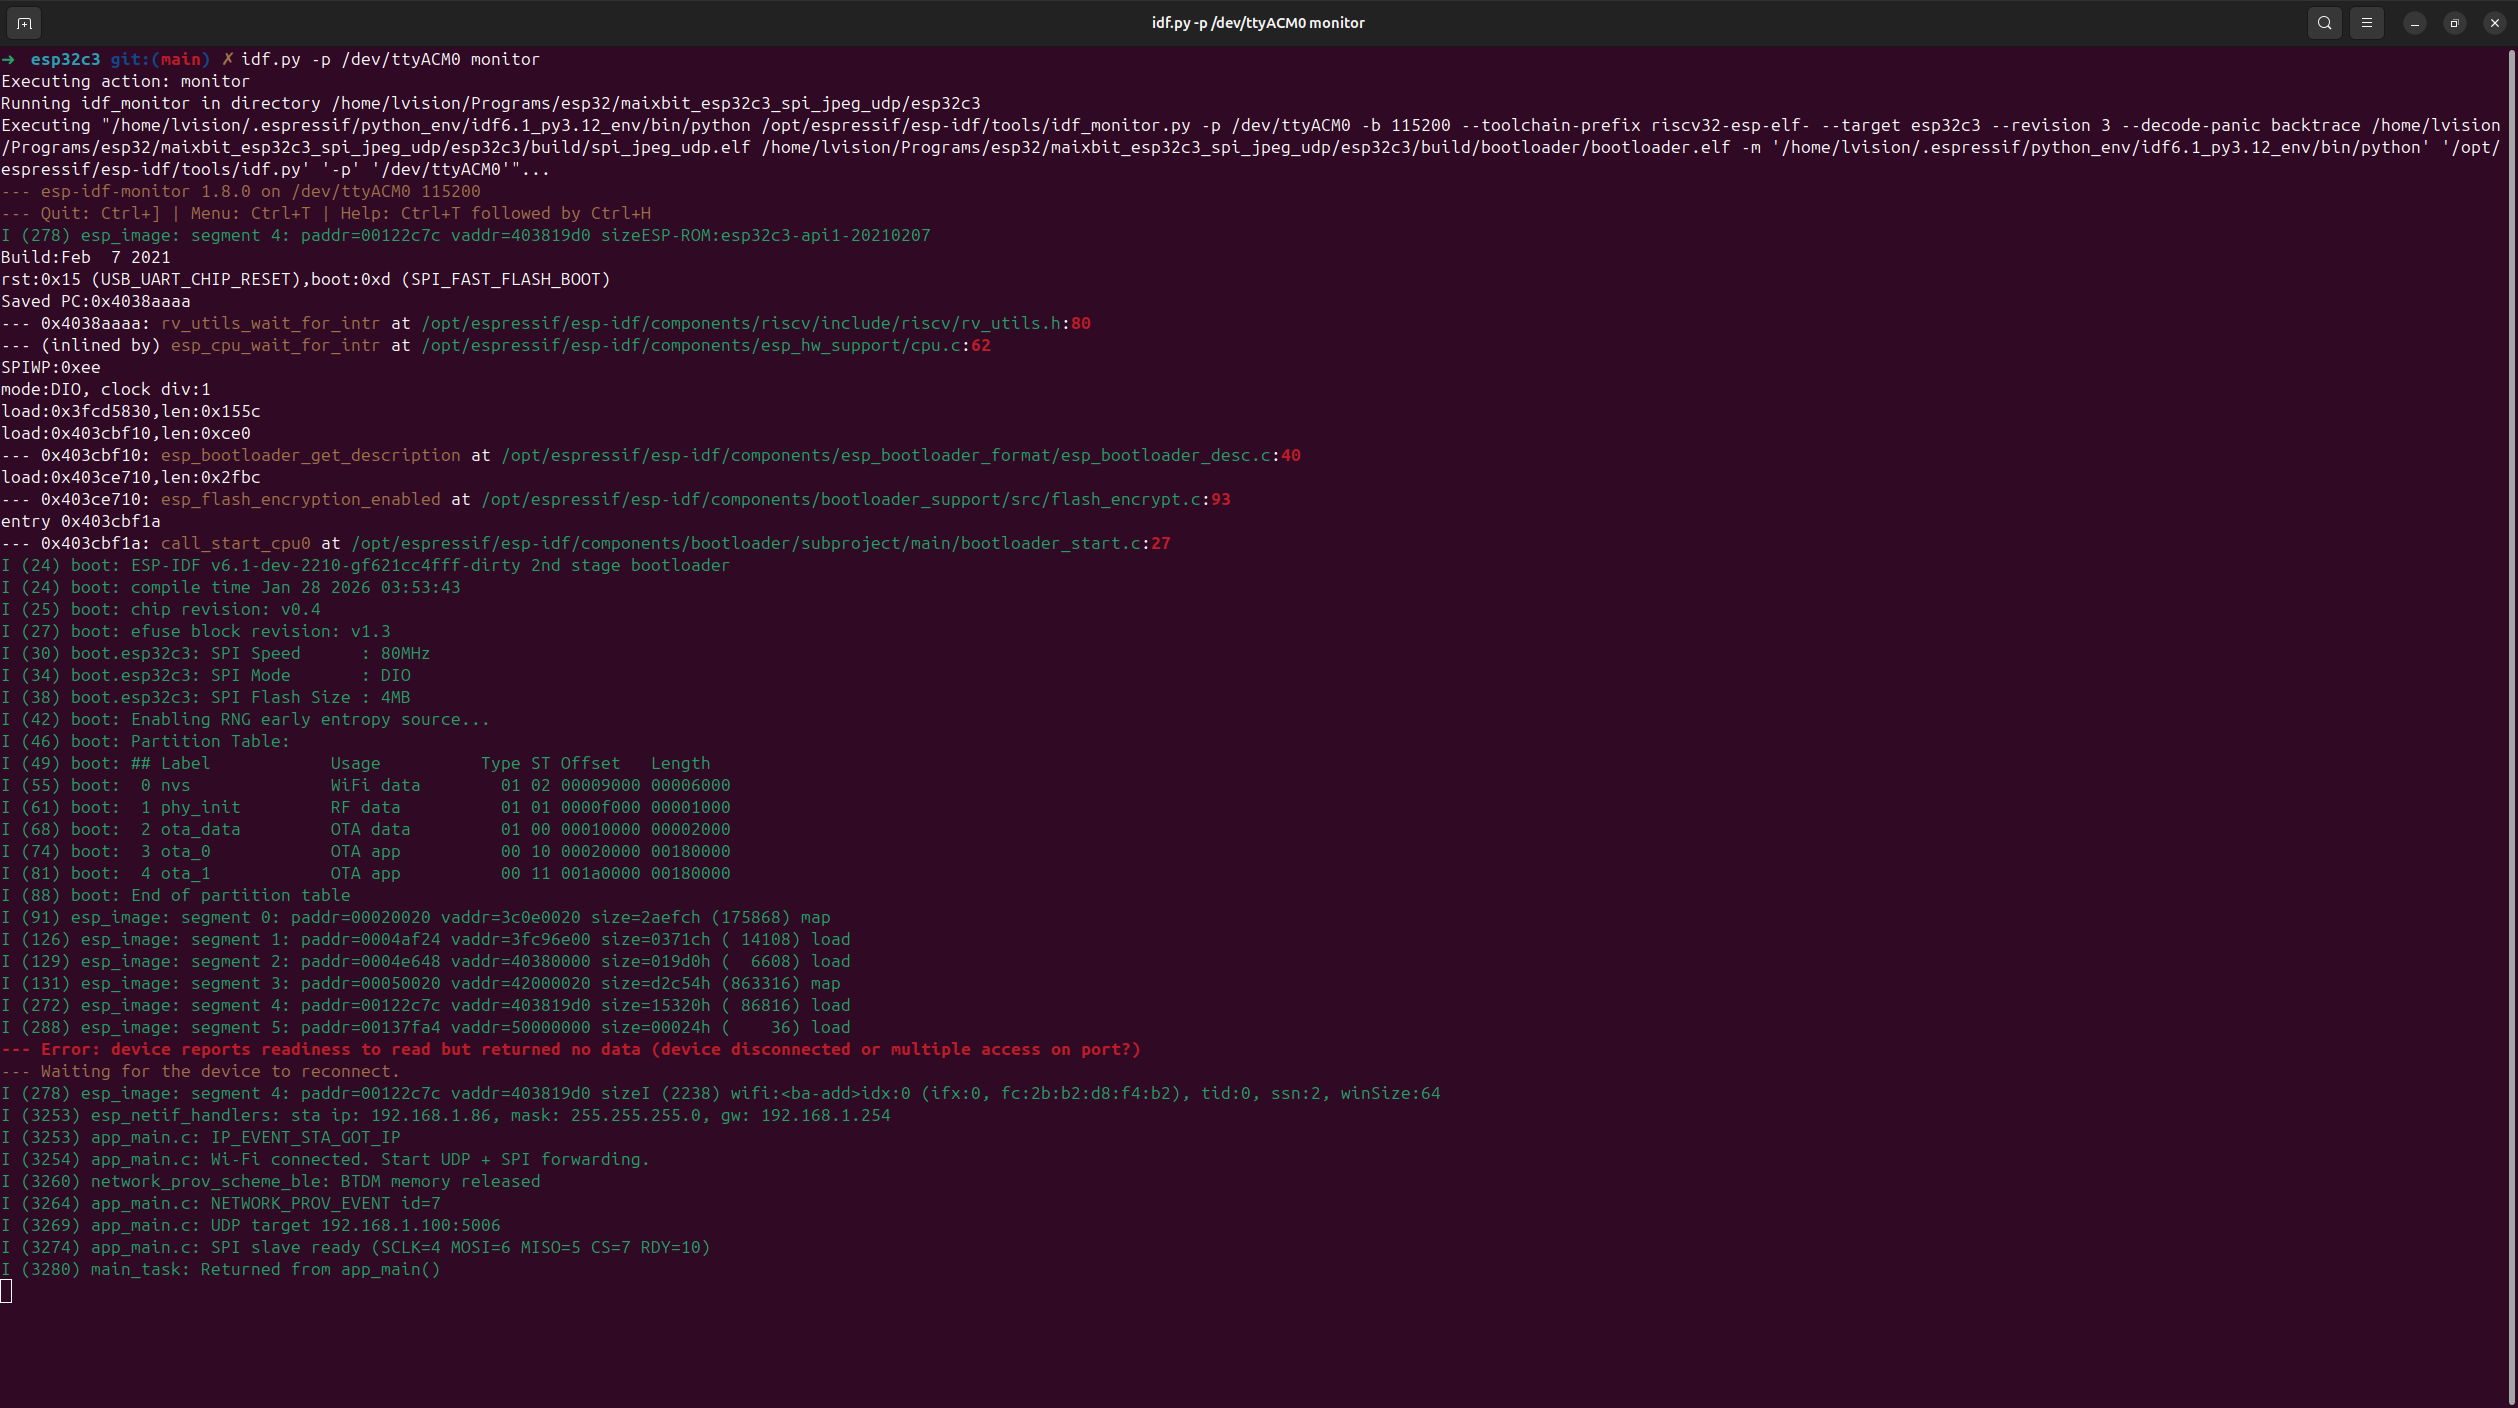
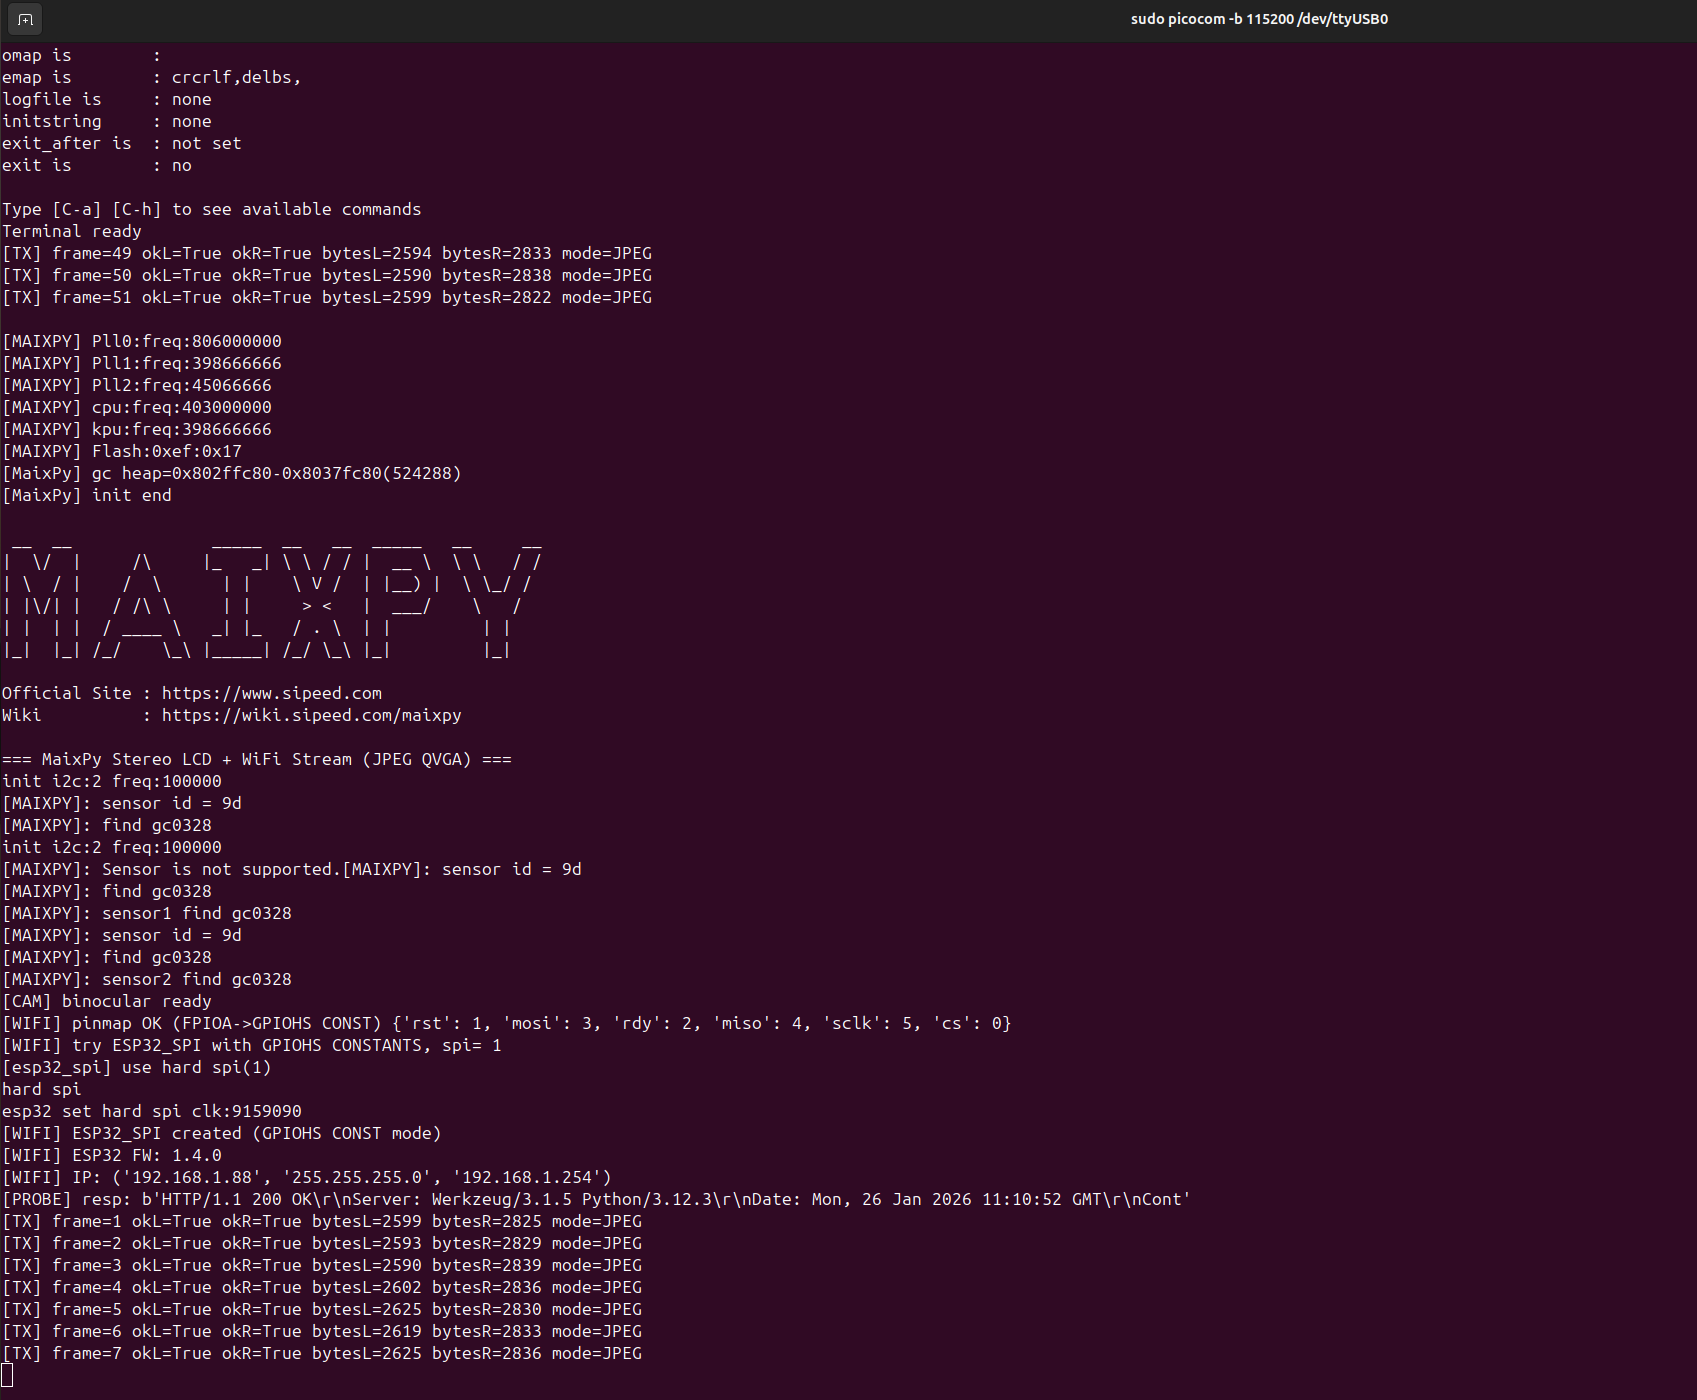
Streaming the stereo camera images over the MaixDuino’s onboard Wi-Fi to a remote display endpoint.
MaixDuino‘s Sipeed-M1 uses the FIXED hard SPI1 to communicate with its onboard ESP32-WROOM-32, where you need to use network.ESP32_SPI for communication via WiFi, as follows:
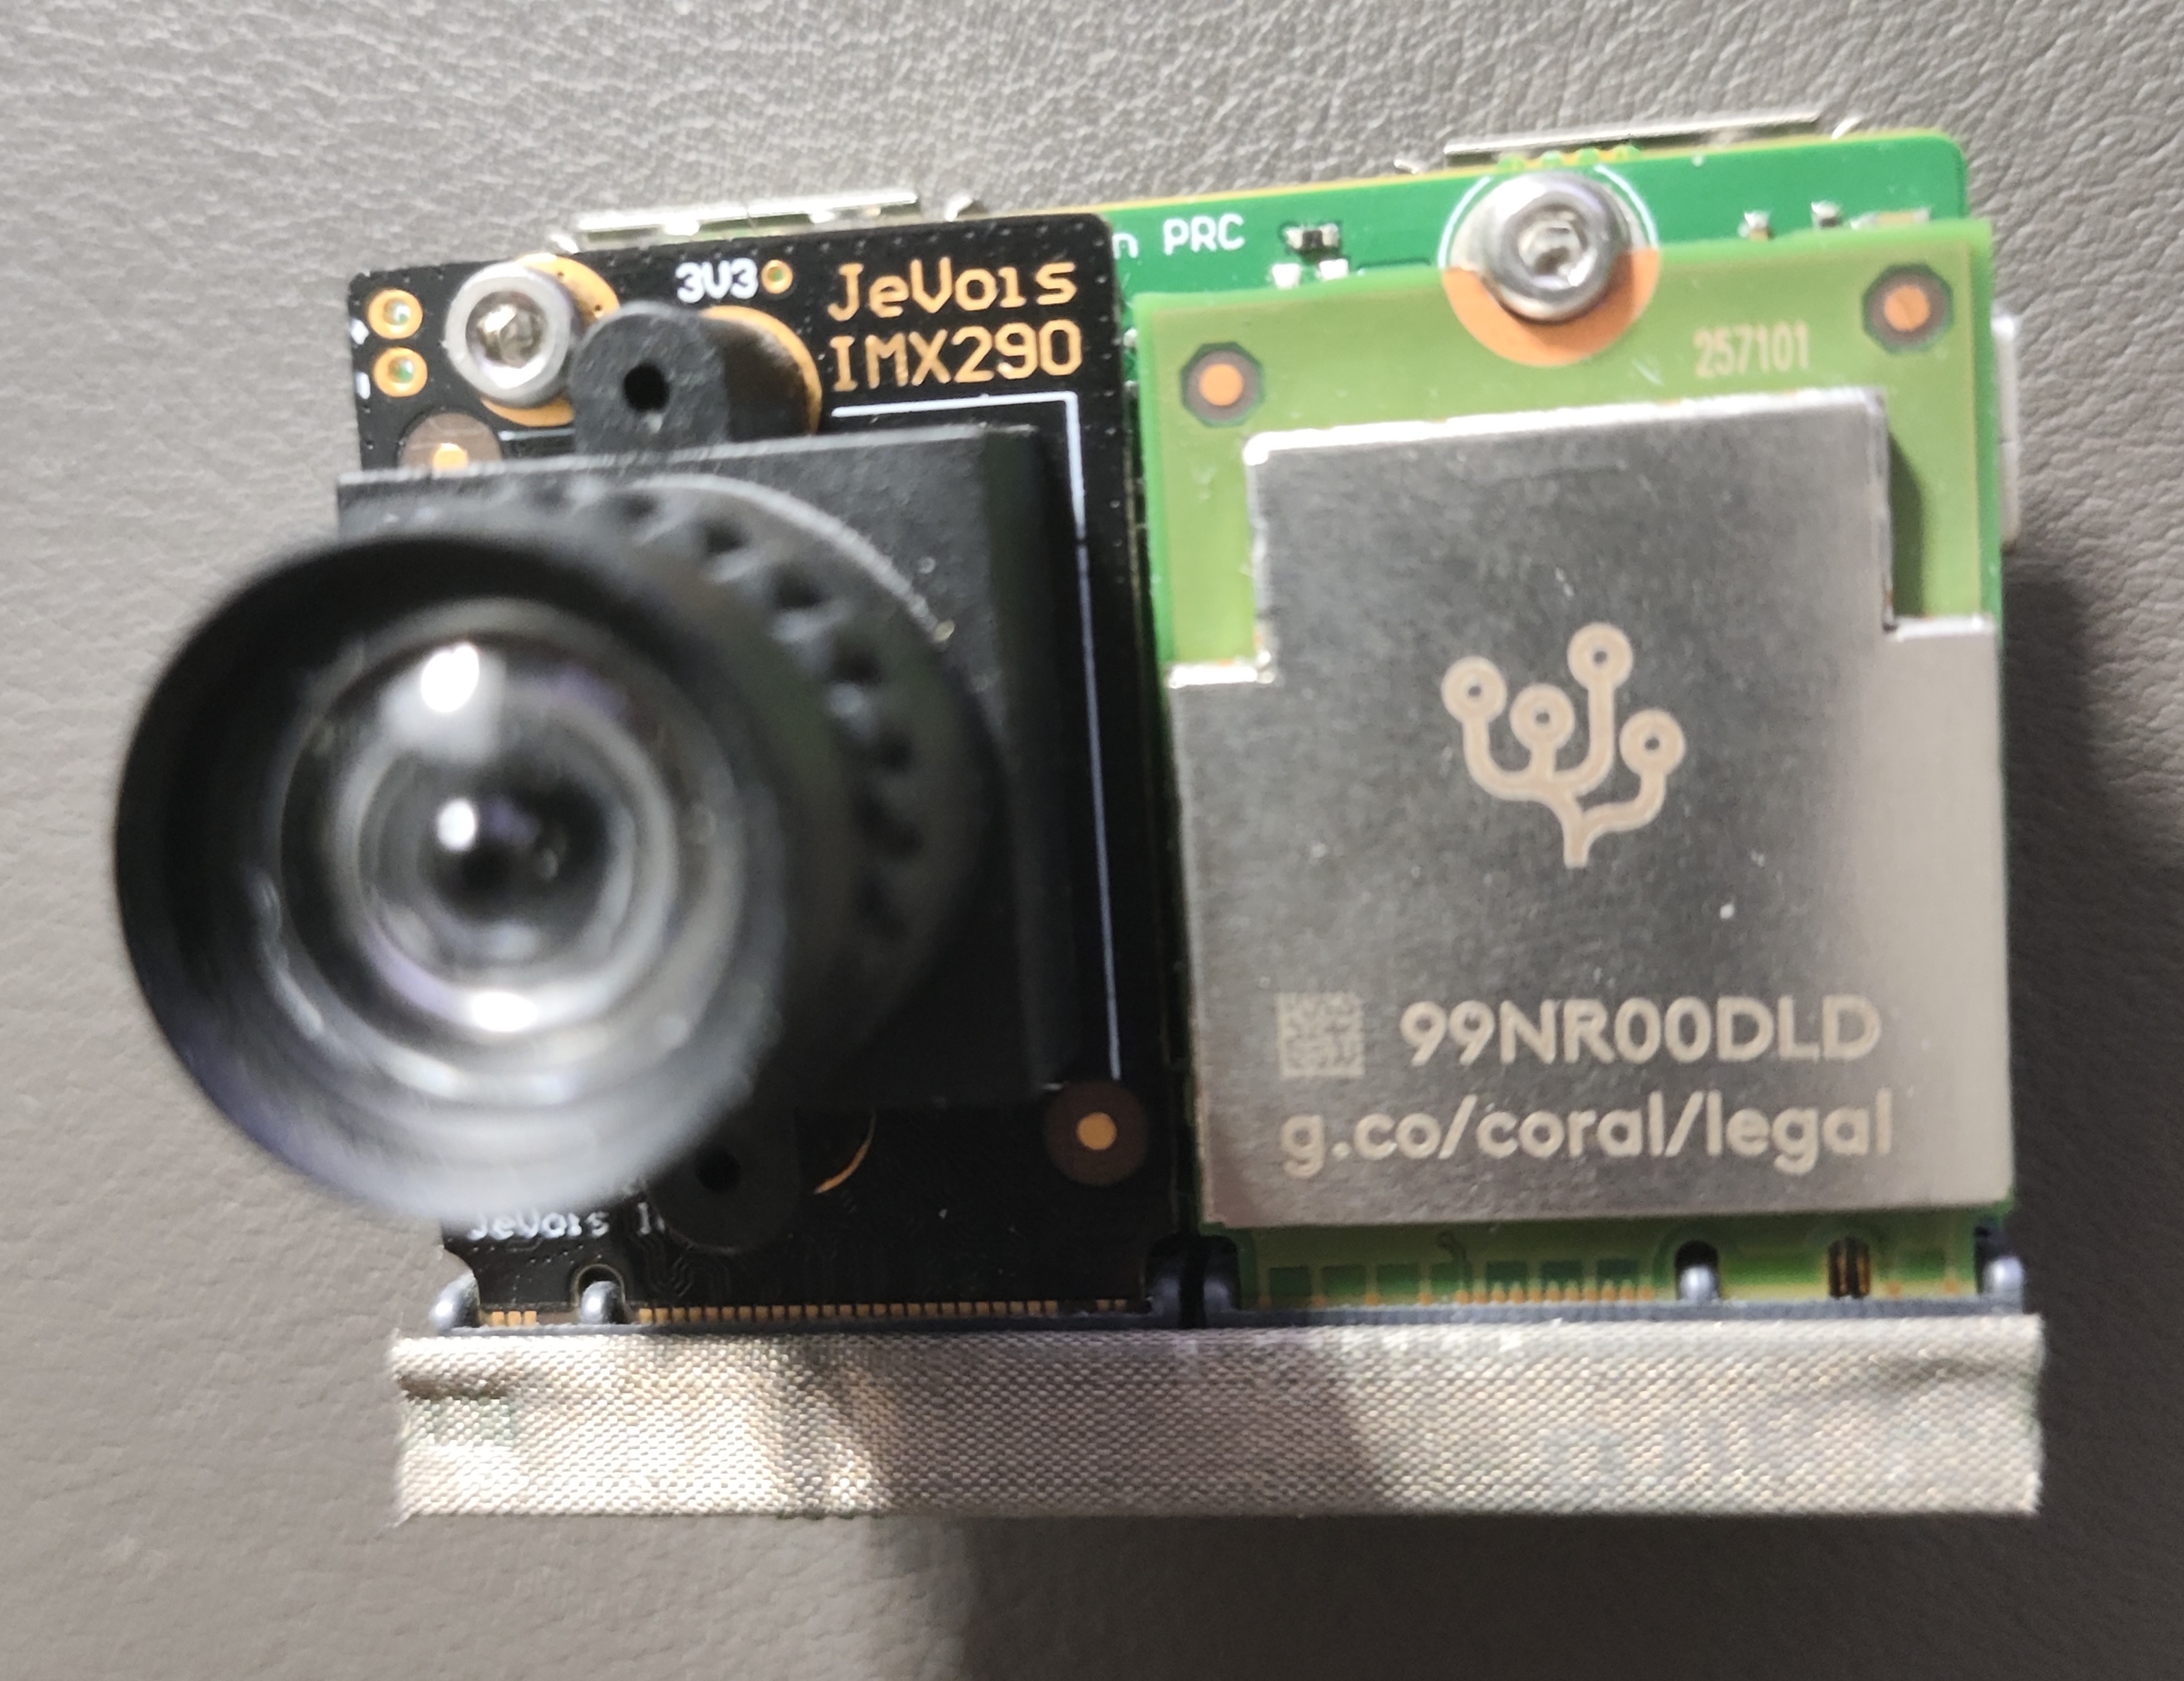
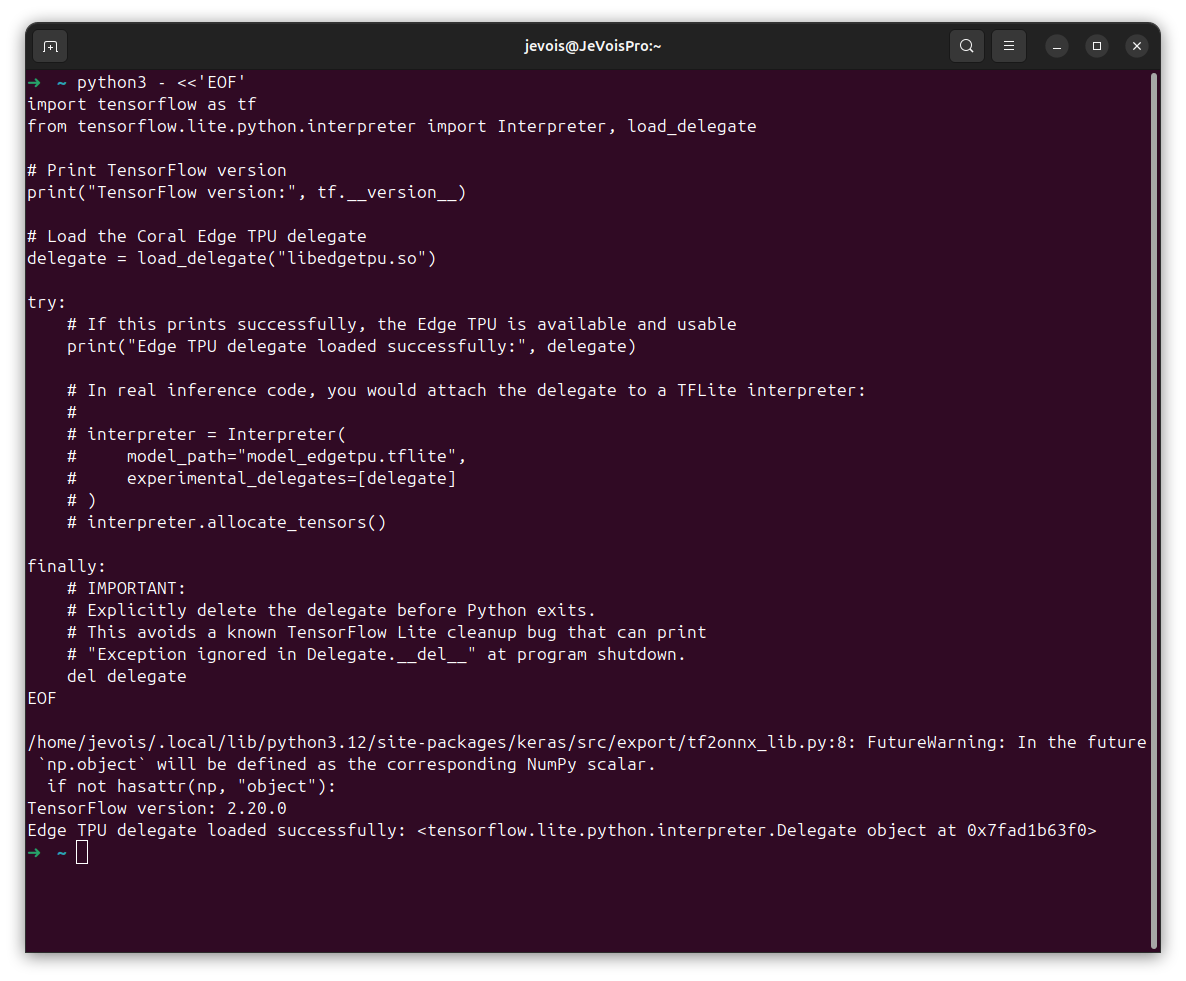
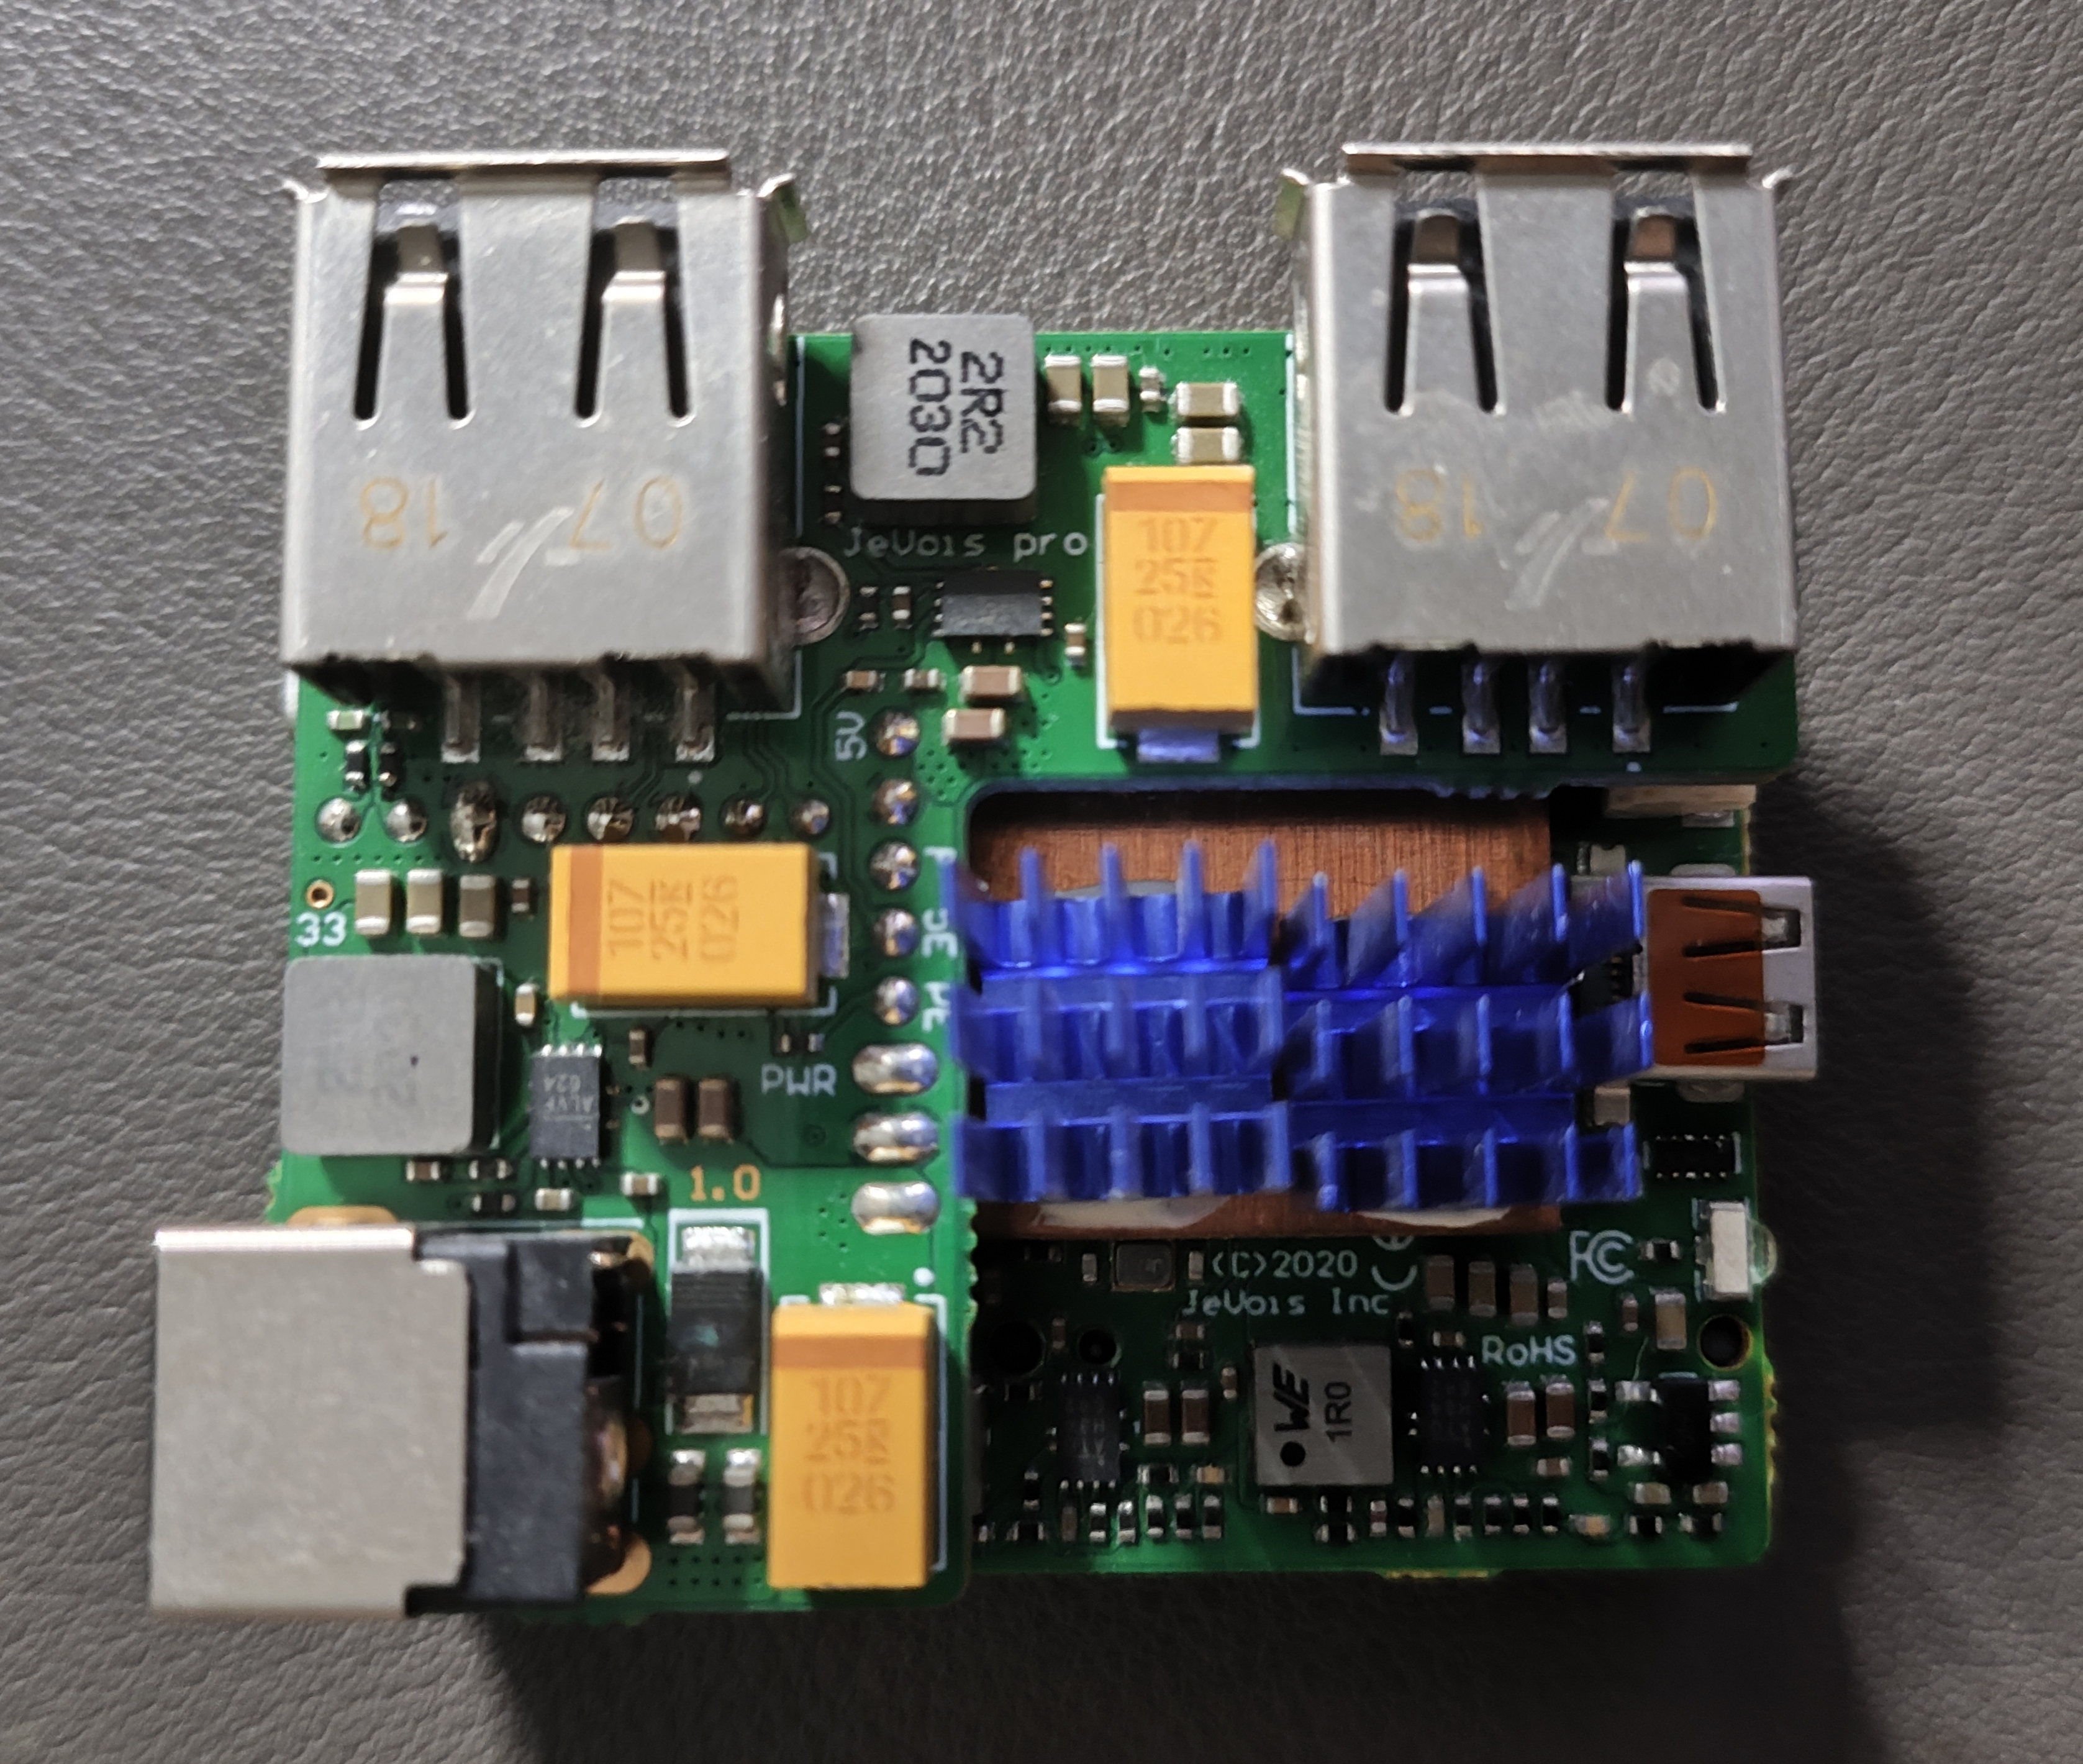
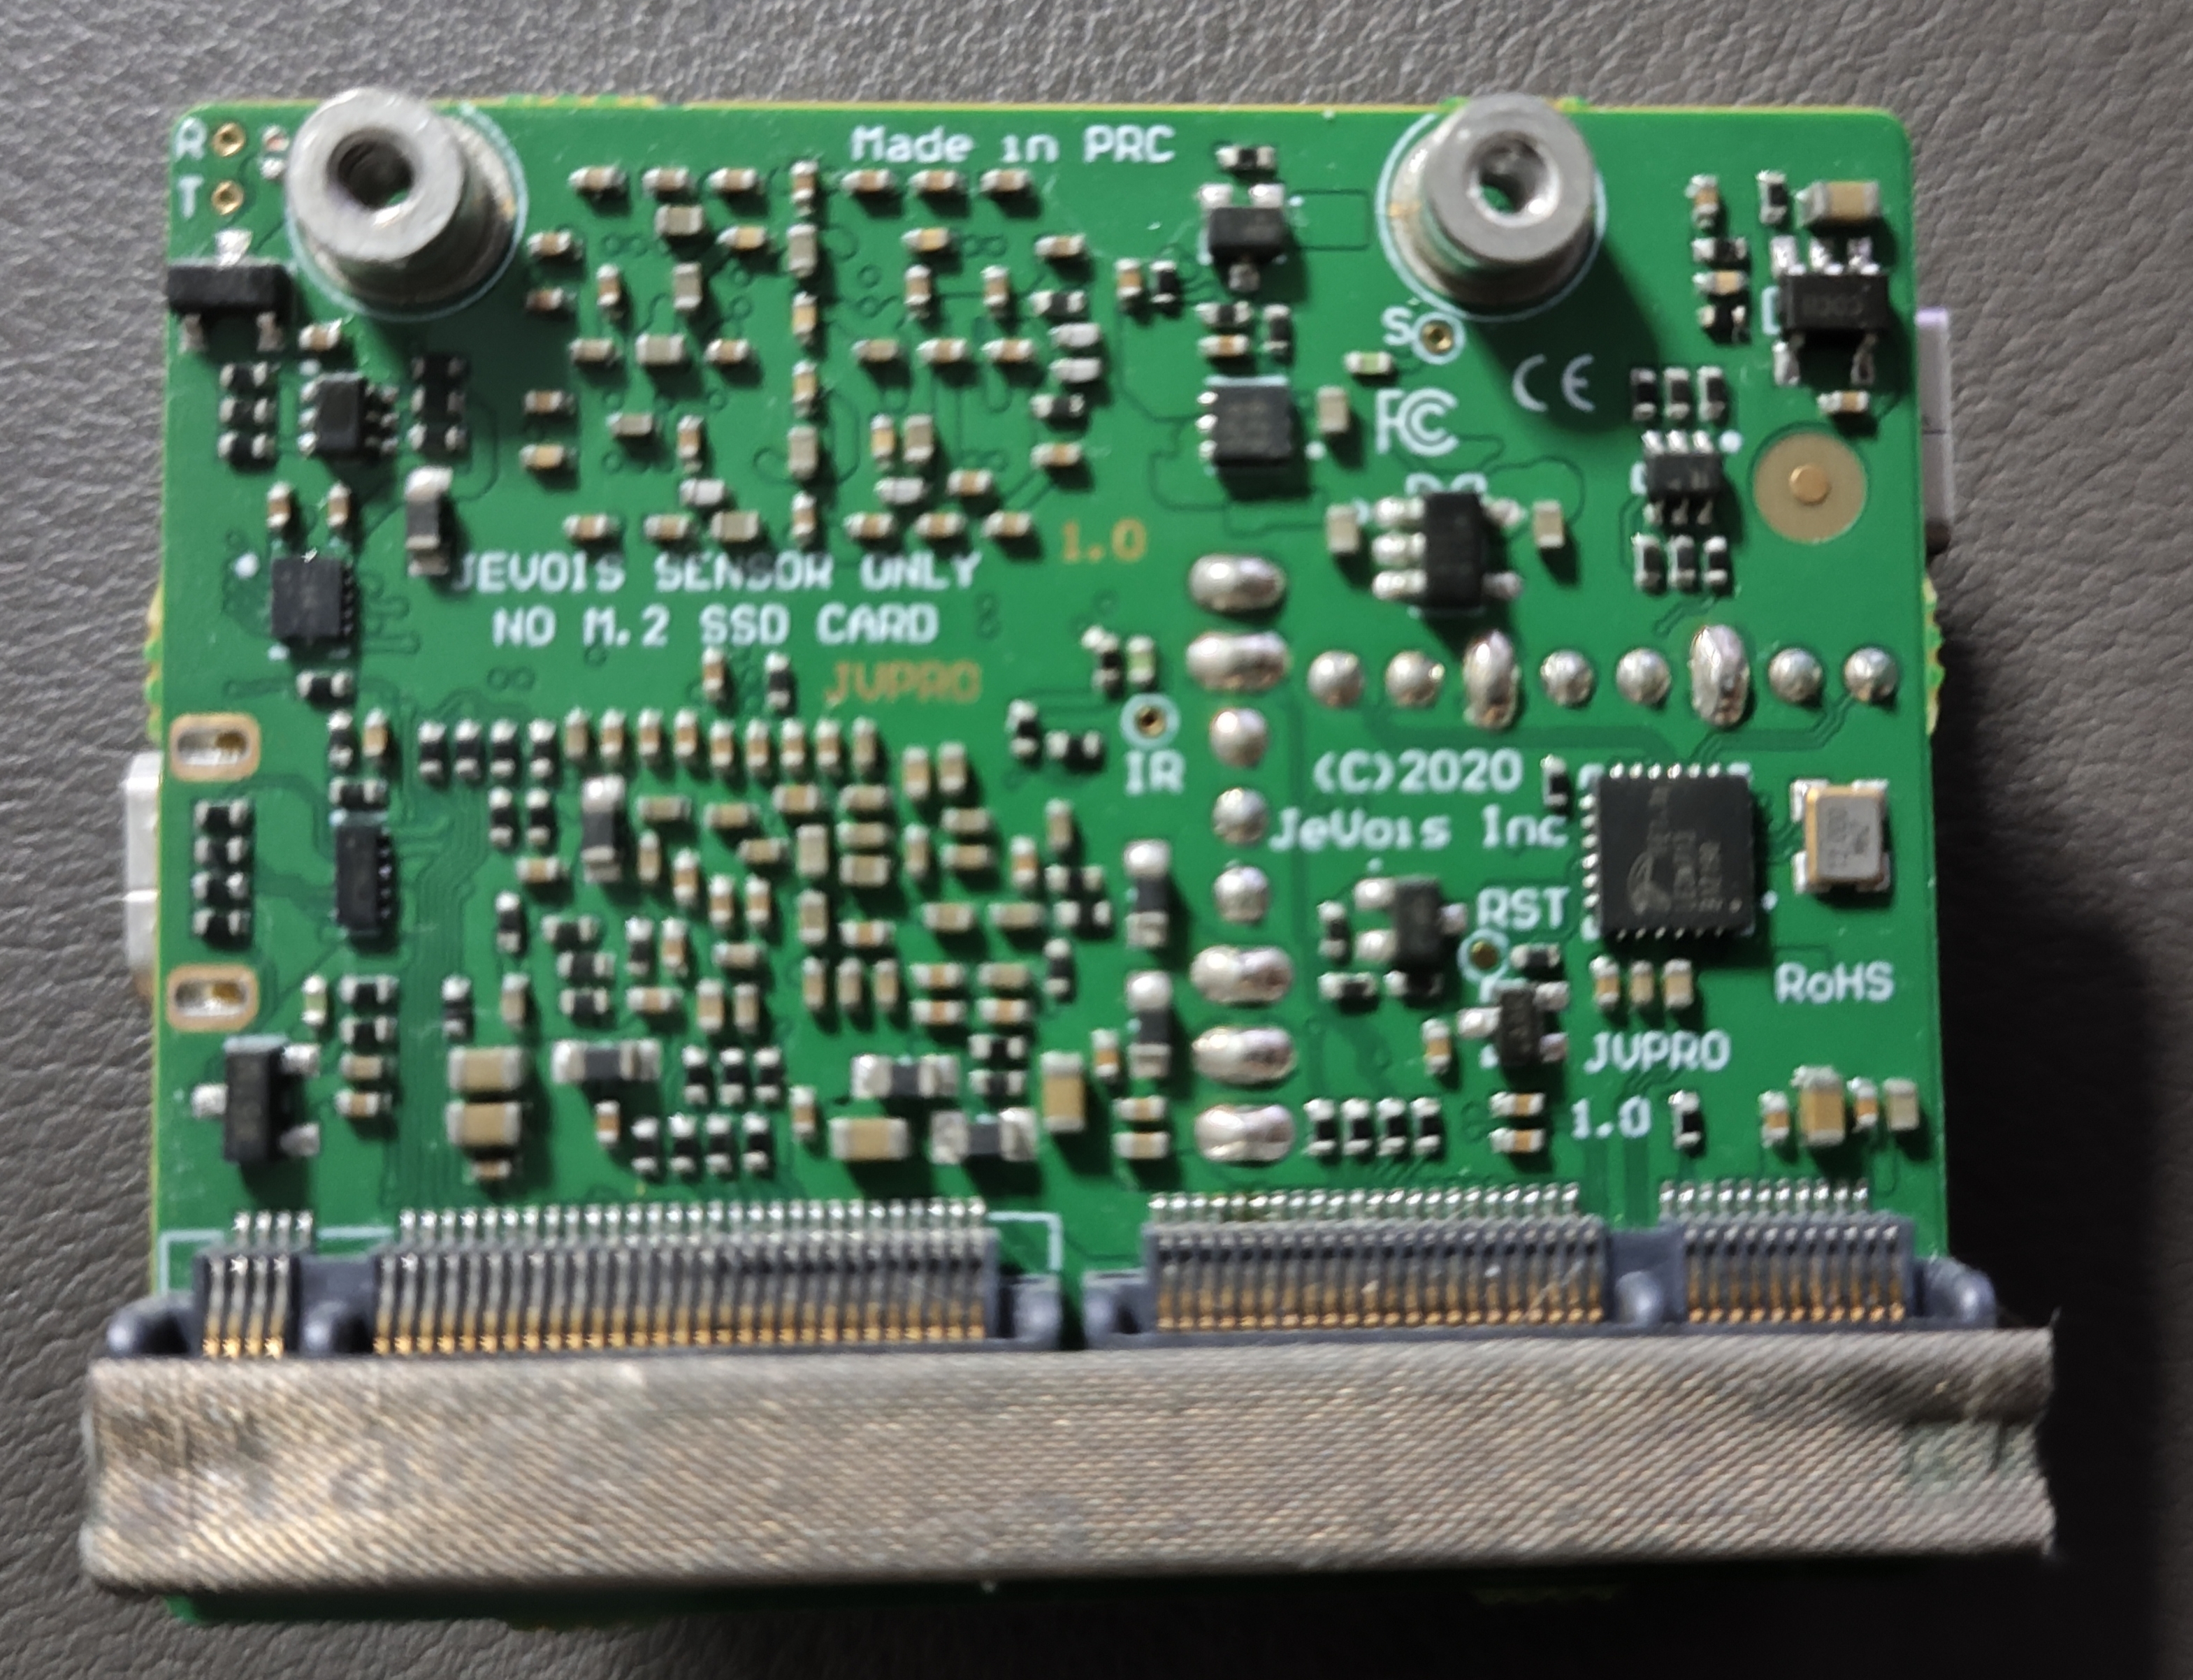
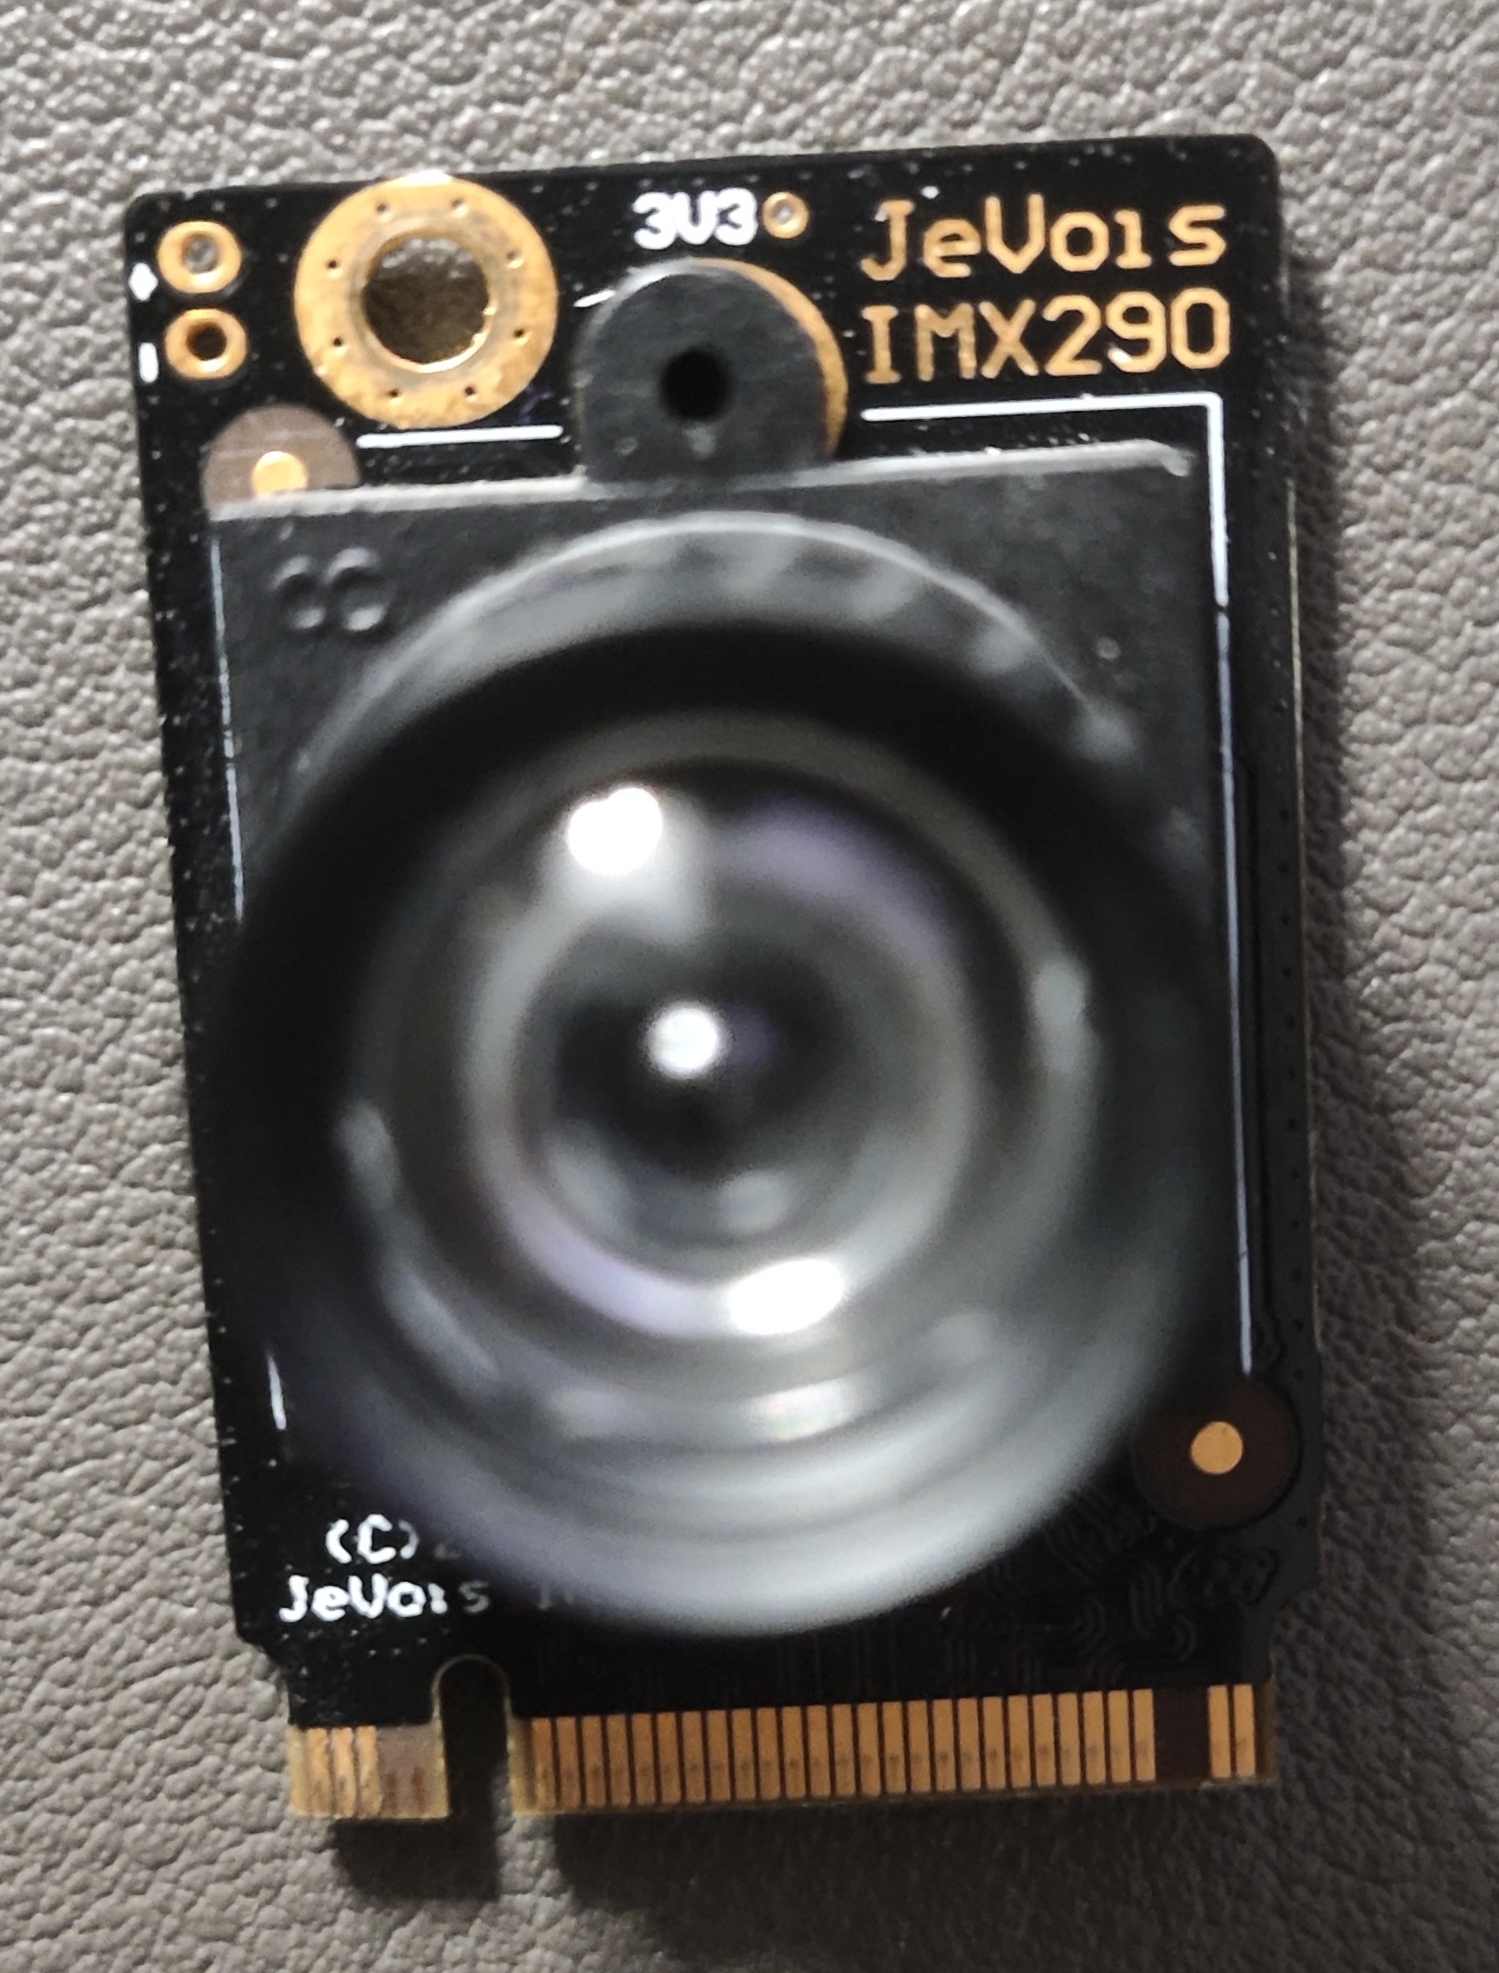
I had never realized before that the JeVois-Pro actually has such powerful computing capability. Today, while digging through some of my old gears, I suddenly came to realize that in addition to the 5 TOPs of computing capability on the SoC itself, my JeVois-Pro also has a Google CoralM.2 Accelerator A+E key installed, adding another 4 TOPs of computing power.
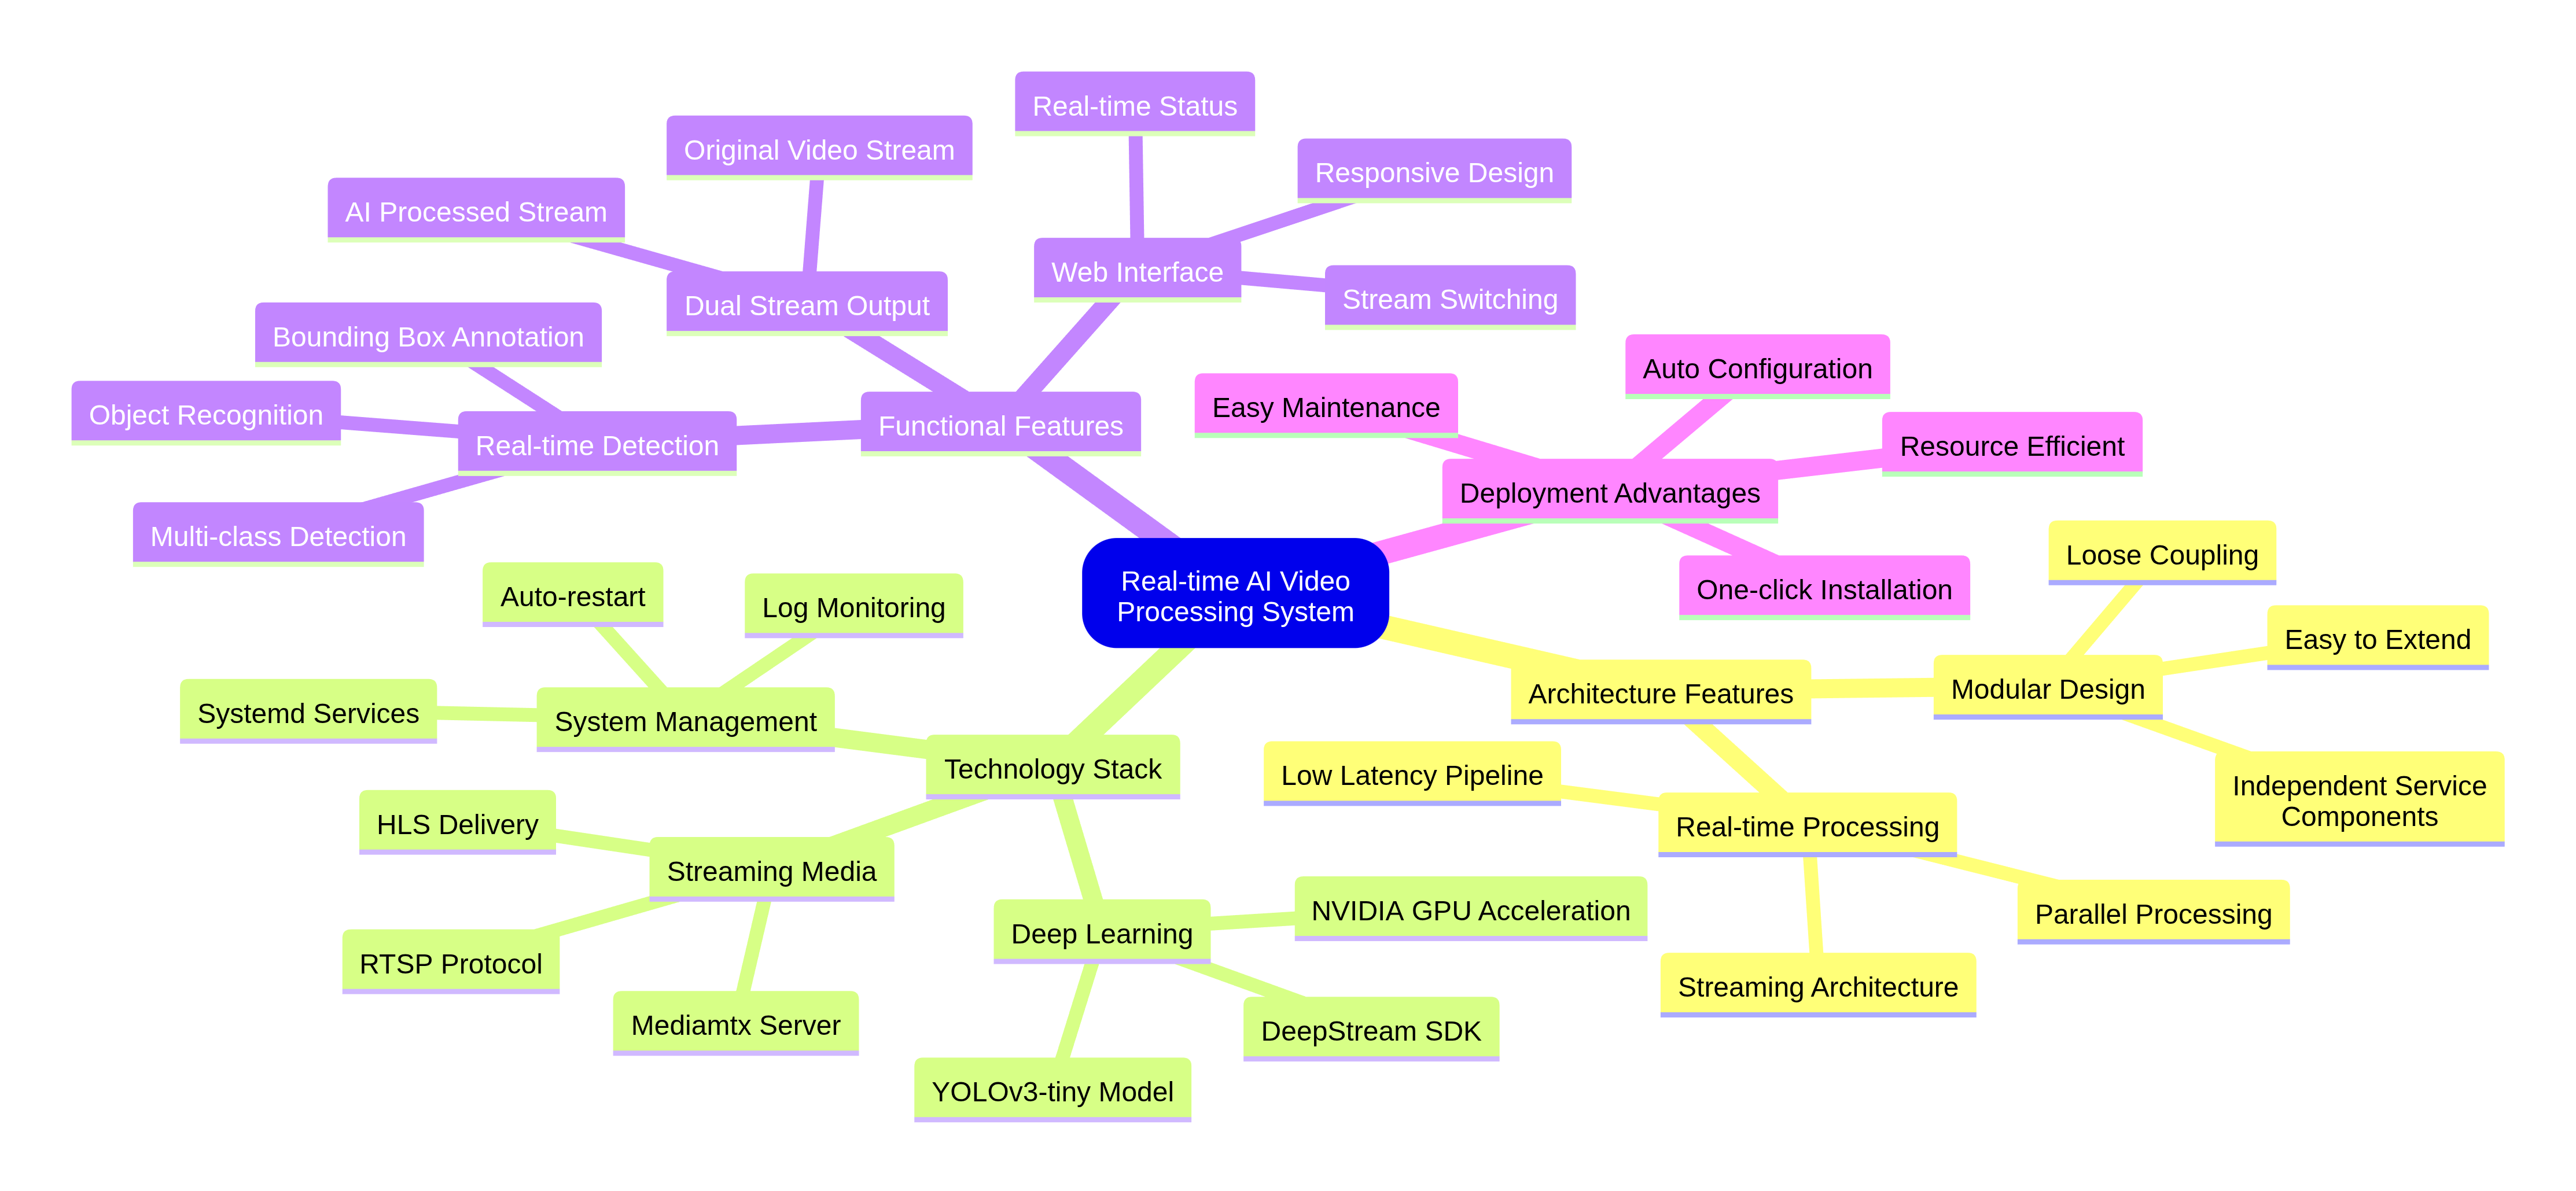
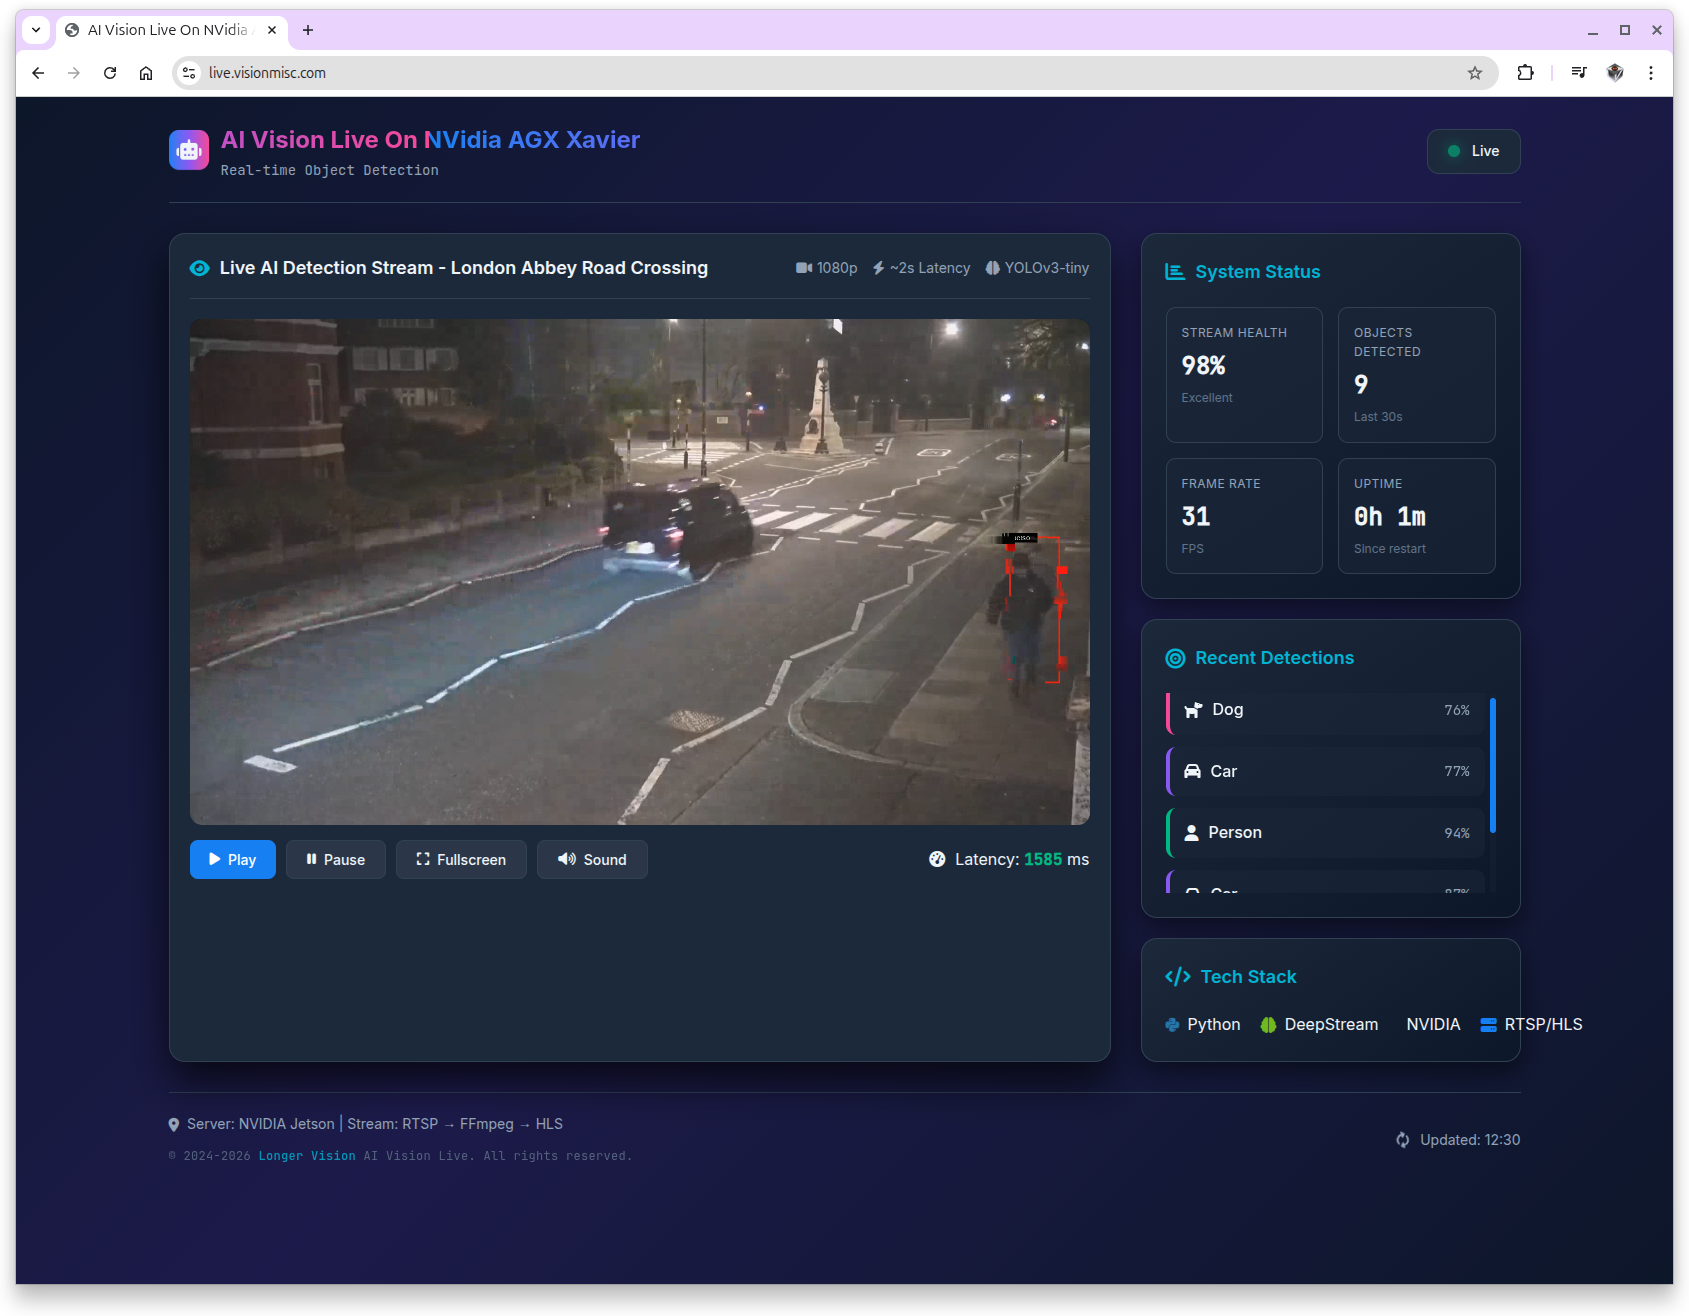
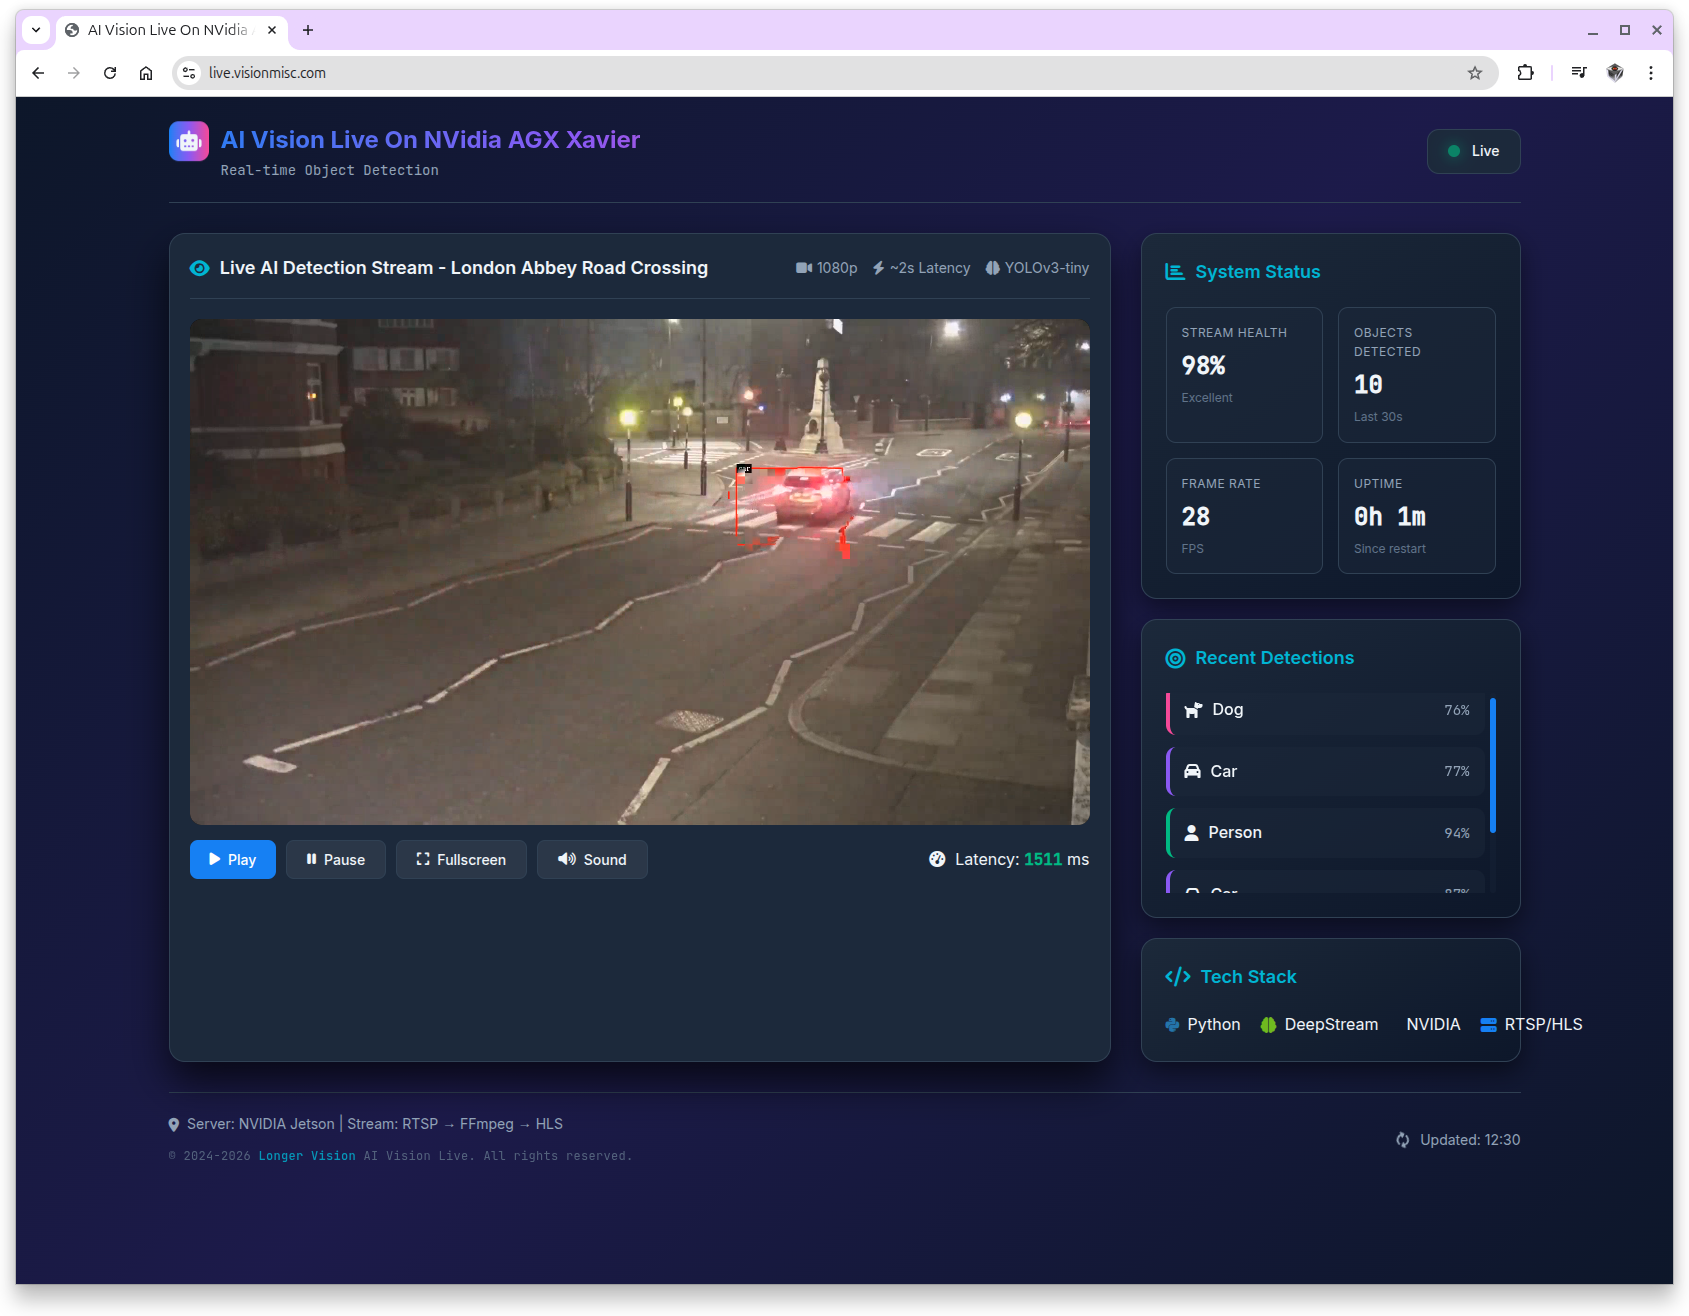
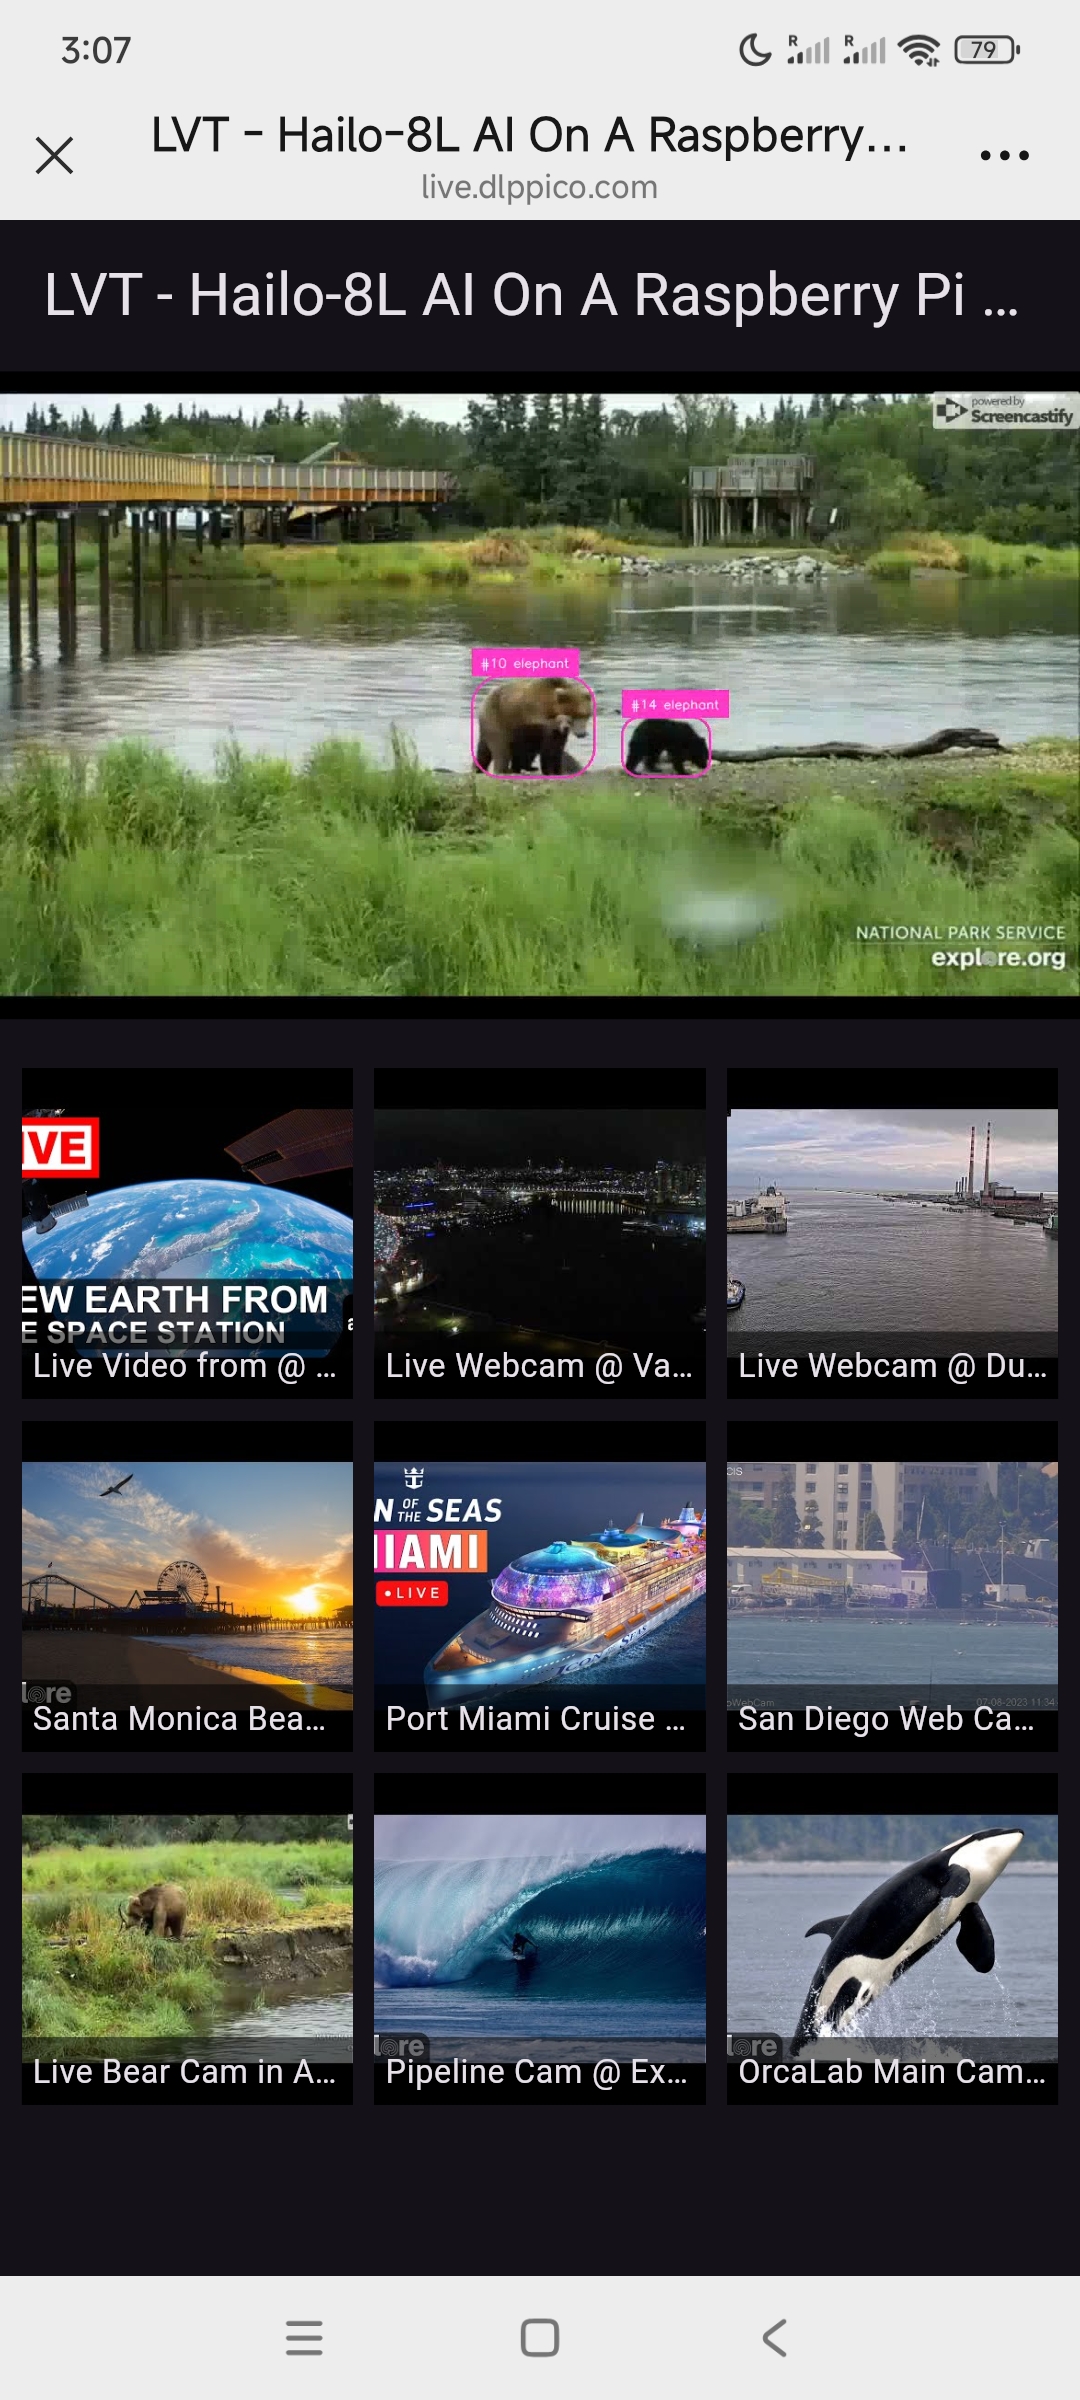
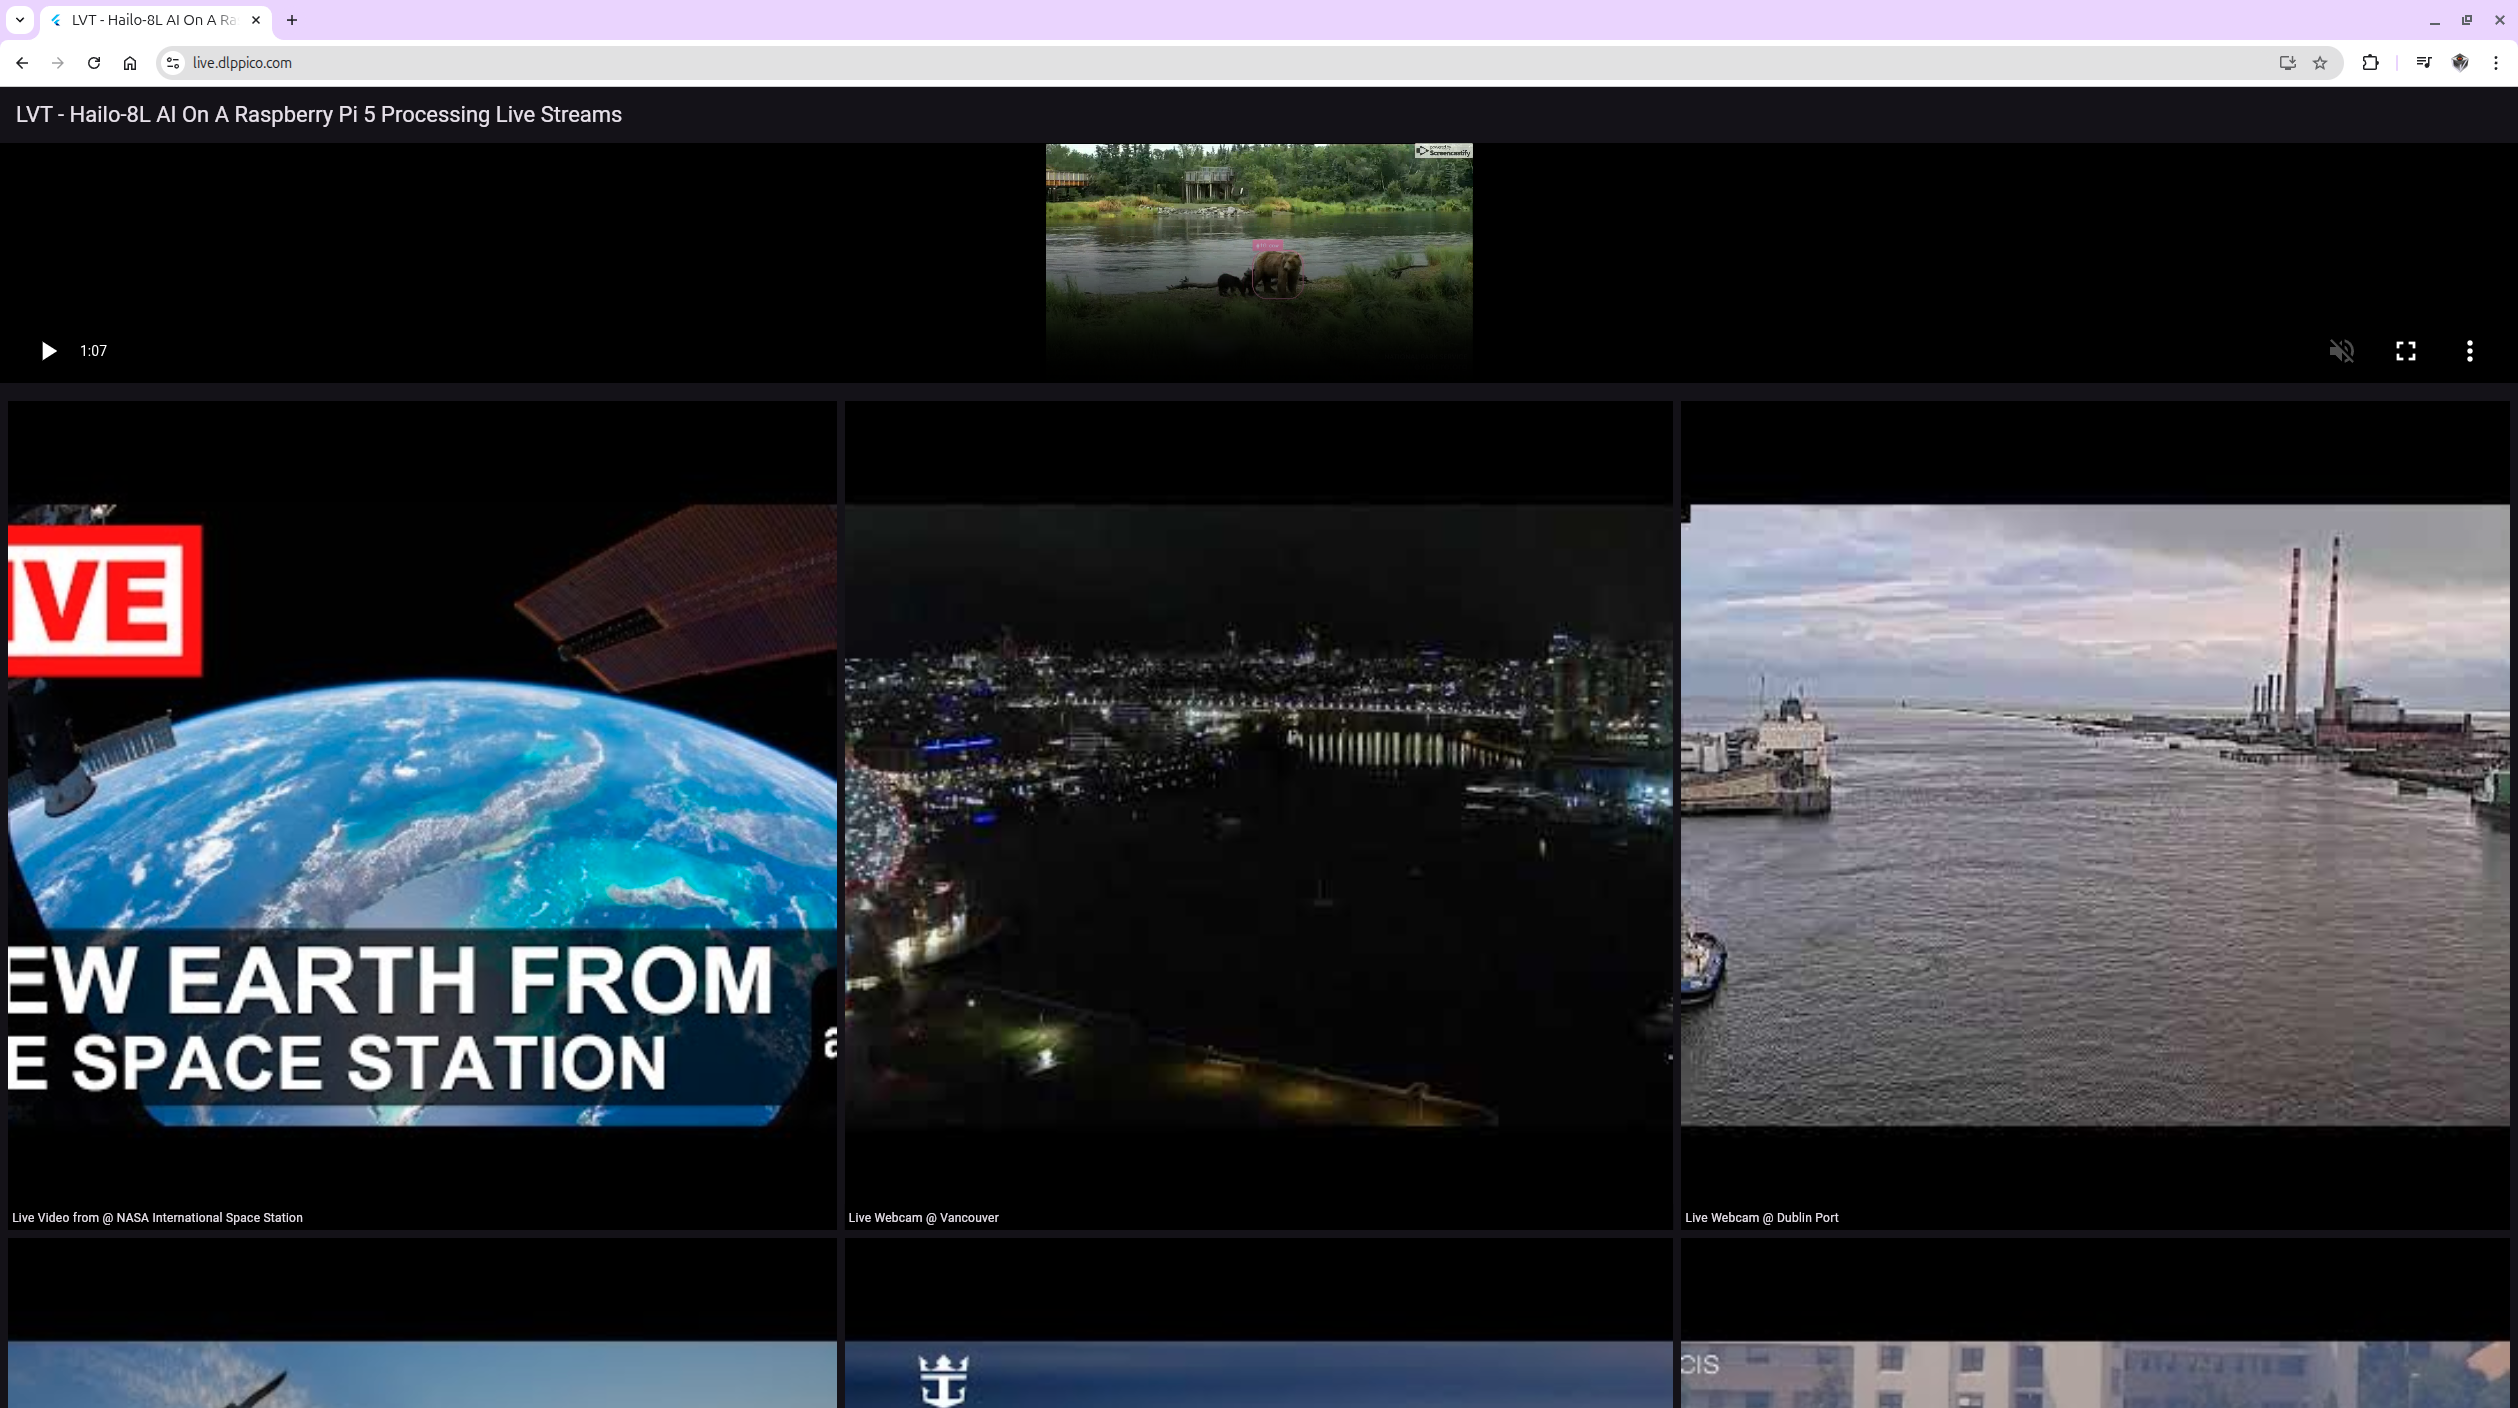
From my earlier blog about JeVois-Pro, it’s clear that I never really took full advantage of the computing power of the JeVois-Pro, and I also didn’t succeed in turning the JeVois-Pro into an RTSP server. However, in this blog post, I will carry out a comprehensive test.
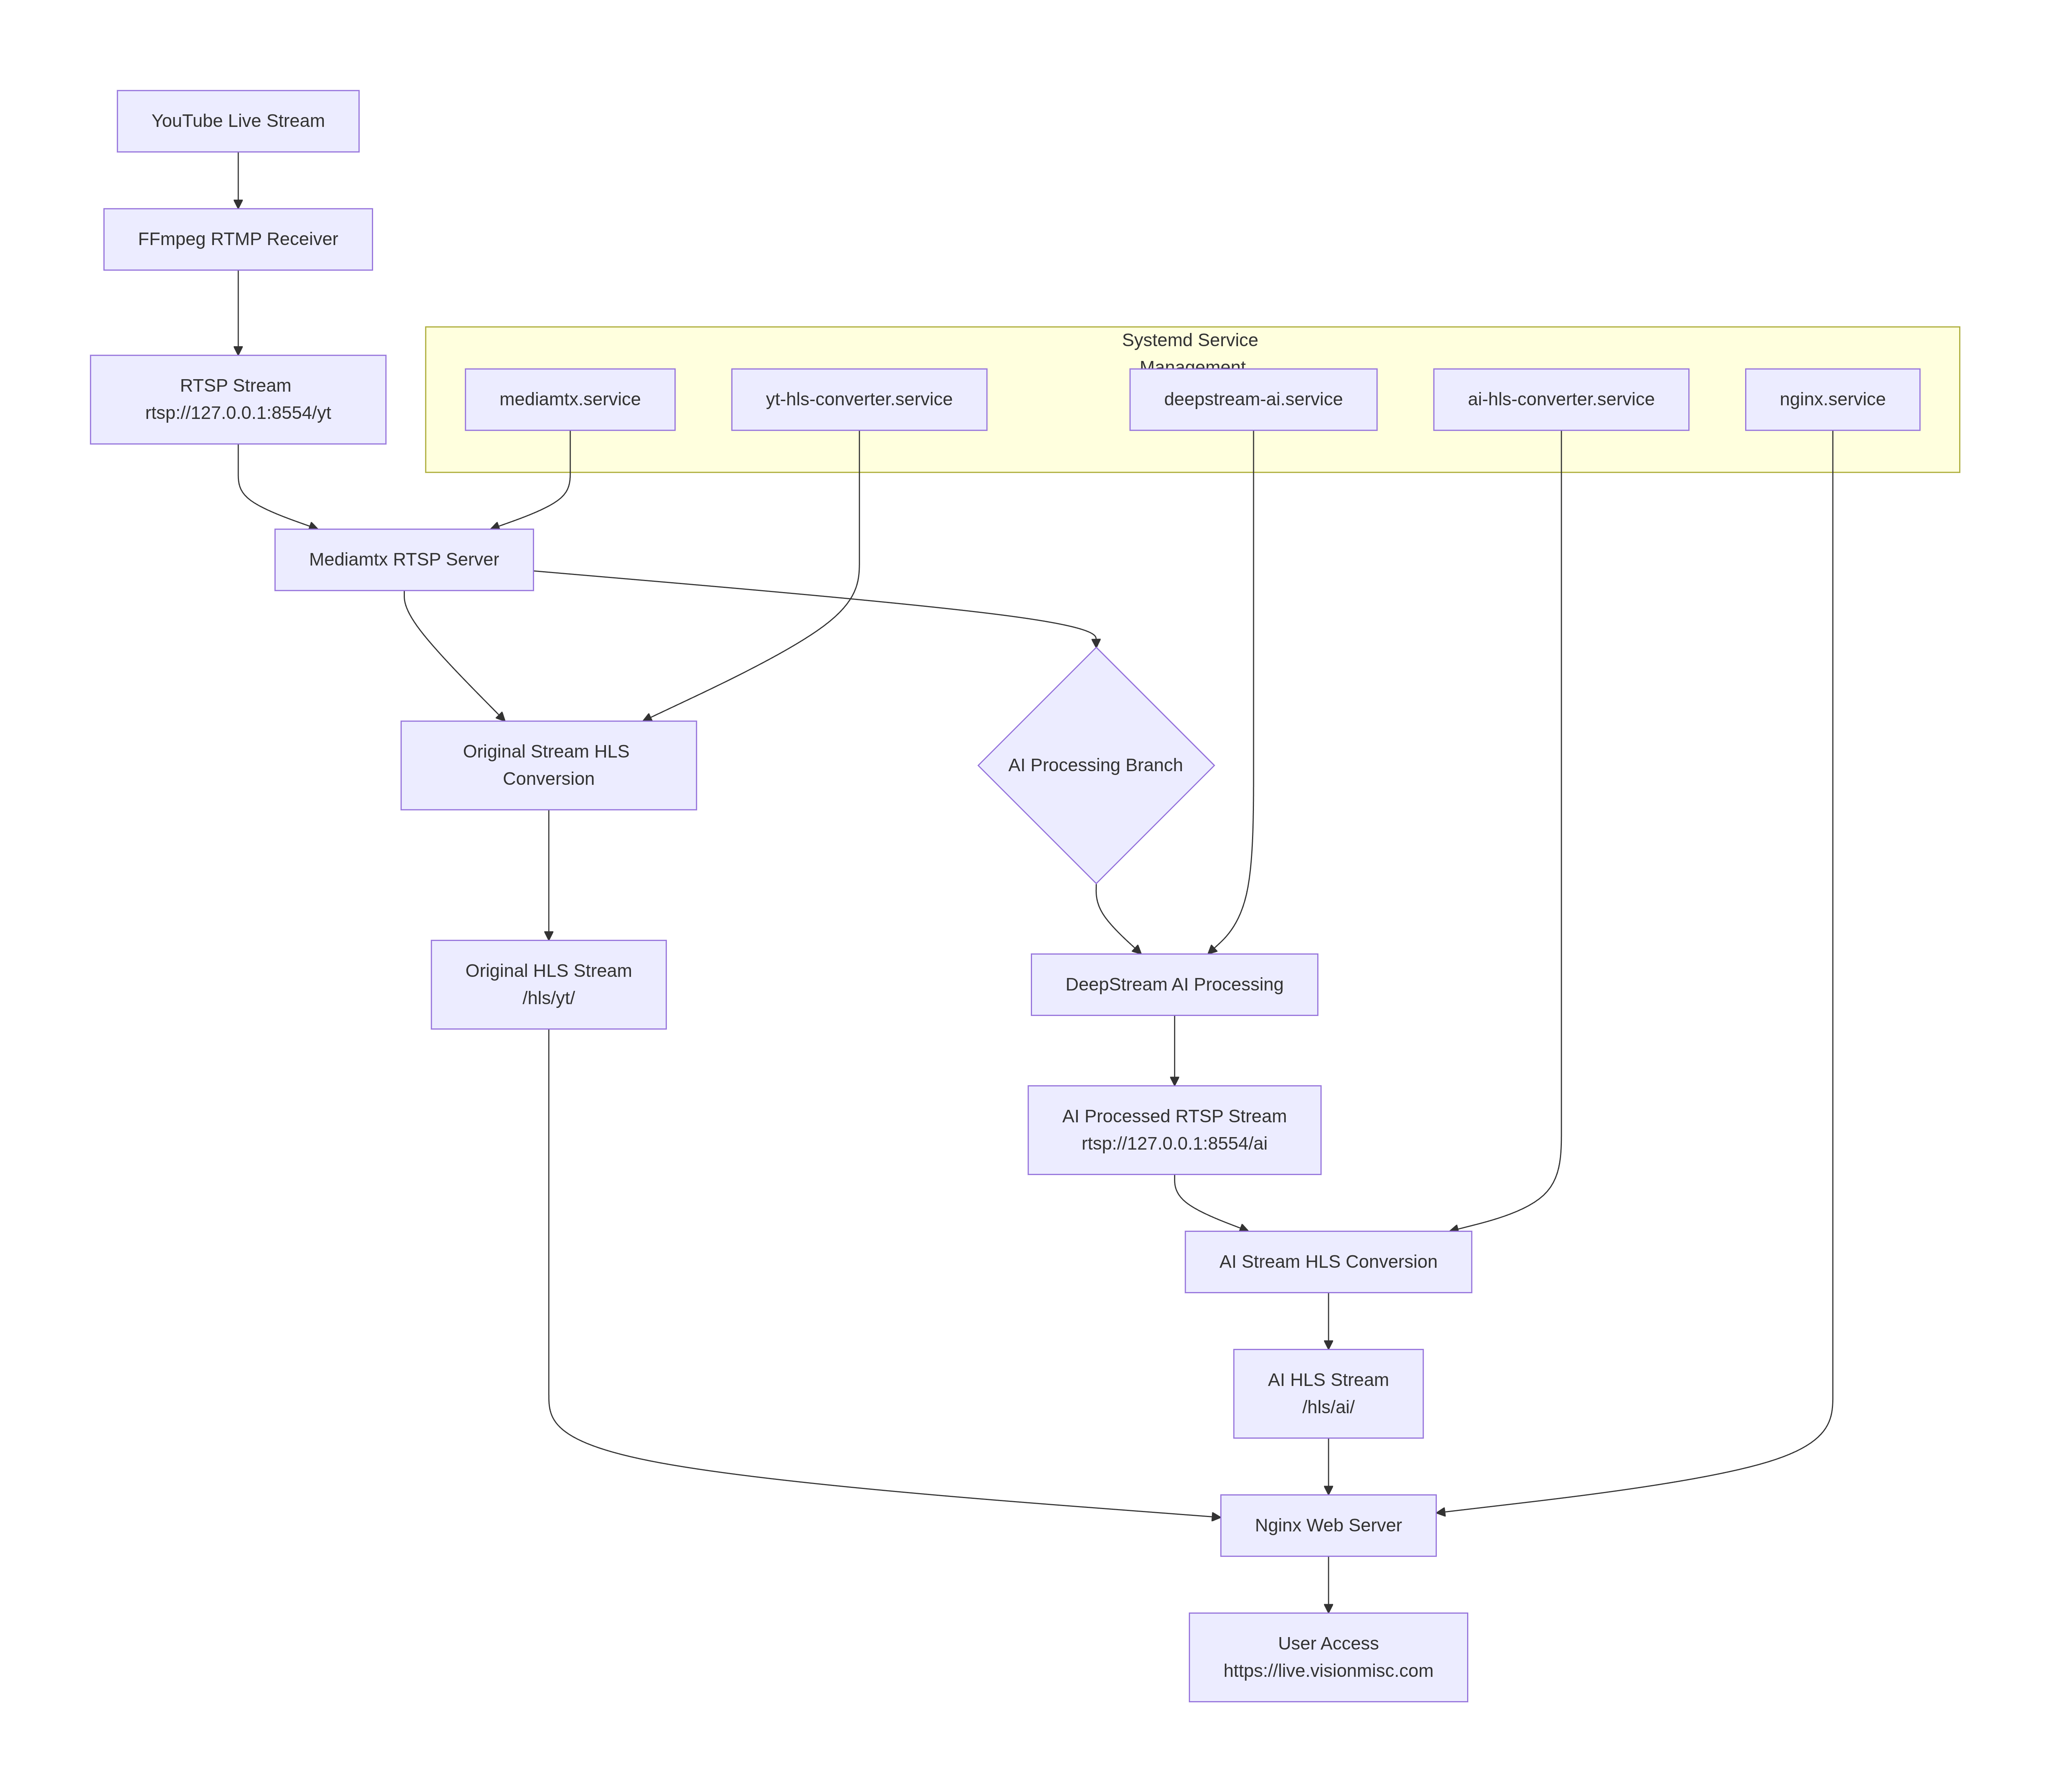
flowchart TD
    A[YouTube Live Stream] --> B[FFmpeg RTMP Receiver]
    B --> C[RTSP Stream rtsp://127.0.0.1:8554/yt]

    C --> D[Mediamtx RTSP Server]

    D --> E[Original Stream HLS Conversion]
    E --> F[Original HLS Stream<br>/hls/yt/]

    D --> G{AI Processing Branch}

    G --> H[DeepStream AI Processing]
    H --> I[AI Processed RTSP Stream<br>rtsp://127.0.0.1:8554/ai]

    I --> J[AI Stream HLS Conversion]
    J --> K[AI HLS Stream<br>/hls/ai/]

    F --> L[Nginx Web Server]
    K --> L

    L --> M[User Access<br>https://live.visionmisc.com]

    subgraph "Systemd Service Management"
        S1[mediamtx.service]
        S2[yt-hls-converter.service]
        S3[deepstream-ai.service]
        S4[ai-hls-converter.service]
        S5[nginx.service]
    end

    S1 --> D
    S2 --> E
    S3 --> H
    S4 --> J
    S5 --> L
➜  system systemctl list-units --type=service --state=active | grep -E "(mediamtx|hls|deepstream|mtx)"

  ai-hls-converter.service           loaded active running AI RTSP to HLS Converter
  deepstream-ai.service              loaded active running DeepStream AI Processing
  mediamtx.service                   loaded active running MediaMTX (RTSP/HLS/WebRTC Media Server)
  youtube-to-mtx@lvision.service     loaded active running YouTube -> MediaMTX RTSP Publisher (yt) for user lvision
  yt-hls-converter.service           loaded active running YouTube RTSP to HLS Converter
➜  system
➜ system cat mediamtx.service [Unit] Description=MediaMTX (RTSP/HLS/WebRTC Media Server) After=network-online.target Wants=network-online.target # Add this line to allow other services to declare dependencies Before=yt-hls-converter.service ai-hls-converter.service deepstream-ai.service
[Service] Type=simple # Add user/group to maintain consistency with other services User=lvision Group=lvision # Add environment variables to ensure correct working environment Environment=PATH=/usr/local/sbin:/usr/local/bin:/usr/sbin:/usr/bin:/sbin:/bin
# Adjust restart policy - keep your choice, but consider stricter restart Restart=on-failure RestartSec=2 # Add startup timeout - mediamtx starts quickly, but just in case TimeoutStartSec=10
➜ system cat yt-hls-converter.service [Unit] Description=YouTube RTSP to HLS Converter After=network.target mediamtx.service Wants=mediamtx.service # If you want to start only after /yt path is ready, you can add: # After=mediamtx.service # BindsTo=mediamtx.service
➜ system cat ai-hls-converter.service [Unit] Description=AI RTSP to HLS Converter # Key Modification 1: Add the dependency of deepstream-ai.service After=deepstream-ai.service mediamtx.service network.target Wants=deepstream-ai.service mediamtx.service # If you want to start only after /ai path is ready, you can add: # After=mediamtx.service # BindsTo=mediamtx.service
# It's possible to use regular expressions by using a tilde as prefix, # for example "~^(test1|test2)$" will match both "test1" and "test2", # for example "~^prefix" will match all paths that start with "prefix". paths: # example: # my_camera: # source: rtsp://my_camera yt: runOnDemand: /usr/local/bin/youtube_to_mtx.sh runOnDemandRestart: yes runOnDemandStartTimeout: 30s runOnDemandCloseAfter: 10s
# Log to stderr (mediamtx will capture) echo"=== YouTube Stream Start $(date) ===" >&2 echo"Source: $YOUTUBE_URL" >&2 echo"Destination: $MTX_RTSP" >&2
# Get best stream URL (filter out warning messages) echo"Fetching stream URL..." >&2 STREAM_URL=$(yt-dlp -f "best[height<=1080]" -g "$YOUTUBE_URL" 2>/dev/null | grep -E "^https?://" | head -1)
if [ -z "$STREAM_URL" ]; then echo"Error: Unable to fetch stream URL" >&2 # Debug: show full output echo"Attempting to fetch stream URL (with debugging):" >&2 yt-dlp -f "best[height<=1080]" -g "$YOUTUBE_URL" >&2 exit 1 fi
echo"Stream URL fetched successfully" >&2 echo"Starting stream to MediaMTX..." >&2
➜ ~ cat /usr/local/bin/rtsp_to_hls_ai.sh #!/usr/bin/env bash set -euo pipefail
# Modification 1: RTSP URL points to AI stream RTSP_URL="rtsp://127.0.0.1:8554/ai" # Modification 2: HLS directory points to ai HLS_DIR="/var/www/live.visionmisc.com/html/hls/ai" HLS_M3U8="${HLS_DIR}/index.m3u8" # Modification 3: log file is now named as AI version LOG_FILE="/home/lvision/logs/rtsp_to_hls_ai.log"
# Simple logging function log() { echo"[$(date '+%Y-%m-%d %H:%M:%S')] $*" | tee -a "${LOG_FILE}" }
log"=== Starting AI RTSP -> HLS Converter ==="
# Clean up old files find "${HLS_DIR}" -name "*.ts" -delete 2>/dev/null || true rm -f "${HLS_M3U8}" 2>/dev/null || true
# Added: Wait for AI RTSP stream to be ready (DeepStream may need time to start) log"Waiting for AI RTSP stream to be ready..." MAX_WAIT=60 for i in $(seq 1 $MAX_WAIT); do iftimeout 2s ffprobe -rtsp_transport tcp "${RTSP_URL}" 2>&1 | grep -q "Stream.*Video"; then log"AI RTSP stream is ready (waited ${i} seconds)" break fi if [ $i -eq $MAX_WAIT ]; then log"Warning: AI RTSP stream not ready within ${MAX_WAIT} seconds, but will continue trying" fi sleep 1 done
# Simple logging function log() { echo"[$(date '+%Y-%m-%d %H:%M:%S')] $*" | tee -a "${LOG_FILE}" }
# Main loop whiletrue; do log"Attempting to connect to AI RTSP stream: $RTSP_URL" log"Starting HLS conversion for AI stream..." if ffmpeg -hide_banner -loglevel warning \ -rtsp_transport tcp \ -i "${RTSP_URL}" \ -an \ -c:v copy \ -f hls \ -hls_time 2 \ -hls_list_size 6 \ -hls_flags delete_segments+append_list \ -hls_segment_filename "${HLS_DIR}/segment_%05d.ts" \ "${HLS_M3U8}" 2>&1 | grep -E "(Stream|Opening|error|failed)" | head -2; then log"AI stream conversion process reported an error" else log"AI stream conversion loop ended or interrupted, preparing to retry..." fi log"Waiting 5 seconds before retrying connection..." sleep 5 done ➜ ~
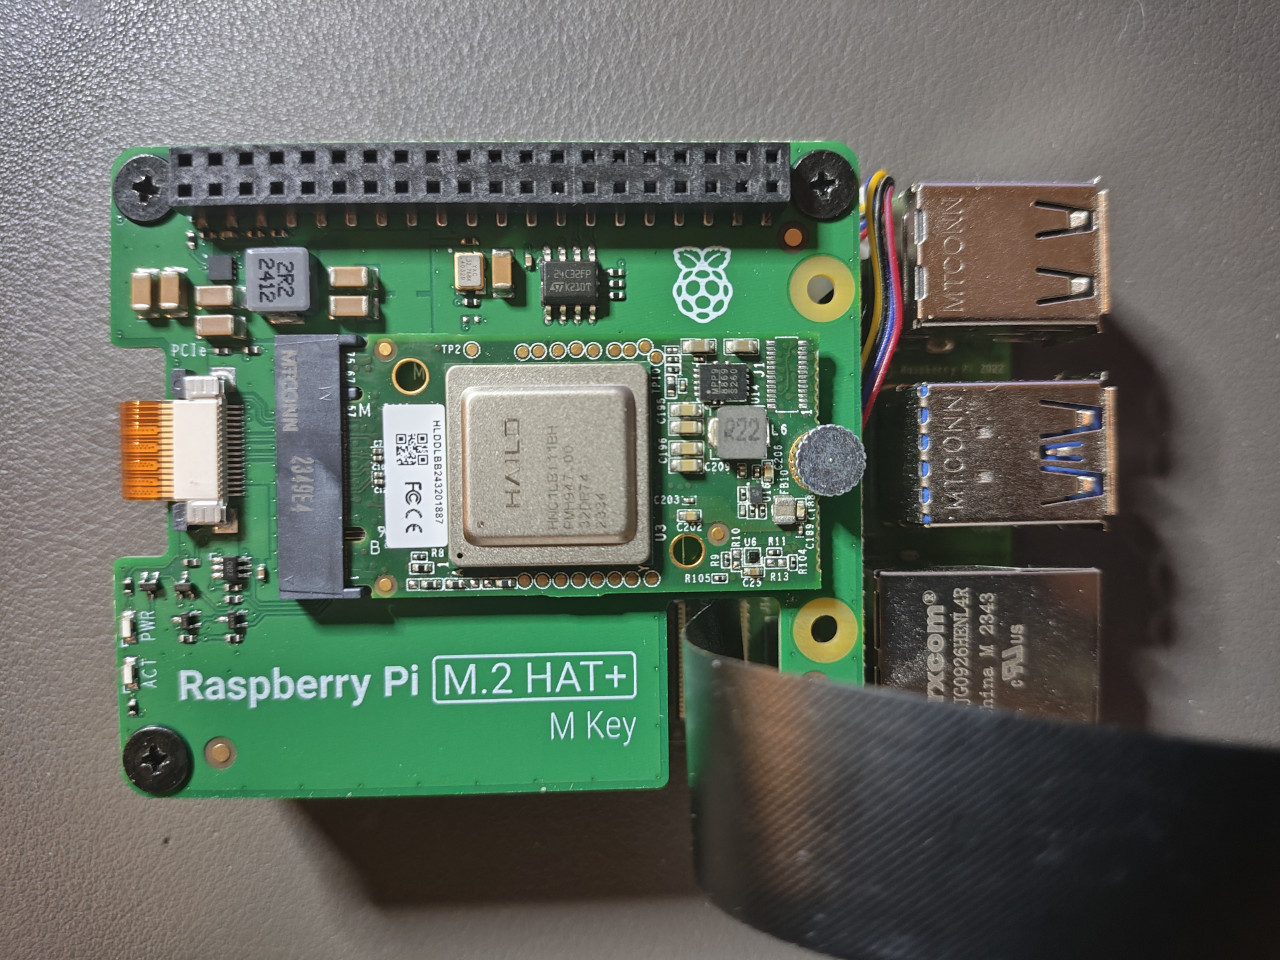
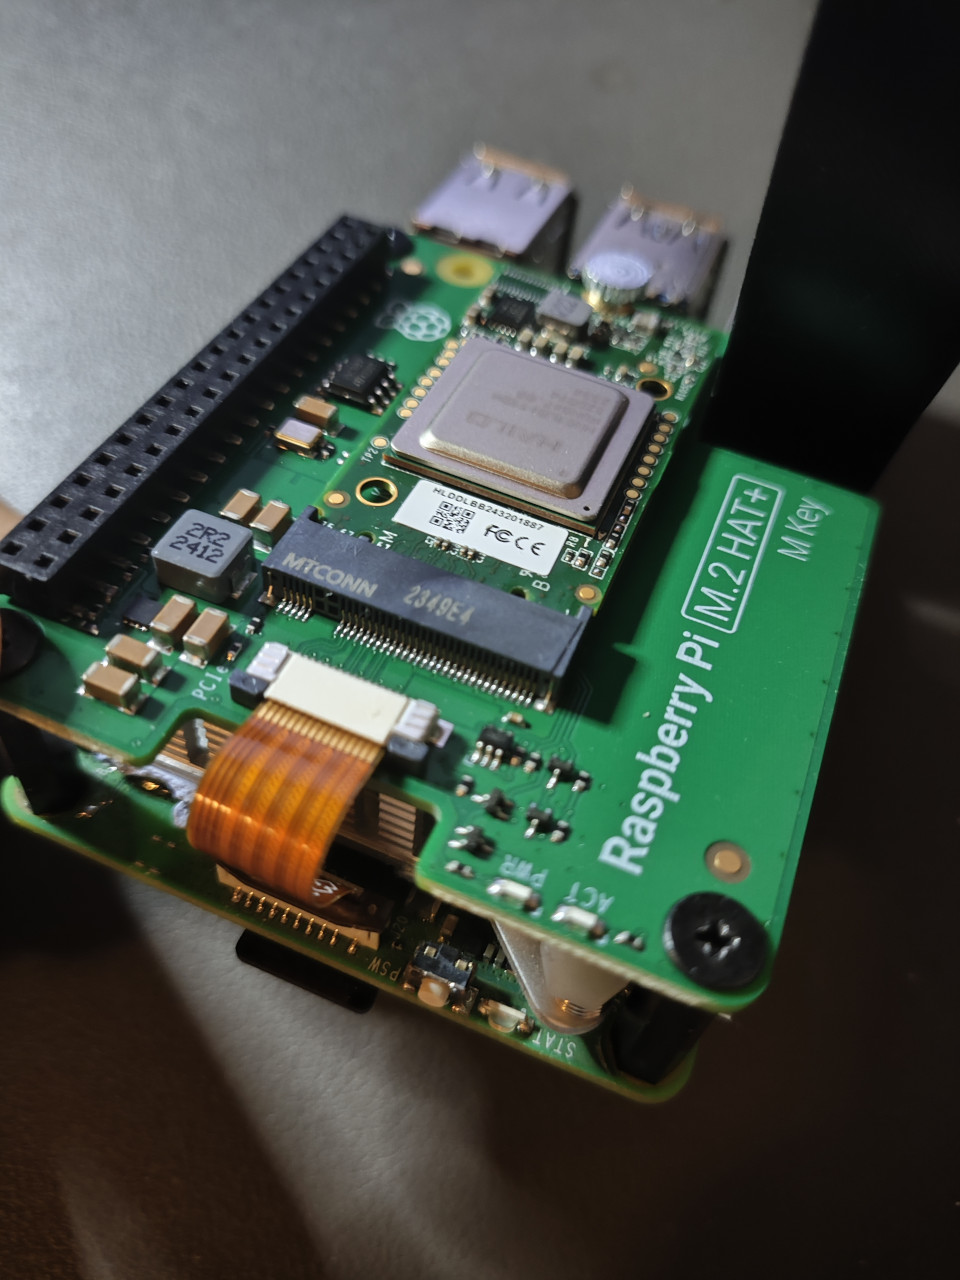
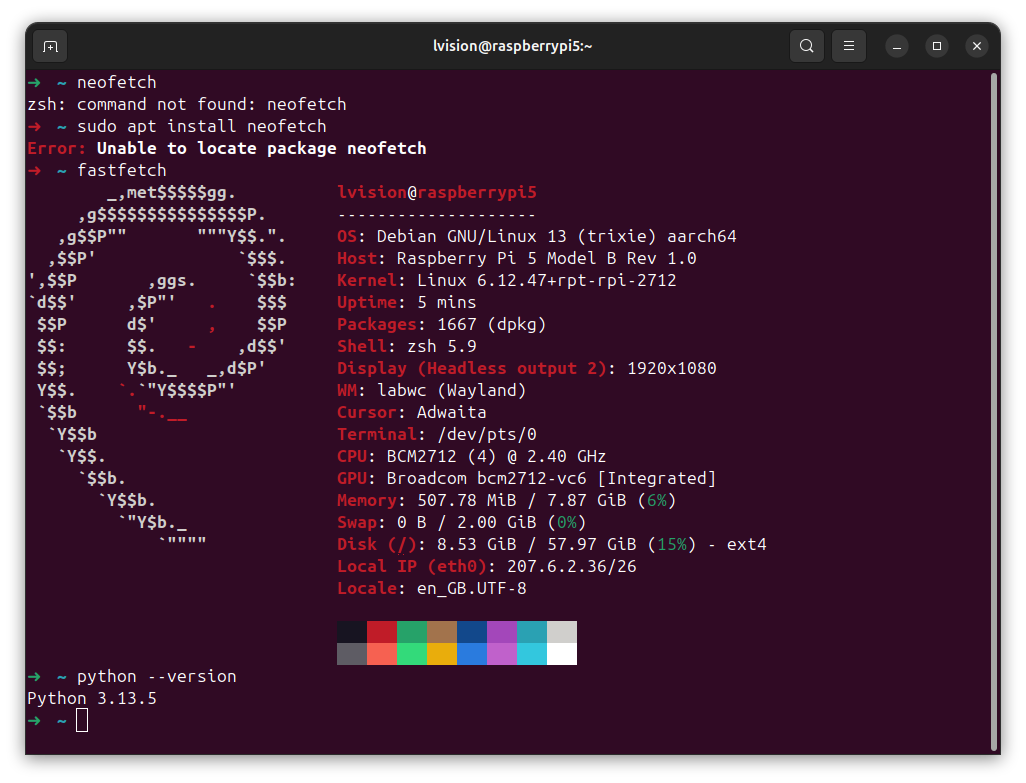
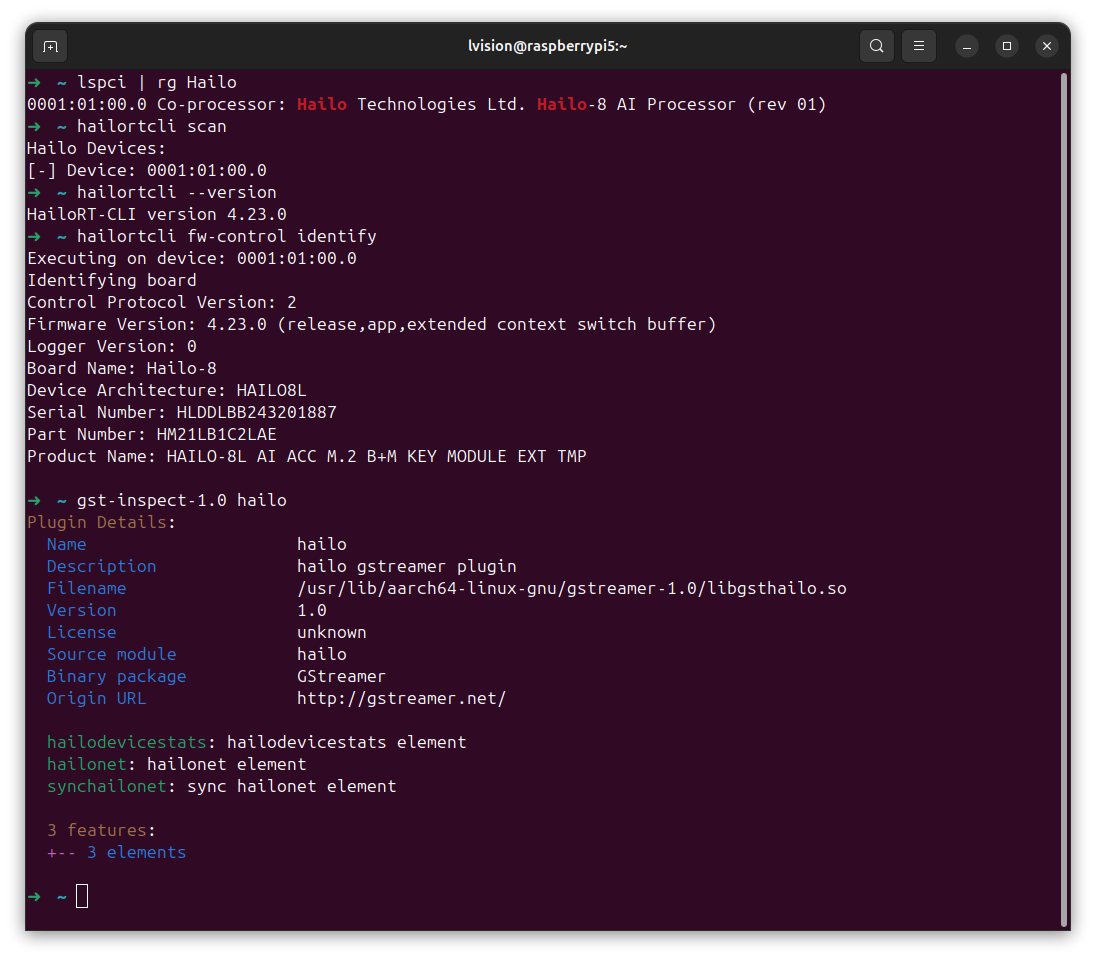
Good news !!! Hailo 4.23.0 has been released, and it supports Raspberry Pi 5 with native Python 3.13.5 installation, which is incredibly convenient. The only thing to remember: make sure to install DKMS by sudo apt install dkms.
Please visit Hailo Software Downloads to download and install the following three MUST software packages:
1.3.1 HailoRT – Ubuntu package (deb) for arm64 hailort_4.23.0_arm64.deb


![[Google Coral] [M.2 Accelerator A+E key]](https://raw.githubusercontent.com/LongerVision/Resource/refs/heads/main/MachineVision/ARMLinux/jevois-pro/04_JeVois-Pro_Google-Coral.jpg)