0%

Install Armbian Ubuntu Desktop Nightly Built onto Orange Pi 3

Today, let's have some fun of Orange Pi 3, which adopts AllWinner H6 as its CPU. The board looks like (cited from Orange Pi 3 ):

Orange Pi 3

By following our previous blog Install Armbian Ubuntu Desktop with the Newest Supported Mainline Linux Kernel onto Orange Pi Plus 2, we'll have the Nightly Built Armbian Ubuntu Desktop installed onto Orange Pi 3.

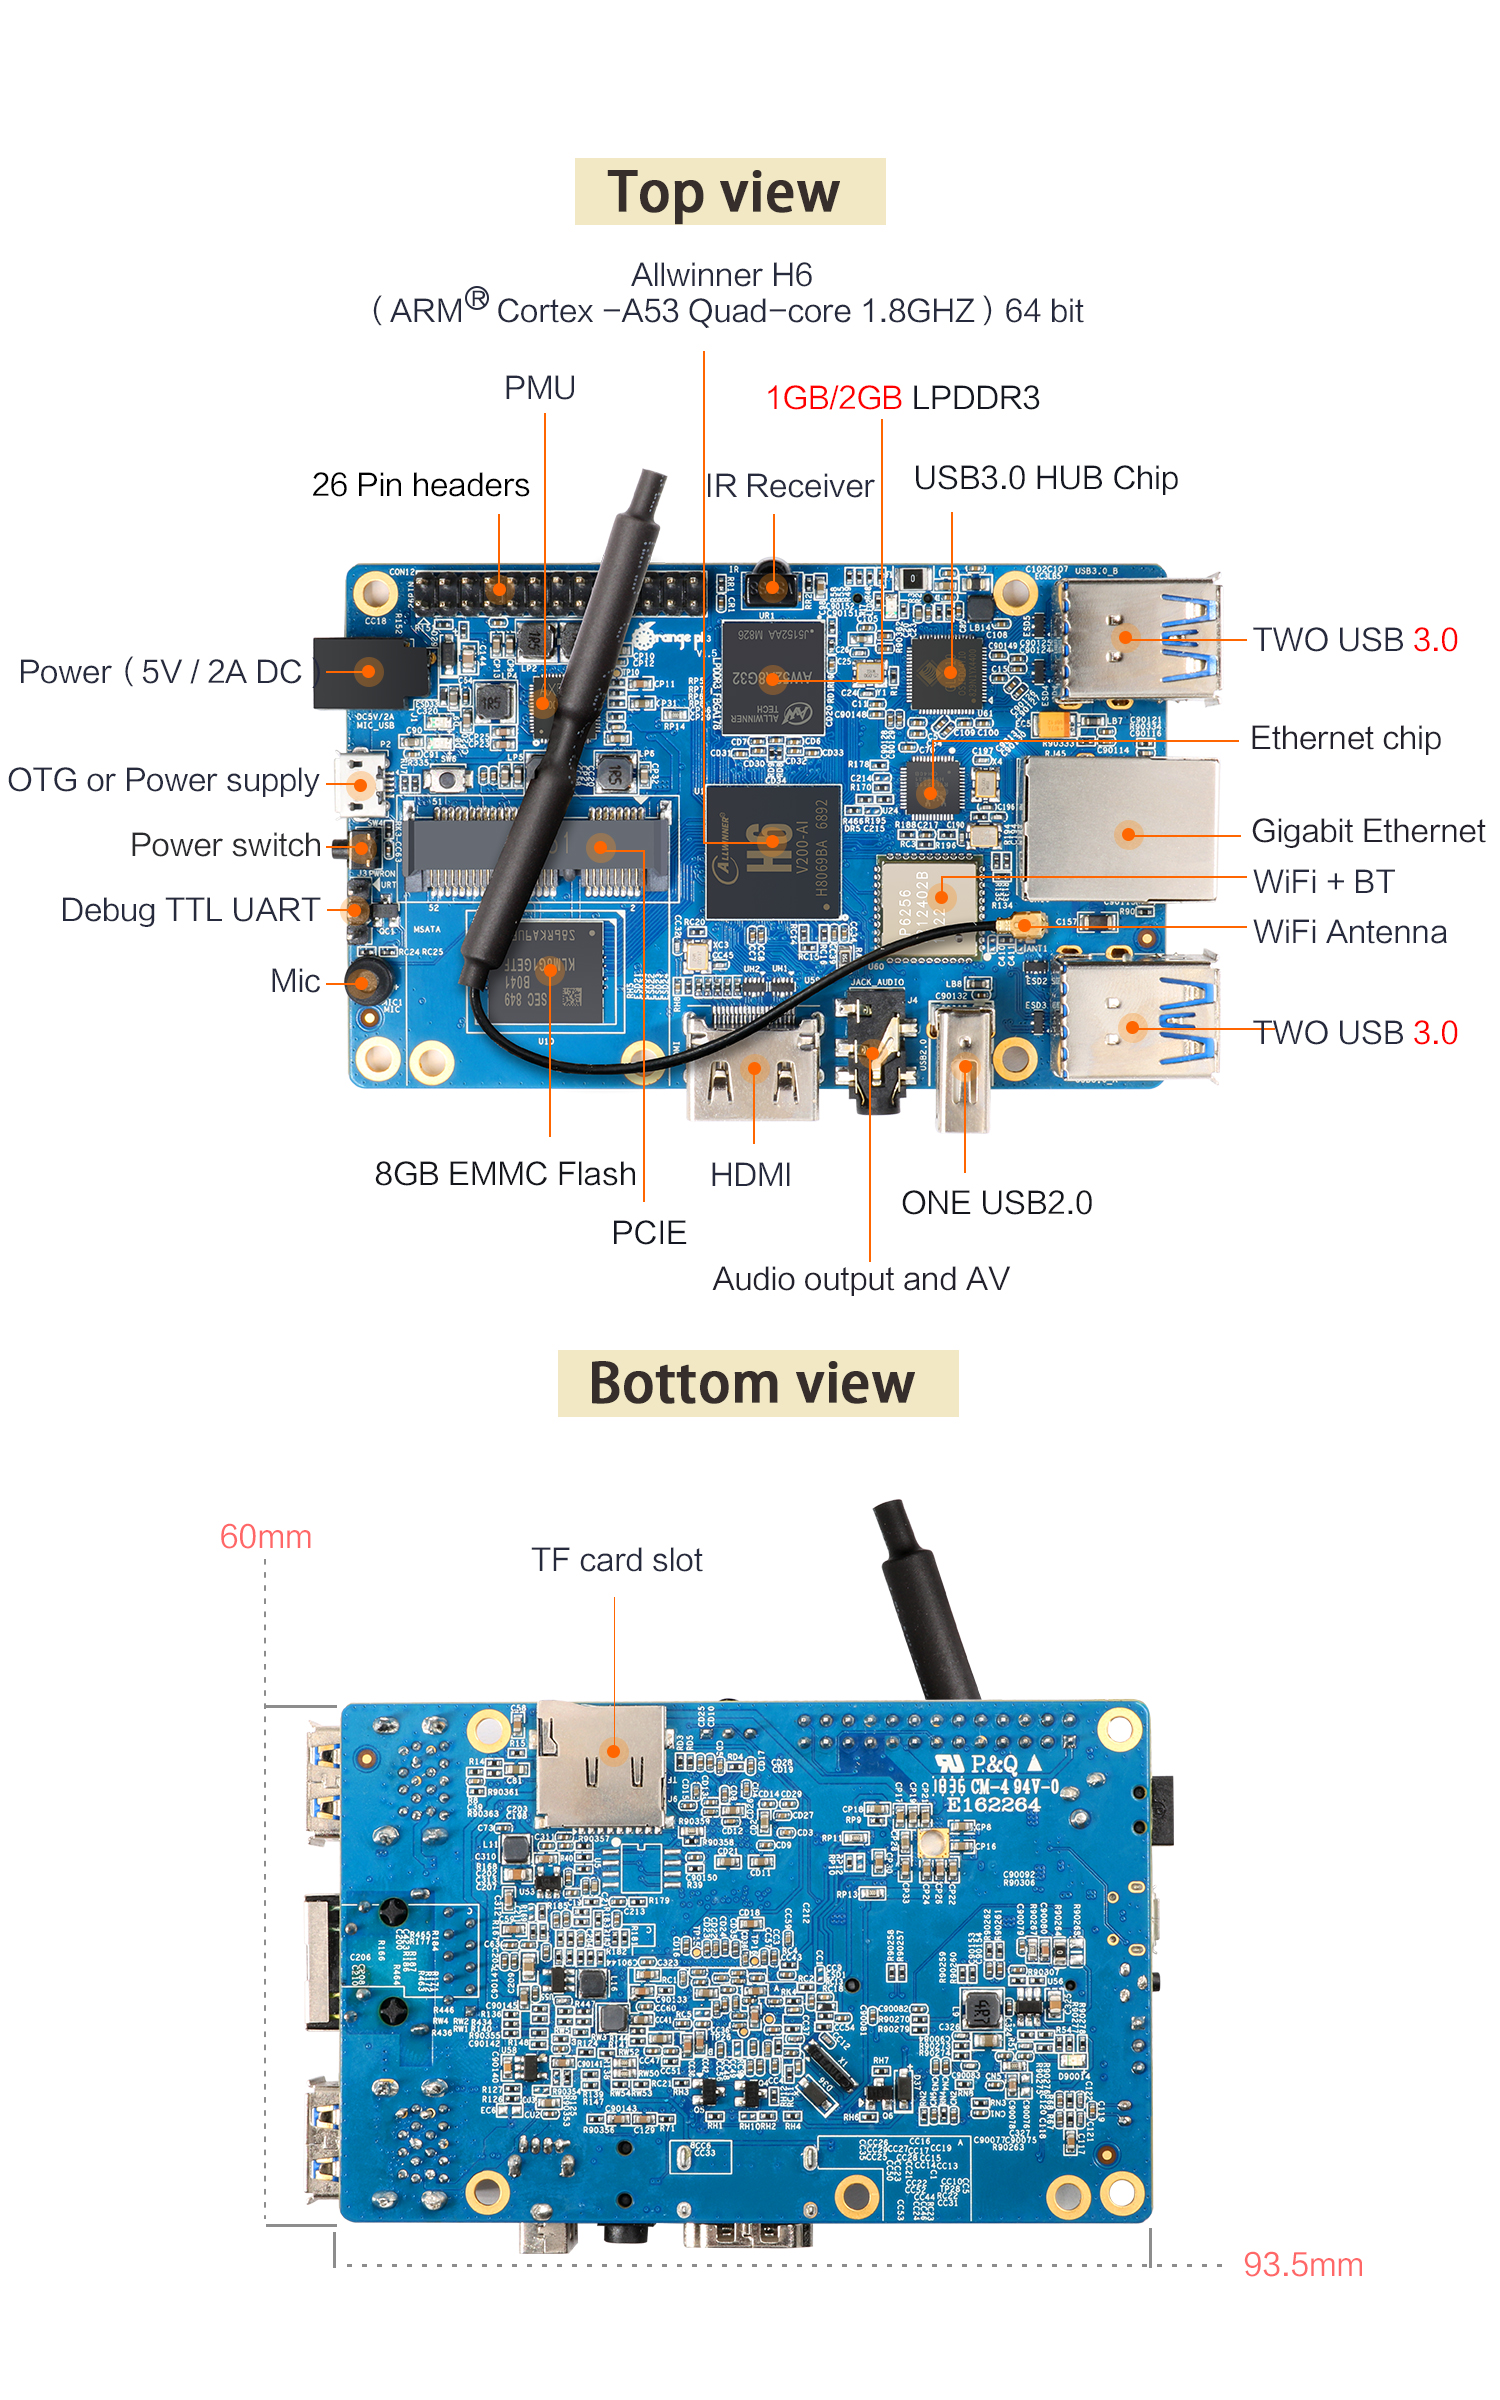
PART A: Install Ubuntu Desktop Nightly Built By Armbian onto Orange Pi 3

1. Download Armbian Ubuntu Desktop for Orange Pi 3

We FIRST go visiting the website https://dl.armbian.com/orangepi3/nightly/ and click on the LAST link, for today May 12, 2019, a file named Armbian_5.86.190512_Orangepi3_Ubuntu_bionic_dev_5.1.0.7z will be automatically downloaded.

Then, we extract this .7z file by

1
2
3
4
5
6
7
8
9
10
11
12
13
14
15
16
17
18
19
20
21
22
23
➜  7z x Armbian_5.86.190512_Orangepi3_Ubuntu_bionic_dev_5.1.0.7z 

7-Zip [64] 16.02 : Copyright (c) 1999-2016 Igor Pavlov : 2016-05-21
p7zip Version 16.02 (locale=en_CA.UTF-8,Utf16=on,HugeFiles=on,64 bits,8 CPUs Intel(R) Core(TM) i7-6700HQ CPU @ 2.60GHz (506E3),ASM,AES-NI)

Scanning the drive for archives:
1 file, 218882367 bytes (209 MiB)

Extracting archive: Armbian_5.86.190512_Orangepi3_Ubuntu_bionic_dev_5.1.0.7z
--
Path = Armbian_5.86.190512_Orangepi3_Ubuntu_bionic_dev_5.1.0.7z
Type = 7z
Physical Size = 218882367
Headers Size = 301
Method = LZMA2:25
Solid = +
Blocks = 1

Everything is Ok

Files: 4
Size: 1111510096
Compressed: 218882367

2. Install Armbian Ubuntu Desktop for Orange Pi 3

Exactly the same as in our previous blog Install Armbian Ubuntu Desktop with the Newest Supported Mainline Linux Kernel onto Orange Pi Plus 2, we have the TF card formatted and dd the system into it.

PART B: SSH Into Orange Pi 3, Update & Upgrade, Locale Configuration, Network Configuration

Exactly the same as in our previous blog Install Armbian Ubuntu Desktop With Kernel 5.0 onto Banana Pi M3, we should be able to SSH into Orange Pi 3, update & upgrade the system, configure both network and locale.

1. SSH Into Armbian

1
2
3
4
5
6
7
8
9
10
11
12
13
14
15
16
17
18
19
20
21
22
23
24
25
26
27
28
29
30
31
32
33
34
35
36
37
38
39
40
41
42
43
44
45
46
47
48
49
50
51
52
53
54
55
56
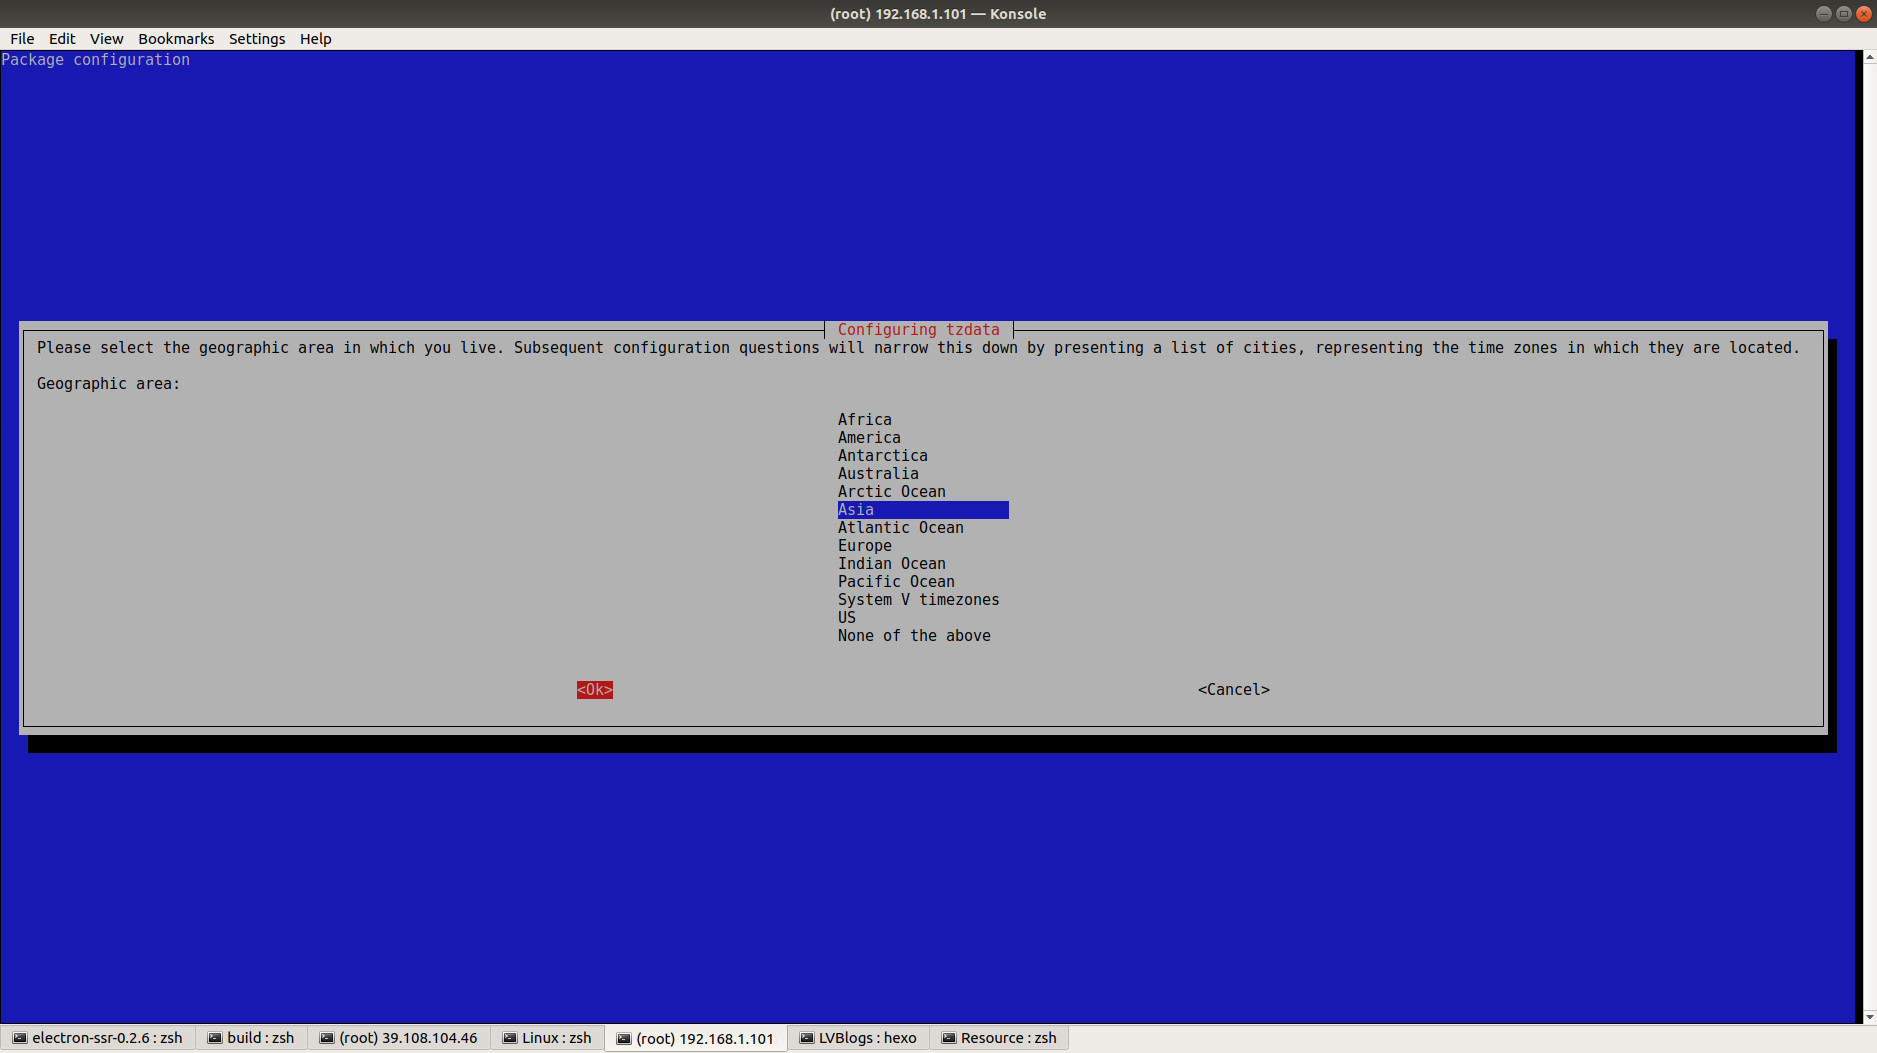
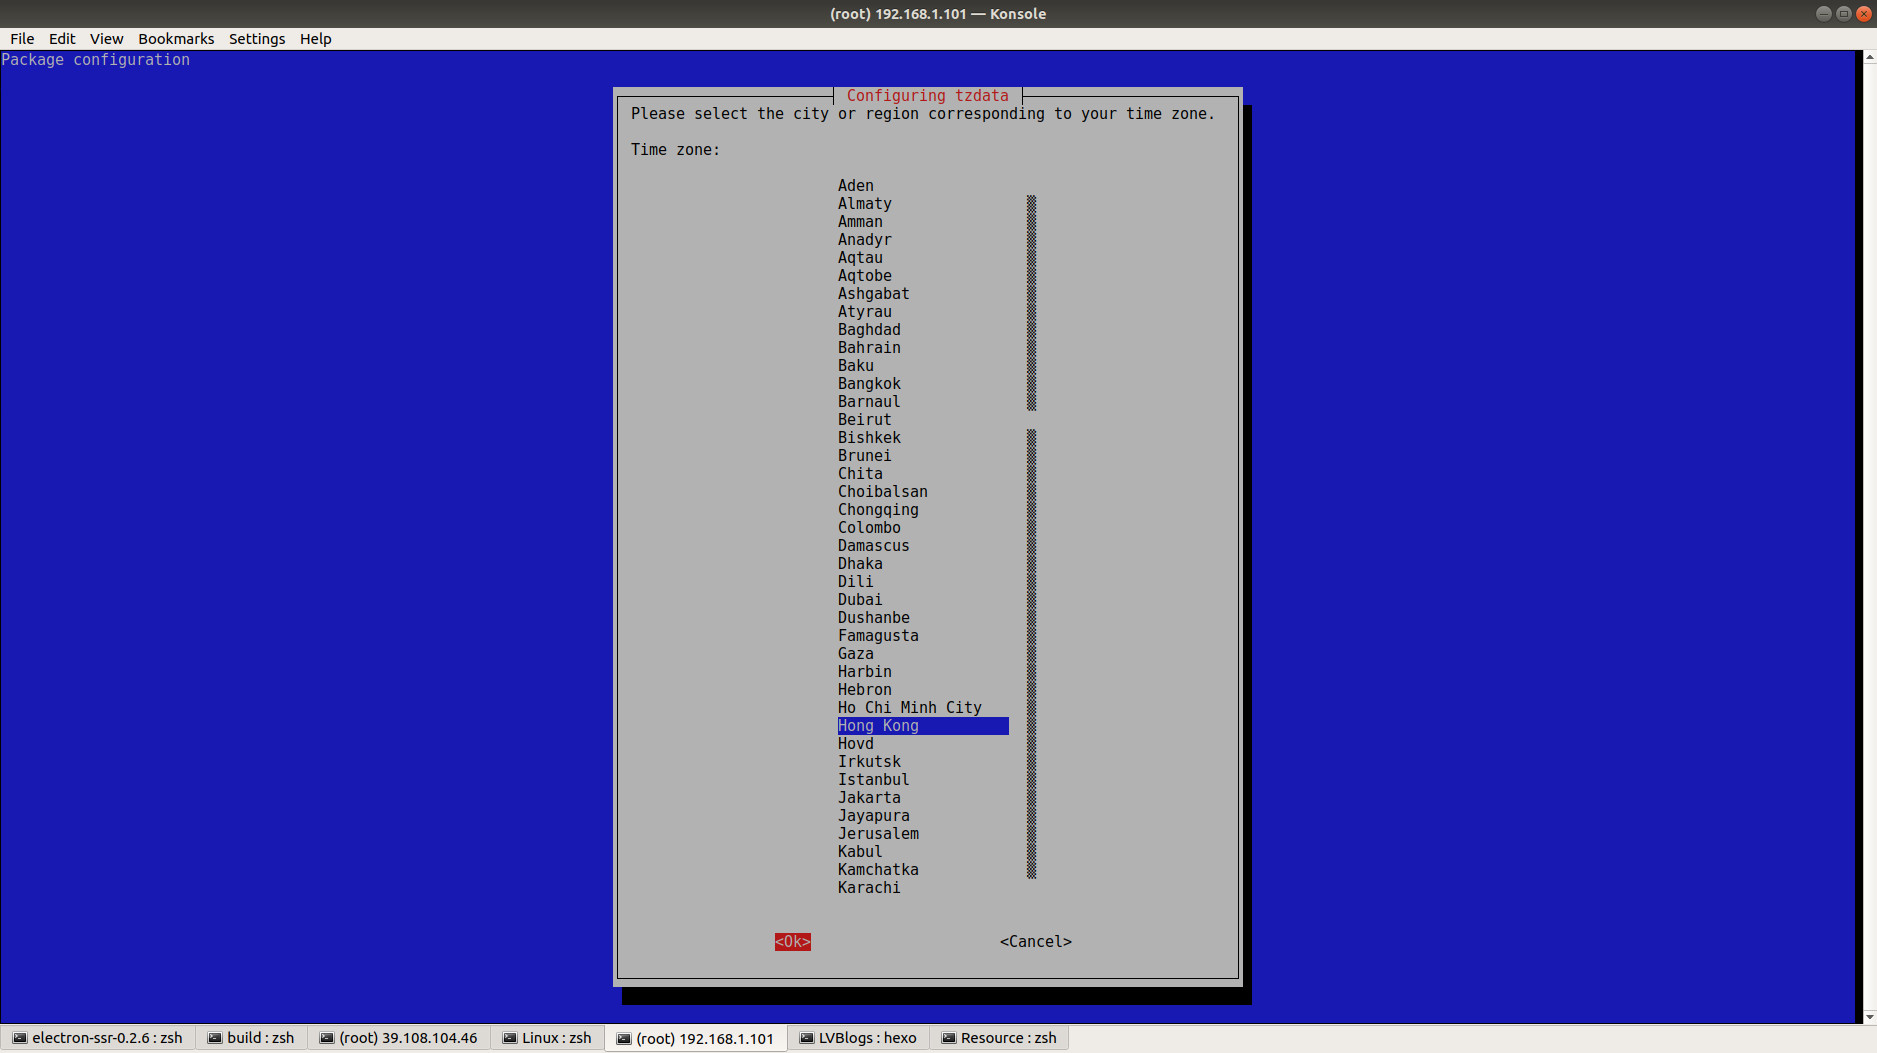
➜  ~ ssh root@192.168.1.101
root@192.168.1.101's password:
You are required to change your password immediately (root enforced)
___ ____ _ _____
/ _ \ _ __ __ _ _ __ __ _ ___ | _ \(_) |___ /
| | | | '__/ _` | '_ \ / _` |/ _ \ | |_) | | |_ \
| |_| | | | (_| | | | | (_| | __/ | __/| | ___) |
\___/|_| \__,_|_| |_|\__, |\___| |_| |_| |____/
|___/

Welcome to ARMBIAN 5.86.190512 nightly Ubuntu 18.04.2 LTS 5.1.0-sunxi64
System load: 0.01 0.13 0.08 Up time: 5 min
Memory usage: 4 % of 1997MB IP: 192.168.1.101
CPU temp: 40°C
Usage of /: 3% of 29G

Last login: Mon May 13 08:59:30 2019 from 192.168.1.11
Changing password for root.
(current) UNIX password:
Enter new UNIX password:
Retype new UNIX password:


You are using an Armbian nightly build meant only for developers to provide
constructive feedback to improve build system, OS settings or user experience.
If this does not apply to you, STOP NOW!. Especially don't use this image for
daily work since things might not work as expected or at all and may break
anytime with next update. YOU HAVE BEEN WARNED!

This image is provided AS IS with NO WARRANTY and NO END USER SUPPORT!.

Creating a new user account. Press <Ctrl-C> to abort

Please provide a username (eg. your forename): Sky
Trying to add user sky
Adding user `sky' ...
Adding new group `sky' (1000) ...
Adding new user `sky' (1000) with group `sky' ...
Creating home directory `/home/sky' ...
Copying files from `/etc/skel' ...
Enter new UNIX password:
Retype new UNIX password:
passwd: password updated successfully
Changing the user information for sky
Enter the new value, or press ENTER for the default
Full Name []:
Room Number []:
Work Phone []:
Home Phone []:
Other []:
Is the information correct? [Y/n] y

Dear sky, your account sky has been created and is sudo enabled.
Please use this account for your daily work from now on.

root@orangepi3:~#

2. Kernel Doublechecking

1
2
3
4
5
6
7
8
9
10
root@orangepi3:~# uname -r
5.1.0-sunxi64
root@orangepi3:~# uname -a
Linux orangepi3 5.1.0-sunxi64 #5.86.190512 SMP Sun May 12 22:26:37 CEST 2019 aarch64 aarch64 aarch64 GNU/Linux
root@orangepi3:~# lsb_release -a
No LSB modules are available.
Distributor ID: Ubuntu
Description: Ubuntu 18.04.2 LTS
Release: 18.04
Codename: bionic

3. Update & Upgrade

1
2
3
4
5
6
7
8
9
10
11
12
13
14
15
16
17
18
19
20
21
22
23
24
25
root@orangepi3:~# sudo apt update
Hit:1 http://ports.ubuntu.com bionic InRelease
Get:2 http://ports.ubuntu.com bionic-security InRelease [88.7 kB]
Get:3 http://ports.ubuntu.com bionic-updates InRelease [88.7 kB]
Get:4 http://ports.ubuntu.com bionic-backports InRelease [74.6 kB]
Get:6 http://ports.ubuntu.com bionic-security/main arm64 Packages [250 kB]
Get:7 http://ports.ubuntu.com bionic-security/main armhf Packages [229 kB]
Get:8 http://ports.ubuntu.com bionic-security/universe armhf Packages [240 kB]
Get:5 https://beta.armbian.com bionic InRelease [23.3 kB]
Get:9 http://ports.ubuntu.com bionic-security/universe arm64 Packages [245 kB]
Get:10 https://beta.armbian.com bionic/main arm64 Packages [179 kB]
Get:11 http://ports.ubuntu.com bionic-updates/main arm64 Packages [484 kB]
Get:12 https://beta.armbian.com bionic/main armhf Packages [205 kB]
Get:13 http://ports.ubuntu.com bionic-updates/main armhf Packages [465 kB]
Get:14 https://beta.armbian.com bionic/bionic-utils arm64 Packages [97.5 kB]
Get:15 https://beta.armbian.com bionic/bionic-utils armhf Packages [97.2 kB]
Get:16 http://ports.ubuntu.com bionic-updates/universe arm64 Packages [834 kB]
Get:17 https://beta.armbian.com bionic/bionic-desktop armhf Packages [27.3 kB]
Get:18 http://ports.ubuntu.com bionic-updates/universe armhf Packages [783 kB]
Fetched 4411 kB in 39s (113 kB/s)
Reading package lists... Done
Building dependency tree
Reading state information... Done
All packages are up to date.
root@orangepi3:~#

4. Locale Configuration

1
2
3
4
5
root@orangepi3:~# dpkg-reconfigure tzdata

Current default time zone: 'Asia/Hong_Kong'
Local time is now: Mon May 13 21:57:02 HKT 2019.
Universal Time is now: Mon May 13 13:57:02 UTC 2019.

During the above process, you'll set the following 2 pages correspondingly:

System Locale Asia
System Locale HongKong

By using the command date, we can see the timezone has been successfully reset.

1
2
root@orangepi3:~# date
Mon May 13 22:11:20 HKT 2019

5. Network Configuration

1). How to connect to wireless?

Wifi module does NOT function well.

1
2
3
4
5
6
7
8
9
10
11
12
13
root@orangepi3:~# ip -c address
1: lo: <LOOPBACK,UP,LOWER_UP> mtu 65536 qdisc noqueue state UNKNOWN group default qlen 1000
link/loopback 00:00:00:00:00:00 brd 00:00:00:00:00:00
inet 127.0.0.1/8 scope host lo
valid_lft forever preferred_lft forever
inet6 ::1/128 scope host
valid_lft forever preferred_lft forever
2: eth0: <BROADCAST,MULTICAST,UP,LOWER_UP> mtu 1500 qdisc mq state UP group default qlen 1000
link/ether 02:07:a1:4a:a5:38 brd ff:ff:ff:ff:ff:ff
inet 192.168.1.101/24 brd 192.168.1.255 scope global dynamic noprefixroute eth0
valid_lft 6426sec preferred_lft 6426sec
inet6 fe80::c8b:b3a4:2793:72b3/64 scope link noprefixroute
valid_lft forever preferred_lft forever