Raspberry Pi Pico is a MCU, which adopts Raspberry Pi‘s chip RP2040.
1. Introduction
1.1 lsusb
1 | ...... |
1.2 Spec
- All details can be found at Raspberry Pi Documentation Microcontrollers. Particularly:
- the Chip RP2040
- Two types of Picos Raspberry Pi Pico and Pico W
1.3 Github Source Code
2. Flash the Firmware
2.1 Micropython
2.1.1 How to?
The official way to flash a Raspberry Pi Pico is just to drag-and-drop the Micropython UF2 file onto it. Please follow:
- Raspberry Pi‘s official documentation Flash Raspberry Pi Pico Using MicroPython UF2.
- MicroPython‘s official download page MicroPython Download RPI_PICO
2.1.2 Demonstration
By connecting from my Ubuntu desktop using command
1 | ➜ ~ minicom -b 115200 -o -D /dev/ttyACM0 |
we can easily connect to Raspberry Pi Pico:
1 | Welcome to minicom 2.8 |
2.2 Arduino
2.2.1 Using Arduino IDE
Since Raspberry Pi Pico is an MCU, it is of course able to be connected using the popular Arduino IDE.
I actually strictly follow this blog Programming Raspberry Pi Pico with Arduino IDE.
2.2.2 Flash with BOOTSEL Pressed
In my test, no matter MicroPython Download RPI_PICO is dragged-and-dropped, or a customized program is uploaded via Arduino IDE as in the following picture:
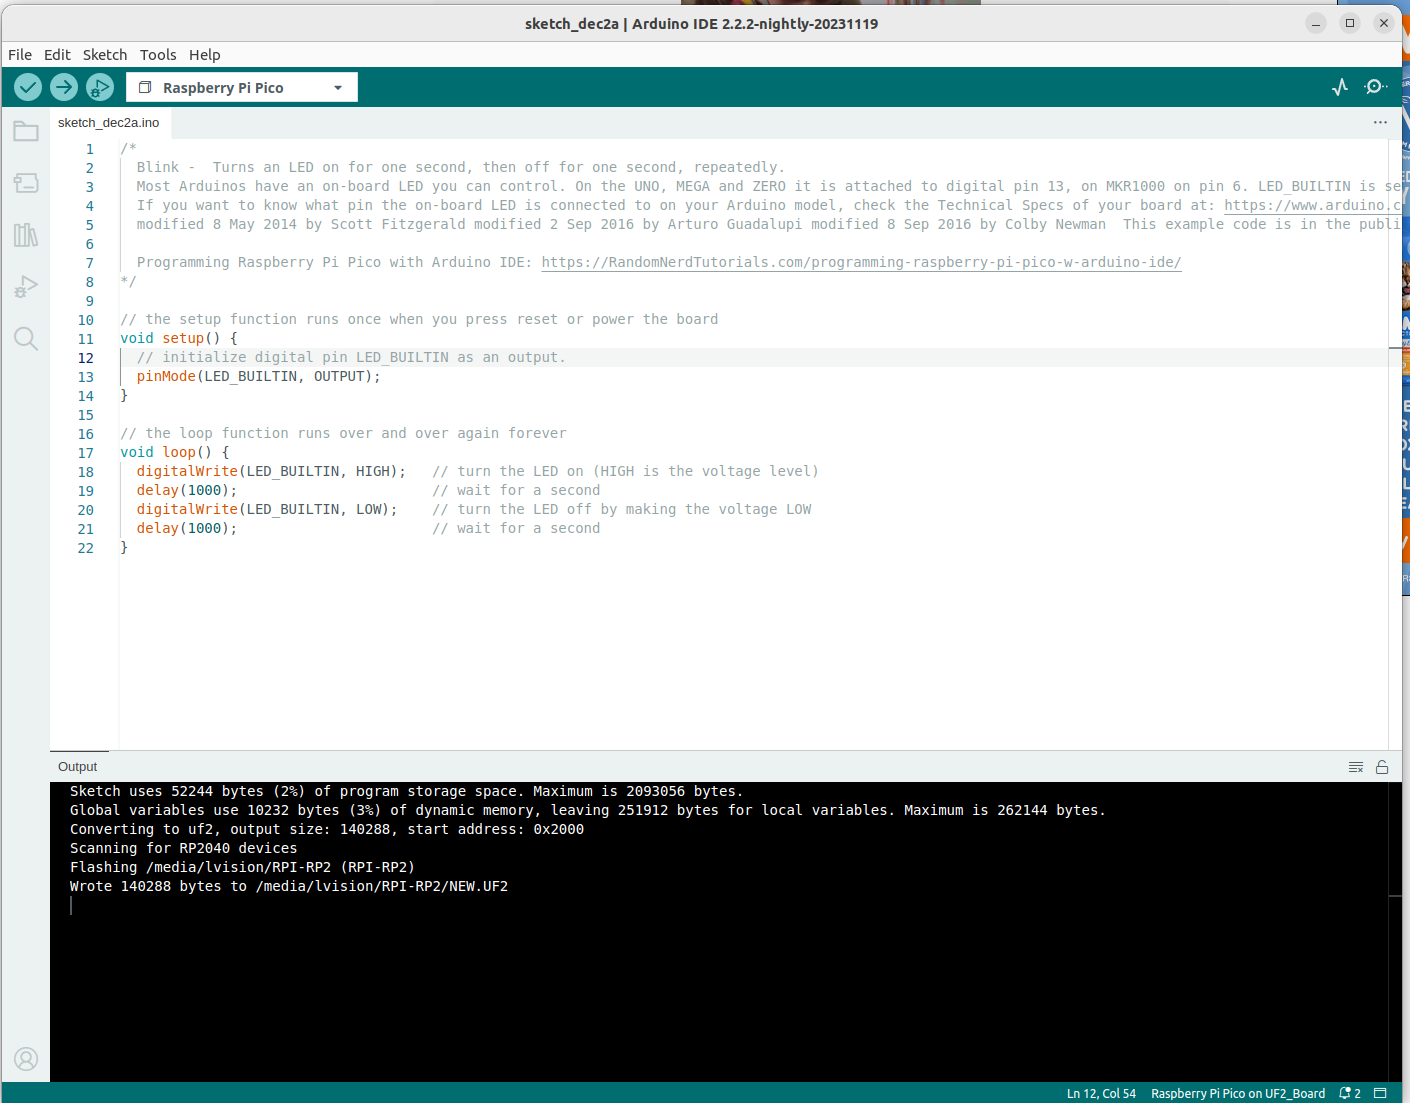
I ALWAYS hold the BOOTSEL button.
3. More to Talk
3.1 LED Example Demo
3.2 Please Try Out Raspberry Pi Pico W and Pico WH Yourself
Recommended tutorials: