pi@pi01:~ $ curl -sSL https://get.docker.com | sh # Executing docker install script, commit: 26ff363bcf3b3f5a00498ac43694bf1c7d9ce16c Warning: the "docker" command appears to already exist on this system.
If you already have Docker installed, this script can cause trouble, which is why we're displaying this warning and provide the opportunity to cancel the installation.
If you installed the current Docker package using this script and are using it again to update Docker, you can safely ignore this message.
You may press Ctrl+C now to abort this script. + sleep 20 + sudo -E sh -c apt-get update -qq >/dev/null + sudo -E sh -c DEBIAN_FRONTEND=noninteractive apt-get install -y -qq apt-transport-https ca-certificates curl >/dev/null + sudo -E sh -c curl -fsSL "https://download.docker.com/linux/raspbian/gpg" | apt-key add -qq - >/dev/null Warning: apt-key output should not be parsed (stdout is not a terminal) + sudo -E sh -c echo "deb [arch=armhf] https://download.docker.com/linux/raspbian buster stable" > /etc/apt/sources.list.d/docker.list + sudo -E sh -c apt-get update -qq >/dev/null + [ -n ] + sudo -E sh -c apt-get install -y -qq --no-install-recommends docker-ce >/dev/null + sudo -E sh -c docker version Client: Docker Engine - Community Version: 19.03.11 API version: 1.40 Go version: go1.13.10 Git commit: 42e35e6 Built: Mon Jun 1 09:20:15 2020 OS/Arch: linux/arm Experimental: false
Server: Docker Engine - Community Engine: Version: 19.03.11 API version: 1.40 (minimum version 1.12) Go version: go1.13.10 Git commit: 42e35e6 Built: Mon Jun 1 09:14:09 2020 OS/Arch: linux/arm Experimental: false containerd: Version: 1.2.13 GitCommit: 7ad184331fa3e55e52b890ea95e65ba581ae3429 runc: Version: 1.0.0-rc10 GitCommit: dc9208a3303feef5b3839f4323d9beb36df0a9dd docker-init: Version: 0.18.0 GitCommit: fec3683 If you would like to use Docker as a non-root user, you should now consider adding your user to the "docker" group with something like:
sudo usermod -aG docker pi
Remember that you will have to log out and back in for this to take effect!
WARNING: Adding a user to the "docker" group will grant the ability to run containers which can be used to obtain root privileges on the docker host. Refer to https://docs.docker.com/engine/security/security/#docker-daemon-attack-surface for more information.
pi@pi01:~ $ docker pull arm64v8/alpine Using default tag: latest latest: Pulling from arm64v8/alpine b538f80385f9: Pull complete Digest: sha256:3b3f647d2d99cac772ed64c4791e5d9b750dd5fe0b25db653ec4976f7b72837c Status: Downloaded newer image for arm64v8/alpine:latest docker.io/arm64v8/alpine:latest pi@pi01:~ $ docker images REPOSITORY TAG IMAGE ID CREATED SIZE arm64v8/alpine latest 62ee0e9f8440 11 days ago 5.32MB pi@pi01:~ $ docker run -it -d arm64v8/alpine 4deed42b3a29231bde40176c5c385d9f04bbf5188383b2ede4a09383360d69bb pi@pi01:~ $ docker ps CONTAINER ID IMAGE COMMAND CREATED STATUS PORTS NAMES 4deed42b3a29 arm64v8/alpine "/bin/sh" 49 seconds ago Restarting (159) 8 seconds ago inspiring_mendeleev pi@pi01:~ $ docker ps -a CONTAINER ID IMAGE COMMAND CREATED STATUS PORTS NAMES 4deed42b3a29 arm64v8/alpine "/bin/sh" 51 seconds ago Up 2 seconds inspiring_mendeleev pi@pi02:~ $
pi@pi01:~ $ docker images REPOSITORY TAG IMAGE ID CREATED SIZE alpine latest 3ddac682c5b6 12 days ago 4.77MB arm64v8/alpine latest 62ee0e9f8440 12 days ago 5.32MB arm64v8/ubuntu latest dbc66a3d7b82 6 weeks ago 66.7MB aarch64/ubuntu latest 5227400055a2 3 years ago 122MB pi@pi01:~ $ docker ps -a CONTAINER ID IMAGE COMMAND CREATED STATUS PORTS NAMES e06eaba12e82 alpine "/bin/sh" 2 hours ago Up 2 hours relaxed_cerf ba8d858d36f0 aarch64/ubuntu "/bin/bash" 2 hours ago Exited (159) 2 hours ago nifty_sutherland 08346701599a arm64v8/ubuntu "/bin/bash" 2 hours ago Exited (159) 2 hours ago jolly_fermi ccda6c95f81d arm64v8/alpine "/bin/sh" 4 hours ago Exited (159) 4 hours ago nifty_gates
pi@pi02:~ $ docker pull arm32v6/alpine Using default tag: latest latest: Pulling from arm32v6/alpine Digest: sha256:71465c7d45a086a2181ce33bb47f7eaef5c233eace65704da0c5e5454a79cee5 Status: Image is up to date for arm32v6/alpine:latest docker.io/arm32v6/alpine:latest pi@pi02:~ $ docker images REPOSITORY TAG IMAGE ID CREATED SIZE arm32v6/alpine latest 3ddac682c5b6 3 weeks ago 4.77MB pi@pi02:~ $ docker run -it -d arm32v6/alpine 66b813b4c07426294e01f3c7b2ff03f6608f6be10f8f7bf9fde581f605e6a5bc pi@pi02:~ $ docker ps CONTAINER ID IMAGE COMMAND CREATED STATUS PORTS NAMES 66b813b4c074 arm32v6/alpine "/bin/sh" 10 seconds ago Up 5 seconds intelligent_gates pi@pi02:~ $ docker ps -a CONTAINER ID IMAGE COMMAND CREATED STATUS PORTS NAMES 66b813b4c074 arm32v6/alpine "/bin/sh" 12 seconds ago Up 8 seconds intelligent_gates pi@pi02:~ $ docker exec -it 66b813b4c074 /bin/sh / # cat /etc/os-release NAME="Alpine Linux" ID=alpine VERSION_ID=3.12.0 PRETTY_NAME="Alpine Linux v3.12" HOME_URL="https://alpinelinux.org/" BUG_REPORT_URL="https://bugs.alpinelinux.org/" / # uname -a Linux 66b813b4c074 4.19.118-v7l+ #1311 SMP Mon Apr 27 14:26:42 BST 2020 armv7l Linux / # exit pi@pi02:~ $
, where X=1, or 2, or 3, or 4.
Now, we can see docker0 is UP. And a wired connection is running as the additional interface vethc6e4f97, which is actually just eth0 running in docker image arm32v6/alpine.
1 2 3 4 5 6 7 8 9 10 11 12 13 14
pi@pi02:~ $ ip -c address ... 4: docker0: <BROADCAST,MULTICAST,UP,LOWER_UP> mtu 1500 qdisc noqueue state UP group default link/ether 02:42:0e:a2:30:0d brd ff:ff:ff:ff:ff:ff inet 172.17.0.1/16 brd 172.17.255.255 scope global docker0 valid_lft forever preferred_lft forever inet6 fe80::42:eff:fea2:300d/64 scope link valid_lft forever preferred_lft forever 6: vethc6e4f97@if5: <BROADCAST,MULTICAST,UP,LOWER_UP> mtu 1500 qdisc noqueue master docker0 state UP group default link/ether 3e:cf:32:5f:92:e8 brd ff:ff:ff:ff:ff:ff link-netnsid 0 inet 169.254.108.166/16 brd 169.254.255.255 scope global noprefixroute vethc6e4f97 valid_lft forever preferred_lft forever inet6 fe80::f8c1:6d4c:aa67:11af/64 scope link valid_lft forever preferred_lft forever
3.3.2 Docker Login & Docker Commit
In order to avoid issues about registry, we can run docker login, so that a configuration file /home/pi/.docker/config.json will also be automatically generated.
1 2 3 4 5 6 7 8 9 10 11
pi@pi01:~ $ docker login Login with your Docker ID to push and pull images from Docker Hub. If you don't have a Docker ID, head over to https://hub.docker.com to create one. Username: jiapei100 Password: WARNING! Your password will be stored unencrypted in /home/pi/.docker/config.json. Configure a credential helper to remove this warning. See https://docs.docker.com/engine/reference/commandline/login/#credentials-store
From the above command docker info, you can see clearly that Swarm: inactive. Docker now has a Docker Swarm Mode. Now, let’s begin playing with Docker Swarm.
If you’ve got both Wired and Wifi enabled at the same time, without specifying with connection you are going to use for initializing your docker swarm, you’ll meet the following ERROR message.
1 2
pi@pi01:~ $ docker swarm init Error response from daemon: could not choose an IP address to advertise since this system has multiple addresses on different interfaces (192.168.1.253 on eth0 and 192.168.1.252 on wlan0) - specify one with --advertise-addr
By specifying the argument --advertise-addr, docker swarm can be successfully initialized as:
1 2 3 4 5 6 7 8
pi@pi01:~ $ docker swarm init --advertise-addr 192.168.1.253 Swarm initialized: current node (q7w8gwf9z6keb86rltvqx0f7z) is now a manager.
To add a worker to this swarm, run the following command:
On each worker, just run the following command to join docker swarm created by master.
1 2
pi@pi0X:~ $ docker swarm join --token SWMTKN-1-5ivkmmwk8kfw92gs0emkmgzg78d4cwitqmi827ghikpajzvrjt-6i326au3t4ka3g1wa74n4rhe4 192.168.1.253:2377 This node joined a swarm as a worker.
, where X=2, or 3, or 4.
4.3 List Docker Nodes In Leader
Come back to pi01, namely, docker swarmmaster, also the leader, and list all nodes:
1
2
3
4
5
6
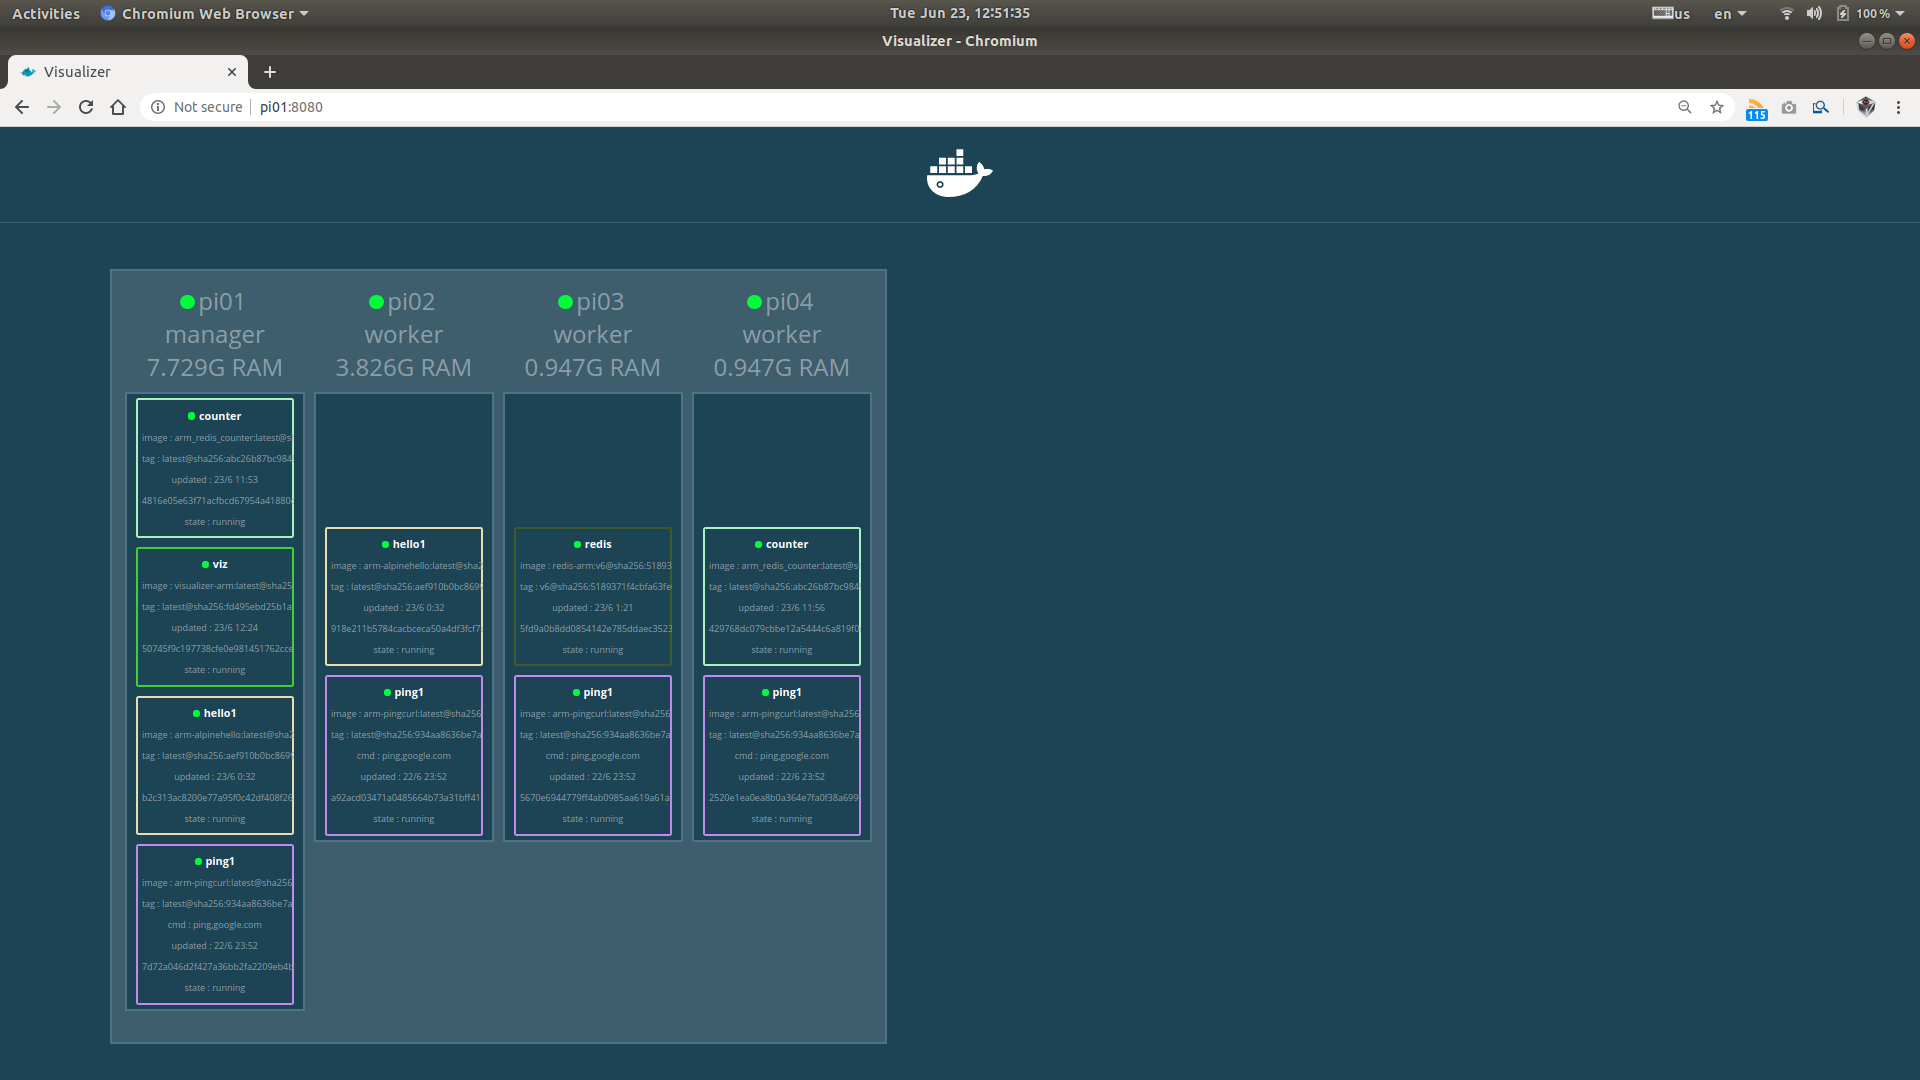
pi@pi01:~ $ docker node ls ID HOSTNAME STATUS AVAILABILITY MANAGER STATUS ENGINE VERSION q7w8gwf9z6keb86rltvqx0f7z * pi01 Ready Active Leader 19.03.11 sdiwqlawhfjobfsymmp38xivn pi02 Ready Active 19.03.11 97h11ixu7nvce4p64td2o5one pi03 Ready Active 19.03.11 tzrqp2fcj4yht20j84r83s5ps pi04 Ready Active 19.03.11
In our test, we ONLY designate a single leader. You can of course have the option to designate multiple leaders by using command docker node promote.
Create the service on leader with 4 replicas on both the master and 3 workers.
1 2 3 4 5 6 7 8
pi@pi01:~ $ docker service create --name ping1 --replicas=4 alexellis2/arm-pingcurl ping google.com 63n31w2jyr6uuqg2670r985h6 overall progress: 4 out of 4 tasks 1/4: running [==================================================>] 2/4: running [==================================================>] 3/4: running [==================================================>] 4/4: running [==================================================>] verify: Service converged
Then, we can list the created docker service on the leader.
1 2 3 4 5 6 7 8 9
pi@pi01:~ $ docker service ls ID NAME MODE REPLICAS IMAGE PORTS 63n31w2jyr6u ping1 replicated 4/4 alexellis2/arm-pingcurl:latest pi@pi01:~ $ docker service ps ping1 ID NAME IMAGE NODE DESIRED STATE CURRENT STATE ERROR PORTS xqjxus8ayetx ping1.1 alexellis2/arm-pingcurl:latest pi02 Running Running 2 hours ago 9lemwgls6hp6 ping1.2 alexellis2/arm-pingcurl:latest pi03 Running Running 2 hours ago b2y2muif9h2x ping1.3 alexellis2/arm-pingcurl:latest pi04 Running Running 2 hours ago 2uqbcrn0j7et ping1.4 alexellis2/arm-pingcurl:latest pi01 Running Running 2 hours ago
4.4.1.1 On Master
1 2 3 4 5 6 7 8 9 10 11 12 13 14 15
pi@pi01:~ $ docker ps CONTAINER ID IMAGE COMMAND CREATED STATUS PORTS NAMES 7d72a046d2f4 alexellis2/arm-pingcurl:latest "ping google.com" 41 minutes ago Up 41 minutes ping1.4.2uqbcrn0j7ettnqndxfq6s44b 71ef4e0107a7 arm32v6/alpine "/bin/sh" 9 hours ago Up 9 hours great_saha pi@pi01:~ $ docker logs 7d72a046d2f4 | tail -n 10 64 bytes from sea15s12-in-f206.1e100.net (172.217.3.206): icmp_seq=42461 ttl=119 time=5.98 ms 64 bytes from sea15s12-in-f14.1e100.net (172.217.3.206): icmp_seq=42462 ttl=119 time=5.53 ms 64 bytes from sea15s12-in-f14.1e100.net (172.217.3.206): icmp_seq=42463 ttl=119 time=5.69 ms 64 bytes from sea15s12-in-f206.1e100.net (172.217.3.206): icmp_seq=42464 ttl=119 time=5.98 ms 64 bytes from sea15s12-in-f206.1e100.net (172.217.3.206): icmp_seq=42465 ttl=119 time=5.97 ms 64 bytes from sea15s12-in-f206.1e100.net (172.217.3.206): icmp_seq=42466 ttl=119 time=5.65 ms 64 bytes from sea15s12-in-f14.1e100.net (172.217.3.206): icmp_seq=42467 ttl=119 time=6.22 ms 64 bytes from sea15s12-in-f206.1e100.net (172.217.3.206): icmp_seq=42468 ttl=119 time=6.33 ms 64 bytes from sea15s12-in-f14.1e100.net (172.217.3.206): icmp_seq=42469 ttl=119 time=9.93 ms 64 bytes from sea15s12-in-f206.1e100.net (172.217.3.206): icmp_seq=42470 ttl=119 time=5.82 ms
4.4.1.2 On Worker
This time, let’s take pi04 as our example:
1 2 3 4 5 6 7 8 9 10 11 12 13 14 15
pi@pi04:~/Downloads $ docker ps CONTAINER ID IMAGE COMMAND CREATED STATUS PORTS NAMES 2520e1ea0ea8 alexellis2/arm-pingcurl:latest "ping google.com" 44 minutes ago Up 44 minutes ping1.3.b2y2muif9h2xa847rlibcv5nz 746386fce983 arm32v6/alpine "/bin/sh" 11 days ago Up 9 hours serene_chebyshev pi@pi04:~ $ docker logs 2520e1ea0ea8 | tail -n 10 64 bytes from sea15s12-in-f14.1e100.net (172.217.3.206): icmp_seq=42491 ttl=119 time=7.22 ms 64 bytes from sea15s12-in-f14.1e100.net (172.217.3.206): icmp_seq=42492 ttl=119 time=9.10 ms 64 bytes from sea15s12-in-f206.1e100.net (172.217.3.206): icmp_seq=42493 ttl=119 time=6.97 ms 64 bytes from sea15s12-in-f14.1e100.net (172.217.3.206): icmp_seq=42494 ttl=119 time=6.76 ms 64 bytes from sea15s12-in-f206.1e100.net (172.217.3.206): icmp_seq=42495 ttl=119 time=6.74 ms 64 bytes from sea15s12-in-f206.1e100.net (172.217.3.206): icmp_seq=42496 ttl=119 time=7.03 ms 64 bytes from sea15s12-in-f206.1e100.net (172.217.3.206): icmp_seq=42497 ttl=119 time=7.06 ms 64 bytes from sea15s12-in-f206.1e100.net (172.217.3.206): icmp_seq=42498 ttl=119 time=6.17 ms 64 bytes from sea15s12-in-f14.1e100.net (172.217.3.206): icmp_seq=42499 ttl=119 time=6.74 ms 64 bytes from sea15s12-in-f206.1e100.net (172.217.3.206): icmp_seq=42500 ttl=119 time=6.23 ms
4.4.2 Scenario 2 - Replicate Webservice
In this example, we will create 2 replicas only for fun.
1 2 3 4 5 6
pi@pi01:~ $ docker service create --name hello1 --publish 3000:3000 --replicas=2 alexellis2/arm-alpinehello pe19as7evzmgi5qiq36z2pk63 overall progress: 2 out of 2 tasks 1/2: running [==================================================>] 2/2: running [==================================================>] verify: Service converged
Again, let’s list our created services.
1 2 3 4 5 6 7 8
pi@pi01:~ $ docker service ls ID NAME MODE REPLICAS IMAGE PORTS pe19as7evzmg hello1 replicated 2/2 alexellis2/arm-alpinehello:latest *:3000->3000/tcp 63n31w2jyr6u ping1 replicated 4/4 alexellis2/arm-pingcurl:latest pi@pi01:~ $ docker service ps hello1 ID NAME IMAGE NODE DESIRED STATE CURRENT STATE ERROR PORTS z9k8a10hkxqv hello1.1 alexellis2/arm-alpinehello:latest pi02 Running Running about an hour ago 7xuhpuru0r5u hello1.2 alexellis2/arm-alpinehello:latest pi01 Running Running about an hour ago
4.4.2.1 On Master and Worker pi02
On masterpi01 and workerpi02, there are 3 running docker images:
1 2 3 4 5
pi@pi02:~ $ docker images REPOSITORY TAG IMAGE ID CREATED SIZE arm32v6/alpine latest 3ddac682c5b6 3 weeks ago 4.77MB alexellis2/arm-pingcurl <none> 86a225e3a07b 3 years ago 6.19MB alexellis2/arm-alpinehello <none> 2ad6d1f9b6ae 3 years ago 33.8MB
, and 3 running docker containers.
1 2 3 4 5
pi@pi02:~ $ docker ps CONTAINER ID IMAGE COMMAND CREATED STATUS PORTS NAMES 918e211b5784 alexellis2/arm-alpinehello:latest "npm start" 22 minutes ago Up 22 minutes 3000/tcp hello1.1.z9k8a10hkxqvsovuu6omw4axy a92acd03471a alexellis2/arm-pingcurl:latest "ping google.com" About an hour ago Up About an hour ping1.1.xqjxus8ayetxiip2cmw4fm54x 66b813b4c074 arm32v6/alpine "/bin/sh" 11 hours ago Up 11 hours intelligent_gates
4.4.2.2 On Worker pi03 and Worker pi04
On masterpi03 and workerpi04, there are only 2 running docker images:
1 2 3 4
pi@pi03:~ $ docker images REPOSITORY TAG IMAGE ID CREATED SIZE arm32v6/alpine latest 3ddac682c5b6 3 weeks ago 4.77MB alexellis2/arm-pingcurl <none> 86a225e3a07b 3 years ago 6.19MB
, and 3 running docker containers.
1 2 3 4
pi@pi03:~ $ docker ps CONTAINER ID IMAGE COMMAND CREATED STATUS PORTS NAMES 5670e6944779 alexellis2/arm-pingcurl:latest "ping google.com" About an hour ago Up About an hour ping1.2.9lemwgls6hp6wnpyg14aeyeva f3d1670dfc7a arm32v6/alpine "/bin/sh" 11 days ago Up 9 hours infallible_cerf
Afterwards, a redis database service is created and runs on a single node, here, masterpi01.
1 2 3 4 5
pi@pi01:~ $ docker service create --replicas=1 --network=armnet --name redis alexellis2/redis-arm:v6 kmk663ad1t88nfjf567tkctmr overall progress: 1 out of 1 tasks 1/1: running [==================================================>] verify: Service converged
Finally, 2 replicas of docker service counter are created in this created subnetwork armnet and listening to port 3333.
1 2 3 4 5 6
pi@pi01:~ $ docker service create --name counter --replicas=2 --network=armnet --publish 3333:3333 alexellis2/arm_redis_counter ivdubq3vzdil3r2i5z0r1d2va overall progress: 2 out of 2 tasks 1/2: running [==================================================>] 2/2: running [==================================================>] verify: Service converged
Now, let’s list all created docker service on the leader.
1 2 3 4 5 6 7 8 9 10 11 12 13
pi@pi01:~ $ docker service ls ID NAME MODE REPLICAS IMAGE PORTS ivdubq3vzdil counter replicated 2/2 alexellis2/arm_redis_counter:latest *:3333->3333/tcp pe19as7evzmg hello1 replicated 2/2 alexellis2/arm-alpinehello:latest *:3000->3000/tcp 63n31w2jyr6u ping1 replicated 4/4 alexellis2/arm-pingcurl:latest kmk663ad1t88 redis replicated 1/1 alexellis2/redis-arm:v6 pi@pi01:~ $ docker service ps counter ID NAME IMAGE NODE DESIRED STATE CURRENT STATE ERROR PORTS ip6z9yacmjbz counter.1 alexellis2/arm_redis_counter:latest pi04 Running Running about an hour ago nzhx6q1vugm9 counter.2 alexellis2/arm_redis_counter:latest pi02 Running Running about an hour ago pi@pi01:~ $ docker service ps redis ID NAME IMAGE NODE DESIRED STATE CURRENT STATE ERROR PORTS z1tqve759bh6 redis.1 alexellis2/redis-arm:v6 pi03 Running Running 2 hours ago
It’s interesting that this time:
the 2 replicas of service counter are automatically created on node pi02 and pi04
the unique replica of service redis is allocated for node pi03
I’ve got no idea how the created services are distributed to different nodes. The ONLY thing I can do is to run docker ps and show the distribution results:
pi01
1 2 3 4 5
pi@pi01:~ $ docker ps CONTAINER ID IMAGE COMMAND CREATED STATUS PORTS NAMES b2c313ac8200 alexellis2/arm-alpinehello:latest "npm start" 3 hours ago Up 3 hours 3000/tcp hello1.2.7xuhpuru0r5ujkyrp4g558ehu 7d72a046d2f4 alexellis2/arm-pingcurl:latest "ping google.com" 3 hours ago Up 3 hours ping1.4.2uqbcrn0j7ettnqndxfq6s44b 71ef4e0107a7 arm32v6/alpine "/bin/sh" 11 hours ago Up 11 hours great_saha
pi02
1 2 3 4 5 6
pi@pi02:~ $ docker ps CONTAINER ID IMAGE COMMAND CREATED STATUS PORTS NAMES da2452b474af alexellis2/arm_redis_counter:latest "node ./app.js" 2 hours ago Up 2 hours 3000/tcp counter.2.nzhx6q1vugm9w7ouqyots5x43 918e211b5784 alexellis2/arm-alpinehello:latest "npm start" 3 hours ago Up 3 hours 3000/tcp hello1.1.z9k8a10hkxqvsovuu6omw4axy a92acd03471a alexellis2/arm-pingcurl:latest "ping google.com" 3 hours ago Up 3 hours ping1.1.xqjxus8ayetxiip2cmw4fm54x 66b813b4c074 arm32v6/alpine "/bin/sh" 14 hours ago Up 14 hours intelligent_gates
pi03
1 2 3 4 5
pi@pi03:~ $ docker ps CONTAINER ID IMAGE COMMAND CREATED STATUS PORTS NAMES 5fd9a0b8dd08 alexellis2/redis-arm:v6 "redis-server" 2 hours ago Up 2 hours 6379/tcp redis.1.z1tqve759bh6hdw2udnk6hh7t 5670e6944779 alexellis2/arm-pingcurl:latest "ping google.com" 3 hours ago Up 3 hours ping1.2.9lemwgls6hp6wnpyg14aeyeva f3d1670dfc7a arm32v6/alpine "/bin/sh" 12 days ago Up 11 hours infallible_cerf
pi04
1 2 3 4 5
pi@pi04:~ $ docker ps CONTAINER ID IMAGE COMMAND CREATED STATUS PORTS NAMES aca52fdaf2d4 alexellis2/arm_redis_counter:latest "node ./app.js" 2 hours ago Up 2 hours 3000/tcp counter.1.ip6z9yacmjbzjaeax45tuh2oa 2520e1ea0ea8 alexellis2/arm-pingcurl:latest "ping google.com" 3 hours ago Up 3 hours ping1.3.b2y2muif9h2xa847rlibcv5nz 746386fce983 arm32v6/alpine "/bin/sh" 12 days ago Up 11 hours serene_chebyshev
Clearly,
servicealexellis2/arm_redis_counter is running on both nodes pi02 and pi04, but not on nodes pi01 or pi03
servicealexellis2/arm-alpinehello is running on both nodes pi01 and pi02, but not on nodes pi03 or pi04
servicealexellis2/arm-pingcurl is running on all 4 nodes pi01, pi02. pi03, and pi04
So far, curl localhost:3333/incr is NOT running. Why?
What’s more:
without touching anything for a whole night, servicealexellis2/arm_redis_counter seems to automatically shundown with the ERROR: task: non-zero exit (1) for multiple times.
alexellis2/arm_redis_counter is now running on nodes masterpi01 and workerpi04, instead of original masterpi02 and workerpi04.
it’s interesting that alexellis2/redis-arm is still running on node pi03.
Hmmm… Happened to get this chance of playing with micro:bit for fun, then take this opportunity to write a blog. It seems this BBC products is very convenient. Let’s just plug and play.
1. Introduction
1.1 lsusb
Just plug in and lsusb.
1 2 3
...... Bus 001 Device 008: ID 0d28:0204 NXP LPC1768 ......
port is : /dev/ttyACM0 flowcontrol : none baudrate is : 115200 parity is : none databits are : 8 stopbits are : 1 escape is : C-a local echo is : no noinit is : no noreset is : no nolock is : no send_cmd is : sz -vv receive_cmd is : rz -vv -E imap is : omap is : emap is : crcrlf,delbs,
Type [C-a] [C-h] to see available commands
Terminal ready
*** Picocom commands (all prefixed by [C-a])
*** [C-x] : Exit picocom *** [C-q] : Exit without reseting serial port *** [C-b] : Set baudrate *** [C-u] : Increase baudrate (baud-up) *** [C-d] : Decrease baudrate (baud-down) *** [C-i] : Change number of databits *** [C-j] : Change number of stopbits *** [C-f] : Change flow-control mode *** [C-y] : Change parity mode *** [C-p] : Pulse DTR *** [C-t] : Toggle DTR *** [C-|] : Send break *** [C-c] : Toggle local echo *** [C-s] : Send file *** [C-r] : Receive file *** [C-v] : Show port settings *** [C-h] : Show this message
Oh, my god… why can’t I just code directly here from within the console??? That’s ABSOLUTELY NOT my style.
As mentioned above, the UNACCEPTABLE thing is: it seems we have to use micro:bit Python IDE for python coding for micro:bit????? Anyway, my generated HEX of Hello World is here.
141 ✔ cd microbit-samples/ 142 master ✔ ls debugOnVisualStudioCode.gif* LICENSE* module.json* README.md* source/ 143 master ✔ yt target bbc-microbit-classic-gcc info: get versions for bbc-microbit-classic-gcc info: download bbc-microbit-classic-gcc@0.2.3 from the public module registry info: get versions for mbed-gcc info: download mbed-gcc@0.1.3 from the public module registry 144 master ✔ yt build info: get versions for microbit info: download microbit@v2.1.1 from GitHub lancaster-university/microbit info: get versions for microbit-dal info: download microbit-dal@v2.1.1 from GitHub lancaster-university/microbit-dal info: get versions for mbed-classic info: download mbed-classic@microbit_hfclk+mb6 from GitHub lancaster-university/mbed-classic info: get versions for ble info: download ble@v2.5.0+mb3 from GitHub lancaster-university/BLE_API info: get versions for ble-nrf51822 info: download ble-nrf51822@v2.5.0+mb7 from GitHub lancaster-university/nRF51822 info: get versions for nrf51-sdk info: download nrf51-sdk@v2.2.0+mb4 from GitHub lancaster-university/nrf51-sdk info: generate for target: bbc-microbit-classic-gcc 0.2.3 at ....../microbit-samples/yotta_targets/bbc-microbit-classic-gcc CMake Deprecation Warning at CMakeLists.txt:16 (cmake_policy): The OLD behavior for policy CMP0017 will be removed from a future version of CMake.
The cmake-policies(7) manual explains that the OLD behaviors of all policies are deprecated and that a policy should be set to OLD only under specific short-term circumstances. Projects should be ported to the NEW behavior and not rely on setting a policy to OLD.
CMake Deprecation Warning at /usr/local/share/cmake-3.17/Modules/CMakeForceCompiler.cmake:75 (message): The CMAKE_FORCE_C_COMPILER macro is deprecated. Instead just set CMAKE_C_COMPILER and allow CMake to identify the compiler. Call Stack (most recent call first): ....../microbit-samples/yotta_targets/mbed-gcc/CMake/toolchain.cmake:78 (cmake_force_c_compiler) toolchain.cmake:8 (include) /usr/local/share/cmake-3.17/Modules/CMakeDetermineSystem.cmake:93 (include) CMakeLists.txt:76 (project)
CMake Deprecation Warning at /usr/local/share/cmake-3.17/Modules/CMakeForceCompiler.cmake:89 (message): The CMAKE_FORCE_CXX_COMPILER macro is deprecated. Instead just set CMAKE_CXX_COMPILER and allow CMake to identify the compiler. Call Stack (most recent call first): ....../microbit-samples/yotta_targets/mbed-gcc/CMake/toolchain.cmake:79 (cmake_force_cxx_compiler) toolchain.cmake:8 (include) /usr/local/share/cmake-3.17/Modules/CMakeDetermineSystem.cmake:93 (include) CMakeLists.txt:76 (project)
GCC version is: 6.3.1 -- The ASM compiler identification is GNU -- Found assembler: /usr/bin/arm-none-eabi-gcc suppressing warnings from ble-nrf51822 suppressing warnings from nrf51-sdk suppressing ALL warnings from mbed-classic, ble, ble-nrf51822 & nrf51-sdk -- Configuring done -- Generating done -- Build files have been written to: ....../microbit-samples/build/bbc-microbit-classic-gcc [112/172] Building CXX object ym/microbit-dal/source/CMakeFiles/microbit-dal.dir/core/MicroBitHeapAllocator.cpp.o ....../microbit-samples/yotta_modules/microbit-dal/source/core/MicroBitHeapAllocator.cpp: In function 'void free(void*)': ....../microbit-samples/yotta_modules/microbit-dal/source/core/MicroBitHeapAllocator.cpp:342:13: warning: this 'if' clause does not guard... [-Wmisleading-indentation] if (*cb == 0 || *cb & MICROBIT_HEAP_BLOCK_FREE) ^~ ....../microbit-samples/yotta_modules/microbit-dal/source/core/MicroBitHeapAllocator.cpp:345:10: note: ...this statement, but the latter is misleadingly indented as if it is guarded by the 'if' *cb |= MICROBIT_HEAP_BLOCK_FREE; ^ [120/172] Building CXX object ym/microbit-dal/source/CMakeFiles/microbit-dal.dir/core/MicroBitFiber.cpp.o ....../microbit-samples/yotta_modules/microbit-dal/source/core/MicroBitFiber.cpp: In function 'void scheduler_init(EventModel&)': ....../microbit-samples/yotta_modules/microbit-dal/source/core/MicroBitFiber.cpp:189:5: warning: this 'if' clause does not guard... [-Wmisleading-indentation] if (fiber_scheduler_running()) ^~ ....../microbit-samples/yotta_modules/microbit-dal/source/core/MicroBitFiber.cpp:194:2: note: ...this statement, but the latter is misleadingly indented as if it is guarded by the 'if' messageBus = &_messageBus; ^~~~~~~~~~ ....../microbit-samples/yotta_modules/microbit-dal/source/core/MicroBitFiber.cpp: In function 'int fiber_wait_for_event(uint16_t, uint16_t)': ....../microbit-samples/yotta_modules/microbit-dal/source/core/MicroBitFiber.cpp:388:5: warning: this 'if' clause does not guard... [-Wmisleading-indentation] if(ret == MICROBIT_OK) ^~ ....../microbit-samples/yotta_modules/microbit-dal/source/core/MicroBitFiber.cpp:391:2: note: ...this statement, but the latter is misleadingly indented as if it is guarded by the 'if' return ret; ^~~~~~ [159/172] Building CXX object ym/microbit-dal/source/CMakeFiles/microbit-dal.dir/bluetooth/MicroBitIOPinService.cpp.o ....../microbit-samples/yotta_modules/microbit-dal/source/bluetooth/MicroBitIOPinService.cpp: In member function 'void MicroBitIOPinService::onDataWritten(const GattWriteCallbackParams*)': ....../microbit-samples/yotta_modules/microbit-dal/source/bluetooth/MicroBitIOPinService.cpp:179:42: warning: array subscript is above array bounds [-Warray-bounds] io.pin[i].getDigitalValue(); ~~~~~~~~~~~~~~~~~~~~~~~~~^~ ....../microbit-samples/yotta_modules/microbit-dal/source/bluetooth/MicroBitIOPinService.cpp:182:41: warning: array subscript is above array bounds [-Warray-bounds] io.pin[i].getAnalogValue(); ~~~~~~~~~~~~~~~~~~~~~~~~^~ ....../microbit-samples/yotta_modules/microbit-dal/source/bluetooth/MicroBitIOPinService.cpp:199:41: warning: array subscript is above array bounds [-Warray-bounds] io.pin[i].getDigitalValue(); ~~~~~~~~~~~~~~~~~~~~~~~~~^~ ....../microbit-samples/yotta_modules/microbit-dal/source/bluetooth/MicroBitIOPinService.cpp:202:40: warning: array subscript is above array bounds [-Warray-bounds] io.pin[i].getAnalogValue(); ~~~~~~~~~~~~~~~~~~~~~~~~^~ ....../microbit-samples/yotta_modules/microbit-dal/source/bluetooth/MicroBitIOPinService.cpp:224:43: warning: array subscript is above array bounds [-Warray-bounds] io.pin[pin].setAnalogValue(value); ~~~~~~~~~~~~~~~~~~~~~~~~~~^~~~~~~ ....../microbit-samples/yotta_modules/microbit-dal/source/bluetooth/MicroBitIOPinService.cpp:225:46: warning: array subscript is above array bounds [-Warray-bounds] io.pin[pin].setAnalogPeriodUs(period); ~~~~~~~~~~~~~~~~~~~~~~~~~~~~~^~~~~~~~ ....../microbit-samples/yotta_modules/microbit-dal/source/bluetooth/MicroBitIOPinService.cpp:245:51: warning: array subscript is above array bounds [-Warray-bounds] io.pin[data->pin].setDigitalValue(data->value); ~~~~~~~~~~~~~~~~~~~~~~~~~~~~~~~~~^~~~~~~~~~~~~ ....../microbit-samples/yotta_modules/microbit-dal/source/bluetooth/MicroBitIOPinService.cpp:247:50: warning: array subscript is above array bounds [-Warray-bounds] io.pin[data->pin].setAnalogValue(data->value == 255 ? 1023 : data->value << 2); ~~~~~~~~~~~~~~~~~~~~~~~~~~~~~~~~^~~~~~~~~~~~~~~~~~~~~~~~~~~~~~~~~~~~~~~~~~~~~~ ....../microbit-samples/yotta_modules/microbit-dal/source/bluetooth/MicroBitIOPinService.cpp: In member function 'void MicroBitIOPinService::updateBLEInputs(bool)': ....../microbit-samples/yotta_modules/microbit-dal/source/bluetooth/MicroBitIOPinService.cpp:136:50: warning: array subscript is above array bounds [-Warray-bounds] value = io.pin[i].getDigitalValue(); ~~~~~~~~~~~~~~~~~~~~~~~~~^~ ....../microbit-samples/yotta_modules/microbit-dal/source/bluetooth/MicroBitIOPinService.cpp:138:49: warning: array subscript is above array bounds [-Warray-bounds] value = io.pin[i].getAnalogValue() >> 2; ~~~~~~~~~~~~~~~~~~~~~~~~^~ [172/172] Linking CXX executable source/microbit-samples /usr/lib/gcc/arm-none-eabi/6.3.1/../../../arm-none-eabi/bin/ld: warning: /usr/lib/gcc/arm-none-eabi/6.3.1/../../../arm-none-eabi/lib/thumb/v6-m/libstdc++_nano.a(atexit_arm.o) uses 2-byte wchar_t yet the output is to use 4-byte wchar_t; use of wchar_t values across objects may fail /usr/lib/gcc/arm-none-eabi/6.3.1/../../../arm-none-eabi/bin/ld: warning: /usr/lib/gcc/arm-none-eabi/6.3.1/../../../arm-none-eabi/lib/thumb/v6-m/libstdc++_nano.a(new_opv.o) uses 2-byte wchar_t yet the output is to use 4-byte wchar_t; use of wchar_t values across objects may fail /usr/lib/gcc/arm-none-eabi/6.3.1/../../../arm-none-eabi/bin/ld: warning: /usr/lib/gcc/arm-none-eabi/6.3.1/../../../arm-none-eabi/lib/thumb/v6-m/libstdc++_nano.a(del_opv.o) uses 2-byte wchar_t yet the output is to use 4-byte wchar_t; use of wchar_t values across objects may fail /usr/lib/gcc/arm-none-eabi/6.3.1/../../../arm-none-eabi/bin/ld: warning: /usr/lib/gcc/arm-none-eabi/6.3.1/../../../arm-none-eabi/lib/thumb/v6-m/libstdc++_nano.a(del_op.o) uses 2-byte wchar_t yet the output is to use 4-byte wchar_t; use of wchar_t values across objects may fail /usr/lib/gcc/arm-none-eabi/6.3.1/../../../arm-none-eabi/bin/ld: warning: /usr/lib/gcc/arm-none-eabi/6.3.1/../../../arm-none-eabi/lib/thumb/v6-m/libstdc++_nano.a(new_op.o) uses 2-byte wchar_t yet the output is to use 4-byte wchar_t; use of wchar_t values across objects may fail /usr/lib/gcc/arm-none-eabi/6.3.1/../../../arm-none-eabi/bin/ld: warning: /usr/lib/gcc/arm-none-eabi/6.3.1/../../../arm-none-eabi/lib/thumb/v6-m/libstdc++_nano.a(new_handler.o) uses 2-byte wchar_t yet the output is to use 4-byte wchar_t; use of wchar_t values across objects may fail 145 master ✘ cp ./build/bbc-microbit-classic-gcc/source/microbit-samples-combined.hex /media/longervision/MICROBIT 146 master ✔
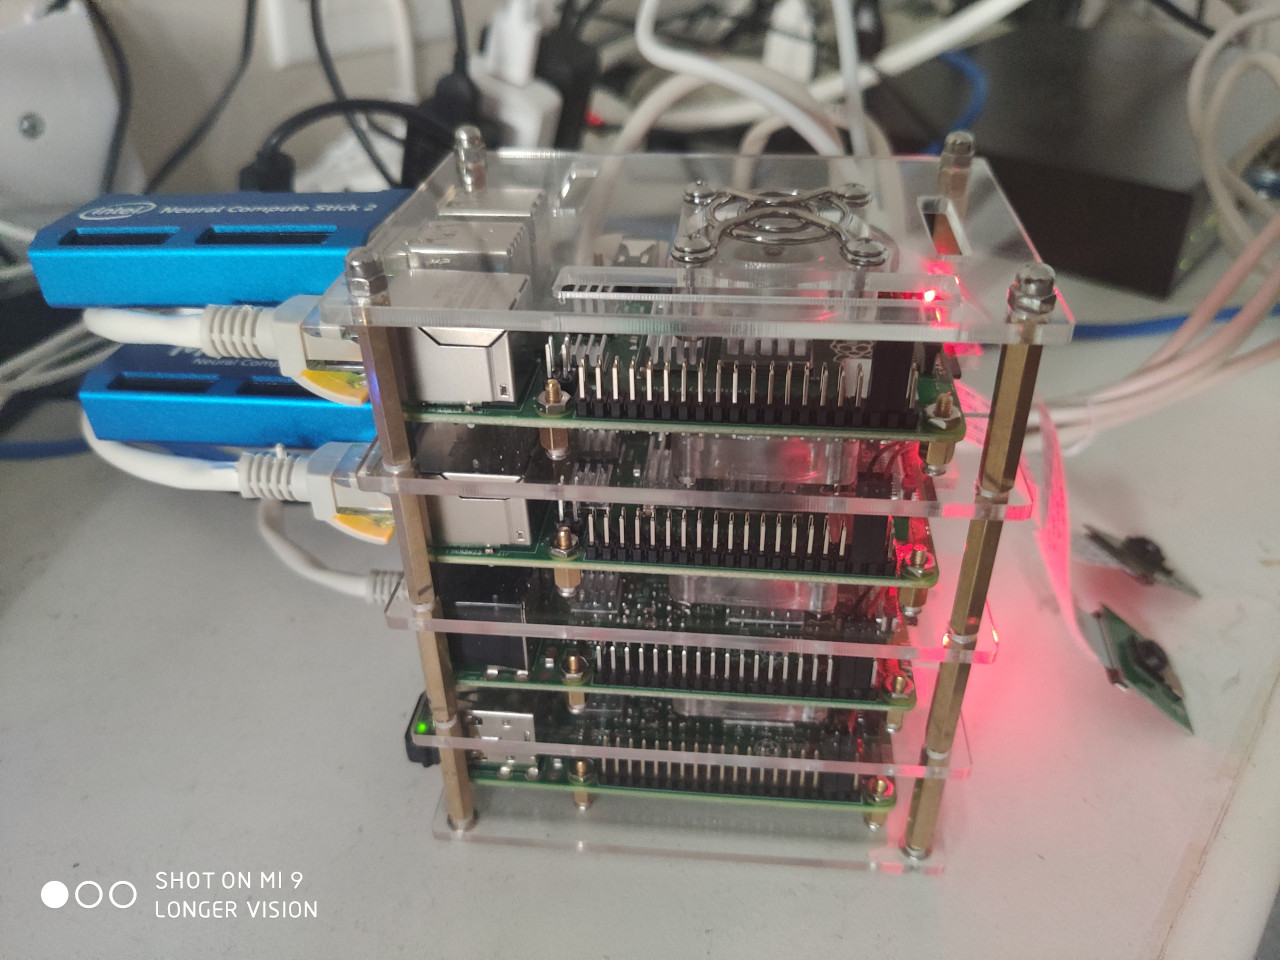
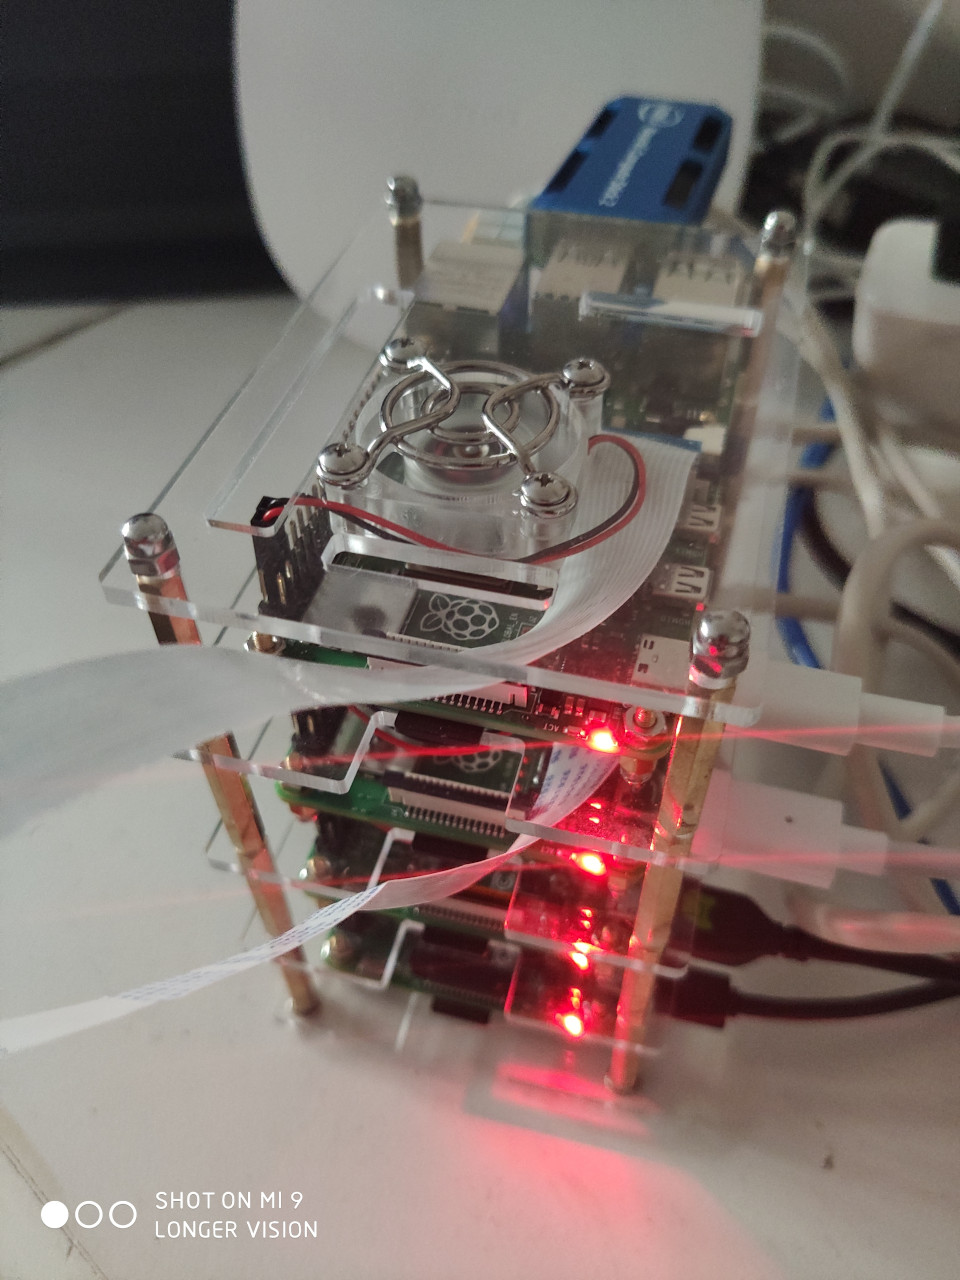
Today is Sunday. Vancouver is sunny. It’s been quite a while that I haven’t written anything. It took me a couple of weeks to have my tax reported finally. Hmmm… Anyway, finally, I’ve got some time to talk about Supercomputer:
processor : 1 model name : ARMv7 Processor rev 3 (v7l) BogoMIPS : 108.00 Features : half thumb fastmult vfp edsp neon vfpv3 tls vfpv4 idiva idivt vfpd32 lpae evtstrm crc32 CPU implementer : 0x41 CPU architecture: 7 CPU variant : 0x0 CPU part : 0xd08 CPU revision : 3
processor : 2 model name : ARMv7 Processor rev 3 (v7l) BogoMIPS : 108.00 Features : half thumb fastmult vfp edsp neon vfpv3 tls vfpv4 idiva idivt vfpd32 lpae evtstrm crc32 CPU implementer : 0x41 CPU architecture: 7 CPU variant : 0x0 CPU part : 0xd08 CPU revision : 3
processor : 3 model name : ARMv7 Processor rev 3 (v7l) BogoMIPS : 108.00 Features : half thumb fastmult vfp edsp neon vfpv3 tls vfpv4 idiva idivt vfpd32 lpae evtstrm crc32 CPU implementer : 0x41 CPU architecture: 7 CPU variant : 0x0 CPU part : 0xd08 CPU revision : 3
Hardware : BCM2835 Revision : d03114 Serial : 10000000bc6e6e05 Model : Raspberry Pi 4 Model B Rev 1.4
processor : 1 BogoMIPS : 108.00 Features : fp asimd evtstrm crc32 cpuid CPU implementer : 0x41 CPU architecture: 8 CPU variant : 0x0 CPU part : 0xd08 CPU revision : 3
processor : 2 BogoMIPS : 108.00 Features : fp asimd evtstrm crc32 cpuid CPU implementer : 0x41 CPU architecture: 8 CPU variant : 0x0 CPU part : 0xd08 CPU revision : 3
processor : 3 BogoMIPS : 108.00 Features : fp asimd evtstrm crc32 cpuid CPU implementer : 0x41 CPU architecture: 8 CPU variant : 0x0 CPU part : 0xd08 CPU revision : 3
Hardware : BCM2835 Revision : d03114 Serial : 10000000bc6e6e05 Model : Raspberry Pi 4 Model B Rev 1.4
processor : 1 model name : ARMv7 Processor rev 3 (v7l) BogoMIPS : 108.00 Features : half thumb fastmult vfp edsp neon vfpv3 tls vfpv4 idiva idivt vfpd32 lpae evtstrm crc32 CPU implementer : 0x41 CPU architecture: 7 CPU variant : 0x0 CPU part : 0xd08 CPU revision : 3
processor : 2 model name : ARMv7 Processor rev 3 (v7l) BogoMIPS : 108.00 Features : half thumb fastmult vfp edsp neon vfpv3 tls vfpv4 idiva idivt vfpd32 lpae evtstrm crc32 CPU implementer : 0x41 CPU architecture: 7 CPU variant : 0x0 CPU part : 0xd08 CPU revision : 3
processor : 3 model name : ARMv7 Processor rev 3 (v7l) BogoMIPS : 108.00 Features : half thumb fastmult vfp edsp neon vfpv3 tls vfpv4 idiva idivt vfpd32 lpae evtstrm crc32 CPU implementer : 0x41 CPU architecture: 7 CPU variant : 0x0 CPU part : 0xd08 CPU revision : 3
Hardware : BCM2835 Revision : c03111 Serial : 100000006c0c9b01 Model : Raspberry Pi 4 Model B Rev 1.1
processor : 1 model name : ARMv7 Processor rev 4 (v7l) BogoMIPS : 38.40 Features : half thumb fastmult vfp edsp neon vfpv3 tls vfpv4 idiva idivt vfpd32 lpae evtstrm crc32 CPU implementer : 0x41 CPU architecture: 7 CPU variant : 0x0 CPU part : 0xd03 CPU revision : 4
processor : 2 model name : ARMv7 Processor rev 4 (v7l) BogoMIPS : 38.40 Features : half thumb fastmult vfp edsp neon vfpv3 tls vfpv4 idiva idivt vfpd32 lpae evtstrm crc32 CPU implementer : 0x41 CPU architecture: 7 CPU variant : 0x0 CPU part : 0xd03 CPU revision : 4
processor : 3 model name : ARMv7 Processor rev 4 (v7l) BogoMIPS : 38.40 Features : half thumb fastmult vfp edsp neon vfpv3 tls vfpv4 idiva idivt vfpd32 lpae evtstrm crc32 CPU implementer : 0x41 CPU architecture: 7 CPU variant : 0x0 CPU part : 0xd03 CPU revision : 4
Hardware : BCM2835 Revision : a02082 Serial : 000000009fcc6a22 Model : Raspberry Pi 3 Model B Rev 1.2
processor : 1 model name : ARMv7 Processor rev 4 (v7l) BogoMIPS : 38.40 Features : half thumb fastmult vfp edsp neon vfpv3 tls vfpv4 idiva idivt vfpd32 lpae evtstrm crc32 CPU implementer : 0x41 CPU architecture: 7 CPU variant : 0x0 CPU part : 0xd03 CPU revision : 4
processor : 2 model name : ARMv7 Processor rev 4 (v7l) BogoMIPS : 38.40 Features : half thumb fastmult vfp edsp neon vfpv3 tls vfpv4 idiva idivt vfpd32 lpae evtstrm crc32 CPU implementer : 0x41 CPU architecture: 7 CPU variant : 0x0 CPU part : 0xd03 CPU revision : 4
processor : 3 model name : ARMv7 Processor rev 4 (v7l) BogoMIPS : 38.40 Features : half thumb fastmult vfp edsp neon vfpv3 tls vfpv4 idiva idivt vfpd32 lpae evtstrm crc32 CPU implementer : 0x41 CPU architecture: 7 CPU variant : 0x0 CPU part : 0xd03 CPU revision : 4
Hardware : BCM2835 Revision : a22082 Serial : 000000003fc1b876 Model : Raspberry Pi 3 Model B Rev 1.2
Actually, the cluster can certainly be arbitrarily configured as you wish. A typical configuration is 1-master-3-workers, but which one should be the master? Is it really a good idea to ALWAYS designate the MOST powerful one as the master? Particularly, in my case, 4 Raspberry Pis are of different versions, so that they are of different computing capability.
3.1 Configure Hostfile
It’s always a good idea to create a hostfile on the master node. However, as reasons mentioned above, there is NO priority among ALL nodes in my case, I configured the hostfile for ALL 4 Raspberry Pis.
In order to test multiple nodes across the cluster, we need to generate SSH keys to avoid inputting password for logging into the other nodes all the time. In such, for each Raspberry Pi, you’ll have to generate a SSH key by ssh-keygen -t rsa, and push this generated key using command ssh-copy-id onto the other 3 Raspberry Pis. Finally, for a cluster of 4 Raspberry Pis, there are 3 authorized keys (for these other 3 Raspberry Pis) stored in file /home/pi/.ssh/authorized_keys on each of the 4 Raspberry Pis.
For a cluster of 4 Raspberry Pis, there will be 4*4=16 CPUs in total. Therefore, the maximum number to specify for argument -n will be 16. Otherwise, you’ll meet the following ERROR message:
1 2 3 4 5 6 7 8 9
pi@pi01:~ $ mpiexec -hostfile hostfile -n 20 hostname -------------------------------------------------------------------------- There are not enough slots available in the system to satisfy the 20 slots that were requested by the application: hostname
Either request fewer slots for your application, or make more slots available for use. --------------------------------------------------------------------------
pi@pi01:~ $ mpiexec -hostfile hostfile -n 16 python Downloads/helloworld.py Hello, World! I am process 1 of 16 on pi01. Hello, World! I am process 5 of 16 on pi02. Hello, World! I am process 6 of 16 on pi02. Hello, World! I am process 7 of 16 on pi02. Hello, World! I am process 4 of 16 on pi02. Hello, World! I am process 15 of 16 on pi04. Hello, World! I am process 12 of 16 on pi04. Hello, World! I am process 13 of 16 on pi04. Hello, World! I am process 14 of 16 on pi04. Hello, World! I am process 2 of 16 on pi01. Hello, World! I am process 0 of 16 on pi01. Hello, World! I am process 3 of 16 on pi01. Hello, World! I am process 9 of 16 on pi03. Hello, World! I am process 10 of 16 on pi03. Hello, World! I am process 11 of 16 on pi03. Hello, World! I am process 8 of 16 on pi03.
pi@pi01:~/Downloads/mpi4py-examples $ mpirun --hostfile ~/hostfile ./01-hello-world Hello! I'm rank 1 from 16 running in total... Hello! I'm rank 2 from 16 running in total... Hello! I'm rank 3 from 16 running in total... Hello! I'm rank 0 from 16 running in total... Hello! I'm rank 6 from 16 running in total... Hello! I'm rank 7 from 16 running in total... Hello! I'm rank 4 from 16 running in total... Hello! I'm rank 5 from 16 running in total... Hello! I'm rank 12 from 16 running in total... Hello! I'm rank 10 from 16 running in total... Hello! I'm rank 11 from 16 running in total... Hello! I'm rank 13 from 16 running in total... Hello! I'm rank 9 from 16 running in total... Hello! I'm rank 14 from 16 running in total... Hello! I'm rank 8 from 16 running in total... Hello! I'm rank 15 from 16 running in total...
Sometimes, without specifying the parameter btl_tcp_if_include, the running program will hang:
1 2 3 4 5 6 7 8 9 10 11 12
pi@pi01:~/Downloads/mpi4py-examples $ mpirun --np 16 --hostfile ~/hostfile 03-scatter-gather ------------------------------------------------------------------------------ Running on 16 cores ------------------------------------------------------------------------------ After Scatter: [0] [0. 1. 2. 3.] [1] [4. 5. 6. 7.] [pi03][[1597,1],8][btl_tcp_endpoint.c:626:mca_btl_tcp_endpoint_recv_connect_ack] received unexpected process identifier [[1597,1],10] [pi01][[1597,1],0][btl_tcp_endpoint.c:626:mca_btl_tcp_endpoint_recv_connect_ack] received unexpected process identifier [[1597,1],3] [2] [ 8. 9. 10. 11.] ^C^Z [1]+ Stopped mpirun --np 16 --hostfile ~/hostfile 03-scatter-gather
Please refer to the explanation TCP: unexpected process identifier in connect_ack. Now, let’s specify the parameter as --mca btl_tcp_if_include "192.168.1.251/24,192.168.1.249/24,192.168.1.247/24".
pi@pi01:~/Downloads/mpi4py-examples $ mpirun --hostfile ~/hostfile python ./09-task-pull.py Master starting with 15 workers I am a worker with rank 1 on pi01. I am a worker with rank 2 on pi01. I am a worker with rank 3 on pi01. I am a worker with rank 4 on pi02. I am a worker with rank 5 on pi02. I am a worker with rank 6 on pi02. I am a worker with rank 7 on pi02. Sending task 0 to worker 2 Sending task 1 to worker 1 Sending task 2 to worker 3 Got data from worker 2 Sending task 3 to worker 2 Got data from worker 3 Sending task 4 to worker 3 Got data from worker 1 Got data from worker 2 Sending task 5 to worker 1 Sending task 6 to worker 2 Got data from worker 3 Sending task 7 to worker 3 Got data from worker 1 Got data from worker 2 Sending task 8 to worker 1 Sending task 9 to worker 2 Got data from worker 3 Sending task 10 to worker 3 Got data from worker 1 Got data from worker 2 Sending task 11 to worker 1 Sending task 12 to worker 2 Got data from worker 3 Sending task 13 to worker 3 Got data from worker 1 Got data from worker 2 Sending task 14 to worker 1 Sending task 15 to worker 2 Got data from worker 3 Sending task 16 to worker 3 Got data from worker 1 Got data from worker 2 Sending task 17 to worker 1 Sending task 18 to worker 2 Got data from worker 3 Sending task 19 to worker 3 Got data from worker 1 Sending task 20 to worker 1 Got data from worker 2 Sending task 21 to worker 2 Got data from worker 3 Sending task 22 to worker 3 Got data from worker 1 Sending task 23 to worker 1 Got data from worker 2 Got data from worker 3 Sending task 24 to worker 2 Sending task 25 to worker 3 Got data from worker 2 Got data from worker 1 Sending task 26 to worker 2 Got data from worker 3 Sending task 27 to worker 3 Got data from worker 2 Sending task 28 to worker 1 Sending task 29 to worker 2 Got data from worker 3 Sending task 30 to worker 3 Got data from worker 2 Got data from worker 1 Sending task 31 to worker 2 Got data from worker 2 Got data from worker 3 Worker 2 exited. Worker 1 exited. Worker 3 exited. I am a worker with rank 15 on pi04. I am a worker with rank 12 on pi04. I am a worker with rank 8 on pi03. I am a worker with rank 13 on pi04. I am a worker with rank 9 on pi03. I am a worker with rank 14 on pi04. I am a worker with rank 10 on pi03. I am a worker with rank 11 on pi03. Worker 5 exited. Worker 4 exited. Worker 6 exited. Worker 7 exited. Worker 15 exited. Worker 8 exited. Worker 9 exited. Worker 10 exited. Worker 11 exited. Worker 12 exited. Worker 13 exited. Worker 14 exited. Master finishing
pi@pi01:~ $ mpiexec -n 1 python prime.py 100000 Find all primes up to: 100000 Nodes: 1 Time elasped: 214.86 seconds Primes discovered: 9592
pi02
1 2 3 4 5
pi@pi02:~ $ mpiexec -n 1 python prime.py 100000 Find all primes up to: 100000 Nodes: 1 Time elasped: 212.2 seconds Primes discovered: 9592
pi03
1 2 3 4 5
pi@pi03:~ $ mpiexec -n 1 python prime.py 100000 Find all primes up to: 100000 Nodes: 1 Time elasped: 665.24 seconds Primes discovered: 9592
pi04
1 2 3 4 5
pi@pi04:~ $ mpiexec -n 1 python prime.py 100000 Find all primes up to: 100000 Nodes: 1 Time elasped: 684.64 seconds Primes discovered: 9592
Clearly, the computing capability of each CPU on pi01/pi02 is roughly 3 times faster than the CPU on pi03/pi04, which can be easily estimated from the parameter BogoMIPS: $$ 108.00 (pi01/pi02) / 38.40 (pi03/pi04) \approx 3 $$
pi@pi01:~ $ mpiexec -np 16 --hostfile hostfile --mca btl_tcp_if_include "192.168.1.251/24,192.168.1.249/24,192.168.1.247/24" python prime.py 100000 Find all primes up to: 100000 Nodes: 16 Time elasped: 42.22 seconds Primes discovered: 9592
192.168.1.253 slots=4
192.168.1.251 slots=4
1 2 3 4 5
pi@pi01:~ $ mpiexec -np 8 --hostfile hostfile --mca btl_tcp_if_include "192.168.1.251/24" python prime.py 100000 Find all primes up to: 100000 Nodes: 8 Time elasped: 29.56 seconds Primes discovered: 9592
The results are obviously telling:
to calculate using a cluster of 4 Raspberry Pis with 16 CPUs is ALWAYS faster than running on a single node with 4 CPUs. $$ 42.22 \le 50 $$
to calculate using 2 fastest nodes is even faster than running on a cluster of 4 nodes. This clearly hints the importance of Load Balancing. $$ 29.56 \le 42.22 $$
the speed in Experiment 2 is roughly doubled as that using a single node of pi03 or pi04. $$ 52 (pi01/pi02) / 29.56 (Experiment 2) \approx 2 $$
In the end of this blog, as for Load Balancing, I may talk about it some time in the future.
Well, I’ve got to build Tensorflow for aarch64 from source. In such, I’ve got to build Bazel for aarch64 as well. A good news is: Bazel recently released 3.0.0.
Today’s concert: ONE WORLD : TOGETHER AT HOME. Yup, today, I’ve my previous blog updated. A lot of modifications. Khadas VIM3 is really a good product. With Amlogic‘s A311D with 5.0 TOPS NPU, the board itself comes with a super powerful AI inference capability.
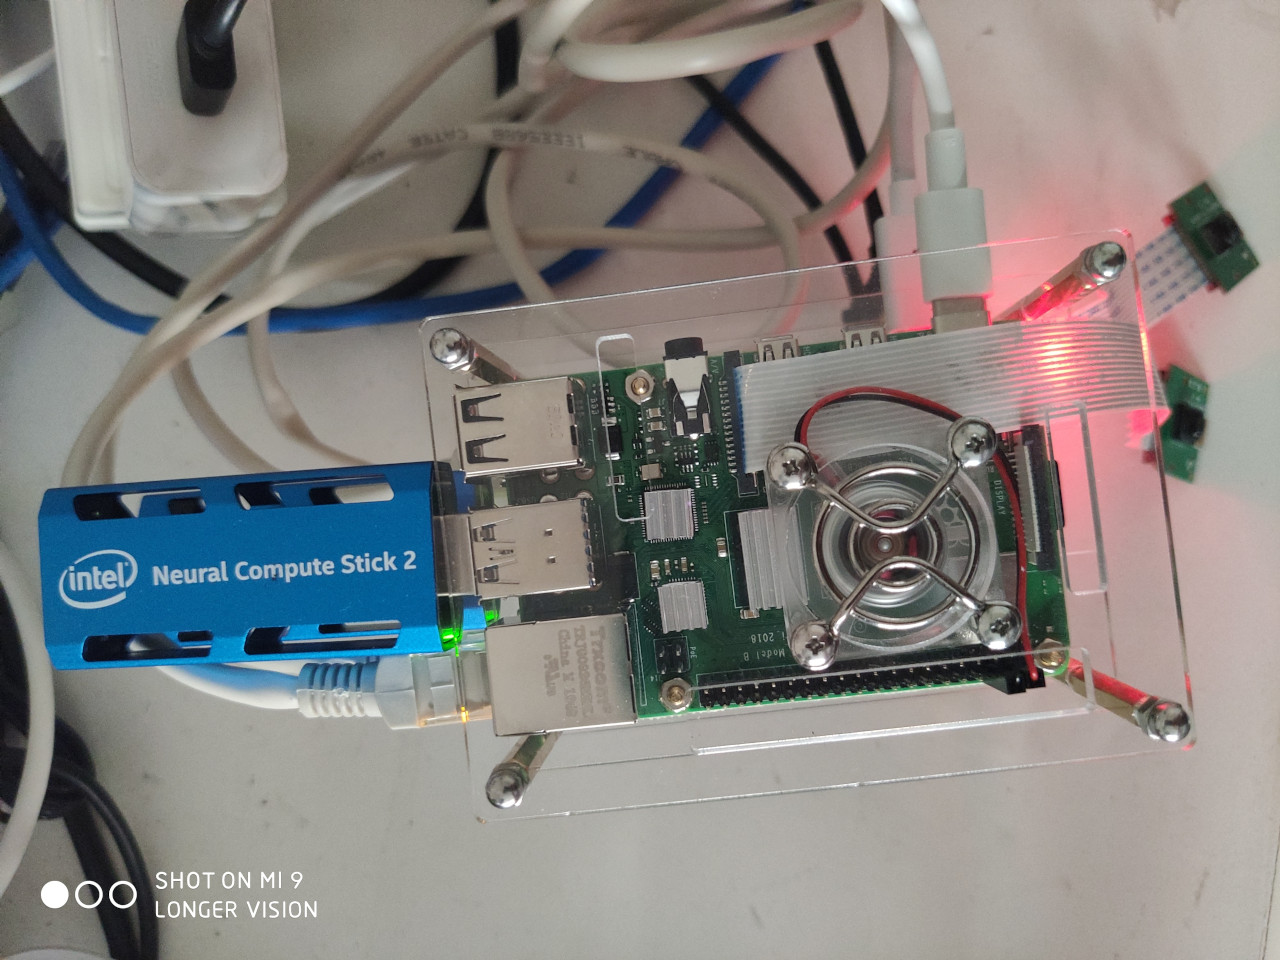
AI inference unit used to be in USB sticks, such as:
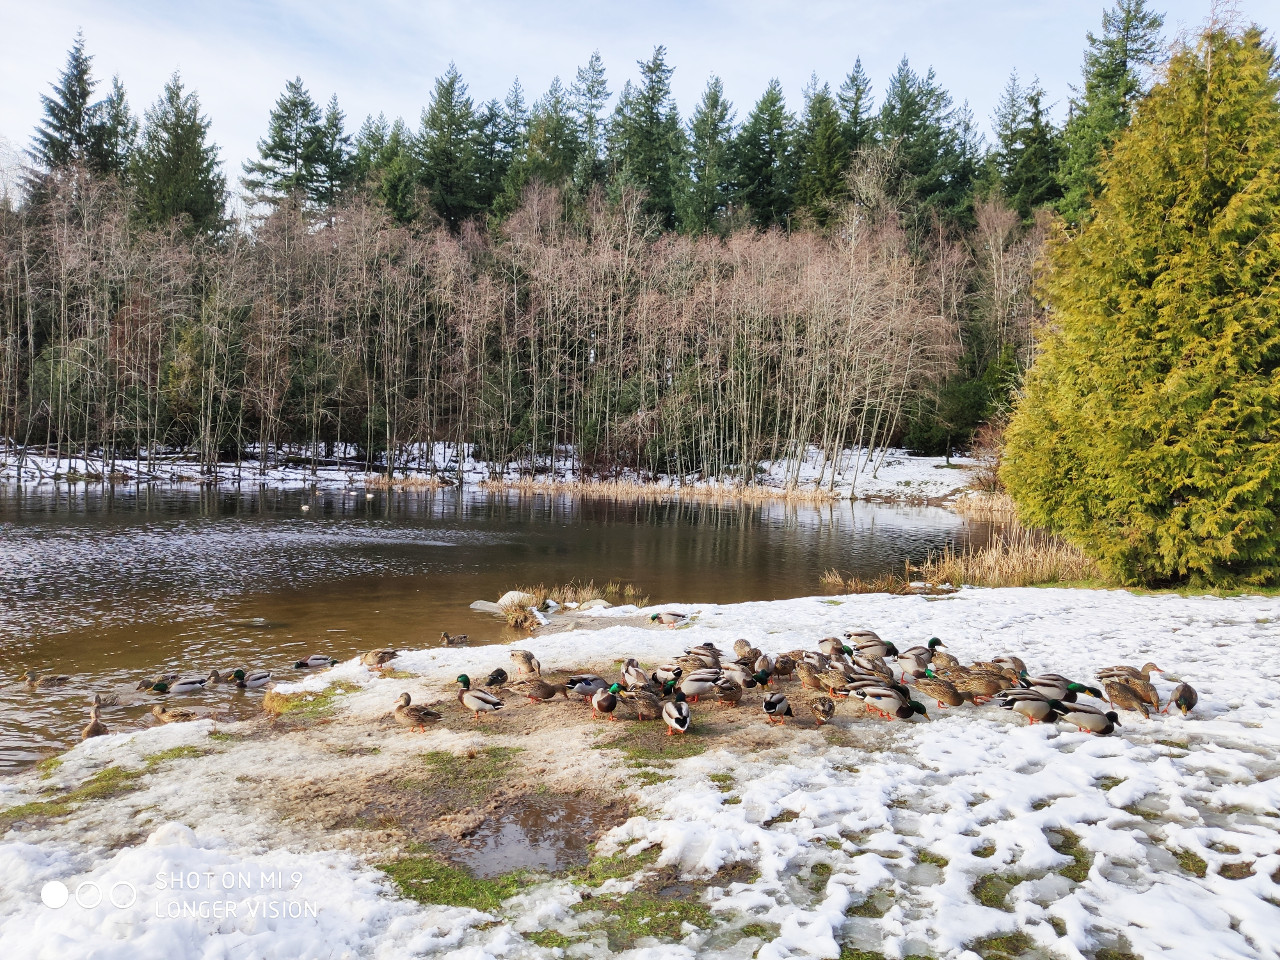
What a sunny day after the **FIRST** snow in this winter. Let me show you 3 pictures in the first row, and 3 videos in the second. We need to enjoy both R&D and life…
Green Timers Lake 1
Green Timers Lake 2
Green Timers Park
A Pair of Swans
A Group of Ducks
A Little Stream In The Snow
After a brief break, I started investigating Khadas VIM3 again.
1. About Khadas VIM3
Khadas VIM3 is a super computer based on Amlogic A311D. Before we start, let’s carry out several simple comparisons.
1.1 Raspberry Pi 4 Model B vs. Khadas VIM3 vs. Jetson Nano Developer Kit
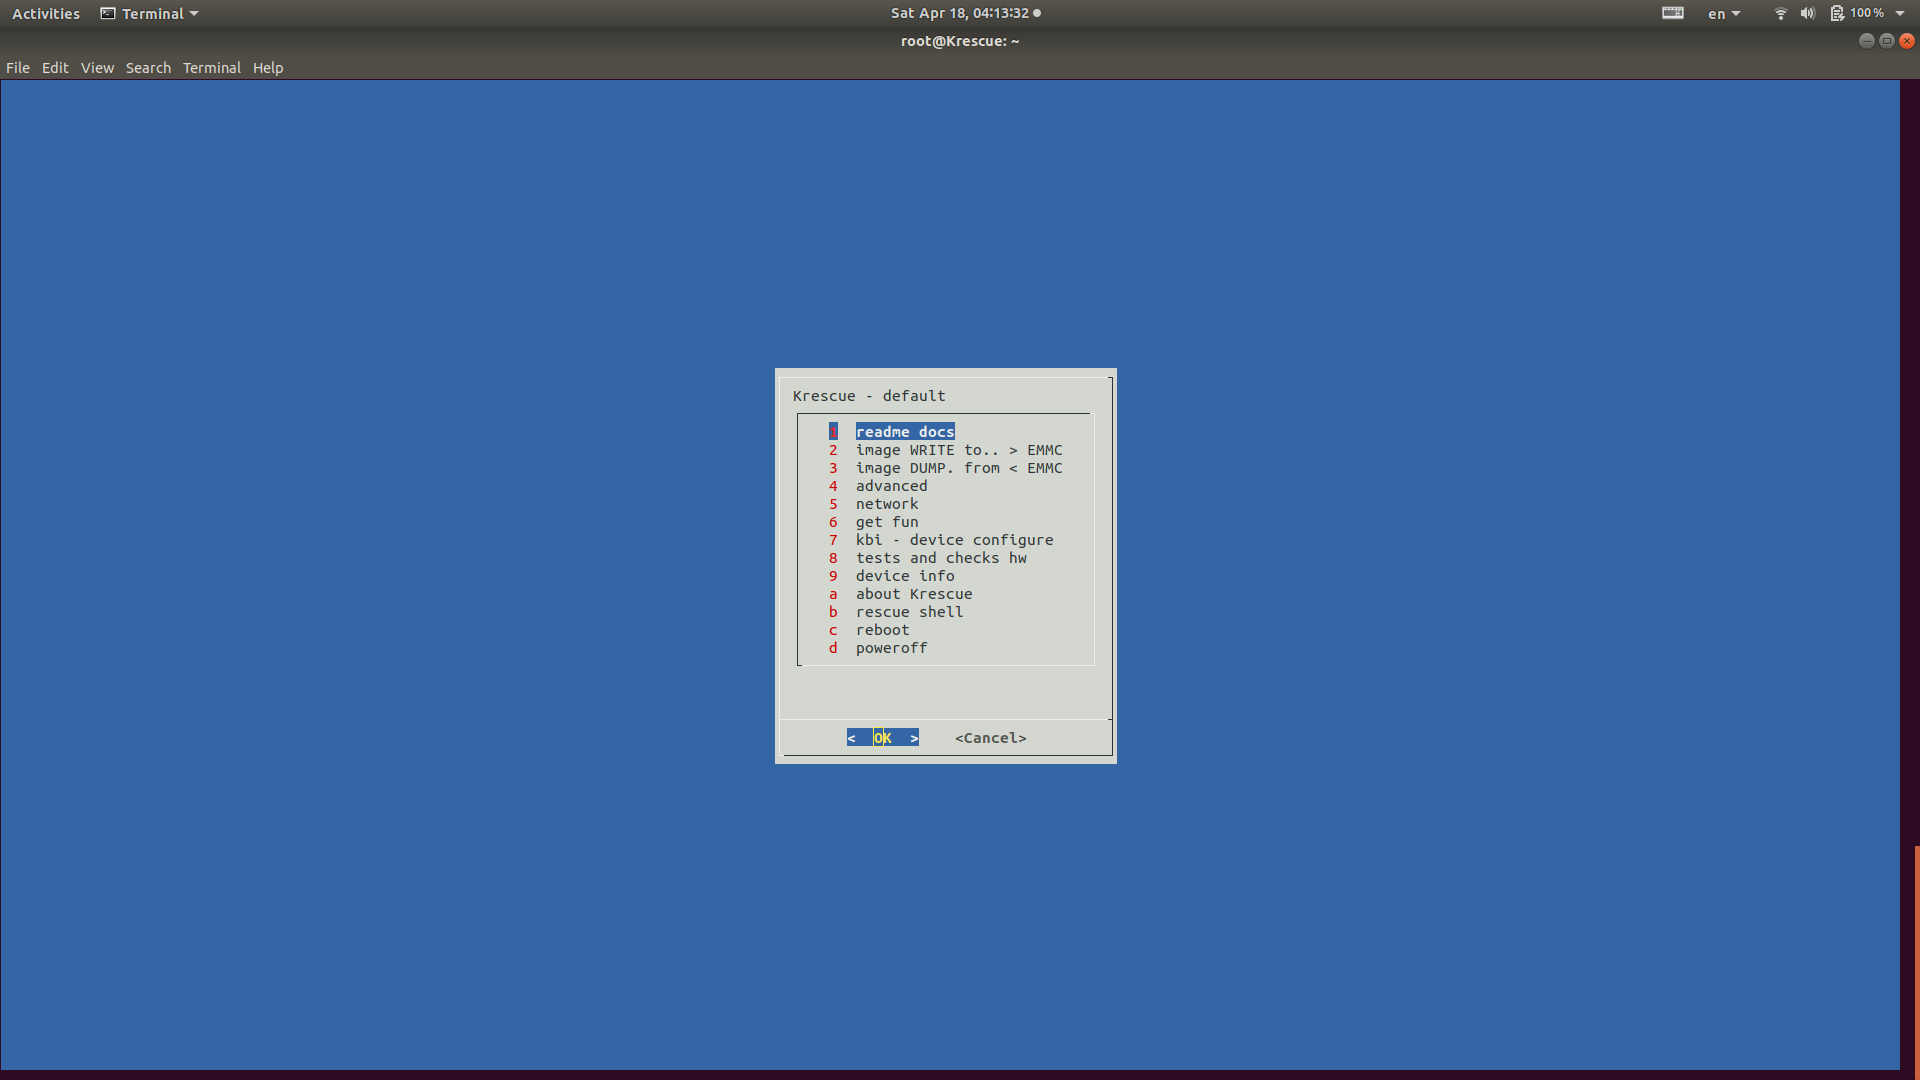
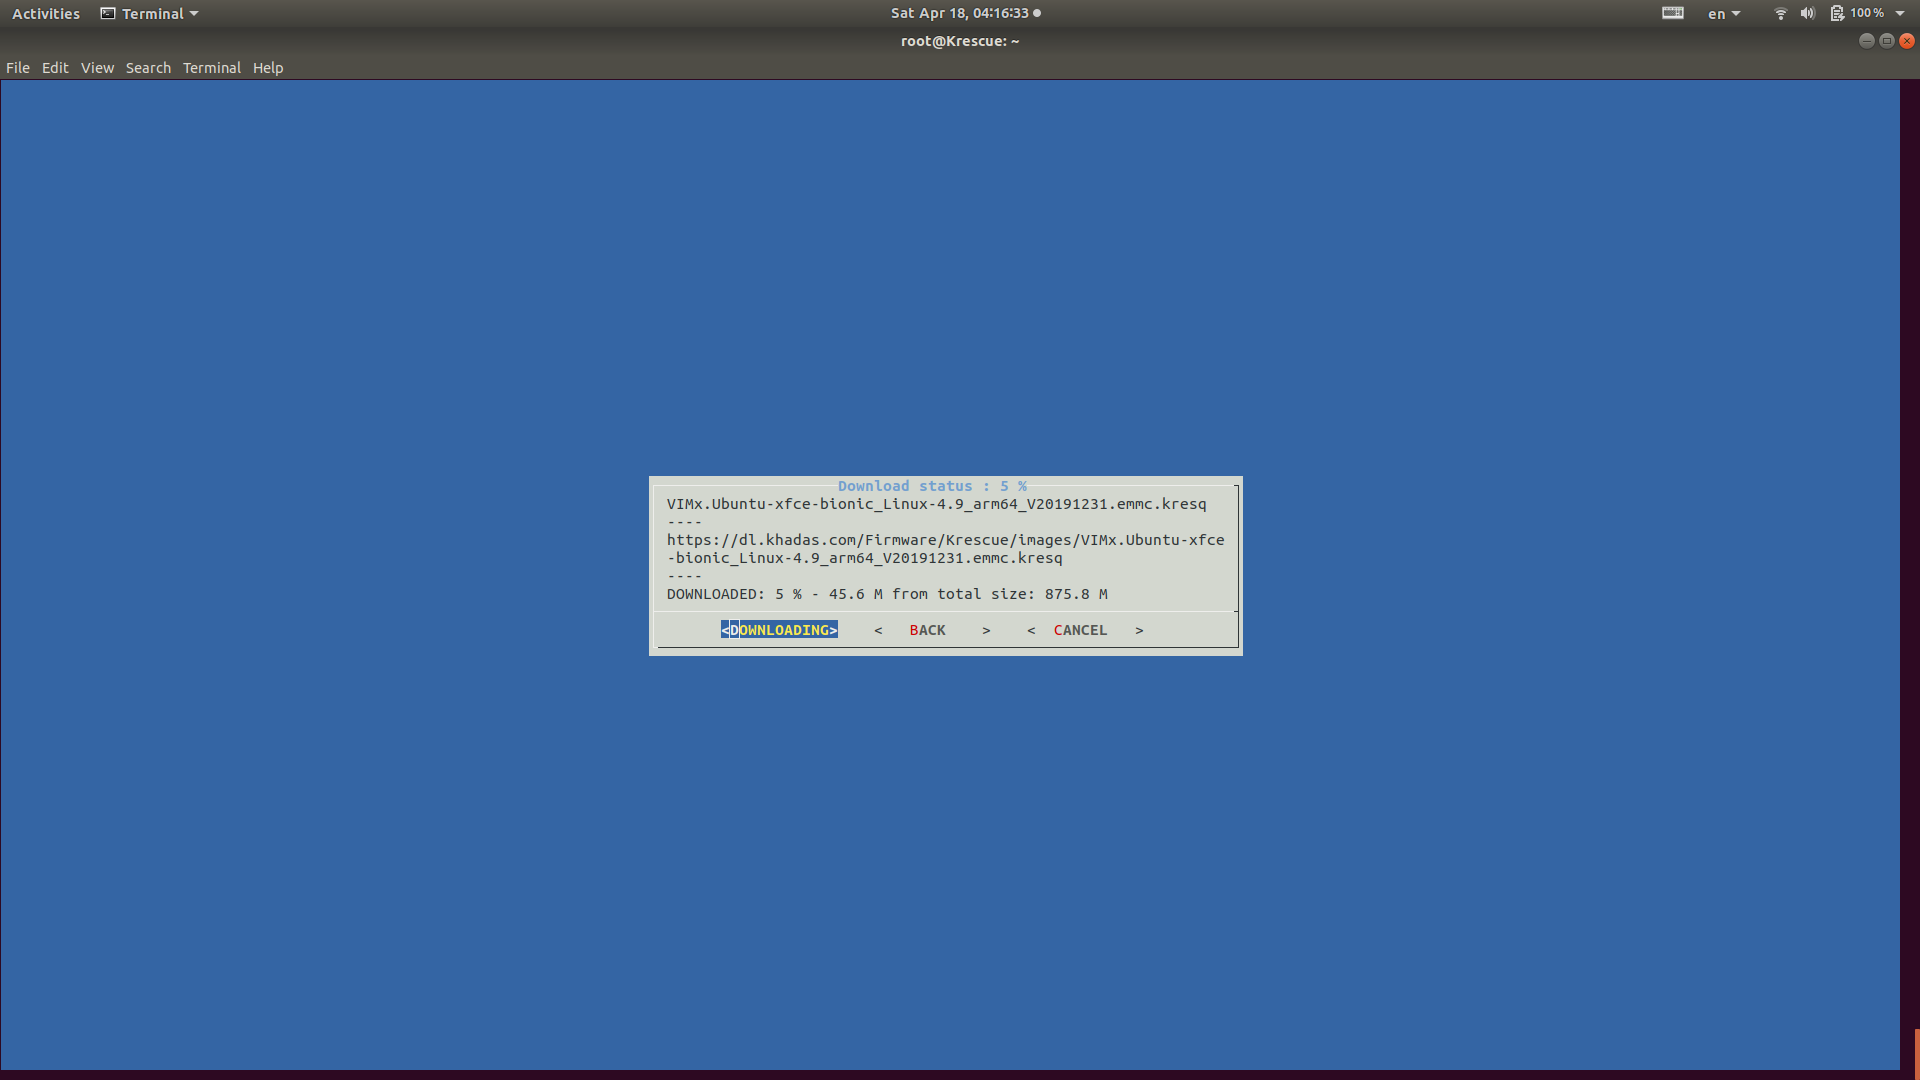
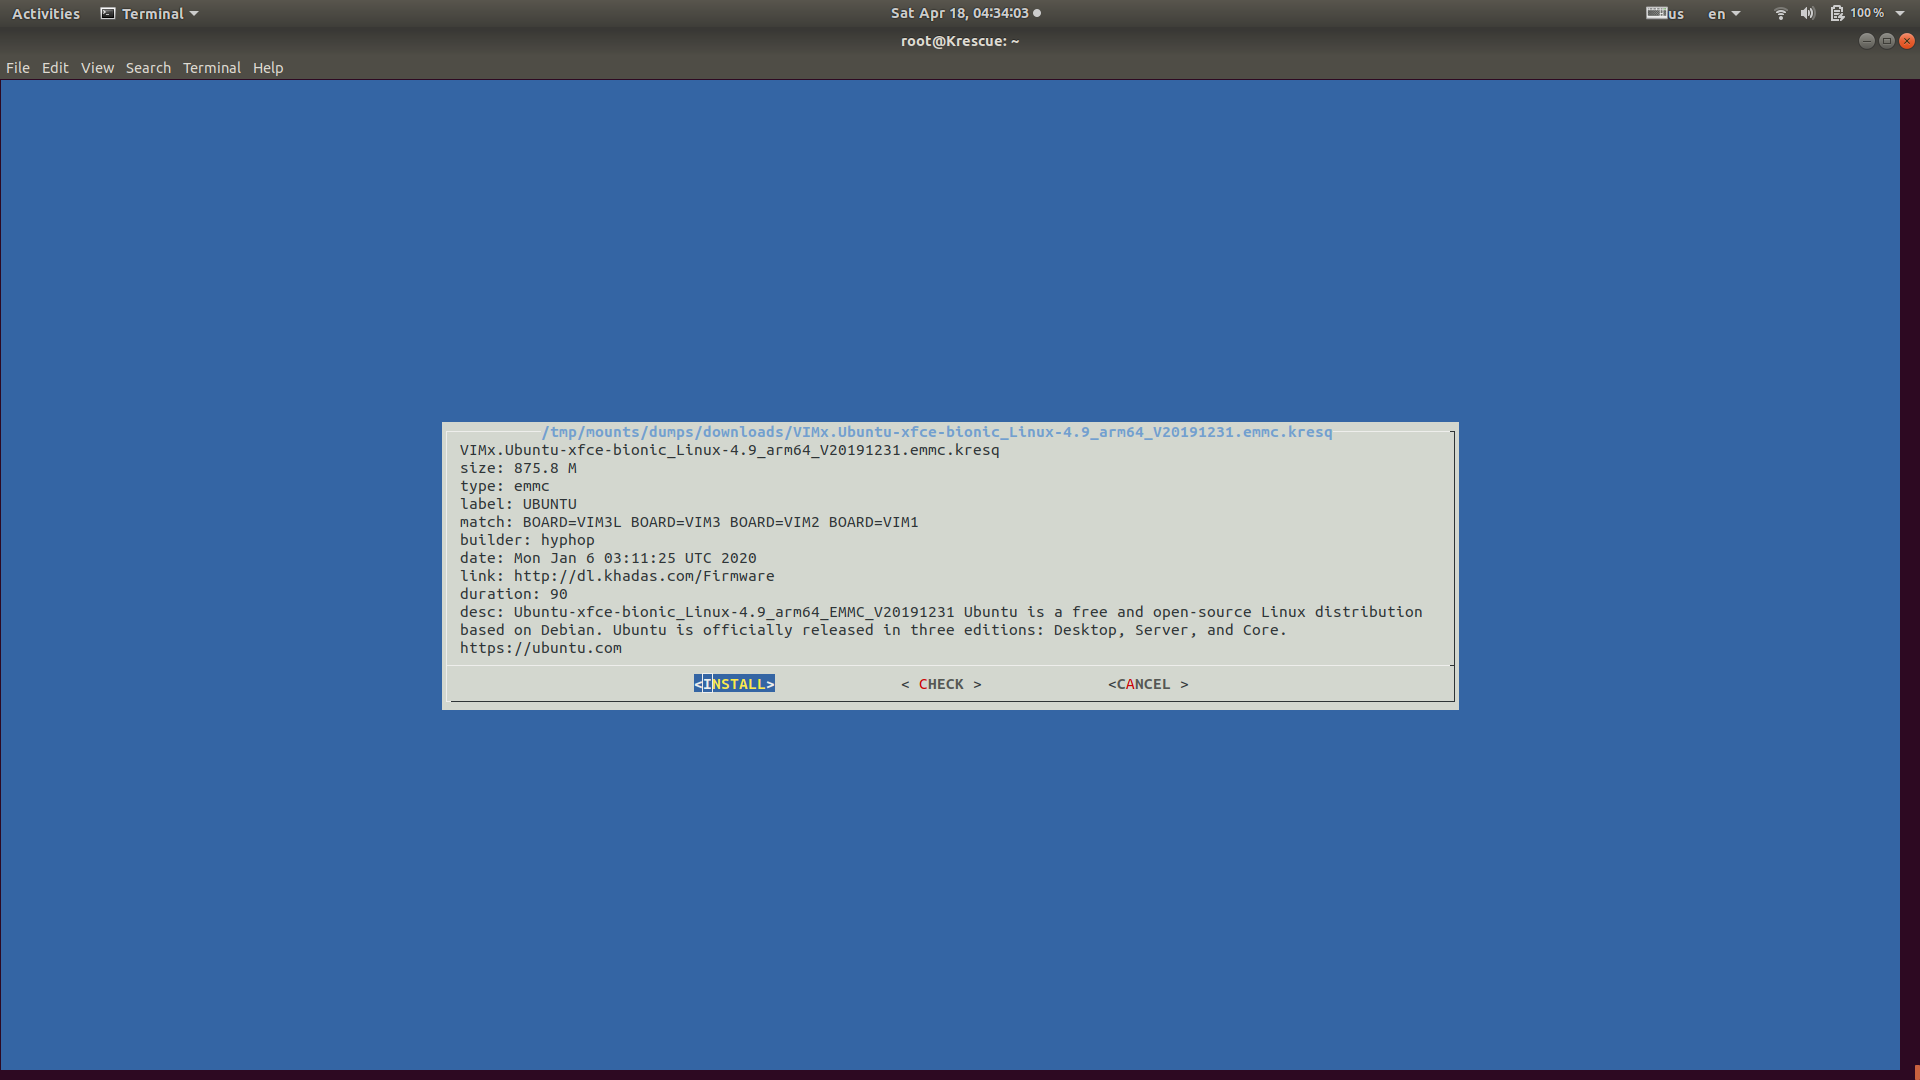
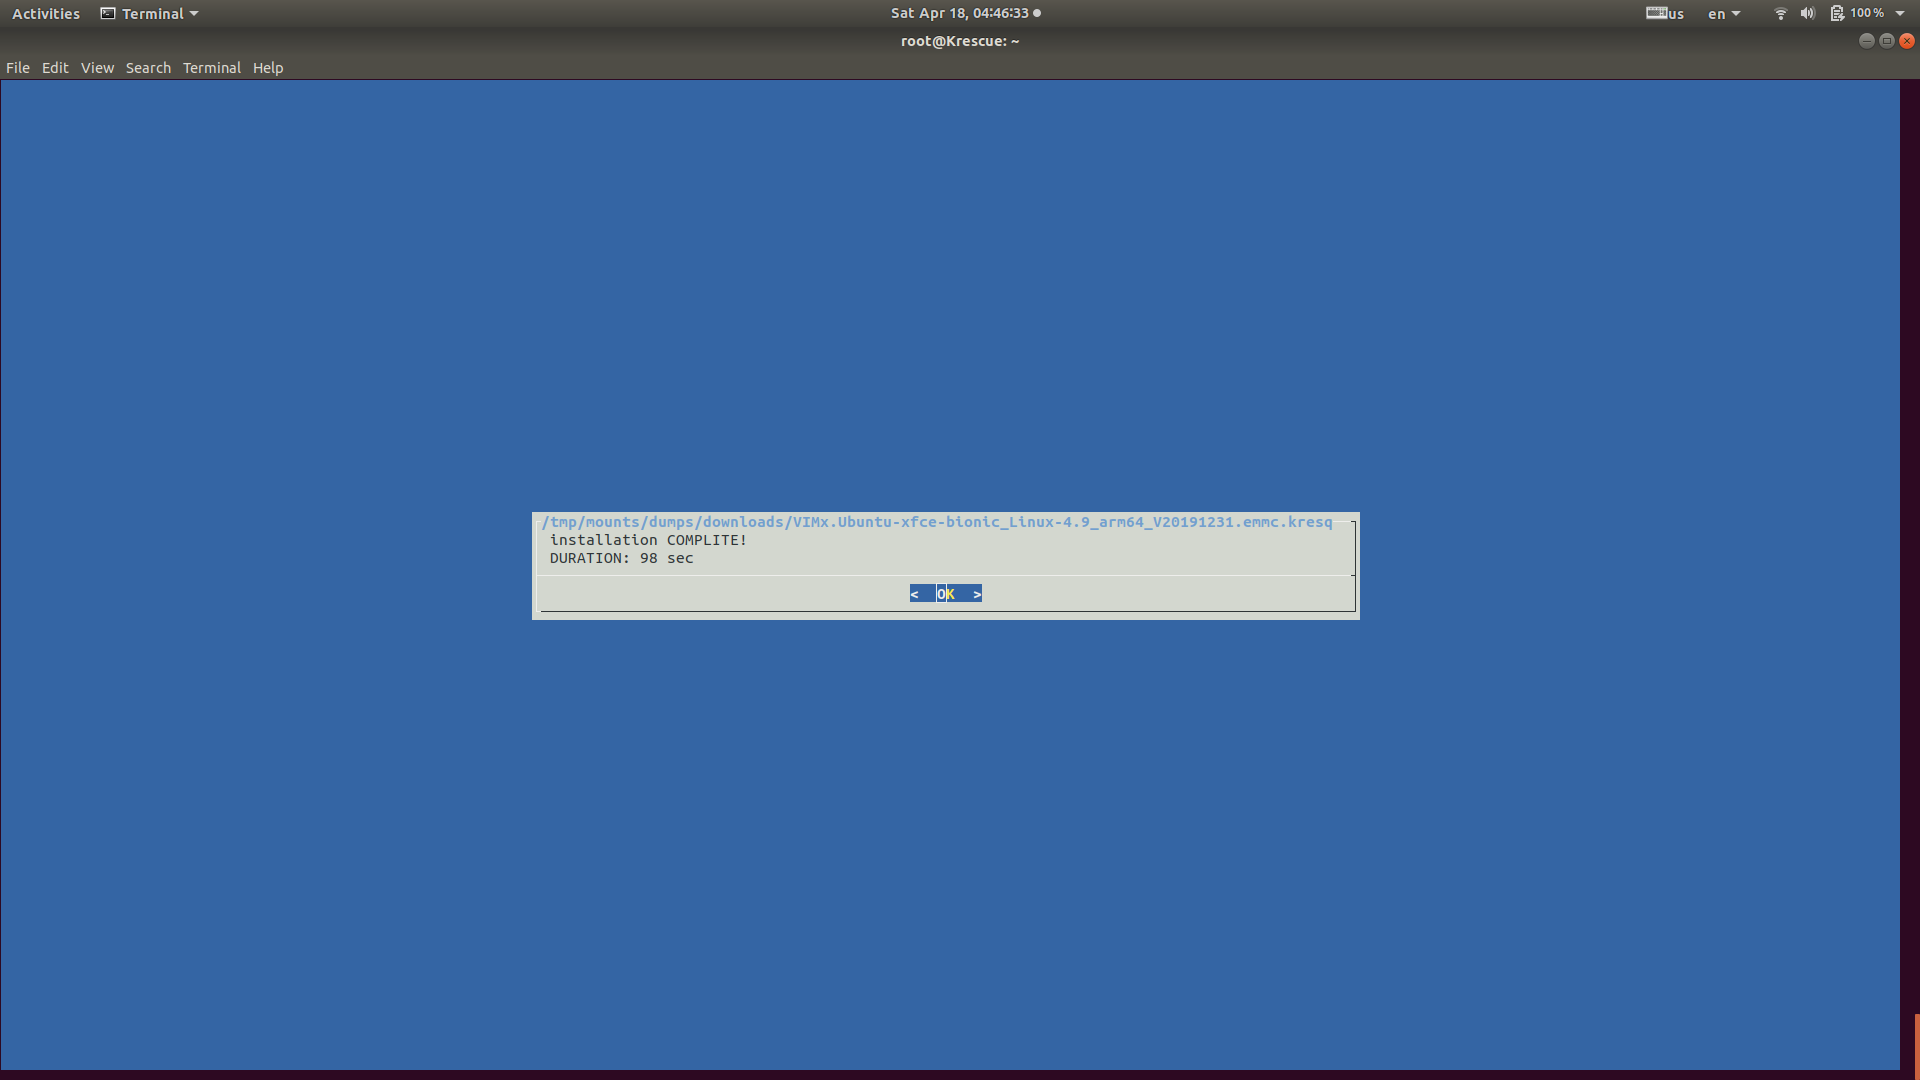
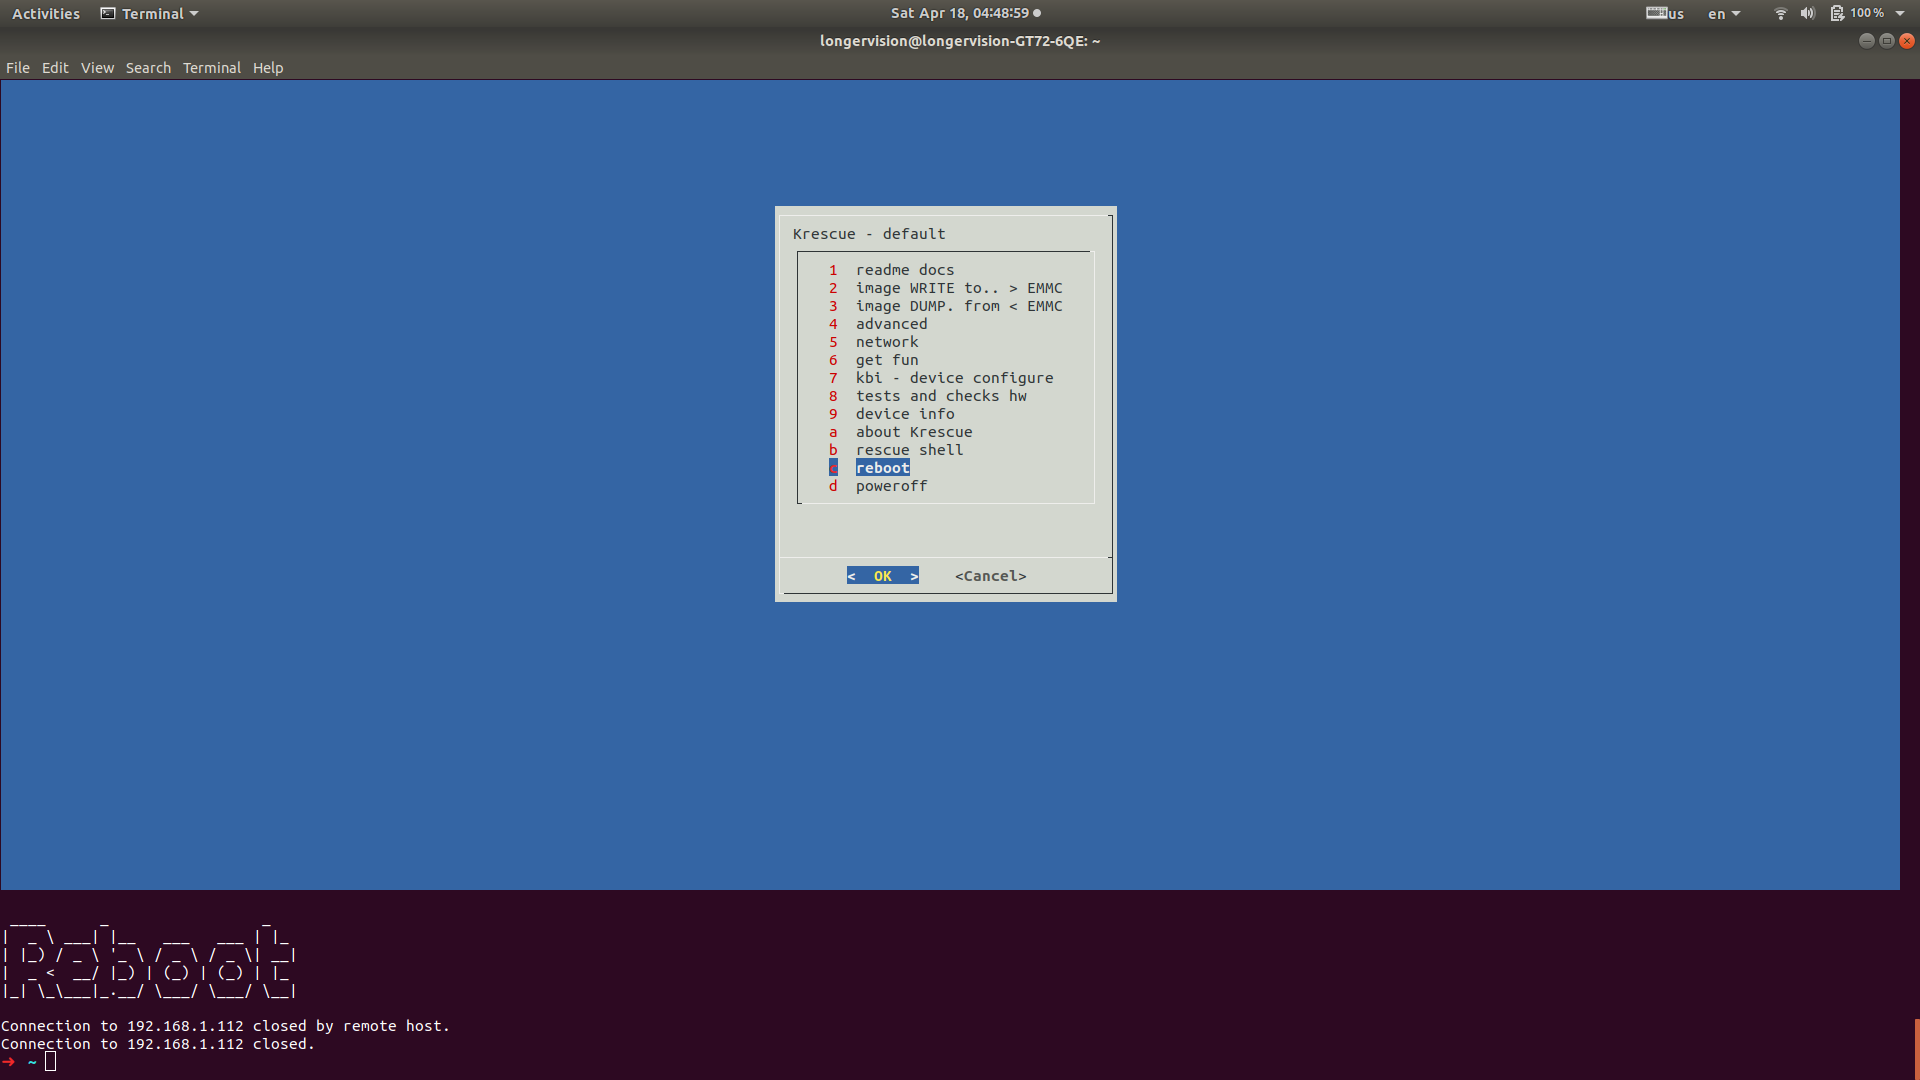
2. Install Prebuilt Operating System To EMMC Via Krescue
2.1 WIRED Connection Preferred
As mentioned in VIM3 Beginners Guide, Krescue is a Swiss Army knife. As of January 2020, Krescue can download and install OS images directly from the web via wired Ethernet.
2.2 Flash Krescue Onto SD Card
1 2 3 4 5
➜ Krescue sudo dd bs=4M if=VIM3.krescue-d41d8cd98f00b204e9800998ecf8427e-1587199778-67108864-279c13890fa7253d5d2b76000769803e.sd.img of=/dev/mmcblk0 conv=fsync [sudo] password for longervision: 16+0 records in 16+0 records out 67108864 bytes (67 MB, 64 MiB) copied, 4.03786 s, 16.6 MB/s
2.3 Setup Wifi From Within Krescue Shell
If you really don’t like the WIRED connection, boot into Krescue shell, and use the following commands to set up Wifi:
➜ ~ ping 192.168.1.110 PING 192.168.1.110 (192.168.1.110) 56(84) bytes of data. 64 bytes from 192.168.1.110: icmp_seq=1 ttl=64 time=140 ms 64 bytes from 192.168.1.110: icmp_seq=2 ttl=64 time=54.0 ms 64 bytes from 192.168.1.110: icmp_seq=3 ttl=64 time=13.1 ms ^C --- 192.168.1.110 ping statistics --- 3 packets transmitted, 3 received, 0% packet loss, time 2001ms rtt min/avg/max/mdev = 13.191/69.145/140.193/52.936 ms ➜ ~ ssh root@192.168.1.110 The authenticity of host '192.168.1.110 (192.168.1.110)' can't be established. RSA key fingerprint is SHA256:0t0PZw/24nWc8hWaCJkltYtwCduMMSlRuux2Nn865Os. Are you sure you want to continue connecting (yes/no)? yes Warning: Permanently added '192.168.1.110' (RSA) to the list of known hosts.
BusyBox v1.28.4 () built-in shell (ash)
OpenWrt 18.06.3, r7798-97ae9e0ccb
__ _____ Khadas ## hyphop ## / //_/ _ \___ ___ ______ _____ / ,< / , _/ -_|_-</ __/ // / -_) /_/|_/_/|_|\__/___/\__/\_,_/\__/ extreme tiny and fast rescue system
=== WARNING! ===================================== There is no root password defined on this device! Use the passwd command to set up a new password in order to prevent unauthorized SSH logins. -------------------------------------------------- root@Krescue:~# uname -a Linux Krescue 5.4.5 #4 SMP PREEMPT Thu Apr 9 22:07:48 +09 2020 aarch64 GNU/Linux
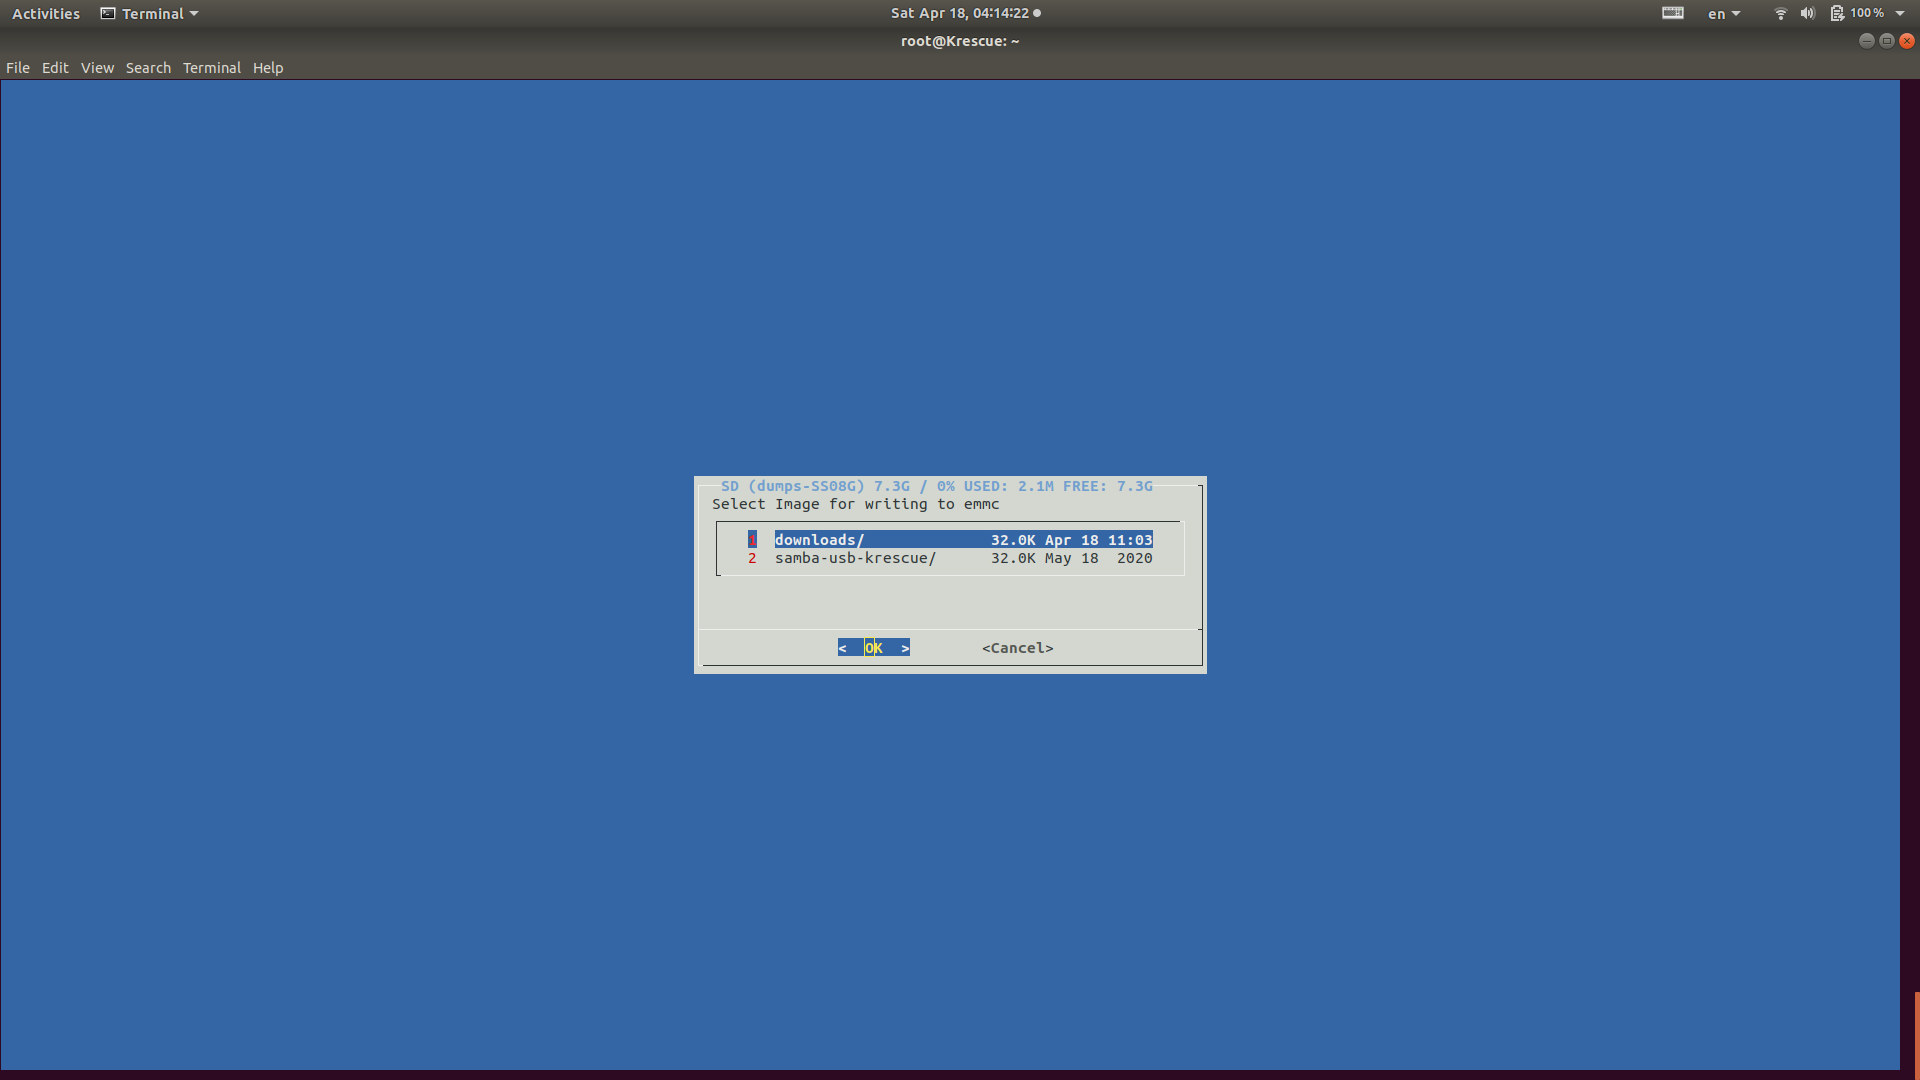
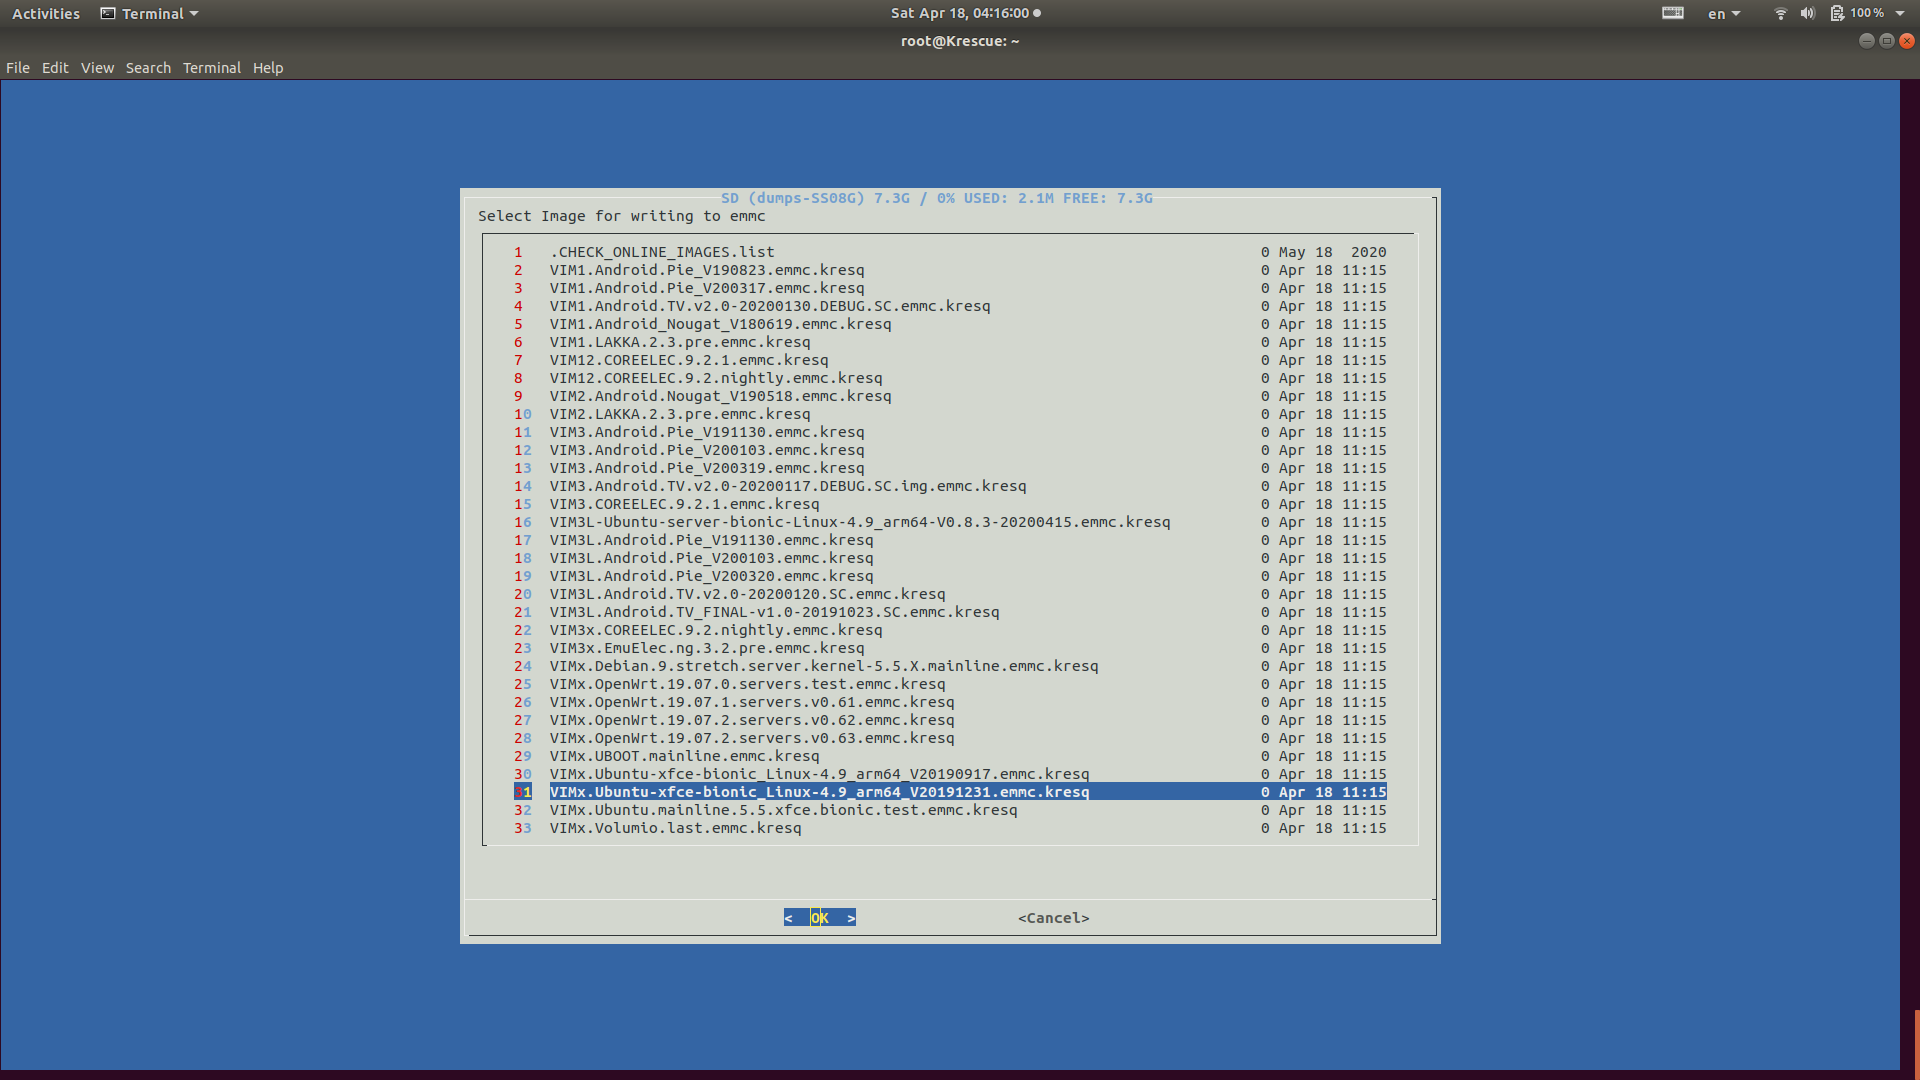
2.5 Flash OS onto EMMC (WIRED Connection Preferred)
Let’s take a look at the SD card device:
1 2
root@Krescue:~# ls /dev/mmcblk* /dev/mmcblk1 /dev/mmcblk1p1 /dev/mmcblk1p2 /dev/mmcblk2 /dev/mmcblk2boot0 /dev/mmcblk2boot1 /dev/mmcblk2rpmb
➜ ~ ssh khadas@192.168.1.95 The authenticity of host '192.168.1.95 (192.168.1.95)' can't be established. ECDSA key fingerprint is SHA256:Q59XrIX7bSWsphZCpgHBSnVH5ETgCY9iLfDEuvRKtOw. Are you sure you want to continue connecting (yes/no)? yes Warning: Permanently added '192.168.1.95' (ECDSA) to the list of known hosts. khadas@192.168.1.95's password:
khadas@Khadas:~$ uname -a Linux Khadas 4.9.206 #13 SMP PREEMPT Tue Dec 31 00:37:47 CST 2019 aarch64 aarch64 aarch64 GNU/Linux khadas@Khadas:~$ cat /proc/cpuinfo processor : 0 BogoMIPS : 48.00 Features : fp asimd evtstrm aes pmull sha1 sha2 crc32 CPU implementer : 0x41 CPU architecture: 8 CPU variant : 0x0 CPU part : 0xd03 CPU revision : 4
processor : 1 BogoMIPS : 48.00 Features : fp asimd evtstrm aes pmull sha1 sha2 crc32 CPU implementer : 0x41 CPU architecture: 8 CPU variant : 0x0 CPU part : 0xd03 CPU revision : 4
processor : 2 BogoMIPS : 48.00 Features : fp asimd evtstrm aes pmull sha1 sha2 crc32 CPU implementer : 0x41 CPU architecture: 8 CPU variant : 0x0 CPU part : 0xd09 CPU revision : 2
processor : 3 BogoMIPS : 48.00 Features : fp asimd evtstrm aes pmull sha1 sha2 crc32 CPU implementer : 0x41 CPU architecture: 8 CPU variant : 0x0 CPU part : 0xd09 CPU revision : 2
processor : 4 BogoMIPS : 48.00 Features : fp asimd evtstrm aes pmull sha1 sha2 crc32 CPU implementer : 0x41 CPU architecture: 8 CPU variant : 0x0 CPU part : 0xd09 CPU revision : 2
processor : 5 BogoMIPS : 48.00 Features : fp asimd evtstrm aes pmull sha1 sha2 crc32 CPU implementer : 0x41 CPU architecture: 8 CPU variant : 0x0 CPU part : 0xd09 CPU revision : 2
Serial : 290b1000010c1900000437304e424e50 Hardware : Khadas VIM3 khadas@Khadas:~$ clinfo Number of platforms 1 Platform Name ARM Platform Platform Vendor ARM Platform Version OpenCL 2.0 git.c8adbf9.ad00b04c1b60847de257177231dc1a53 Platform Profile FULL_PROFILE Platform Extensions cl_khr_global_int32_base_atomics cl_khr_global_int32_extended_atomics cl_khr_local_int32_base_atomics cl_khr_local_int32_extended_atomics cl_khr_byte_addressable_store cl_khr_3d_image_writes cl_khr_int64_base_atomics cl_khr_int64_extended_atomics cl_khr_fp16 cl_khr_icd cl_khr_egl_image cl_khr_image2d_from_buffer cl_khr_depth_images cl_khr_create_command_queue cl_arm_core_id cl_arm_printf cl_arm_thread_limit_hint cl_arm_non_uniform_work_group_size cl_arm_import_memory cl_arm_shared_virtual_memory Platform Extensions function suffix ARM
Platform Name ARM Platform Number of devices 1 ERROR: The DDK (built for 0x70030000 r0p0 status range [0..15]) is not compatible with this Mali GPU device, /dev/mali0 detected as 0x7212 r0p0 status 0. Failed creating base context during DDK compatibility check. Device Name <printDeviceInfo:0: get CL_DEVICE_NAME size : error -6> Device Vendor ARM ERROR: The DDK (built for 0x70030000 r0p0 status range [0..15]) is not compatible with this Mali GPU device, /dev/mali0 detected as 0x7212 r0p0 status 0. Failed creating base context during DDK compatibility check. Device Vendor ID <printDeviceInfo:2: get CL_DEVICE_VENDOR_ID : error -6> Device Version OpenCL 2.0 git.c8adbf9.ad00b04c1b60847de257177231dc1a53 Driver Version 2.0 Device OpenCL C Version OpenCL C 2.0 git.c8adbf9.ad00b04c1b60847de257177231dc1a53 Device Type GPU Device Profile FULL_PROFILE Device Available Yes Compiler Available Yes Linker Available Yes ERROR: The DDK (built for 0x70030000 r0p0 status range [0..15]) is not compatible with this Mali GPU device, /dev/mali0 detected as 0x7212 r0p0 status 0. Failed creating base context during DDK compatibility check. Max compute units <printDeviceInfo:17: get CL_DEVICE_MAX_COMPUTE_UNITS : error -6> ERROR: The DDK (built for 0x70030000 r0p0 status range [0..15]) is not compatible with this Mali GPU device, /dev/mali0 detected as 0x7212 r0p0 status 0. Failed creating base context during DDK compatibility check. Max clock frequency <printDeviceInfo:21: get CL_DEVICE_MAX_CLOCK_FREQUENCY : error -6> Device Partition (core) Max number of sub-devices 0 Supported partition types None Max work item dimensions 3 ERROR: The DDK (built for 0x70030000 r0p0 status range [0..15]) is not compatible with this Mali GPU device, /dev/mali0 detected as 0x7212 r0p0 status 0. Failed creating base context during DDK compatibility check. Max work item sizes <printDeviceInfo:36: get number of CL_DEVICE_MAX_WORK_ITEM_SIZES : error -6> ERROR: The DDK (built for 0x70030000 r0p0 status range [0..15]) is not compatible with this Mali GPU device, /dev/mali0 detected as 0x7212 r0p0 status 0. Failed creating base context during DDK compatibility check. Max work group size <printDeviceInfo:37: get CL_DEVICE_MAX_WORK_GROUP_SIZE : error -6> ERROR: The DDK (built for 0x70030000 r0p0 status range [0..15]) is not compatible with this Mali GPU device, /dev/mali0 detected as 0x7212 r0p0 status 0. Failed creating base context during DDK compatibility check. Preferred work group size multiple <getWGsizes:671: create context : error -6> Preferred / native vector sizes char 16 / 4 short 8 / 2 int 4 / 1 long 2 / 1 half 8 / 2 (cl_khr_fp16) float 4 / 1 double 0 / 0 (n/a) Half-precision Floating-point support (cl_khr_fp16) Denormals Yes Infinity and NANs Yes Round to nearest Yes Round to zero Yes Round to infinity Yes IEEE754-2008 fused multiply-add Yes Support is emulated in software No Single-precision Floating-point support (core) Denormals Yes Infinity and NANs Yes Round to nearest Yes Round to zero Yes Round to infinity Yes IEEE754-2008 fused multiply-add Yes Support is emulated in software No Correctly-rounded divide and sqrt operations No Double-precision Floating-point support (n/a) Address bits 64, Little-Endian ERROR: The DDK (built for 0x70030000 r0p0 status range [0..15]) is not compatible with this Mali GPU device, /dev/mali0 detected as 0x7212 r0p0 status 0. Failed creating base context during DDK compatibility check. Global memory size <printDeviceInfo:74: get CL_DEVICE_GLOBAL_MEM_SIZE : error -6> Error Correction support No ERROR: The DDK (built for 0x70030000 r0p0 status range [0..15]) is not compatible with this Mali GPU device, /dev/mali0 detected as 0x7212 r0p0 status 0. Failed creating base context during DDK compatibility check. Max memory allocation <printDeviceInfo:80: get CL_DEVICE_MAX_MEM_ALLOC_SIZE : error -6> Unified memory for Host and Device Yes ERROR: The DDK (built for 0x70030000 r0p0 status range [0..15]) is not compatible with this Mali GPU device, /dev/mali0 detected as 0x7212 r0p0 status 0. Failed creating base context during DDK compatibility check. Shared Virtual Memory (SVM) capabilities <printDeviceInfo:83: get CL_DEVICE_SVM_CAPABILITIES : error -6> ERROR: The DDK (built for 0x70030000 r0p0 status range [0..15]) is not compatible with this Mali GPU device, /dev/mali0 detected as 0x7212 r0p0 status 0. Failed creating base context during DDK compatibility check. Shared Virtual Memory (SVM) capabilities (ARM) <printDeviceInfo:84: get CL_DEVICE_SVM_CAPABILITIES_ARM : error -6> Minimum alignment for any data type 128 bytes Alignment of base address 1024 bits (128 bytes) Preferred alignment for atomics SVM 0 bytes Global 0 bytes Local 0 bytes Max size for global variable 65536 (64KiB) Preferred total size of global vars 0 Global Memory cache type Read/Write ERROR: The DDK (built for 0x70030000 r0p0 status range [0..15]) is not compatible with this Mali GPU device, /dev/mali0 detected as 0x7212 r0p0 status 0. Failed creating base context during DDK compatibility check. Global Memory cache size <printDeviceInfo:97: get CL_DEVICE_GLOBAL_MEM_CACHE_SIZE : error -6> ERROR: The DDK (built for 0x70030000 r0p0 status range [0..15]) is not compatible with this Mali GPU device, /dev/mali0 detected as 0x7212 r0p0 status 0. Failed creating base context during DDK compatibility check. Global Memory cache line size <printDeviceInfo:98: get CL_DEVICE_GLOBAL_MEM_CACHELINE_SIZE : error -6> Image support Yes Max number of samplers per kernel 16 Max size for 1D images from buffer 65536 pixels Max 1D or 2D image array size 2048 images Base address alignment for 2D image buffers 32 bytes Pitch alignment for 2D image buffers 64 pixels Max 2D image size 65536x65536 pixels Max 3D image size 65536x65536x65536 pixels Max number of read image args 128 Max number of write image args 64 Max number of read/write image args 64 Max number of pipe args 16 Max active pipe reservations 1 Max pipe packet size 1024 Local memory type Global Local memory size 32768 (32KiB) Max number of constant args 8 Max constant buffer size 65536 (64KiB) Max size of kernel argument 1024 Queue properties (on host) Out-of-order execution Yes Profiling Yes Queue properties (on device) Out-of-order execution Yes Profiling Yes Preferred size 2097152 (2MiB) Max size 16777216 (16MiB) Max queues on device 1 Max events on device 1024 Prefer user sync for interop No ERROR: The DDK (built for 0x70030000 r0p0 status range [0..15]) is not compatible with this Mali GPU device, /dev/mali0 detected as 0x7212 r0p0 status 0. Failed creating base context during DDK compatibility check. Profiling timer resolution <printDeviceInfo:145: get CL_DEVICE_PROFILING_TIMER_RESOLUTION : error -6> Execution capabilities Run OpenCL kernels Yes Run native kernels No printf() buffer size 1048576 (1024KiB) Built-in kernels Device Extensions cl_khr_global_int32_base_atomics cl_khr_global_int32_extended_atomics cl_khr_local_int32_base_atomics cl_khr_local_int32_extended_atomics cl_khr_byte_addressable_store cl_khr_3d_image_writes cl_khr_int64_base_atomics cl_khr_int64_extended_atomics cl_khr_fp16 cl_khr_icd cl_khr_egl_image cl_khr_image2d_from_buffer cl_khr_depth_images cl_khr_create_command_queue cl_arm_core_id cl_arm_printf cl_arm_thread_limit_hint cl_arm_non_uniform_work_group_size cl_arm_import_memory cl_arm_shared_virtual_memory
NULL platform behavior clGetPlatformInfo(NULL, CL_PLATFORM_NAME, ...) ARM Platform clGetDeviceIDs(NULL, CL_DEVICE_TYPE_ALL, ...) Success [ARM] ERROR: The DDK (built for 0x70030000 r0p0 status range [0..15]) is not compatible with this Mali GPU device, /dev/mali0 detected as 0x7212 r0p0 status 0. Failed creating base context during DDK compatibility check. clCreateContext(NULL, ...) [default] <checkNullCtx:2694: create context with device from default platform : error -6> ERROR: The DDK (built for 0x70030000 r0p0 status range [0..15]) is not compatible with this Mali GPU device, /dev/mali0 detected as 0x7212 r0p0 status 0. Failed creating base context during DDK compatibility check. clCreateContextFromType(NULL, CL_DEVICE_TYPE_DEFAULT) <checkNullCtxFromType:2737: create context from type CL_DEVICE_TYPE_DEFAULT : error -6> clCreateContextFromType(NULL, CL_DEVICE_TYPE_CPU) No devices found in platform ERROR: The DDK (built for 0x70030000 r0p0 status range [0..15]) is not compatible with this Mali GPU device, /dev/mali0 detected as 0x7212 r0p0 status 0. Failed creating base context during DDK compatibility check. clCreateContextFromType(NULL, CL_DEVICE_TYPE_GPU) <checkNullCtxFromType:2737: create context from type CL_DEVICE_TYPE_GPU : error -6> clCreateContextFromType(NULL, CL_DEVICE_TYPE_ACCELERATOR) No devices found in platform clCreateContextFromType(NULL, CL_DEVICE_TYPE_CUSTOM) No devices found in platform ERROR: The DDK (built for 0x70030000 r0p0 status range [0..15]) is not compatible with this Mali GPU device, /dev/mali0 detected as 0x7212 r0p0 status 0. Failed creating base context during DDK compatibility check. clCreateContextFromType(NULL, CL_DEVICE_TYPE_ALL) <checkNullCtxFromType:2737: create context from type CL_DEVICE_TYPE_ALL : error -6>
ICD loader properties ICD loader Name OpenCL ICD Loader ICD loader Vendor OCL Icd free software ICD loader Version 2.2.11 ICD loader Profile OpenCL 2.1 khadas@Khadas:~$ cat /proc/partitions major minor #blocks name
khadas@Khadas:~$ gcc --version gcc (Ubuntu/Linaro 7.5.0-3ubuntu1~18.04) 7.5.0 Copyright (C) 2017 Free Software Foundation, Inc. This is free software; see the source for copying conditions. There is NO warranty; not even for MERCHANTABILITY or FITNESS FOR A PARTICULAR PURPOSE.
Name: OpenCV Description: Open Source Computer Vision Library Version: 3.4.3 Libs: -L${exec_prefix}/lib -lopencv_dnn -lopencv_ml -lopencv_objdetect -lopencv_shape -lopencv_stitching -lopencv_superres -lopencv_videostab -lopencv_calib3d -lopencv_features2d -lopencv_highgui -lopencv_videoio -lopencv_imgcodecs -lopencv_video -lopencv_photo -lopencv_imgproc -lopencv_flann -lopencv_core Libs.private: -ldl -lm -lpthread -lrt Cflags: -I${includedir_old} -I${includedir_new} khadas@Khadas:~$ sudo apt remove opencv3 Reading package lists... Done Building dependency tree Reading state information... Done The following package was automatically installed and is no longer required: libllvm8 Use 'sudo apt autoremove' to remove it. The following packages will be REMOVED: opencv3 0 upgraded, 0 newly installed, 1 to remove and 0 not upgraded. After this operation, 1024 B disk space will be freed. Do you want to continue? [Y/n] Y (Reading database ... 118978 files and directories currently installed.) Removing opencv3 (3.4.3-2) ... khadas@Khadas:~$ ls /usr/lib/libopencv* ls: cannot access '/usr/lib/libopencv*': No such file or directory khadas@Khadas:~$ cat /usr/lib/pkgconfig/opencv.pc cat: /usr/lib/pkgconfig/opencv.pc: No such file or directory
It looks current OpenCV on current VIM3_Ubuntu-xfce-bionic_Linux-4.9_arm64_EMMC_V20191231.img is a kind of outdated. Let’s just remove package opencv3 and have OpenCV-4.3.0 installed manually.
To flash either of the above systems onto a TF/SD card is simple. However, both are ONLY for SD-USB, instead of EMMC. For instancen:
1 2 3
➜ Manjaro burn-tool -b VIM3 -i ./Manjaro-ARM-xfce-vim3-20.04.img Try to burn Amlogic image... ERROR: Try to burn to eMMC storage, but the image installation type is 'SD-USB', please use 'EMMC' image!
In this section, we’re testing the computing capability of Khadas VIM3‘s NPU.
Before everything starts, make sure you have the galcore module loaded, by using command modinfo galcore.
4.1 Obtain aml_npu_sdk From Khadas
Extract the obtained aml_npu_sdk.tgz on your local host. Bear in mind that it is your local host, BUT NOT Khadas VIM3. Relative issues can be found at:
Afterwards, the models applicable on Khadas VIM3 can be obtained by following Model Conversion. Anyway, on my laptop, I obtained the converted model as follows:
Do I need to emphasize that I’m using Tensorflow 2.1.0 ? Anyway, check the following:
1 2 3 4 5 6 7 8
➜ ~ python Python 3.6.9 (default, Apr 18 2020, 01:56:04) [GCC 8.4.0] on linux Type "help", "copyright", "credits" or "license" for more information. >>> import tensorflow as tf 2020-04-29 03:11:24.272348: I tensorflow/stream_executor/platform/default/dso_loader.cc:44] Successfully opened dynamic library libcudart.so.10.2 >>> tf.__version__ '2.1.0'
4.3 Build Case Code
4.3.1 Cross-build on Host
You can of course cross-build the case code on your local host, instead of Khadas VIM3 by referring to Compile the Case Code. (The document seems NOT updated yet.) Instead of using 1 argument, we specify 2 auguments, one for aml_npu_sdk, the other for Fenix.
inceptionv3 now should be ready to use, but in my case, it’s NOT working properly. It’s probably because Fenix is NOT able to provide/represent the correct cross-compile toolchains for my installed VIMx.Ubuntu-xfce-bionic_Linux-4.9_arm64_V20191231.emmc.kresq. Anyway, this is NOT my preference.
khadas@Khadas:~$ sudo apt install aml-npu Reading package lists... Done Building dependency tree Reading state information... Done The following packages were automatically installed and are no longer required: libllvm8 libssh-dev Use 'sudo apt autoremove' to remove them. The following NEW packages will be installed: aml-npu 0 upgraded, 1 newly installed, 0 to remove and 1 not upgraded. Need to get 0 B/3318 kB of archives. After this operation, 1024 B of additional disk space will be used. Selecting previously unselected package aml-npu. (Reading database ... 136037 files and directories currently installed.) Preparing to unpack .../aml-npu_6.4.0.3_arm64.deb ... Unpacking aml-npu (6.4.0.3) ... Setting up aml-npu (6.4.0.3) ...
And with command line dpkg -L aml-npu, you’ll see what’s been installed by aml-npu. However, due to its commercial license, I may NOT be allowed to show anything here in my blog.
😶
4.4.2 Step 2: Install aml-npu-demo and Run Demo
1 2 3 4 5 6 7 8 9 10 11 12 13 14 15 16 17
khadas@Khadas:~$ sudo apt install aml-npu-demo Reading package lists... Done Building dependency tree Reading state information... Done The following packages were automatically installed and are no longer required: libllvm8 libssh-dev Use 'sudo apt autoremove' to remove them. The following NEW packages will be installed: aml-npu-demo 0 upgraded, 1 newly installed, 0 to remove and 1 not upgraded. Need to get 0 B/19.7 MB of archives. After this operation, 1024 B of additional disk space will be used. Selecting previously unselected package aml-npu-demo. (Reading database ... 136098 files and directories currently installed.) Preparing to unpack .../aml-npu-demo_6.3.3.4_arm64.deb ... Unpacking aml-npu-demo (6.3.3.4) ... Setting up aml-npu-demo (6.3.3.4) ...
Where is the sample to run? /usr/share/npu/inceptionv3.
khadas@Khadas:~$ cd /usr/share/npu/inceptionv3 khadas@Khadas:/usr/share/npu/inceptionv3$ ./inceptionv3 ./inception_v3.nb ./dog_299x299.jpg D [setup_node:368]Setup node id[0] uid[4294967295] op[NBG] D [print_tensor:136]in(0) : id[ 1] vtl[0] const[0] shape[ 3, 299, 299, 1 ] fmt[u8 ] qnt[ASM zp=137, scale=0.007292] D [print_tensor:136]out(0): id[ 0] vtl[0] const[0] shape[ 1001, 1 ] fmt[f16] qnt[NONE] D [optimize_node:312]Backward optimize neural network D [optimize_node:319]Forward optimize neural network I [compute_node:261]Create vx node Create Neural Network: 37ms or 37726us I [vsi_nn_PrintGraph:1421]Graph: I [vsi_nn_PrintGraph:1422]***************** Tensors ****************** D [print_tensor:146]id[ 0] vtl[0] const[0] shape[ 1001, 1 ] fmt[f16] qnt[NONE] D [print_tensor:146]id[ 1] vtl[0] const[0] shape[ 3, 299, 299, 1 ] fmt[u8 ] qnt[ASM zp=137, scale=0.007292] I [vsi_nn_PrintGraph:1431]***************** Nodes ****************** I [vsi_nn_PrintNode:159]( NBG)node[0] [in: 1 ], [out: 0 ] [10587cb0] I [vsi_nn_PrintGraph:1440]****************************************** I [vsi_nn_ConvertTensorToData:750]Create 268203 data. Verify... Verify Graph: 1ms or 1811us Start run graph [1] times... Run the 1 time: 28ms or 28075us vxProcessGraph execution time: Total 28ms or 28091us Average 28.09ms or 28091.00us I [vsi_nn_ConvertTensorToData:750]Create 2002 data. --- Top5 --- 208: 0.819824 209: 0.040344 223: 0.009354 185: 0.002956 268: 0.002829 I [vsi_nn_ConvertTensorToData:750]Create 2002 data.
The program runs smoothly.
😏
4.4.3 Step 3: Build Your Own Executable and Run
Clearly, ALL (really???) required development files have been provided by aml-npu, in such, we should be able to build this demo inceptionv3 out by ourselves.
Besides aml-npu from repo, in order to have the demo inceptionv3fully and successfully built, you still need aml_npu_sdk from Khadas. In my case, you do need acuity-ovxlib-dev, and let’s do export ACUITY_OVXLIB_DEV=path_to_acuity-ovxlib-dev.
4.4.3.2 Build inceptionv3 from Source
We don’t need to copy the entire aml_npu_sdk onto Khadas VIM3, but ONLY demo/inceptionv3. Here in my case, ONLY demo/inceptionv3 is copied under ~/Programs.
In fact, you still need to modify common.target a little bit accordingly. However, to disclose it in this blog is still NOT allowed I think. Anyway, after the modification, let’s make it.
1 2 3 4 5 6 7 8 9 10
khadas@Khadas:~/Programs/inceptionv3$ make cc -c -I/opt/acuity-ovxlib-dev/include -o bin_r/vnn_pre_process.o vnn_pre_process.c cc -c -I/opt/acuity-ovxlib-dev/include -o bin_r/vnn_inceptionv3.o vnn_inceptionv3.c cc -c -I/opt/acuity-ovxlib-dev/include -o bin_r/main.o main.c cc -c -I/opt/acuity-ovxlib-dev/include -o bin_r/vnn_post_process.o vnn_post_process.c cc -Wl,-rpath-link /opt/vivante_sdk/drivers bin_r/vnn_pre_process.o bin_r/vnn_inceptionv3.o bin_r/main.o bin_r/vnn_post_process.o -o bin_r/inceptionv3 -L/lib -lOpenVX -lOpenVXU -lCLC -lVSC -lGAL -lovxlib -lm -ljpeg -lrt bin_r/inceptionv3 Usage: bin_r/inceptionv3 data_file inputs... /opt/vivante_sdk/common.target:64: recipe for target 'bin_r/inceptionv3' failed make: *** [bin_r/inceptionv3] Error 255
Don’t worry about the error. It just failed to run the demo, but the executable inceptionv3 has already been successfully built under folder bin_r.
This is the original status of ALL files under bin_demo. Let’s copy and paste our built bin_r/inceptionv3 into this folder bin_demo. The size of the executable seems to be dramatically decreased.
Now, let’s copy the built inception_v3.nbfrom host to Khadas VIM3. It seems inception_v3.nb built by Tensorflow 2.1.0 on host is of the same size as provided by Khadas.
khadas@Khadas:~/Programs/inceptionv3/bin_demo$ ./inceptionv3 ./inception_v3.nb ./goldfish_299x299.jpg D [setup_node:368]Setup node id[0] uid[4294967295] op[NBG] D [print_tensor:136]in(0) : id[ 1] vtl[0] const[0] shape[ 3, 299, 299, 1 ] fmt[u8 ] qnt[ASM zp=137, scale=0.007292] D [print_tensor:136]out(0): id[ 0] vtl[0] const[0] shape[ 1001, 1 ] fmt[f16] qnt[NONE] D [optimize_node:312]Backward optimize neural network D [optimize_node:319]Forward optimize neural network I [compute_node:261]Create vx node Create Neural Network: 64ms or 64785us I [vsi_nn_PrintGraph:1421]Graph: I [vsi_nn_PrintGraph:1422]***************** Tensors ****************** D [print_tensor:146]id[ 0] vtl[0] const[0] shape[ 1001, 1 ] fmt[f16] qnt[NONE] D [print_tensor:146]id[ 1] vtl[0] const[0] shape[ 3, 299, 299, 1 ] fmt[u8 ] qnt[ASM zp=137, scale=0.007292] I [vsi_nn_PrintGraph:1431]***************** Nodes ****************** I [vsi_nn_PrintNode:159]( NBG)node[0] [in: 1 ], [out: 0 ] [6df47cb0] I [vsi_nn_PrintGraph:1440]****************************************** I [vsi_nn_ConvertTensorToData:750]Create 268203 data. Verify... Verify Graph: 2ms or 2951us Start run graph [1] times... Run the 1 time: 28ms or 28835us vxProcessGraph execution time: Total 28ms or 28873us Average 28.87ms or 28873.00us I [vsi_nn_ConvertTensorToData:750]Create 2002 data. --- Top5 --- 2: 0.832520 795: 0.008316 974: 0.003586 408: 0.002302 393: 0.002016 I [vsi_nn_ConvertTensorToData:750]Create 2002 data.
By comparing to imagenet_slim_labels.txt under current folder, let’s take a look at our inference results. Only the FIRST inference is qualified because of the probability.
dual boot by selecting devices: EMMC or TF/SD Card. On Boot Images from External Media, it’s recommended as Via Keys mode (Side-Buttons) - the easiest and fastest way, which is the FIRST option on page How To Boot Into Upgrade Mode. Therefore, by following 4 steps as follows(cited from How To Boot Into Upgrade Mode), we should be able to boot into SD-USB.
1. Power on VIM3.
2. Long press the POWER key without releasing it.
3. Short press the ‘Reset’ key and release it.
4. Count for 2 to 3 seconds, then release the POWER key to enter into Upgrade Mode. You will see the sys-led turn ON when you’ve entered Upgrade Mode.
- multiple boot via [grub](https://www.gnu.org/software/grub/): Reasonably speaking, 2 operating systems may even have a chance to be installed onto **a SINGLE EMMC**
ONLY 1 operating system is preferred. Why??? Khadas VIM3 board comes with a large EMMC of size 32G.
After a VERY long time struggling, I would really like to emphasize the quality of Type C cable and power adaptor again. Try to buy things NOT from Taobao.
Today, April 17, 2020, I’ve got 2 big NEWS for me.
China Airline cancelled my flight back to China in May.
I received an Email from balena to encourage us to contribute our spare computing power (PCs, laptops, single-board devices) to [Rosetta@Home](https://boinc.bakerlab.org/) and support vital COVID-19 research.
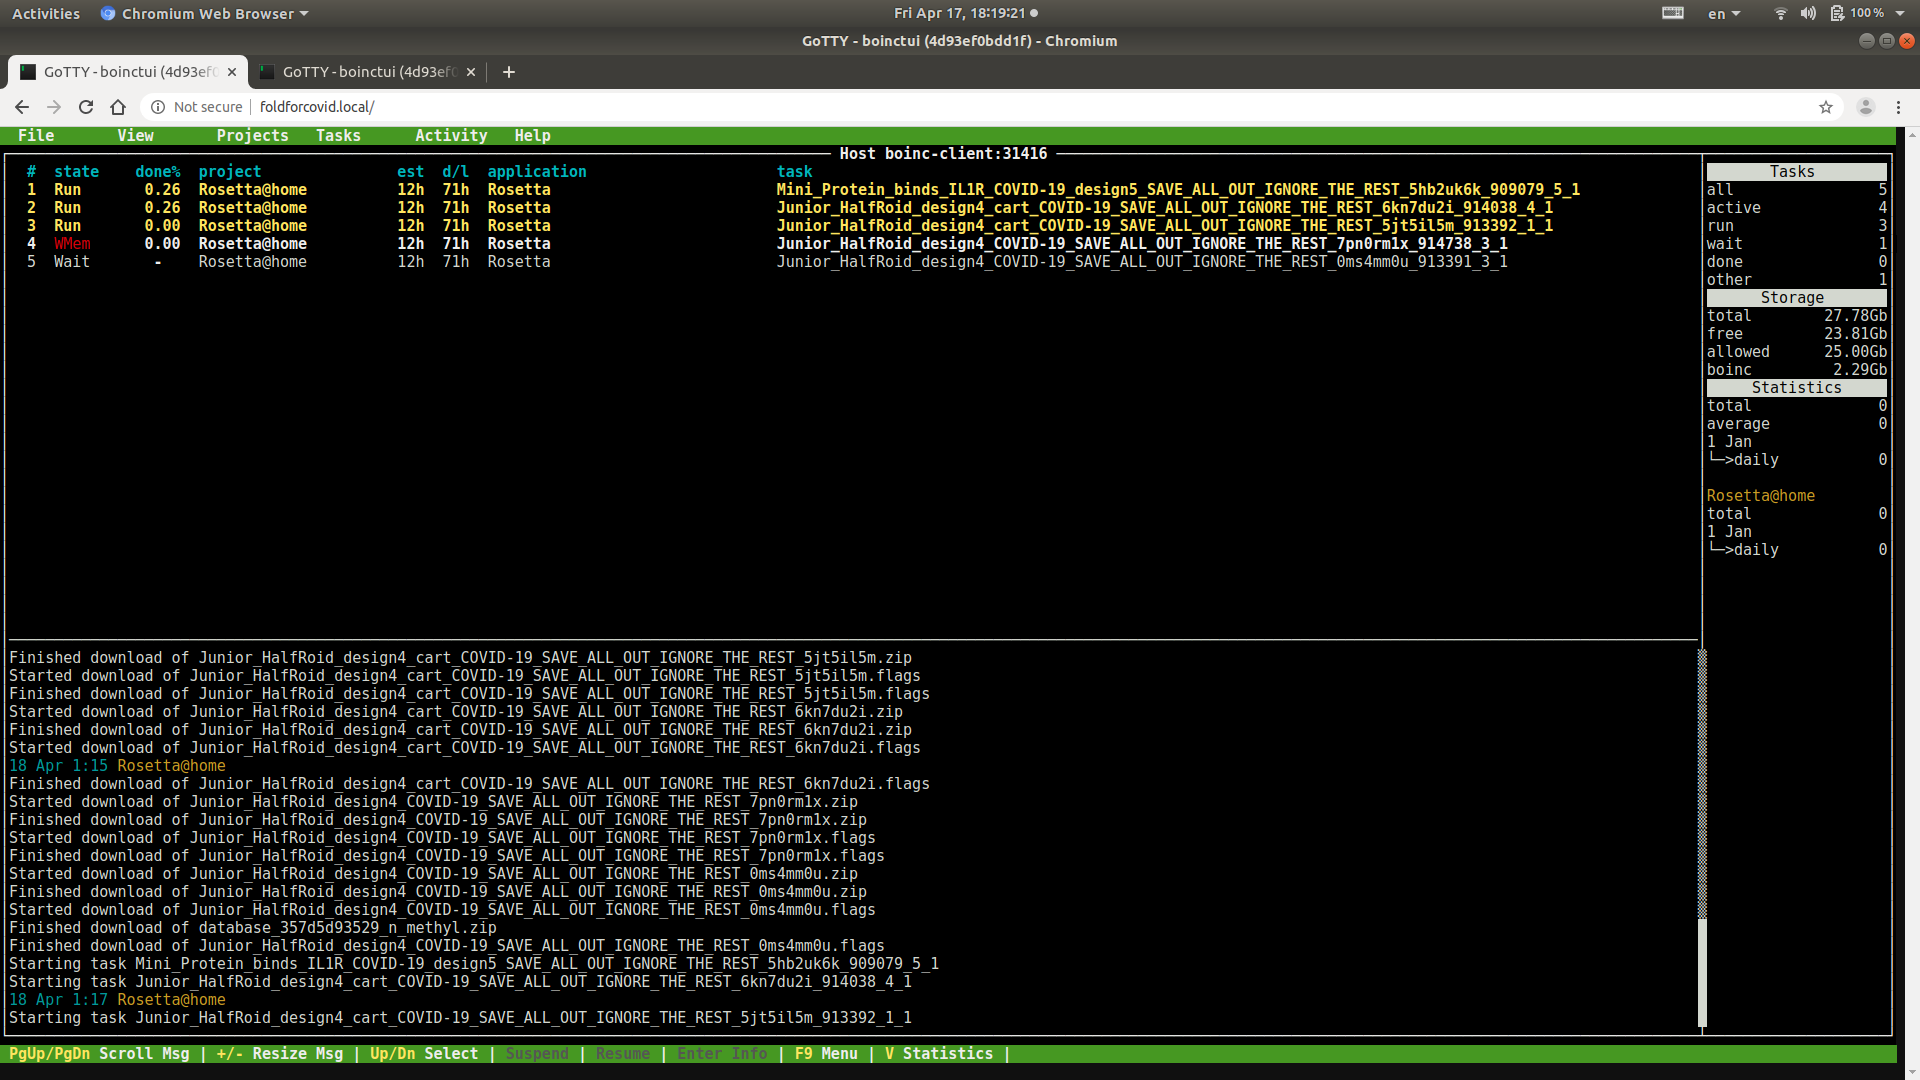
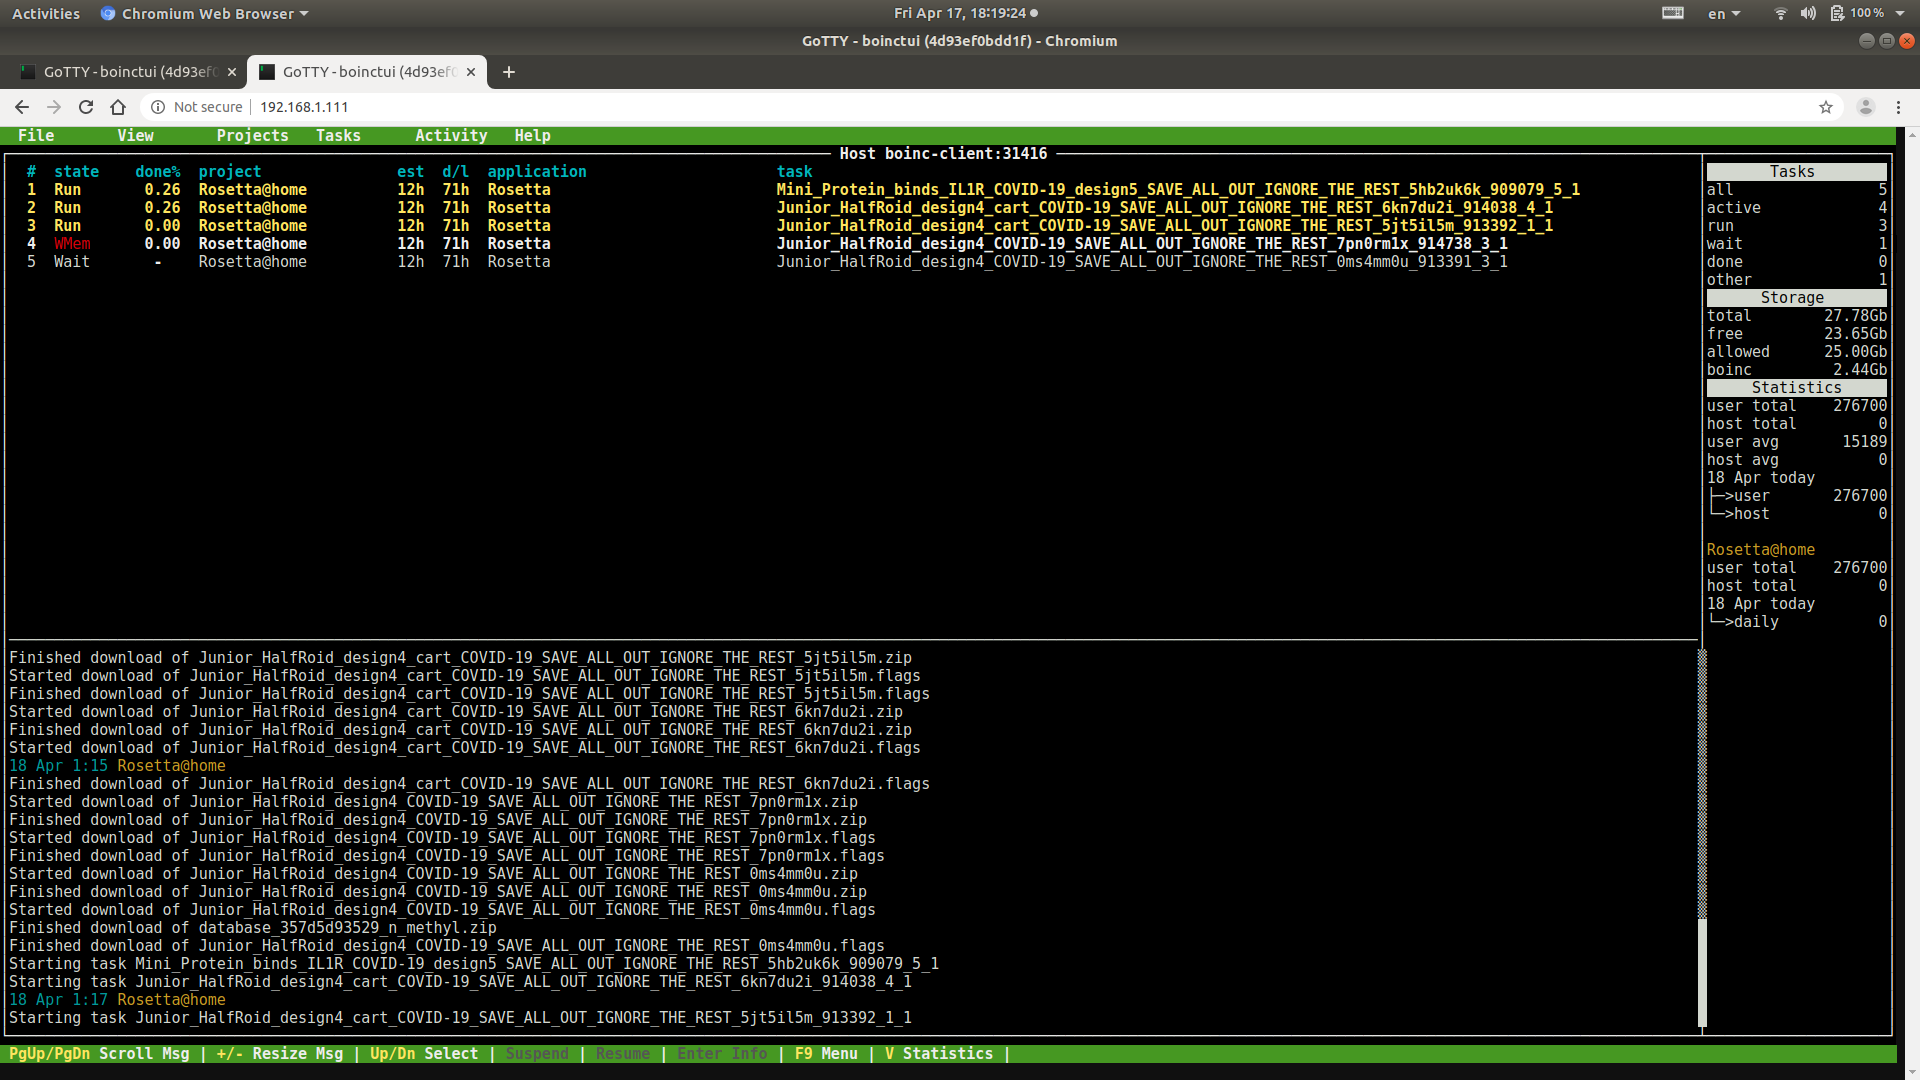
Now, it’s your choice to visit either http://foldforcovid.local/ or IP address of this Raspberry Pi 4, you will see your Raspberry Pi 4 is up and running, and you are donating the compute capacity to support COVID-19.
foldforcovid.local
192.168.1.111
Finally, 2 additional things:
When will the boarder between Canada and USA be opening? I’d love to visit Baker Laboratory in person.
Finally we need to create .html file which will output the result.
Not to spend time on setting-up TensorFlow.js and JQuery I encourage you just to use my template at TensorSpace folder. The folder structure looks as following:
index.html — out html file to run visualization
lib/ — folder storing all the dependencies
data/ — folder containing .json file with network inputs
model/ — folder containing exported model
For our html file we need to first import dependecies and write a TensorSpace script.
Now, let’s take a look at our project.
1 2
➜ WebTensorspace ls data index.html lib model
2.1.1 lib
Three resource is referred to download ALL required libraries.
➜ WebTensorspace tensorspacejs_converter \ --input_model_from="tensorflow" \ --input_model_format="tf_keras" \ --output_layer_names="padding_1,conv_1,maxpool_1,conv_2,maxpool_2,dense_1,dense_2,softmax" \ ./model/tf_keras_model.h5 \ ./model/converted Traceback (most recent call last): File "~/.local/lib/python3.6/site-packages/pkg_resources/__init__.py", line 584, in _build_master ws.require(__requires__) File "~/.local/lib/python3.6/site-packages/pkg_resources/__init__.py", line 901, in require needed = self.resolve(parse_requirements(requirements)) File "~/.local/lib/python3.6/site-packages/pkg_resources/__init__.py", line 792, in resolve raise VersionConflict(dist, req).with_context(dependent_req) pkg_resources.ContextualVersionConflict: (tensorboard 2.2.1 (~/.local/lib/python3.6/site-packages), Requirement.parse('tensorboard<2.2.0,>=2.1.0'), {'tensorflow'})
During handling of the above exception, another exception occurred:
Traceback (most recent call last): File "~/.local/bin/tensorspacejs_converter", line 6, in <module> from pkg_resources import load_entry_point File "~/.local/lib/python3.6/site-packages/pkg_resources/__init__.py", line 3258, in <module> @_call_aside File "~/.local/lib/python3.6/site-packages/pkg_resources/__init__.py", line 3242, in _call_aside f(*args, **kwargs) File "~/.local/lib/python3.6/site-packages/pkg_resources/__init__.py", line 3271, in _initialize_master_working_set working_set = WorkingSet._build_master() File "~/.local/lib/python3.6/site-packages/pkg_resources/__init__.py", line 586, in _build_master return cls._build_from_requirements(__requires__) File "~/.local/lib/python3.6/site-packages/pkg_resources/__init__.py", line 599, in _build_from_requirements dists = ws.resolve(reqs, Environment()) File "~/.local/lib/python3.6/site-packages/pkg_resources/__init__.py", line 787, in resolve raise DistributionNotFound(req, requirers) pkg_resources.DistributionNotFound: The 'tensorflow-estimator<2.2.0,>=2.1.0' distribution was not found and is required by tensorflow
Clearly, we can downgrade tensorflow-estimator from 2.2.0 to 2.1.0.
1 2 3 4 5 6 7 8 9 10 11
➜ WebTensorspace pip show tensorflow_estimator Name: tensorflow-estimator Version: 2.1.0 Summary: TensorFlow Estimator. Home-page: https://www.tensorflow.org/ Author: Google Inc. Author-email: UNKNOWN License: Apache 2.0 Location: ~/.local/lib/python3.6/site-packages Requires: Required-by: tensorflow
Now, we try to re-run the above tensorspacejs_converter command:
1
2
3
4
5
6
7
8
9
10
11
12
13
14
15
16
17
18
19
➜ WebTensorspace tensorspacejs_converter \ --input_model_from="tensorflow" \ --input_model_format="tf_keras" \ --output_layer_names="padding_1,conv_1,maxpool_1,conv_2,maxpool_2,dense_1,dense_2,softmax" \ ./model/tf_keras_model.h5 \ ./model/converted Using TensorFlow backend. Traceback (most recent call last): File "~/.local/bin/tensorspacejs_converter", line 11, in <module> load_entry_point('tensorspacejs==0.2.0', 'console_scripts', 'tensorspacejs_converter')() File "~/.local/lib/python3.6/site-packages/tensorspacejs-0.2.0-py3.6.egg/tensorspacejs/tsp_converters.py", line 167, in main flags.output_layer_names File "~/.local/lib/python3.6/site-packages/tensorspacejs-0.2.0-py3.6.egg/tensorspacejs/tf/tensorflow_conversion.py", line 35, in preprocess_tensorflow_model output_node_names File "~/.local/lib/python3.6/site-packages/tensorspacejs-0.2.0-py3.6.egg/tensorspacejs/tf/keras_model.py", line 15, in preprocess_hdf5_combined_model with K.get_session(): File "~/.local/lib/python3.6/site-packages/Keras-2.3.1-py3.6.egg/keras/backend/tensorflow_backend.py", line 379, in get_session '`get_session` is not available ' RuntimeError: `get_session` is not available when using TensorFlow 2.0.
2.1.2.2 Install tfjs-converter
Please checkout tfjs and enter tfjs-converter, and then have the python package installed tfjs-converter/python
➜ python git:(master) ✗ pwd ....../tfjs/tfjs-converter/python ➜ python git:(master) ✗ python setup.py install --user running install running bdist_egg running egg_info writing tensorflowjs.egg-info/PKG-INFO writing dependency_links to tensorflowjs.egg-info/dependency_links.txt writing entry points to tensorflowjs.egg-info/entry_points.txt writing requirements to tensorflowjs.egg-info/requires.txt writing top-level names to tensorflowjs.egg-info/top_level.txt file tensorflowjs.py (for module tensorflowjs) not found file tensorflowjs/converters.py (for module tensorflowjs.converters) not found package init file 'tensorflowjs/op_list/__init__.py' not found (or not a regular file) reading manifest template 'MANIFEST.in' writing manifest file 'tensorflowjs.egg-info/SOURCES.txt' installing library code to build/bdist.linux-x86_64/egg running install_lib running build_py file tensorflowjs.py (for module tensorflowjs) not found file tensorflowjs/converters.py (for module tensorflowjs.converters) not found file tensorflowjs.py (for module tensorflowjs) not found file tensorflowjs/converters.py (for module tensorflowjs.converters) not found creating build/bdist.linux-x86_64/egg creating build/bdist.linux-x86_64/egg/tensorflowjs creating build/bdist.linux-x86_64/egg/tensorflowjs/converters copying build/lib/tensorflowjs/converters/common.py -> build/bdist.linux-x86_64/egg/tensorflowjs/converters copying build/lib/tensorflowjs/converters/converter.py -> build/bdist.linux-x86_64/egg/tensorflowjs/converters copying build/lib/tensorflowjs/converters/fold_batch_norms.py -> build/bdist.linux-x86_64/egg/tensorflowjs/converters copying build/lib/tensorflowjs/converters/fuse_depthwise_conv2d.py -> build/bdist.linux-x86_64/egg/tensorflowjs/converters copying build/lib/tensorflowjs/converters/fuse_prelu.py -> build/bdist.linux-x86_64/egg/tensorflowjs/converters copying build/lib/tensorflowjs/converters/graph_rewrite_util.py -> build/bdist.linux-x86_64/egg/tensorflowjs/converters copying build/lib/tensorflowjs/converters/keras_h5_conversion.py -> build/bdist.linux-x86_64/egg/tensorflowjs/converters copying build/lib/tensorflowjs/converters/keras_tfjs_loader.py -> build/bdist.linux-x86_64/egg/tensorflowjs/converters copying build/lib/tensorflowjs/converters/tf_saved_model_conversion_v2.py -> build/bdist.linux-x86_64/egg/tensorflowjs/converters copying build/lib/tensorflowjs/converters/wizard.py -> build/bdist.linux-x86_64/egg/tensorflowjs/converters copying build/lib/tensorflowjs/converters/__init__.py -> build/bdist.linux-x86_64/egg/tensorflowjs/converters creating build/bdist.linux-x86_64/egg/tensorflowjs/op_list copying build/lib/tensorflowjs/op_list/arithmetic.json -> build/bdist.linux-x86_64/egg/tensorflowjs/op_list copying build/lib/tensorflowjs/op_list/basic_math.json -> build/bdist.linux-x86_64/egg/tensorflowjs/op_list copying build/lib/tensorflowjs/op_list/control.json -> build/bdist.linux-x86_64/egg/tensorflowjs/op_list copying build/lib/tensorflowjs/op_list/convolution.json -> build/bdist.linux-x86_64/egg/tensorflowjs/op_list copying build/lib/tensorflowjs/op_list/creation.json -> build/bdist.linux-x86_64/egg/tensorflowjs/op_list copying build/lib/tensorflowjs/op_list/dynamic.json -> build/bdist.linux-x86_64/egg/tensorflowjs/op_list copying build/lib/tensorflowjs/op_list/evaluation.json -> build/bdist.linux-x86_64/egg/tensorflowjs/op_list copying build/lib/tensorflowjs/op_list/graph.json -> build/bdist.linux-x86_64/egg/tensorflowjs/op_list copying build/lib/tensorflowjs/op_list/image.json -> build/bdist.linux-x86_64/egg/tensorflowjs/op_list copying build/lib/tensorflowjs/op_list/logical.json -> build/bdist.linux-x86_64/egg/tensorflowjs/op_list copying build/lib/tensorflowjs/op_list/matrices.json -> build/bdist.linux-x86_64/egg/tensorflowjs/op_list copying build/lib/tensorflowjs/op_list/normalization.json -> build/bdist.linux-x86_64/egg/tensorflowjs/op_list copying build/lib/tensorflowjs/op_list/reduction.json -> build/bdist.linux-x86_64/egg/tensorflowjs/op_list copying build/lib/tensorflowjs/op_list/slice_join.json -> build/bdist.linux-x86_64/egg/tensorflowjs/op_list copying build/lib/tensorflowjs/op_list/spectral.json -> build/bdist.linux-x86_64/egg/tensorflowjs/op_list copying build/lib/tensorflowjs/op_list/transformation.json -> build/bdist.linux-x86_64/egg/tensorflowjs/op_list copying build/lib/tensorflowjs/quantization.py -> build/bdist.linux-x86_64/egg/tensorflowjs copying build/lib/tensorflowjs/read_weights.py -> build/bdist.linux-x86_64/egg/tensorflowjs copying build/lib/tensorflowjs/resource_loader.py -> build/bdist.linux-x86_64/egg/tensorflowjs copying build/lib/tensorflowjs/version.py -> build/bdist.linux-x86_64/egg/tensorflowjs copying build/lib/tensorflowjs/write_weights.py -> build/bdist.linux-x86_64/egg/tensorflowjs copying build/lib/tensorflowjs/__init__.py -> build/bdist.linux-x86_64/egg/tensorflowjs byte-compiling build/bdist.linux-x86_64/egg/tensorflowjs/converters/common.py to common.cpython-36.pyc byte-compiling build/bdist.linux-x86_64/egg/tensorflowjs/converters/converter.py to converter.cpython-36.pyc byte-compiling build/bdist.linux-x86_64/egg/tensorflowjs/converters/fold_batch_norms.py to fold_batch_norms.cpython-36.pyc byte-compiling build/bdist.linux-x86_64/egg/tensorflowjs/converters/fuse_depthwise_conv2d.py to fuse_depthwise_conv2d.cpython-36.pyc byte-compiling build/bdist.linux-x86_64/egg/tensorflowjs/converters/fuse_prelu.py to fuse_prelu.cpython-36.pyc byte-compiling build/bdist.linux-x86_64/egg/tensorflowjs/converters/graph_rewrite_util.py to graph_rewrite_util.cpython-36.pyc byte-compiling build/bdist.linux-x86_64/egg/tensorflowjs/converters/keras_h5_conversion.py to keras_h5_conversion.cpython-36.pyc byte-compiling build/bdist.linux-x86_64/egg/tensorflowjs/converters/keras_tfjs_loader.py to keras_tfjs_loader.cpython-36.pyc byte-compiling build/bdist.linux-x86_64/egg/tensorflowjs/converters/tf_saved_model_conversion_v2.py to tf_saved_model_conversion_v2.cpython-36.pyc byte-compiling build/bdist.linux-x86_64/egg/tensorflowjs/converters/wizard.py to wizard.cpython-36.pyc byte-compiling build/bdist.linux-x86_64/egg/tensorflowjs/converters/__init__.py to __init__.cpython-36.pyc byte-compiling build/bdist.linux-x86_64/egg/tensorflowjs/quantization.py to quantization.cpython-36.pyc byte-compiling build/bdist.linux-x86_64/egg/tensorflowjs/read_weights.py to read_weights.cpython-36.pyc byte-compiling build/bdist.linux-x86_64/egg/tensorflowjs/resource_loader.py to resource_loader.cpython-36.pyc byte-compiling build/bdist.linux-x86_64/egg/tensorflowjs/version.py to version.cpython-36.pyc byte-compiling build/bdist.linux-x86_64/egg/tensorflowjs/write_weights.py to write_weights.cpython-36.pyc byte-compiling build/bdist.linux-x86_64/egg/tensorflowjs/__init__.py to __init__.cpython-36.pyc creating build/bdist.linux-x86_64/egg/EGG-INFO copying tensorflowjs.egg-info/PKG-INFO -> build/bdist.linux-x86_64/egg/EGG-INFO copying tensorflowjs.egg-info/SOURCES.txt -> build/bdist.linux-x86_64/egg/EGG-INFO copying tensorflowjs.egg-info/dependency_links.txt -> build/bdist.linux-x86_64/egg/EGG-INFO copying tensorflowjs.egg-info/entry_points.txt -> build/bdist.linux-x86_64/egg/EGG-INFO copying tensorflowjs.egg-info/requires.txt -> build/bdist.linux-x86_64/egg/EGG-INFO copying tensorflowjs.egg-info/top_level.txt -> build/bdist.linux-x86_64/egg/EGG-INFO zip_safe flag not set; analyzing archive contents... tensorflowjs.__pycache__.resource_loader.cpython-36: module references __file__ creating 'dist/tensorflowjs-1.7.0-py3.6.egg' and adding 'build/bdist.linux-x86_64/egg' to it removing 'build/bdist.linux-x86_64/egg' (and everything under it) Processing tensorflowjs-1.7.0-py3.6.egg creating ~/.local/lib/python3.6/site-packages/tensorflowjs-1.7.0-py3.6.egg Extracting tensorflowjs-1.7.0-py3.6.egg to ~/.local/lib/python3.6/site-packages Adding tensorflowjs 1.7.0 to easy-install.pth file Installing tensorflowjs_converter script to ~/.local/bin Installing tensorflowjs_wizard script to ~/.local/bin
Installed ~/.local/lib/python3.6/site-packages/tensorflowjs-1.7.0-py3.6.egg Processing dependencies for tensorflowjs==1.7.0 Searching for PyInquirer==1.0.3 Best match: PyInquirer 1.0.3 Adding PyInquirer 1.0.3 to easy-install.pth file
Using ~/.local/lib/python3.6/site-packages Not found: prompt_toolkit==1.0.14 Not found: Pygments>=2.2.0 Not found: regex>=2016.11.21 Searching for gast==0.3.3 Best match: gast 0.3.3 Adding gast 0.3.3 to easy-install.pth file
Using ~/.local/lib/python3.6/site-packages Searching for tensorflow-hub==0.8.0 Best match: tensorflow-hub 0.8.0 Adding tensorflow-hub 0.8.0 to easy-install.pth file Installing make_image_classifier script to ~/.local/bin Installing make_nearest_neighbour_index script to ~/.local/bin
Using ~/.local/lib/python3.6/site-packages Searching for tensorflow==2.1.0 Best match: tensorflow 2.1.0 Adding tensorflow 2.1.0 to easy-install.pth file Installing estimator_ckpt_converter script to ~/.local/bin Installing saved_model_cli script to ~/.local/bin Installing tensorboard script to ~/.local/bin Installing tf_upgrade_v2 script to ~/.local/bin Installing tflite_convert script to ~/.local/bin Installing toco script to ~/.local/bin Installing toco_from_protos script to ~/.local/bin
Using ~/.local/lib/python3.6/site-packages Searching for six==1.14.0 Best match: six 1.14.0 Adding six 1.14.0 to easy-install.pth file
Using ~/.local/lib/python3.6/site-packages Searching for numpy==1.18.2 Best match: numpy 1.18.2 Adding numpy 1.18.2 to easy-install.pth file Installing f2py script to ~/.local/bin Installing f2py3 script to ~/.local/bin Installing f2py3.6 script to ~/.local/bin
Using ~/.local/lib/python3.6/site-packages Searching for h5py==2.10.0 Best match: h5py 2.10.0 Adding h5py 2.10.0 to easy-install.pth file
Using ~/.local/lib/python3.6/site-packages Searching for prompt-toolkit==1.0.14 Best match: prompt-toolkit 1.0.14 Processing prompt_toolkit-1.0.14-py3.6.egg prompt-toolkit 1.0.14 is already the active version in easy-install.pth
Using ~/.local/lib/python3.6/site-packages/prompt_toolkit-1.0.14-py3.6.egg Searching for regex==2020.4.4 Best match: regex 2020.4.4 Adding regex 2020.4.4 to easy-install.pth file
Using ~/.local/lib/python3.6/site-packages Searching for Pygments==2.6.1 Best match: Pygments 2.6.1 Adding Pygments 2.6.1 to easy-install.pth file Installing pygmentize script to ~/.local/bin
Using ~/.local/lib/python3.6/site-packages Searching for protobuf==3.11.3 Best match: protobuf 3.11.3 Adding protobuf 3.11.3 to easy-install.pth file
Using ~/.local/lib/python3.6/site-packages Searching for grpcio==1.28.1 Best match: grpcio 1.28.1 Adding grpcio 1.28.1 to easy-install.pth file
Using ~/.local/lib/python3.6/site-packages Searching for opt-einsum==3.2.1 Best match: opt-einsum 3.2.1 Adding opt-einsum 3.2.1 to easy-install.pth file
Using ~/.local/lib/python3.6/site-packages Searching for Keras-Preprocessing==1.1.0 Best match: Keras-Preprocessing 1.1.0 Adding Keras-Preprocessing 1.1.0 to easy-install.pth file
Using ~/.local/lib/python3.6/site-packages Searching for wrapt==1.12.1 Best match: wrapt 1.12.1 Adding wrapt 1.12.1 to easy-install.pth file
Using ~/.local/lib/python3.6/site-packages Searching for scipy==1.4.1 Best match: scipy 1.4.1 Adding scipy 1.4.1 to easy-install.pth file
Using ~/.local/lib/python3.6/site-packages Searching for tensorflow-estimator==2.1.0 Best match: tensorflow-estimator 2.1.0 Adding tensorflow-estimator 2.1.0 to easy-install.pth file
Using ~/.local/lib/python3.6/site-packages Searching for tensorboard==2.1.1 Best match: tensorboard 2.1.1 Processing tensorboard-2.1.1-py3.6.egg tensorboard 2.1.1 is already the active version in easy-install.pth Installing tensorboard script to ~/.local/bin
Using ~/.local/lib/python3.6/site-packages/tensorboard-2.1.1-py3.6.egg Searching for astunparse==1.6.3 Best match: astunparse 1.6.3 Adding astunparse 1.6.3 to easy-install.pth file
Using ~/.local/lib/python3.6/site-packages Searching for google-pasta==0.2.0 Best match: google-pasta 0.2.0 Adding google-pasta 0.2.0 to easy-install.pth file
Using ~/.local/lib/python3.6/site-packages Searching for termcolor==1.1.0 Best match: termcolor 1.1.0 Adding termcolor 1.1.0 to easy-install.pth file
Using ~/.local/lib/python3.6/site-packages Searching for absl-py==0.9.0 Best match: absl-py 0.9.0 Adding absl-py 0.9.0 to easy-install.pth file
Using ~/.local/lib/python3.6/site-packages Searching for wheel==0.34.2 Best match: wheel 0.34.2 Adding wheel 0.34.2 to easy-install.pth file Installing wheel script to ~/.local/bin
Using ~/.local/lib/python3.6/site-packages Searching for wcwidth==0.1.9 Best match: wcwidth 0.1.9 Adding wcwidth 0.1.9 to easy-install.pth file
Using ~/.local/lib/python3.6/site-packages Searching for setuptools==46.1.3 Best match: setuptools 46.1.3 Adding setuptools 46.1.3 to easy-install.pth file Installing easy_install script to ~/.local/bin Installing easy_install-3.8 script to ~/.local/bin
Using ~/.local/lib/python3.6/site-packages Searching for Werkzeug==1.0.1 Best match: Werkzeug 1.0.1 Adding Werkzeug 1.0.1 to easy-install.pth file
Using ~/.local/lib/python3.6/site-packages Searching for requests==2.23.0 Best match: requests 2.23.0 Adding requests 2.23.0 to easy-install.pth file
Using ~/.local/lib/python3.6/site-packages Searching for Markdown==3.2.1 Best match: Markdown 3.2.1 Adding Markdown 3.2.1 to easy-install.pth file Installing markdown_py script to ~/.local/bin
Using ~/.local/lib/python3.6/site-packages Searching for google-auth==1.14.0 Best match: google-auth 1.14.0 Adding google-auth 1.14.0 to easy-install.pth file
Using ~/.local/lib/python3.6/site-packages Searching for google-auth-oauthlib==0.4.1 Best match: google-auth-oauthlib 0.4.1 Adding google-auth-oauthlib 0.4.1 to easy-install.pth file Installing google-oauthlib-tool script to ~/.local/bin
Using ~/.local/lib/python3.6/site-packages Searching for urllib3==1.25.9 Best match: urllib3 1.25.9 Adding urllib3 1.25.9 to easy-install.pth file
Using ~/.local/lib/python3.6/site-packages Searching for idna==2.9 Best match: idna 2.9 Adding idna 2.9 to easy-install.pth file
Using ~/.local/lib/python3.6/site-packages Searching for certifi==2020.4.5.1 Best match: certifi 2020.4.5.1 Adding certifi 2020.4.5.1 to easy-install.pth file
Using ~/.local/lib/python3.6/site-packages Searching for chardet==3.0.4 Best match: chardet 3.0.4 Adding chardet 3.0.4 to easy-install.pth file Installing chardetect script to ~/.local/bin
Using /usr/lib/python3/dist-packages Searching for pyasn1-modules==0.2.8 Best match: pyasn1-modules 0.2.8 Adding pyasn1-modules 0.2.8 to easy-install.pth file
Using ~/.local/lib/python3.6/site-packages Searching for cachetools==4.1.0 Best match: cachetools 4.1.0 Adding cachetools 4.1.0 to easy-install.pth file
Using ~/.local/lib/python3.6/site-packages Searching for rsa==4.0 Best match: rsa 4.0 Adding rsa 4.0 to easy-install.pth file Installing pyrsa-decrypt script to ~/.local/bin Installing pyrsa-encrypt script to ~/.local/bin Installing pyrsa-keygen script to ~/.local/bin Installing pyrsa-priv2pub script to ~/.local/bin Installing pyrsa-sign script to ~/.local/bin Installing pyrsa-verify script to ~/.local/bin
Using ~/.local/lib/python3.6/site-packages Searching for requests-oauthlib==1.3.0 Best match: requests-oauthlib 1.3.0 Adding requests-oauthlib 1.3.0 to easy-install.pth file
Using ~/.local/lib/python3.6/site-packages Searching for pyasn1==0.4.8 Best match: pyasn1 0.4.8 Adding pyasn1 0.4.8 to easy-install.pth file
Using ~/.local/lib/python3.6/site-packages Searching for oauthlib==3.1.0 Best match: oauthlib 3.1.0 Adding oauthlib 3.1.0 to easy-install.pth file
Using ~/.local/lib/python3.6/site-packages Finished processing dependencies for tensorflowjs==1.7.0 ➜ python git:(master) ✗
2.1.2.3 Install tensorspace-converter
Please checkout my modified tensorspace-converter and have the python package installed. Please also keep an eye on my PR.
➜ tensorspace-converter git:(master) python setup.py install --user running install running bdist_egg running egg_info writing tensorspacejs.egg-info/PKG-INFO writing dependency_links to tensorspacejs.egg-info/dependency_links.txt writing entry points to tensorspacejs.egg-info/entry_points.txt writing requirements to tensorspacejs.egg-info/requires.txt writing top-level names to tensorspacejs.egg-info/top_level.txt reading manifest template 'MANIFEST.in' warning: no previously-included files matching '*' found under directory 'tensorspacejs/tfjs/node_modules' warning: no previously-included files matching '*' found under directory 'tensorspacejs/tf/pb2json/node_modules' writing manifest file 'tensorspacejs.egg-info/SOURCES.txt' installing library code to build/bdist.linux-x86_64/egg running install_lib running build_py creating build/bdist.linux-x86_64/egg creating build/bdist.linux-x86_64/egg/tensorspacejs copying build/lib/tensorspacejs/install.py -> build/bdist.linux-x86_64/egg/tensorspacejs creating build/bdist.linux-x86_64/egg/tensorspacejs/krs copying build/lib/tensorspacejs/krs/keras_conversion.py -> build/bdist.linux-x86_64/egg/tensorspacejs/krs copying build/lib/tensorspacejs/krs/keras_model.py -> build/bdist.linux-x86_64/egg/tensorspacejs/krs copying build/lib/tensorspacejs/krs/__init__.py -> build/bdist.linux-x86_64/egg/tensorspacejs/krs creating build/bdist.linux-x86_64/egg/tensorspacejs/tf copying build/lib/tensorspacejs/tf/frozen_model.py -> build/bdist.linux-x86_64/egg/tensorspacejs/tf copying build/lib/tensorspacejs/tf/keras_model.py -> build/bdist.linux-x86_64/egg/tensorspacejs/tf creating build/bdist.linux-x86_64/egg/tensorspacejs/tf/pb2json copying build/lib/tensorspacejs/tf/pb2json/package.json -> build/bdist.linux-x86_64/egg/tensorspacejs/tf/pb2json copying build/lib/tensorspacejs/tf/pb2json/pb2json_conversion.py -> build/bdist.linux-x86_64/egg/tensorspacejs/tf/pb2json copying build/lib/tensorspacejs/tf/pb2json/README.md -> build/bdist.linux-x86_64/egg/tensorspacejs/tf/pb2json creating build/bdist.linux-x86_64/egg/tensorspacejs/tf/pb2json/tools copying build/lib/tensorspacejs/tf/pb2json/tools/compiled_api.js -> build/bdist.linux-x86_64/egg/tensorspacejs/tf/pb2json/tools copying build/lib/tensorspacejs/tf/pb2json/tools/pb2json_converter.ts -> build/bdist.linux-x86_64/egg/tensorspacejs/tf/pb2json/tools copying build/lib/tensorspacejs/tf/pb2json/__init__.py -> build/bdist.linux-x86_64/egg/tensorspacejs/tf/pb2json copying build/lib/tensorspacejs/tf/saved_model.py -> build/bdist.linux-x86_64/egg/tensorspacejs/tf copying build/lib/tensorspacejs/tf/tensorflow_conversion.py -> build/bdist.linux-x86_64/egg/tensorspacejs/tf copying build/lib/tensorspacejs/tf/__init__.py -> build/bdist.linux-x86_64/egg/tensorspacejs/tf creating build/bdist.linux-x86_64/egg/tensorspacejs/tfjs creating build/bdist.linux-x86_64/egg/tensorspacejs/tfjs/app copying build/lib/tensorspacejs/tfjs/app/Converter.js -> build/bdist.linux-x86_64/egg/tensorspacejs/tfjs/app copying build/lib/tensorspacejs/tfjs/app/Summary.js -> build/bdist.linux-x86_64/egg/tensorspacejs/tfjs/app copying build/lib/tensorspacejs/tfjs/main.js -> build/bdist.linux-x86_64/egg/tensorspacejs/tfjs copying build/lib/tensorspacejs/tfjs/package.json -> build/bdist.linux-x86_64/egg/tensorspacejs/tfjs copying build/lib/tensorspacejs/tfjs/tfjs_conversion.py -> build/bdist.linux-x86_64/egg/tensorspacejs/tfjs creating build/bdist.linux-x86_64/egg/tensorspacejs/tfjs/utils copying build/lib/tensorspacejs/tfjs/utils/Utils.js -> build/bdist.linux-x86_64/egg/tensorspacejs/tfjs/utils creating build/bdist.linux-x86_64/egg/tensorspacejs/tfjs/wrapper copying build/lib/tensorspacejs/tfjs/wrapper/ModelWrapper.js -> build/bdist.linux-x86_64/egg/tensorspacejs/tfjs/wrapper copying build/lib/tensorspacejs/tfjs/__init__.py -> build/bdist.linux-x86_64/egg/tensorspacejs/tfjs copying build/lib/tensorspacejs/tsp_converters.py -> build/bdist.linux-x86_64/egg/tensorspacejs creating build/bdist.linux-x86_64/egg/tensorspacejs/utility copying build/lib/tensorspacejs/utility/file_utility.py -> build/bdist.linux-x86_64/egg/tensorspacejs/utility copying build/lib/tensorspacejs/utility/__init__.py -> build/bdist.linux-x86_64/egg/tensorspacejs/utility copying build/lib/tensorspacejs/version.py -> build/bdist.linux-x86_64/egg/tensorspacejs copying build/lib/tensorspacejs/__init__.py -> build/bdist.linux-x86_64/egg/tensorspacejs creating build/bdist.linux-x86_64/egg/tensorspacejs/__pycache__ copying build/lib/tensorspacejs/__pycache__/version.cpython-36.pyc -> build/bdist.linux-x86_64/egg/tensorspacejs/__pycache__ copying build/lib/tensorspacejs/__pycache__/__init__.cpython-36.pyc -> build/bdist.linux-x86_64/egg/tensorspacejs/__pycache__ byte-compiling build/bdist.linux-x86_64/egg/tensorspacejs/install.py to install.cpython-36.pyc byte-compiling build/bdist.linux-x86_64/egg/tensorspacejs/krs/keras_conversion.py to keras_conversion.cpython-36.pyc byte-compiling build/bdist.linux-x86_64/egg/tensorspacejs/krs/keras_model.py to keras_model.cpython-36.pyc byte-compiling build/bdist.linux-x86_64/egg/tensorspacejs/krs/__init__.py to __init__.cpython-36.pyc byte-compiling build/bdist.linux-x86_64/egg/tensorspacejs/tf/frozen_model.py to frozen_model.cpython-36.pyc byte-compiling build/bdist.linux-x86_64/egg/tensorspacejs/tf/keras_model.py to keras_model.cpython-36.pyc byte-compiling build/bdist.linux-x86_64/egg/tensorspacejs/tf/pb2json/pb2json_conversion.py to pb2json_conversion.cpython-36.pyc byte-compiling build/bdist.linux-x86_64/egg/tensorspacejs/tf/pb2json/__init__.py to __init__.cpython-36.pyc byte-compiling build/bdist.linux-x86_64/egg/tensorspacejs/tf/saved_model.py to saved_model.cpython-36.pyc byte-compiling build/bdist.linux-x86_64/egg/tensorspacejs/tf/tensorflow_conversion.py to tensorflow_conversion.cpython-36.pyc byte-compiling build/bdist.linux-x86_64/egg/tensorspacejs/tf/__init__.py to __init__.cpython-36.pyc byte-compiling build/bdist.linux-x86_64/egg/tensorspacejs/tfjs/tfjs_conversion.py to tfjs_conversion.cpython-36.pyc byte-compiling build/bdist.linux-x86_64/egg/tensorspacejs/tfjs/__init__.py to __init__.cpython-36.pyc byte-compiling build/bdist.linux-x86_64/egg/tensorspacejs/tsp_converters.py to tsp_converters.cpython-36.pyc byte-compiling build/bdist.linux-x86_64/egg/tensorspacejs/utility/file_utility.py to file_utility.cpython-36.pyc byte-compiling build/bdist.linux-x86_64/egg/tensorspacejs/utility/__init__.py to __init__.cpython-36.pyc creating build/bdist.linux-x86_64/egg/EGG-INFO copying tensorspacejs.egg-info/PKG-INFO -> build/bdist.linux-x86_64/egg/EGG-INFO copying tensorspacejs.egg-info/SOURCES.txt -> build/bdist.linux-x86_64/egg/EGG-INFO copying tensorspacejs.egg-info/dependency_links.txt -> build/bdist.linux-x86_64/egg/EGG-INFO copying tensorspacejs.egg-info/entry_points.txt -> build/bdist.linux-x86_64/egg/EGG-INFO copying tensorspacejs.egg-info/requires.txt -> build/bdist.linux-x86_64/egg/EGG-INFO copying tensorspacejs.egg-info/top_level.txt -> build/bdist.linux-x86_64/egg/EGG-INFO zip_safe flag not set; analyzing archive contents... tensorspacejs.__pycache__.install.cpython-36: module references __file__ tensorspacejs.__pycache__.tsp_converters.cpython-36: module references __file__ tensorspacejs.tf.pb2json.__pycache__.pb2json_conversion.cpython-36: module references __file__ tensorspacejs.tfjs.__pycache__.tfjs_conversion.cpython-36: module references __file__ creating 'dist/tensorspacejs-0.6.1-py3.6.egg' and adding 'build/bdist.linux-x86_64/egg' to it removing 'build/bdist.linux-x86_64/egg' (and everything under it) Processing tensorspacejs-0.6.1-py3.6.egg creating ~/.local/lib/python3.6/site-packages/tensorspacejs-0.6.1-py3.6.egg Extracting tensorspacejs-0.6.1-py3.6.egg to ~/.local/lib/python3.6/site-packages Adding tensorspacejs 0.6.1 to easy-install.pth file Installing tensorspacejs_converter script to ~/.local/bin
Installed ~/.local/lib/python3.6/site-packages/tensorspacejs-0.6.1-py3.6.egg Processing dependencies for tensorspacejs==0.6.1 Searching for tensorflow==2.1.0 Best match: tensorflow 2.1.0 Adding tensorflow 2.1.0 to easy-install.pth file Installing estimator_ckpt_converter script to ~/.local/bin Installing saved_model_cli script to ~/.local/bin Installing tensorboard script to ~/.local/bin Installing tf_upgrade_v2 script to ~/.local/bin Installing tflite_convert script to ~/.local/bin Installing toco script to ~/.local/bin Installing toco_from_protos script to ~/.local/bin
Using ~/.local/lib/python3.6/site-packages Searching for Keras==2.3.1 Best match: Keras 2.3.1 Processing Keras-2.3.1-py3.6.egg Keras 2.3.1 is already the active version in easy-install.pth
Using ~/.local/lib/python3.6/site-packages/Keras-2.3.1-py3.6.egg Searching for tensorflowjs==1.7.2 Best match: tensorflowjs 1.7.2 Processing tensorflowjs-1.7.2-py3.6.egg tensorflowjs 1.7.2 is already the active version in easy-install.pth Installing tensorflowjs_converter script to ~/.local/bin
Using ~/.local/lib/python3.6/site-packages/tensorflowjs-1.7.2-py3.6.egg Searching for tensorboard==2.1.1 Best match: tensorboard 2.1.1 Processing tensorboard-2.1.1-py3.6.egg tensorboard 2.1.1 is already the active version in easy-install.pth Installing tensorboard script to ~/.local/bin
Using ~/.local/lib/python3.6/site-packages/tensorboard-2.1.1-py3.6.egg Searching for Keras-Preprocessing==1.1.0 Best match: Keras-Preprocessing 1.1.0 Adding Keras-Preprocessing 1.1.0 to easy-install.pth file
Using ~/.local/lib/python3.6/site-packages Searching for grpcio==1.28.1 Best match: grpcio 1.28.1 Adding grpcio 1.28.1 to easy-install.pth file
Using ~/.local/lib/python3.6/site-packages Searching for termcolor==1.1.0 Best match: termcolor 1.1.0 Adding termcolor 1.1.0 to easy-install.pth file
Using ~/.local/lib/python3.6/site-packages Searching for six==1.14.0 Best match: six 1.14.0 Adding six 1.14.0 to easy-install.pth file
Using ~/.local/lib/python3.6/site-packages Searching for protobuf==3.11.3 Best match: protobuf 3.11.3 Adding protobuf 3.11.3 to easy-install.pth file
Using ~/.local/lib/python3.6/site-packages Searching for wrapt==1.12.1 Best match: wrapt 1.12.1 Adding wrapt 1.12.1 to easy-install.pth file
Using ~/.local/lib/python3.6/site-packages Searching for opt-einsum==3.2.1 Best match: opt-einsum 3.2.1 Adding opt-einsum 3.2.1 to easy-install.pth file
Using ~/.local/lib/python3.6/site-packages Searching for google-pasta==0.2.0 Best match: google-pasta 0.2.0 Adding google-pasta 0.2.0 to easy-install.pth file
Using ~/.local/lib/python3.6/site-packages Searching for scipy==1.4.1 Best match: scipy 1.4.1 Adding scipy 1.4.1 to easy-install.pth file
Using ~/.local/lib/python3.6/site-packages Searching for h5py==2.10.0 Best match: h5py 2.10.0 Adding h5py 2.10.0 to easy-install.pth file
Using ~/.local/lib/python3.6/site-packages Searching for absl-py==0.9.0 Best match: absl-py 0.9.0 Adding absl-py 0.9.0 to easy-install.pth file
Using ~/.local/lib/python3.6/site-packages Searching for wheel==0.34.2 Best match: wheel 0.34.2 Adding wheel 0.34.2 to easy-install.pth file Installing wheel script to ~/.local/bin
Using ~/.local/lib/python3.6/site-packages Searching for gast==0.3.3 Best match: gast 0.3.3 Adding gast 0.3.3 to easy-install.pth file
Using ~/.local/lib/python3.6/site-packages Searching for numpy==1.18.2 Best match: numpy 1.18.2 Adding numpy 1.18.2 to easy-install.pth file Installing f2py script to ~/.local/bin Installing f2py3 script to ~/.local/bin Installing f2py3.6 script to ~/.local/bin
Using ~/.local/lib/python3.6/site-packages Searching for tensorflow-estimator==2.1.0 Best match: tensorflow-estimator 2.1.0 Adding tensorflow-estimator 2.1.0 to easy-install.pth file
Using ~/.local/lib/python3.6/site-packages Searching for astunparse==1.6.3 Best match: astunparse 1.6.3 Adding astunparse 1.6.3 to easy-install.pth file
Using ~/.local/lib/python3.6/site-packages Searching for Keras-Applications==1.0.8 Best match: Keras-Applications 1.0.8 Adding Keras-Applications 1.0.8 to easy-install.pth file
Using ~/.local/lib/python3.6/site-packages Searching for PyYAML==5.3.1 Best match: PyYAML 5.3.1 Adding PyYAML 5.3.1 to easy-install.pth file
Using ~/.local/lib/python3.6/site-packages Searching for tensorflow-hub==0.8.0 Best match: tensorflow-hub 0.8.0 Adding tensorflow-hub 0.8.0 to easy-install.pth file Installing make_image_classifier script to ~/.local/bin Installing make_nearest_neighbour_index script to ~/.local/bin
Using ~/.local/lib/python3.6/site-packages Searching for Werkzeug==1.0.1 Best match: Werkzeug 1.0.1 Adding Werkzeug 1.0.1 to easy-install.pth file
Using ~/.local/lib/python3.6/site-packages Searching for setuptools==46.1.3 Best match: setuptools 46.1.3 Adding setuptools 46.1.3 to easy-install.pth file Installing easy_install script to ~/.local/bin Installing easy_install-3.8 script to ~/.local/bin
Using ~/.local/lib/python3.6/site-packages Searching for requests==2.23.0 Best match: requests 2.23.0 Adding requests 2.23.0 to easy-install.pth file
Using ~/.local/lib/python3.6/site-packages Searching for Markdown==3.2.1 Best match: Markdown 3.2.1 Adding Markdown 3.2.1 to easy-install.pth file Installing markdown_py script to ~/.local/bin
Using ~/.local/lib/python3.6/site-packages Searching for google-auth==1.14.0 Best match: google-auth 1.14.0 Adding google-auth 1.14.0 to easy-install.pth file
Using ~/.local/lib/python3.6/site-packages Searching for google-auth-oauthlib==0.4.1 Best match: google-auth-oauthlib 0.4.1 Adding google-auth-oauthlib 0.4.1 to easy-install.pth file Installing google-oauthlib-tool script to ~/.local/bin
Using ~/.local/lib/python3.6/site-packages Searching for chardet==3.0.4 Best match: chardet 3.0.4 Adding chardet 3.0.4 to easy-install.pth file Installing chardetect script to ~/.local/bin
Using /usr/lib/python3/dist-packages Searching for certifi==2020.4.5.1 Best match: certifi 2020.4.5.1 Adding certifi 2020.4.5.1 to easy-install.pth file
Using ~/.local/lib/python3.6/site-packages Searching for idna==2.9 Best match: idna 2.9 Adding idna 2.9 to easy-install.pth file
Using ~/.local/lib/python3.6/site-packages Searching for urllib3==1.25.9 Best match: urllib3 1.25.9 Adding urllib3 1.25.9 to easy-install.pth file
Using ~/.local/lib/python3.6/site-packages Searching for cachetools==4.1.0 Best match: cachetools 4.1.0 Adding cachetools 4.1.0 to easy-install.pth file
Using ~/.local/lib/python3.6/site-packages Searching for rsa==4.0 Best match: rsa 4.0 Adding rsa 4.0 to easy-install.pth file Installing pyrsa-decrypt script to ~/.local/bin Installing pyrsa-encrypt script to ~/.local/bin Installing pyrsa-keygen script to ~/.local/bin Installing pyrsa-priv2pub script to ~/.local/bin Installing pyrsa-sign script to ~/.local/bin Installing pyrsa-verify script to ~/.local/bin
Using ~/.local/lib/python3.6/site-packages Searching for pyasn1-modules==0.2.8 Best match: pyasn1-modules 0.2.8 Adding pyasn1-modules 0.2.8 to easy-install.pth file
Using ~/.local/lib/python3.6/site-packages Searching for requests-oauthlib==1.3.0 Best match: requests-oauthlib 1.3.0 Adding requests-oauthlib 1.3.0 to easy-install.pth file
Using ~/.local/lib/python3.6/site-packages Searching for pyasn1==0.4.8 Best match: pyasn1 0.4.8 Adding pyasn1 0.4.8 to easy-install.pth file
Using ~/.local/lib/python3.6/site-packages Searching for oauthlib==3.1.0 Best match: oauthlib 3.1.0 Adding oauthlib 3.1.0 to easy-install.pth file
Using ~/.local/lib/python3.6/site-packages Finished processing dependencies for tensorspacejs==0.6.1
➜ WebTensorspace tensorspacejs_converter \ --input_model_from="tensorflow" \ --input_model_format="tf_keras" \ --output_layer_names="padding_1,conv_1,maxpool_1,conv_2,maxpool_2,dense_1,dense_2,softmax" \ ./model/tf_keras_model.h5 \ ./model/convertedModel Using TensorFlow backend. 2020-04-17 04:45:23.473683: I tensorflow/stream_executor/platform/default/dso_loader.cc:44] Successfully opened dynamic library libcuda.so.1 2020-04-17 04:45:23.477188: I tensorflow/stream_executor/cuda/cuda_gpu_executor.cc:981] successful NUMA node read from SysFS had negative value (-1), but there must be at least one NUMA node, so returning NUMA node zero 2020-04-17 04:45:23.477770: I tensorflow/core/common_runtime/gpu/gpu_device.cc:1558] Found device 0 with properties: pciBusID: 0000:01:00.0 name: GeForce GTX 980M computeCapability: 5.2 coreClock: 1.1265GHz coreCount: 12 deviceMemorySize: 3.94GiB deviceMemoryBandwidth: 149.31GiB/s 2020-04-17 04:45:23.478004: I tensorflow/stream_executor/platform/default/dso_loader.cc:44] Successfully opened dynamic library libcudart.so.10.2 2020-04-17 04:45:23.479508: I tensorflow/stream_executor/platform/default/dso_loader.cc:44] Successfully opened dynamic library libcublas.so.10 2020-04-17 04:45:23.480978: I tensorflow/stream_executor/platform/default/dso_loader.cc:44] Successfully opened dynamic library libcufft.so.10 2020-04-17 04:45:23.481245: I tensorflow/stream_executor/platform/default/dso_loader.cc:44] Successfully opened dynamic library libcurand.so.10 2020-04-17 04:45:23.482737: I tensorflow/stream_executor/platform/default/dso_loader.cc:44] Successfully opened dynamic library libcusolver.so.10 2020-04-17 04:45:23.483660: I tensorflow/stream_executor/platform/default/dso_loader.cc:44] Successfully opened dynamic library libcusparse.so.10 2020-04-17 04:45:23.487100: I tensorflow/stream_executor/platform/default/dso_loader.cc:44] Successfully opened dynamic library libcudnn.so.7 2020-04-17 04:45:23.487273: I tensorflow/stream_executor/cuda/cuda_gpu_executor.cc:981] successful NUMA node read from SysFS had negative value (-1), but there must be at least one NUMA node, so returning NUMA node zero 2020-04-17 04:45:23.487902: I tensorflow/stream_executor/cuda/cuda_gpu_executor.cc:981] successful NUMA node read from SysFS had negative value (-1), but there must be at least one NUMA node, so returning NUMA node zero 2020-04-17 04:45:23.488310: I tensorflow/core/common_runtime/gpu/gpu_device.cc:1700] Adding visible gpu devices: 0 2020-04-17 04:45:23.488621: I tensorflow/core/platform/cpu_feature_guard.cc:143] Your CPU supports instructions that this TensorFlow binary was not compiled to use: SSE3 SSE4.1 SSE4.2 AVX AVX2 FMA 2020-04-17 04:45:23.511713: I tensorflow/core/platform/profile_utils/cpu_utils.cc:102] CPU Frequency: 2599990000 Hz 2020-04-17 04:45:23.512333: I tensorflow/compiler/xla/service/service.cc:168] XLA service 0x5bc9f30 initialized for platform Host (this does not guarantee that XLA will be used). Devices: 2020-04-17 04:45:23.512354: I tensorflow/compiler/xla/service/service.cc:176] StreamExecutor device (0): Host, Default Version 2020-04-17 04:45:23.553407: I tensorflow/stream_executor/cuda/cuda_gpu_executor.cc:981] successful NUMA node read from SysFS had negative value (-1), but there must be at least one NUMA node, so returning NUMA node zero 2020-04-17 04:45:23.553764: I tensorflow/compiler/xla/service/service.cc:168] XLA service 0x5c320e0 initialized for platform CUDA (this does not guarantee that XLA will be used). Devices: 2020-04-17 04:45:23.553782: I tensorflow/compiler/xla/service/service.cc:176] StreamExecutor device (0): GeForce GTX 980M, Compute Capability 5.2 2020-04-17 04:45:23.553969: I tensorflow/stream_executor/cuda/cuda_gpu_executor.cc:981] successful NUMA node read from SysFS had negative value (-1), but there must be at least one NUMA node, so returning NUMA node zero 2020-04-17 04:45:23.554208: I tensorflow/core/common_runtime/gpu/gpu_device.cc:1558] Found device 0 with properties: pciBusID: 0000:01:00.0 name: GeForce GTX 980M computeCapability: 5.2 coreClock: 1.1265GHz coreCount: 12 deviceMemorySize: 3.94GiB deviceMemoryBandwidth: 149.31GiB/s 2020-04-17 04:45:23.554271: I tensorflow/stream_executor/platform/default/dso_loader.cc:44] Successfully opened dynamic library libcudart.so.10.2 2020-04-17 04:45:23.554302: I tensorflow/stream_executor/platform/default/dso_loader.cc:44] Successfully opened dynamic library libcublas.so.10 2020-04-17 04:45:23.554315: I tensorflow/stream_executor/platform/default/dso_loader.cc:44] Successfully opened dynamic library libcufft.so.10 2020-04-17 04:45:23.554344: I tensorflow/stream_executor/platform/default/dso_loader.cc:44] Successfully opened dynamic library libcurand.so.10 2020-04-17 04:45:23.554389: I tensorflow/stream_executor/platform/default/dso_loader.cc:44] Successfully opened dynamic library libcusolver.so.10 2020-04-17 04:45:23.554413: I tensorflow/stream_executor/platform/default/dso_loader.cc:44] Successfully opened dynamic library libcusparse.so.10 2020-04-17 04:45:23.554442: I tensorflow/stream_executor/platform/default/dso_loader.cc:44] Successfully opened dynamic library libcudnn.so.7 2020-04-17 04:45:23.554519: I tensorflow/stream_executor/cuda/cuda_gpu_executor.cc:981] successful NUMA node read from SysFS had negative value (-1), but there must be at least one NUMA node, so returning NUMA node zero 2020-04-17 04:45:23.554755: I tensorflow/stream_executor/cuda/cuda_gpu_executor.cc:981] successful NUMA node read from SysFS had negative value (-1), but there must be at least one NUMA node, so returning NUMA node zero 2020-04-17 04:45:23.554956: I tensorflow/core/common_runtime/gpu/gpu_device.cc:1700] Adding visible gpu devices: 0 2020-04-17 04:45:23.555015: I tensorflow/stream_executor/platform/default/dso_loader.cc:44] Successfully opened dynamic library libcudart.so.10.2 2020-04-17 04:45:23.555794: I tensorflow/core/common_runtime/gpu/gpu_device.cc:1099] Device interconnect StreamExecutor with strength 1 edge matrix: 2020-04-17 04:45:23.555806: I tensorflow/core/common_runtime/gpu/gpu_device.cc:1105] 0 2020-04-17 04:45:23.555830: I tensorflow/core/common_runtime/gpu/gpu_device.cc:1118] 0: N 2020-04-17 04:45:23.555939: I tensorflow/stream_executor/cuda/cuda_gpu_executor.cc:981] successful NUMA node read from SysFS had negative value (-1), but there must be at least one NUMA node, so returning NUMA node zero 2020-04-17 04:45:23.556211: I tensorflow/stream_executor/cuda/cuda_gpu_executor.cc:981] successful NUMA node read from SysFS had negative value (-1), but there must be at least one NUMA node, so returning NUMA node zero 2020-04-17 04:45:23.556465: I tensorflow/core/common_runtime/gpu/gpu_device.cc:1244] Created TensorFlow device (/job:localhost/replica:0/task:0/device:GPU:0 with 133 MB memory) -> physical GPU (device: 0, name: GeForce GTX 980M, pci bus id: 0000:01:00.0, compute capability: 5.2) Preprocessing hdf5 combined model... Loading .h5 model into memory... WARNING:tensorflow:From /home/longervision/.local/lib/python3.6/site-packages/tensorflow/python/ops/resource_variable_ops.py:1658: calling BaseResourceVariable.__init__ (from tensorflow.python.ops.resource_variable_ops) with constraint is deprecated and will be removed in a future version. Instructions for updating: If using Keras pass *_constraint arguments to layers. Generating multi-output encapsulated model... Saving temp multi-output .h5 model... Converting .h5 to web friendly format... Deleting temp .h5 model... Mission Complete!!! ➜ WebTensorspace ls model/convertedModel group1-shard1of1.bin model.json
CPU: Freescale i.MX8MQ rev2.0 1500 MHz (running at 1000 MHz) CPU: Commercial temperature grade (0C to 95C) at 64C Reset cause: POR Model: Freescale i.MX8MQ Phanbell DRAM: 1 GiB Board id: 6 Baseboard id: 1 MMC: FSL_SDHC: 0, FSL_SDHC: 1 *** Warning - bad CRC, using default environment
In: serial Out: serial Err: serial
BuildInfo: - ATF - U-Boot 2017.03.3
flash target is MMC:0 Net: Warning: ethernet@30be0000 using MAC address from ROM eth0: ethernet@30be0000 Fastboot: Normal Hit any key to stop autoboot: 0 u-boot=> [A
That is shown on the screen monitor of Google Coral Dev Board. We now need to input fastboot 0 on u-boot=> prompt. After having connected the Type C OTG cable, we should be able to see on the host:
You will be able to see Google Coral Dev Board is NOW connected. If you don’t see the EXPECTED output mocha-shrimp (192.168.101.2), just plug out and plug in the Type C power cable again.
Unfortunately, mdt tool does NOT work properly.
1 2 3 4 5 6 7 8 9 10 11
➜ mendel-enterprise-day-13 mdt shell Waiting for a device... Connecting to mocha-shrimp at 192.168.101.2 Key not present on mocha-shrimp -- pushing
It looks like you're trying to connect to a device that isn't connected to your workstation via USB and doesn't have the SSH key this MDT generated. To connect with `mdt shell` you will need to first connect to your device ONLY via USB.
Cowardly refusing to attempt to push a key to a public machine.
This bug has been clarified on StackOverflow. By modifying file vim $HOME/.local/lib/python3.6/site-packages/mdt/sshclient.py line 86, from if not self.address.startswith('192.168.100'): to if not self.address.startswith('192.168.10'):, problem solved.
➜ mendel-enterprise-day-13 mdt shell Waiting for a device... Connecting to mocha-shrimp at 192.168.101.2 Key not present on mocha-shrimp -- pushing Linux mocha-shrimp 4.14.98-imx #1 SMP PREEMPT Fri Nov 8 23:28:21 UTC 2019 aarch64
The programs included with the Mendel GNU/Linux system are free software; the exact distribution terms for each program are described in the individual files in /usr/share/doc/*/copyright.
Mendel GNU/Linux comes with ABSOLUTELY NO WARRANTY, to the extent permitted by applicable law. Last login: Thu Feb 14 10:12:02 2019 mendel@mocha-shrimp:~$ ls mendel@mocha-shrimp:~$ pwd /home/mendel mendel@mocha-shrimp:~$ uname -a Linux mocha-shrimp 4.14.98-imx #1 SMP PREEMPT Fri Nov 8 23:28:21 UTC 2019 aarch64 GNU/Linux mendel@mocha-shrimp:~$ lsb_release -a No LSB modules are available. Distributor ID: Mendel Description: Mendel GNU/Linux 4 (Day) Release: 10.0 Codename: day mendel@mocha-shrimp:~$ ip -c address 1: lo: <LOOPBACK,UP,LOWER_UP> mtu 65536 qdisc noqueue state UNKNOWN group default qlen 1000 link/loopback 00:00:00:00:00:00 brd 00:00:00:00:00:00 inet 127.0.0.1/8 scope host lo valid_lft forever preferred_lft forever inet6 ::1/128 scope host valid_lft forever preferred_lft forever 2: eth0: <NO-CARRIER,BROADCAST,MULTICAST,UP> mtu 1500 qdisc mq state DOWN group default qlen 1000 link/ether 7c:d9:5c:b1:fa:cc brd ff:ff:ff:ff:ff:ff 3: wlan0: <NO-CARRIER,BROADCAST,MULTICAST,UP> mtu 1500 qdisc mq state DOWN group default qlen 3000 link/ether 7c:d9:5c:b1:fa:cd brd ff:ff:ff:ff:ff:ff 4: p2p0: <BROADCAST,MULTICAST> mtu 1500 qdisc noop state DOWN group default qlen 3000 link/ether 00:0a:f5:89:89:81 brd ff:ff:ff:ff:ff:ff 5: usb0: <NO-CARRIER,BROADCAST,MULTICAST,UP> mtu 1500 qdisc pfifo_fast state DOWN group default qlen 1000 link/ether 02:22:78:0d:f6:df brd ff:ff:ff:ff:ff:ff inet 192.168.100.2/24 brd 192.168.100.255 scope global noprefixroute usb0 valid_lft forever preferred_lft forever inet6 fe80::cc6d:b3d4:f07e:eed1/64 scope link tentative noprefixroute valid_lft forever preferred_lft forever 6: usb1: <BROADCAST,MULTICAST,UP,LOWER_UP> mtu 1500 qdisc pfifo_fast state UP group default qlen 1000 link/ether 02:22:78:0d:f6:de brd ff:ff:ff:ff:ff:ff inet 192.168.101.2/24 brd 192.168.101.255 scope global noprefixroute usb1 valid_lft forever preferred_lft forever inet6 fe80::5bf4:c217:d9c9:859c/64 scope link noprefixroute valid_lft forever preferred_lft forever mendel@mocha-shrimp:~$
After activate the Internet by nmtui, we can NOW clearly see the wlan0 IP is automatically allocated.
1 2 3 4 5 6 7 8 9 10 11
mendel@mocha-shrimp:~$ ip -c address ...... 3: wlan0: <BROADCAST,MULTICAST,UP,LOWER_UP> mtu 1500 qdisc mq state UP group default qlen 3000 link/ether 7c:d9:5c:b1:fa:cd brd ff:ff:ff:ff:ff:ff inet 192.168.1.110/24 brd 192.168.1.255 scope global dynamic noprefixroute wlan0 valid_lft 86367sec preferred_lft 86367sec inet6 2001:569:7e6e:dc00:d1c4:697a:f60e:b5a4/64 scope global dynamic noprefixroute valid_lft 7468sec preferred_lft 7168sec inet6 fe80::e10b:9dc6:60c4:b91b/64 scope link noprefixroute valid_lft forever preferred_lft forever ......
Of course, we can setup a static IP for this particular Google Coral Dev Board afterwards.
2.1.5 SSH into Mendel
In order to SSH into Mendel and connect remotely, we need to do Connect to a board’s shell on the host computer. You MUST pushkey before you can ssh into the board via the Internet IP instead of the virtual IP via USB, say 192.168.100.2 or 192.168.101.2.
1 2
➜ ~ ssh -i ~/.ssh/id_rsa_mendel.pub mendel@192.168.1.97 Connection closed by 192.168.1.97 port 22
However, for now, I’ve got NO idea why sshNETVER works for Google Coral Dev Board any more.
From now on, a huge modification.
2.2 Flash from U-Boot on an SD card
If you get unlucky and you can't even boot your board into U-Boot, then you can recover the system by booting into U-Boot from an image on the SD card and then reflash the board from your Linux (cited from Google Coral Dev Board’s Official Doc). Now, fastboot devices from host is NOW back.
➜ mendel-enterprise-day-13 mdt shell Waiting for a device... Connecting to green-snail at 192.168.100.2 Key not present on green-snail -- pushing Linux green-snail 4.14.98-imx #1 SMP PREEMPT Fri Nov 8 23:28:21 UTC 2019 aarch64
The programs included with the Mendel GNU/Linux system are free software; the exact distribution terms for each program are described in the individual files in /usr/share/doc/*/copyright.
Mendel GNU/Linux comes with ABSOLUTELY NO WARRANTY, to the extent permitted by applicable law. Last login: Mon Nov 11 18:19:48 2019
Run ssh-keygen and pushkey consequently:
1 2 3 4 5 6 7 8 9 10 11 12 13 14
➜ .ssh ssh-keygen Generating public/private rsa key pair. Enter file in which to save the key (/home/longervision/.ssh/id_rsa): /home/longervision/.ssh/id_rsa_mendel Enter passphrase (empty for no passphrase): Enter same passphrase again: Your identification has been saved in /home/longervision/.ssh/id_rsa_mendel. Your public key has been saved in /home/longervision/.ssh/id_rsa_mendel.pub. The key fingerprint is: ...... ➜ .ssh mdt pushkey ~/.ssh/id_rsa_mendel.pub Waiting for a device... Connecting to green-snail at 192.168.100.2 Pushing /home/longervision/.ssh/id_rsa_mendel.pub Key /home/longervision/.ssh/id_rsa_mendel.pub pushed.
Then, with mdt shell, run command nmtui to activate wlan0.
mendel@deft-orange:~$ edgetpu_demo --stream Press 'q' to quit. Press 'n' to switch between models.
(edgetpu_detect_server:9991): Gtk-WARNING **: 07:56:57.725: Locale not supported by C library. Using the fallback 'C' locale. INFO:edgetpuvision.streaming.server:Listening on ports tcp: 4665, web: 4664, annexb: 4666 INFO:edgetpuvision.streaming.server:New web connection from 192.168.1.200:37536 INFO:edgetpuvision.streaming.server:Number of active clients: 1 INFO:edgetpuvision.streaming.server:New web connection from 192.168.1.200:37538 INFO:edgetpuvision.streaming.server:[192.168.1.200:37536] Rx thread finished INFO:edgetpuvision.streaming.server:[192.168.1.200:37536] Tx thread finished INFO:edgetpuvision.streaming.server:Number of active clients: 2 INFO:edgetpuvision.streaming.server:[192.168.1.200:37536] Stopping... INFO:edgetpuvision.streaming.server:[192.168.1.200:37536] Stopped. INFO:edgetpuvision.streaming.server:Number of active clients: 1 INFO:edgetpuvision.streaming.server:New web connection from 192.168.1.200:37540 INFO:edgetpuvision.streaming.server:Number of active clients: 2 INFO:edgetpuvision.streaming.server:New web connection from 192.168.1.200:37542 INFO:edgetpuvision.streaming.server:Number of active clients: 3 INFO:edgetpuvision.streaming.server:[192.168.1.200:37538] Rx thread finished INFO:edgetpuvision.streaming.server:[192.168.1.200:37540] Rx thread finished INFO:edgetpuvision.streaming.server:New web connection from 192.168.1.200:37544 INFO:edgetpuvision.streaming.server:[192.168.1.200:37538] Tx thread finished INFO:edgetpuvision.streaming.server:[192.168.1.200:37542] Rx thread finished INFO:edgetpuvision.streaming.server:[192.168.1.200:37542] Tx thread finished INFO:edgetpuvision.streaming.server:Number of active clients: 4 ......
mendel@green-snail:~/Downloads/tflite/python/examples/classification$ python3 classify_image.py --model models/mobilenet_v2_1.0_224_inat_bird_quant_edgetpu.tflite --labels models/inat_bird_labels.txt --input images/parrot.jpg ----INFERENCE TIME---- Note: The first inference on Edge TPU is slow because it includes loading the model into Edge TPU memory. 13.5ms 3.5ms 2.7ms 3.0ms 3.0ms -------RESULTS-------- Ara macao (Scarlet Macaw): 0.77734
(edgetpu_detect_server:4081): Gtk-WARNING **: 10:40:45.436: Locale not supported by C library. Using the fallback 'C' locale. INFO:edgetpuvision.streaming.server:Listening on ports tcp: 4665, web: 4664, annexb: 4666 INFO:edgetpuvision.streaming.server:New web connection from 192.168.1.200:33950 INFO:edgetpuvision.streaming.server:[192.168.1.200:33950] Rx thread finished INFO:edgetpuvision.streaming.server:[192.168.1.200:33950] Tx thread finished INFO:edgetpuvision.streaming.server:Number of active clients: 1 INFO:edgetpuvision.streaming.server:[192.168.1.200:33950] Stopping... INFO:edgetpuvision.streaming.server:[192.168.1.200:33950] Stopped. INFO:edgetpuvision.streaming.server:Number of active clients: 0 INFO:edgetpuvision.streaming.server:New web connection from 192.168.1.200:33952 INFO:edgetpuvision.streaming.server:Number of active clients: 1 INFO:edgetpuvision.streaming.server:[192.168.1.200:33952] Rx thread finished INFO:edgetpuvision.streaming.server:[192.168.1.200:33952] Tx thread finished INFO:edgetpuvision.streaming.server:New web connection from 192.168.1.200:33954 INFO:edgetpuvision.streaming.server:Number of active clients: 2 INFO:edgetpuvision.streaming.server:[192.168.1.200:33952] Stopping... INFO:edgetpuvision.streaming.server:[192.168.1.200:33954] Rx thread finished INFO:edgetpuvision.streaming.server:[192.168.1.200:33952] Stopped. INFO:edgetpuvision.streaming.server:Number of active clients: 1 ......
2.3.4 Bugs
1
2
3
4
5
6
7
8
9
10
11
mendel@green-snail:~$ edgetpu_demo --stream Press 'q' to quit. Press 'n' to switch between models. Unable to init server: Could not connect: Connection refused
(edgetpu_detect_server:8391): Gtk-WARNING **: 20:18:07.433: Locale not supported by C library. Using the fallback 'C' locale. Unable to init server: Could not connect: Connection refused Unable to init server: Could not connect: Connection refused
(edgetpu_detect_server:8391): Gtk-WARNING **: 20:18:07.473: cannot open display:
1 2 3 4 5 6 7 8 9 10
mendel@green-snail:~/Downloads/edgetpu/test_data$ edgetpu_detect_server --model ./mobilenet_ssd_v2_face_quant_postprocess_edgetpu.tflite Unable to init server: Could not connect: Connection refused
(edgetpu_detect_server:8382): Gtk-WARNING **: 20:16:43.553: Locale not supported by C library. Using the fallback 'C' locale. Unable to init server: Could not connect: Connection refused Unable to init server: Could not connect: Connection refused Unable to init server: Could not connect: Connection refused
(edgetpu_detect_server:8382): Gtk-WARNING **: 20:16:44.967: cannot open display: :0