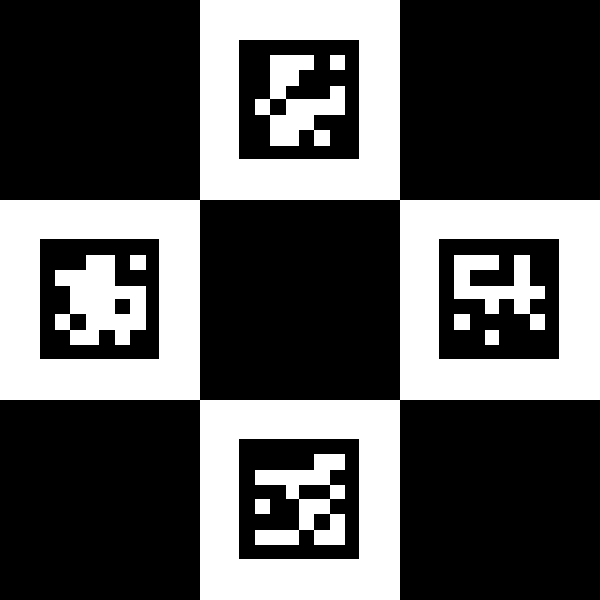
Camera Posture Estimation Using An ArUco Diamond Marker
Preparation
Very similar to our previous post Camera Posture Estimation Using A Single aruco Marker, you need to make sure your camera has already been calibrated. In the coding section, it’s assumed that you can successfully load the camera calibration parameters.
Coding
The code can be found at OpenCV Examples.
First of all
We need to ensure cv2.so is under our system path. cv2.so is specifically for OpenCV Python.
1 | import sys |
Then, we import some packages to be used.
1 | import os |
Secondly
Again, we need to load all camera calibration parameters, including: cameraMatrix, distCoeffs, etc. :
1 | calibrationFile = "calibrationFileName.xml" |
If you are using a calibrated fisheye camera like us, two extra parameters are to be loaded from the calibration file.
1 | r = calibrationParams.getNode("R").mat() |
Afterwards, two mapping matrices are pre-calculated by calling function cv2.fisheye.initUndistortRectifyMap() as (supposing the images to be processed are of 1080P):
1 | image_size = (1920, 1080) |
Thirdly
The dictionary aruco.DICT_6X6_250 is to be loaded. Although current OpenCV provides four groups of aruco patterns, 4X4, 5X5, 6X6, 7X7, etc., it seems OpenCV Python does NOT provide a function named drawCharucoDiamond(). Therefore, we have to refer to the C++ tutorial Detection of Diamond Markers. And, we directly use this particular diamond marker in the tutorial:

1 | aruco_dict = aruco.Dictionary_get( aruco.DICT_6X6_250 ) |
After having this aruco diamond marker printed, the edge lengths of this particular diamond marker are to be measured and stored in two variables squareLength and markerLength.
1 | squareLength = 40 # Here, our measurement unit is centimetre. |
Meanwhile, create aruco detector with default parameters.
1 | arucoParams = aruco.DetectorParameters_create() |
Finally
This time, let’s test on a video stream, a .mp4 file. We first load the video file and initialize a video capture handle.
1 | videoFile = "aruco_diamond.mp4" |
Then, we calculate the camera posture frame by frame:
1 | while(True): |
The drawn axis is just the world coordinators and orientations estimated from the images taken by the testing camera. At the end of the code, we release the video capture handle and destroy all opening windows.
1 | cap.release() # When everything done, release the capture |